Arduino Mega - Control Heating Element
This guide shows you how to control a heating element with Arduino Mega. In the next tutorial, you will learn how to build a heating system.
Hardware Preparation
| 1 | × | Arduino Mega | |
| 1 | × | USB 2.0 cable type A/B (for USB-A PC) | |
| 1 | × | USB 2.0 cable type C/B (for USB-C PC) | |
| 1 | × | Relay | |
| 1 | × | Heating Element | |
| 1 | × | 12V Power Adapter | |
| 1 | × | DC Power Jack | |
| 1 | × | Jumper Wires |
Or you can buy the following kits:
| 1 | × | DIYables Sensor Kit (30 sensors/displays) | |
| 1 | × | DIYables Sensor Kit (18 sensors/displays) |
Additionally, some of these links are for products from our own brand, DIYables .
Overview of Heating Element
Pinout
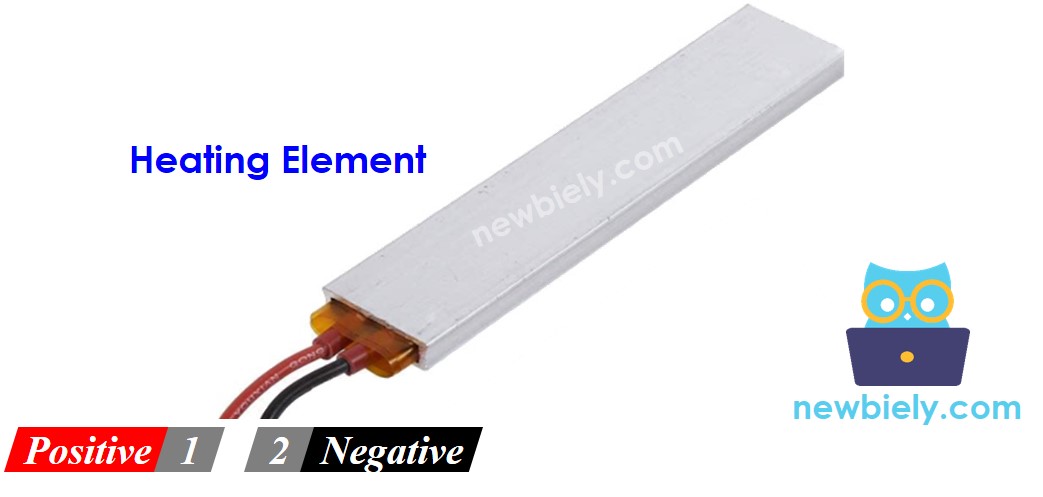
A heating element usually has two pins.
- Connect the red wire to the +12V side of the power supply.
- Connect the black wire to the ground (GND) of the power supply.
How to Control Heating Element
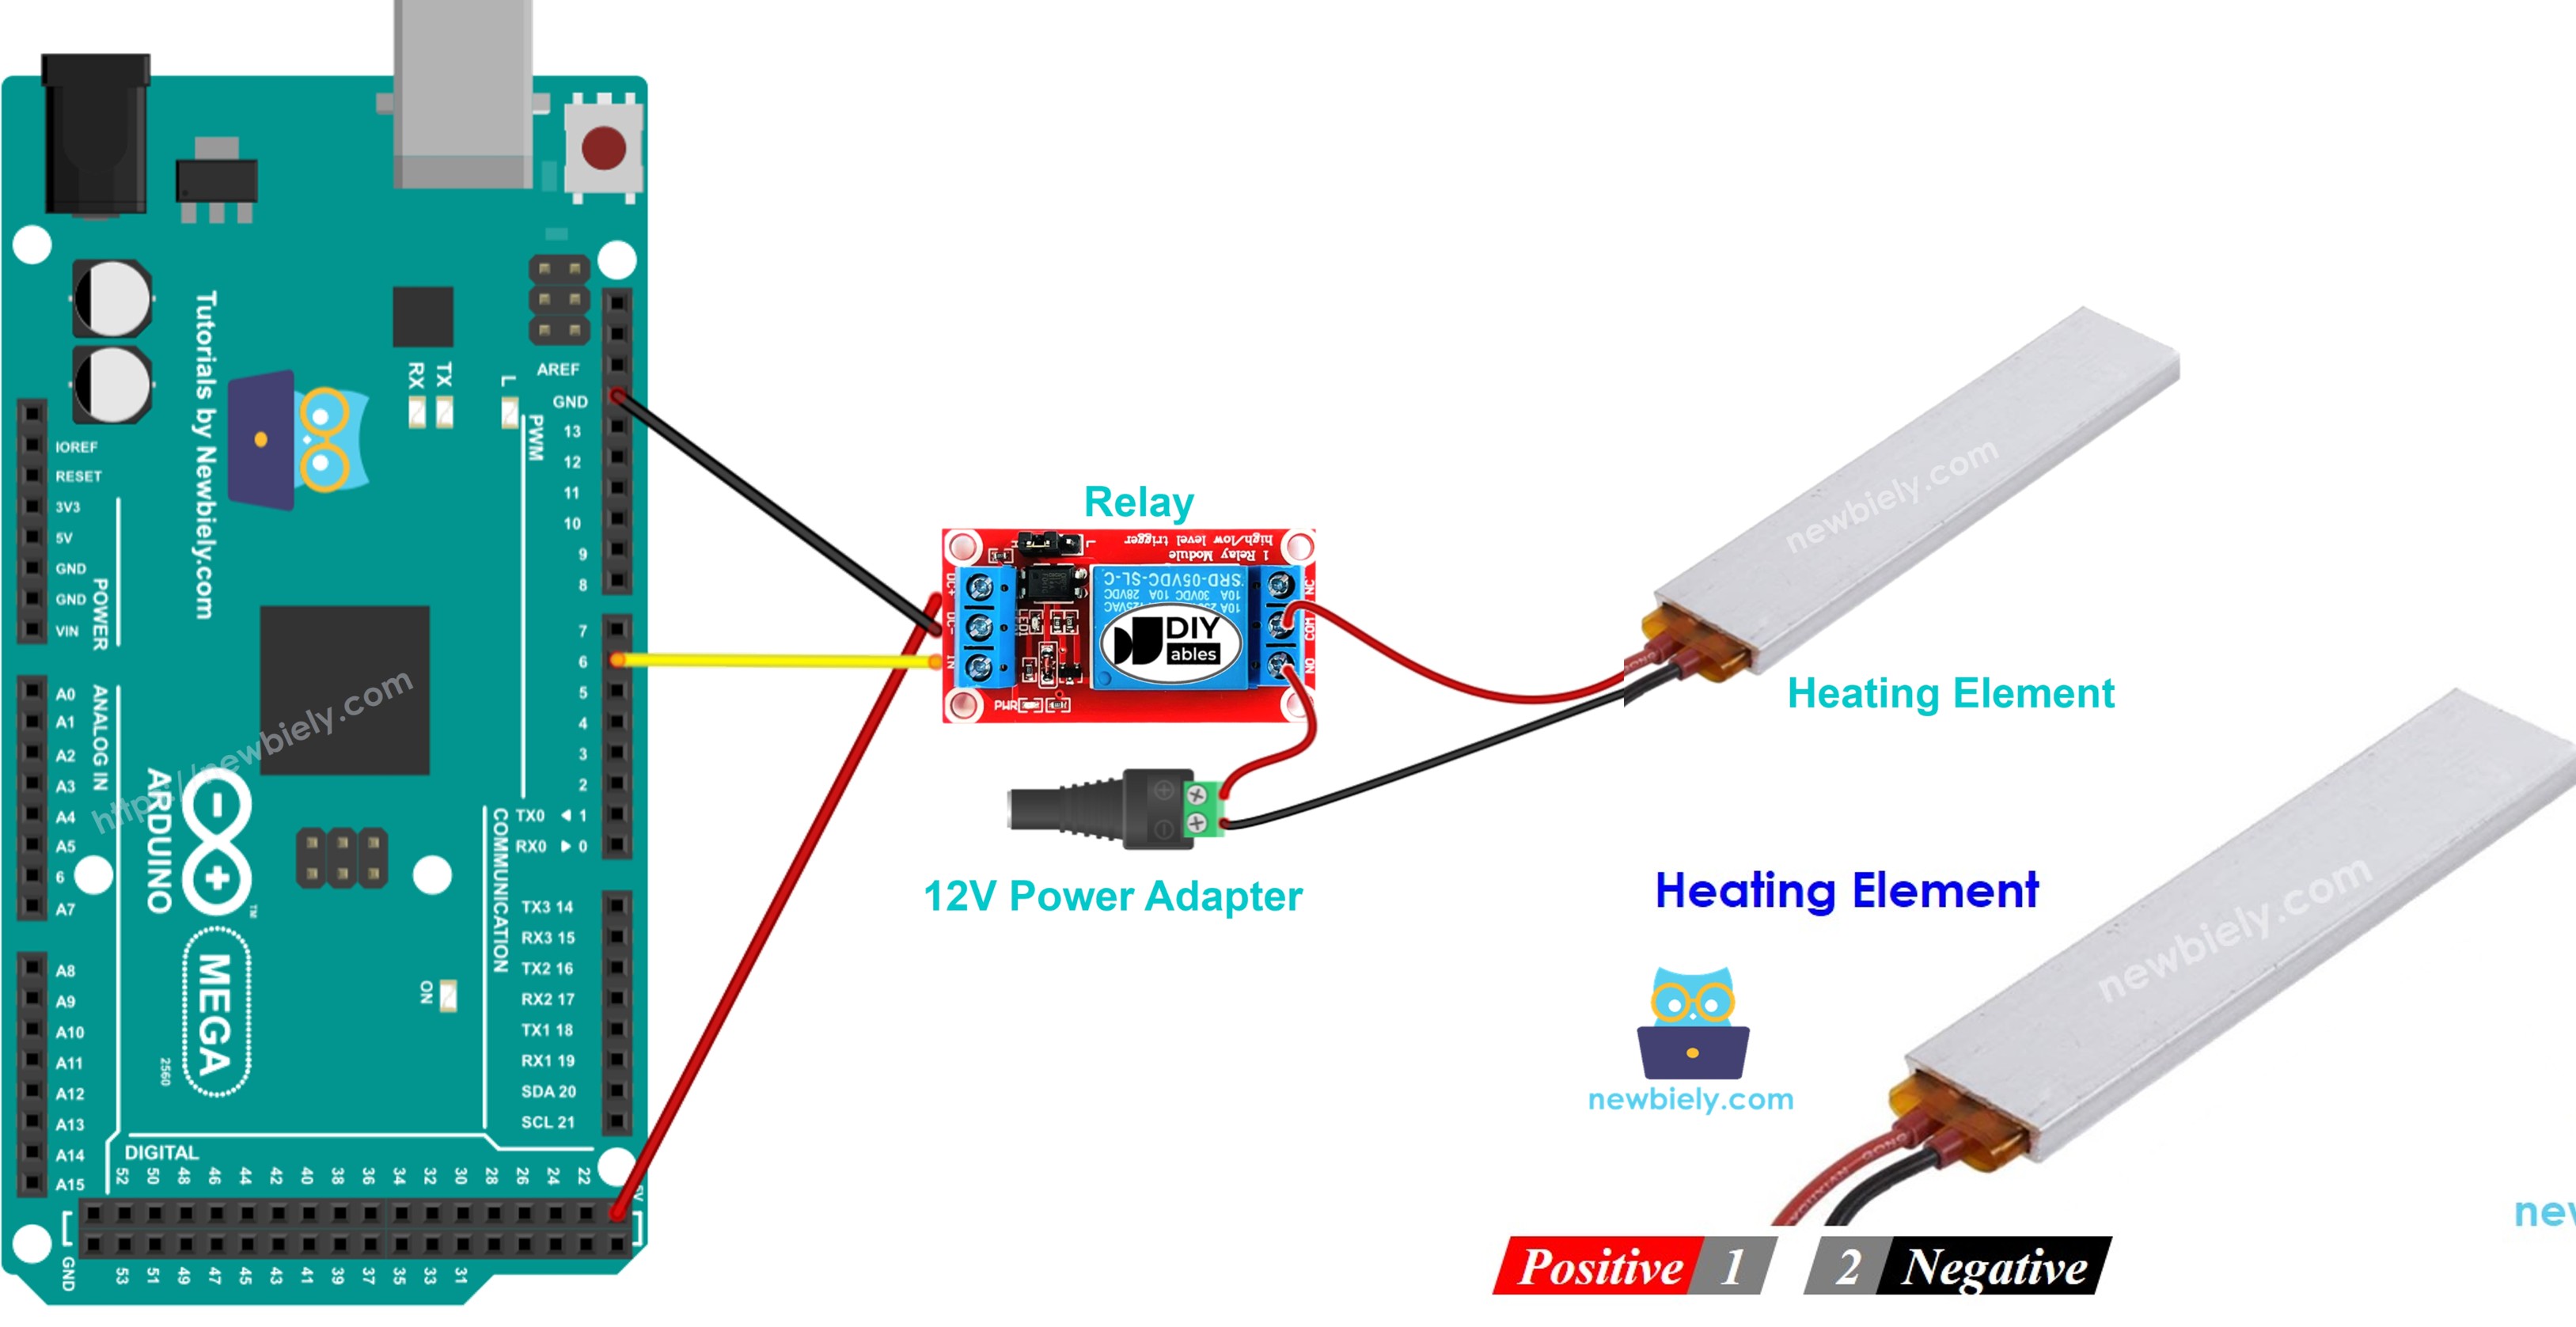
When a 12V heating element is connected to a 12V power supply, it heats up. To control this heating element, we use a relay as a connection between the Arduino Mega and the heating element. The Arduino Mega can then turn the heating element on and off through the relay. If you don’t know how a relay works, what its pins are, or how to program it, you can learn more in the Arduino Mega relay tutorial.
Wiring Diagram
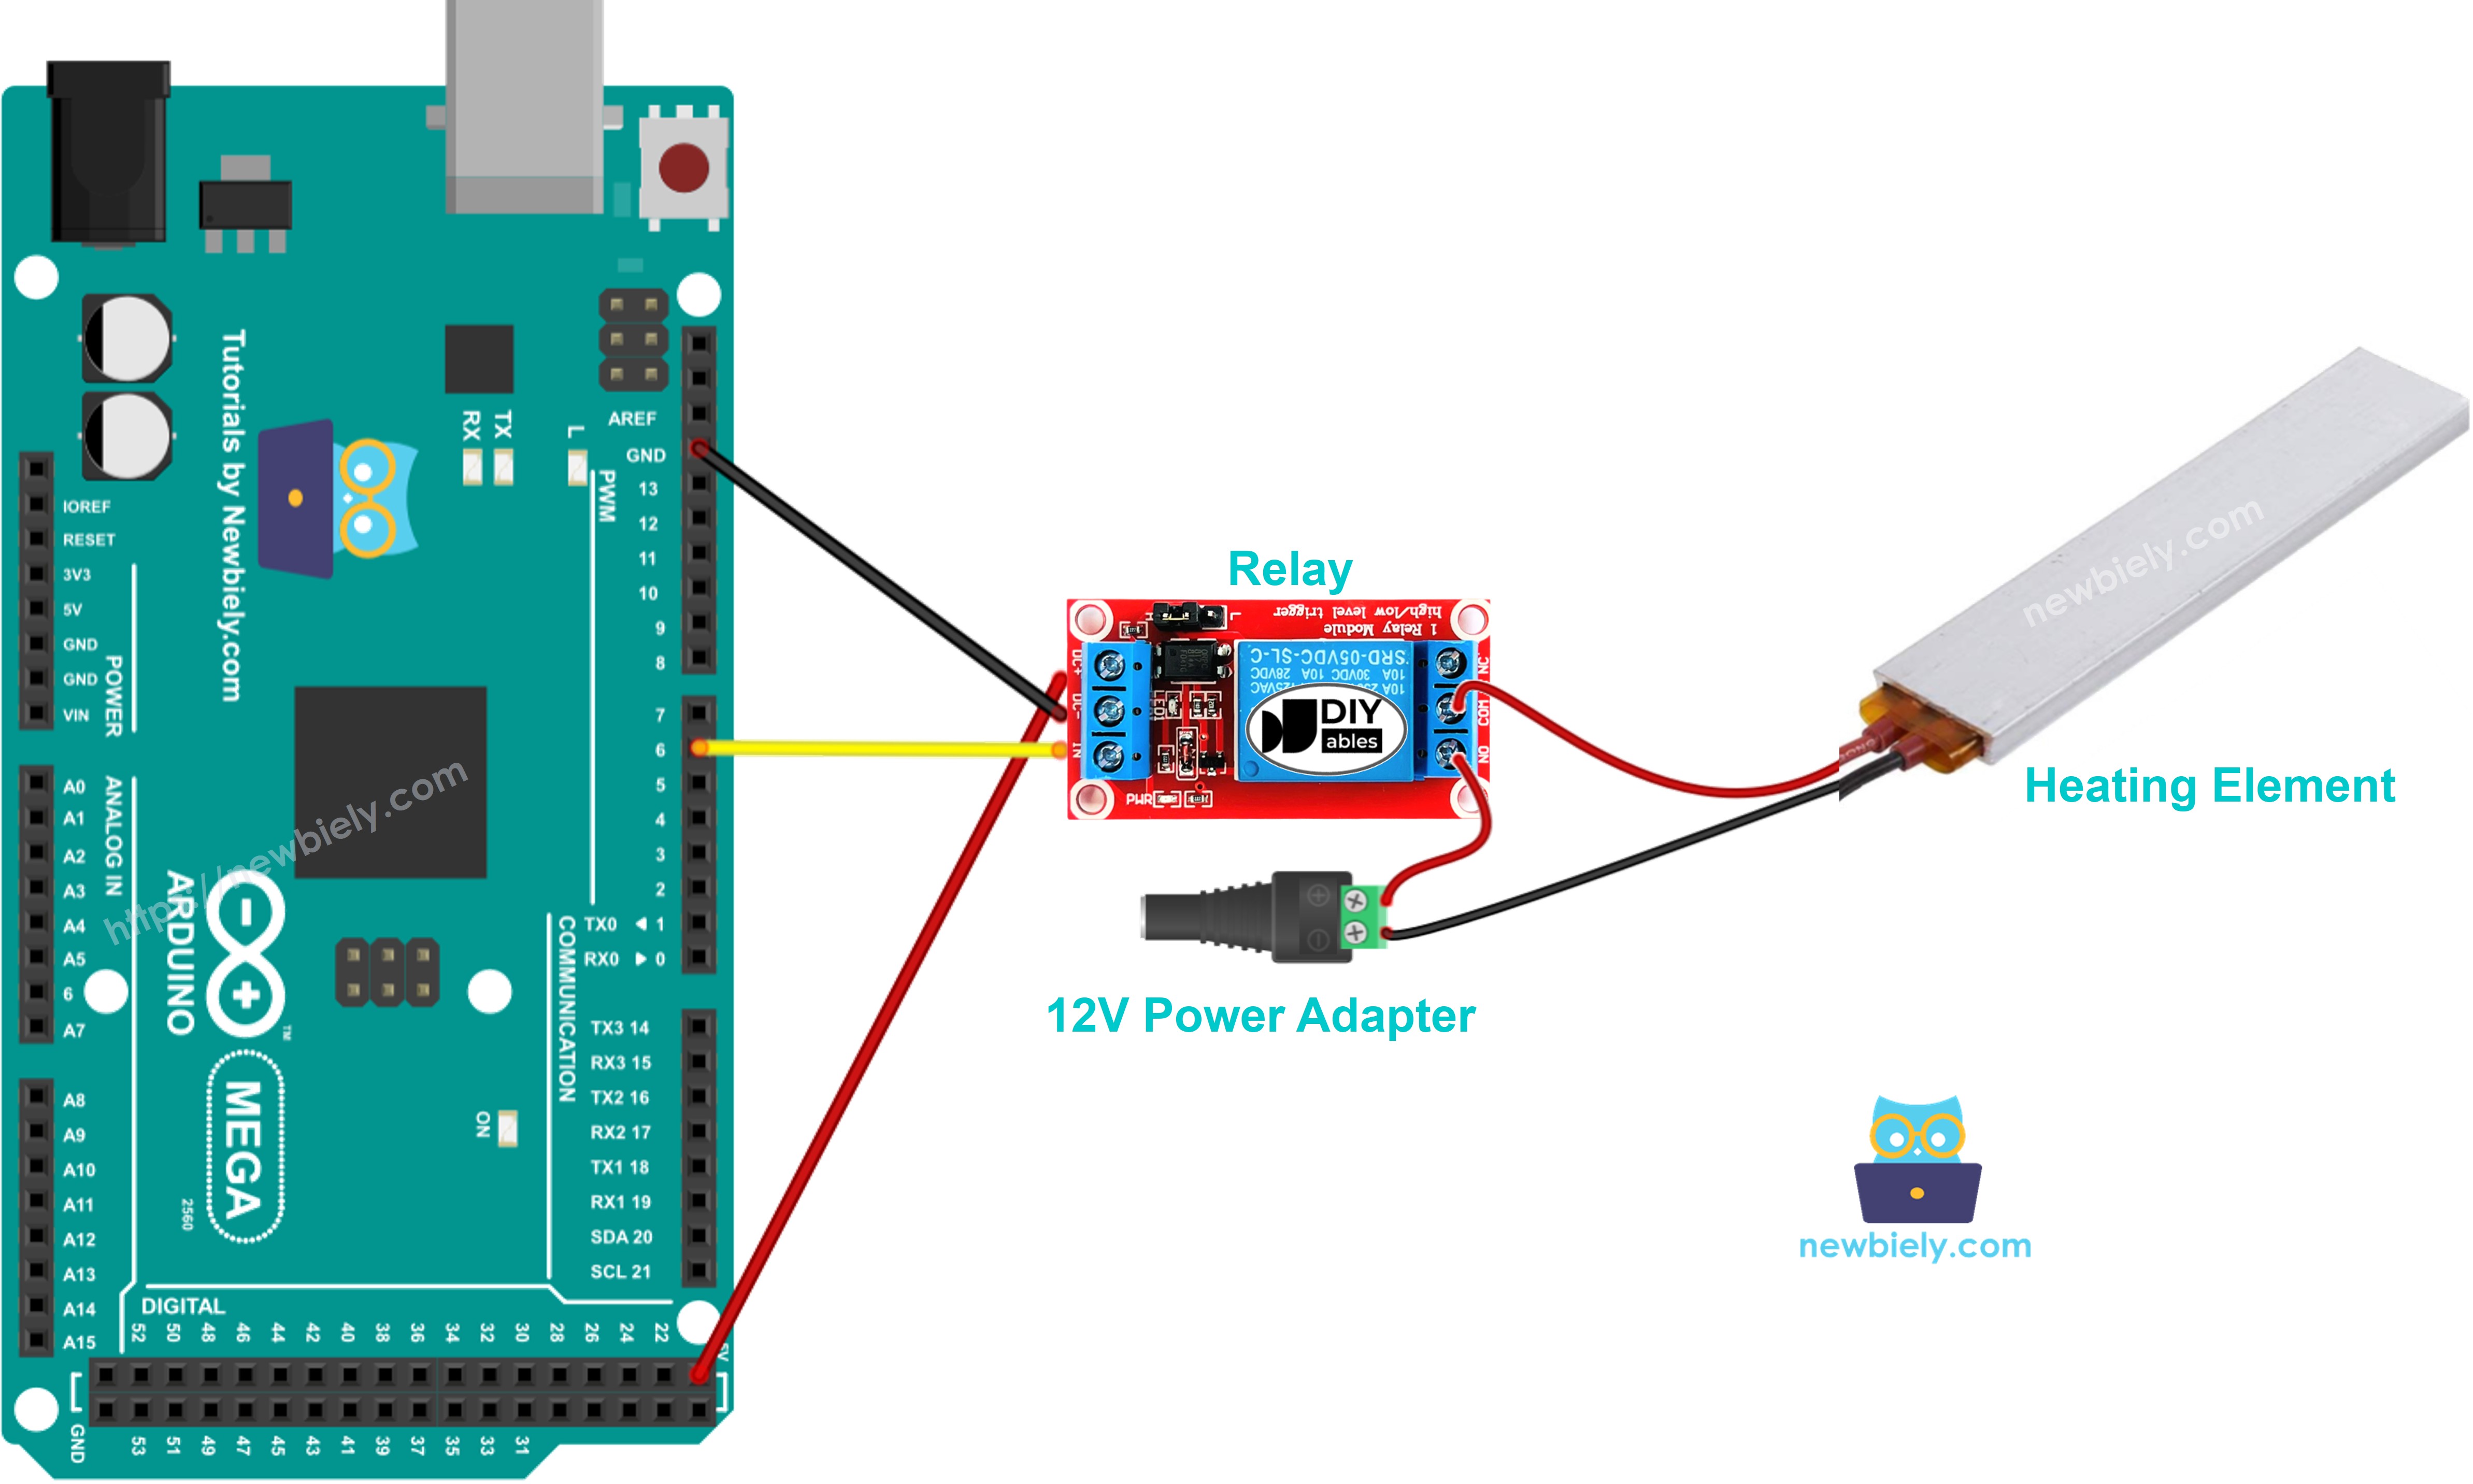
This image is created using Fritzing. Click to enlarge image
Arduino Mega Code
The code below turns the heater on for five seconds, then off for five seconds, and repeats.
Detailed Instructions
Do these steps one by one:
- Connect the heating element to the Arduino Uno as shown in the diagram.
- Connect the Arduino Mega board to your computer with a USB cable.
- Open the Arduino IDE on your computer.
- Choose the Arduino Mega board and the correct COM port.
- Copy the code and paste it into the Arduino IDE.
- Click Upload to send the code to the Arduino Mega.
- Check the temperature of the heating element.
WARNING
Be careful, it can burn you or start a fire in your home. This is important, and we want you to stay safe. If you are not sure what you are doing, do not touch anything. Instead, ask someone who knows about it. We are not responsible for your safety.
Code Explanation
The explanation is in the comments in the Arduino code shown above.