Arduino Mega - Button
The button is a simple but important part used in many Arduino Mega projects. It may seem hard because of how it works and how it feels when you press it, which can be tough for beginners. This guide is made to help beginners understand it easily. Let’s start!
※ NOTE THAT:
Before we learn how to use the button with the Arduino Mega, here are two common mistakes beginners make:
- Floating input problem
- Symptom: When a button is connected to an Arduino Mega input pin, the pin’s state is not reliable and does not show the real button state.
- Cause: The input pin has no pull-down or pull-up resistor.
- Solution: Add a pull-down or pull-up resistor to the input pin. We’ll explain more later in this guide.
- Debounce (chattering) problem
- Symptom: The Mega reads the button and tries to see a press by looking for changes in state (HIGH to LOW, or LOW to HIGH). But with one press, the Mega may think there are multiple presses.
- Cause: The button’s mechanical action makes the input switch between LOW and HIGH quickly after one press.
- Solution: Use debounce. See the Arduino Mega button debounce tutorial for details.
Note: Chattering only affects projects that need an exact count of presses. In other apps, it may not be a problem.
Hardware Preparation
Or you can buy the following kits:
| 1 | × | DIYables Sensor Kit (18 sensors/displays) |
Additionally, some of these links are for products from our own brand, DIYables .
Overview of Button
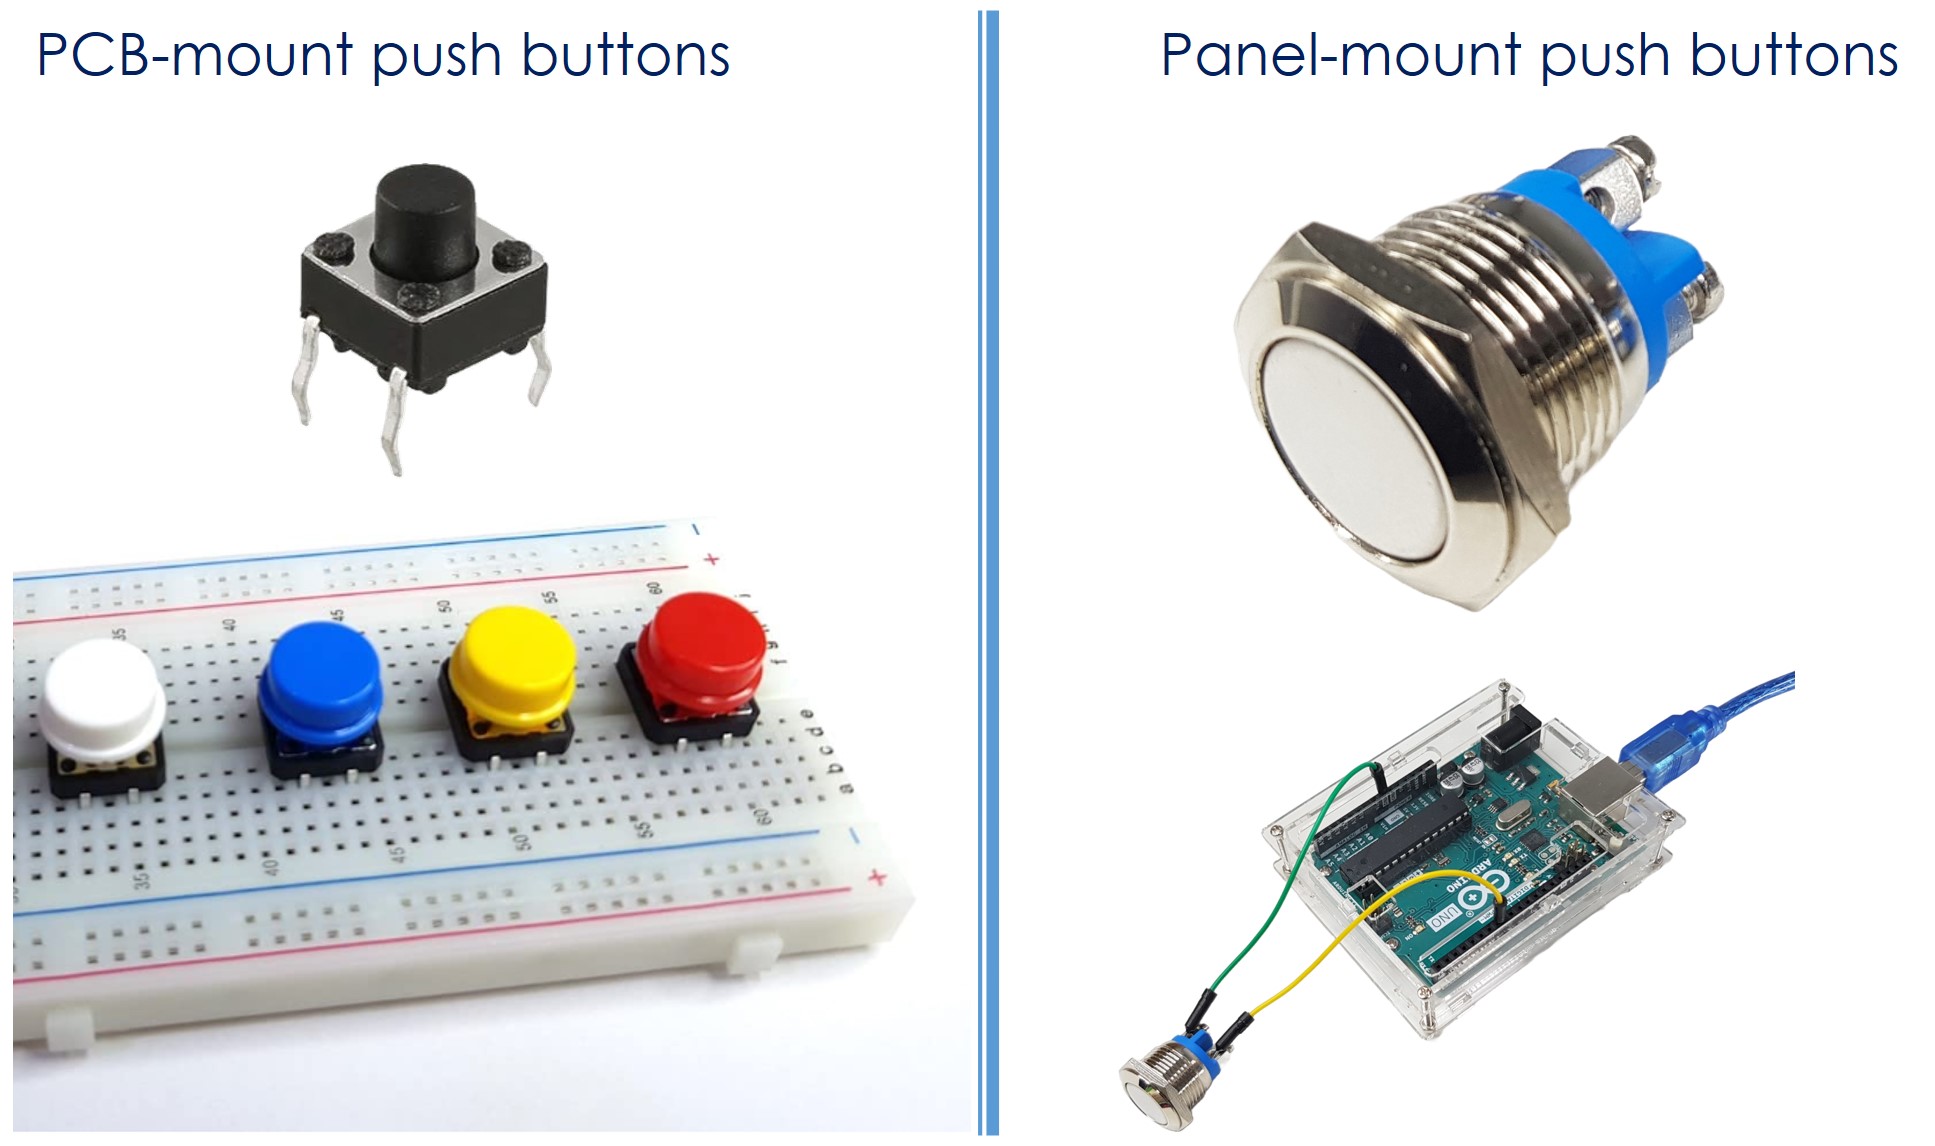
The push button, also called a tactile button or momentary switch, is a switch that closes when you press and hold it, and opens when you release. Push buttons come in different kinds, mainly two groups:
- Push buttons for PCB mounting (can be used on a breadboard)
- Push buttons for mounting on a panel
Pinout
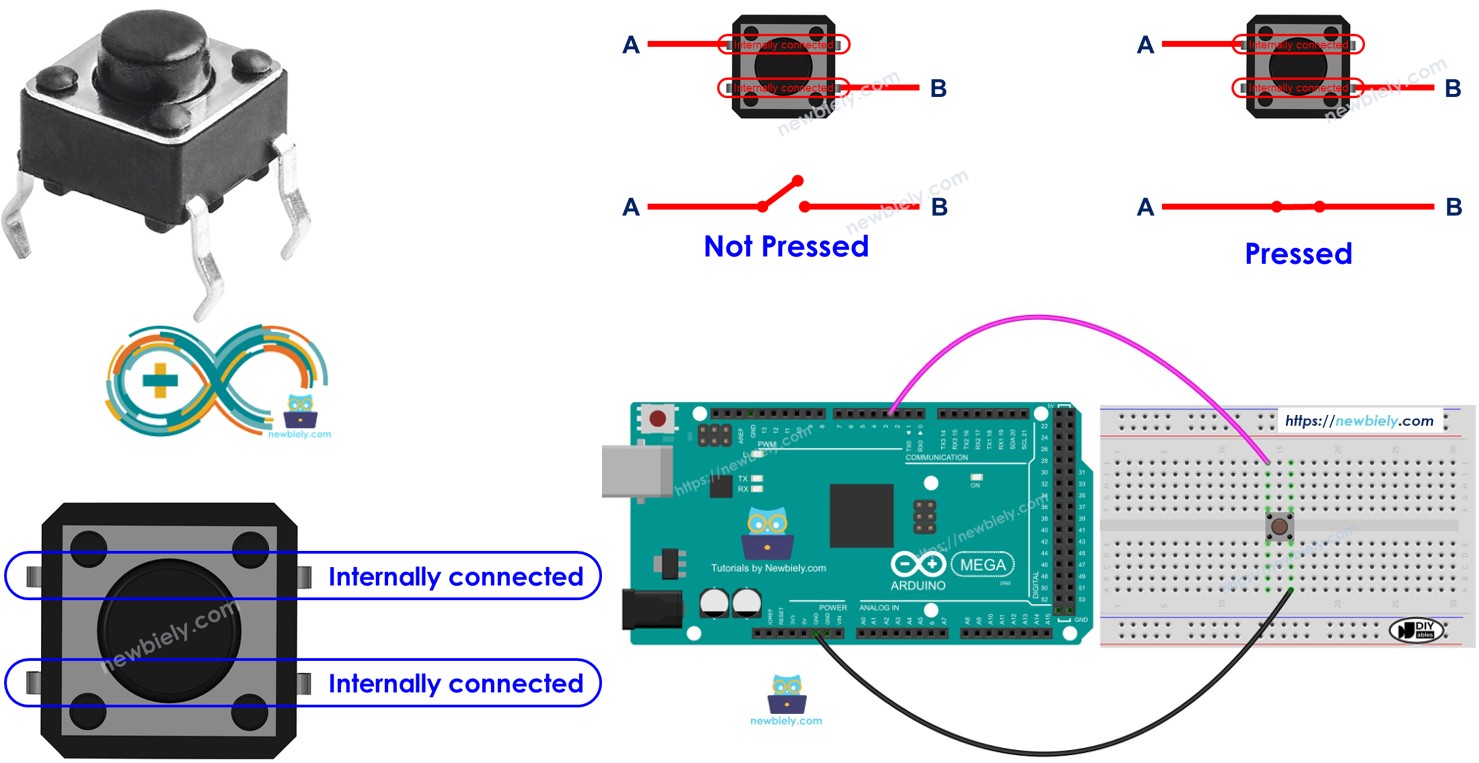
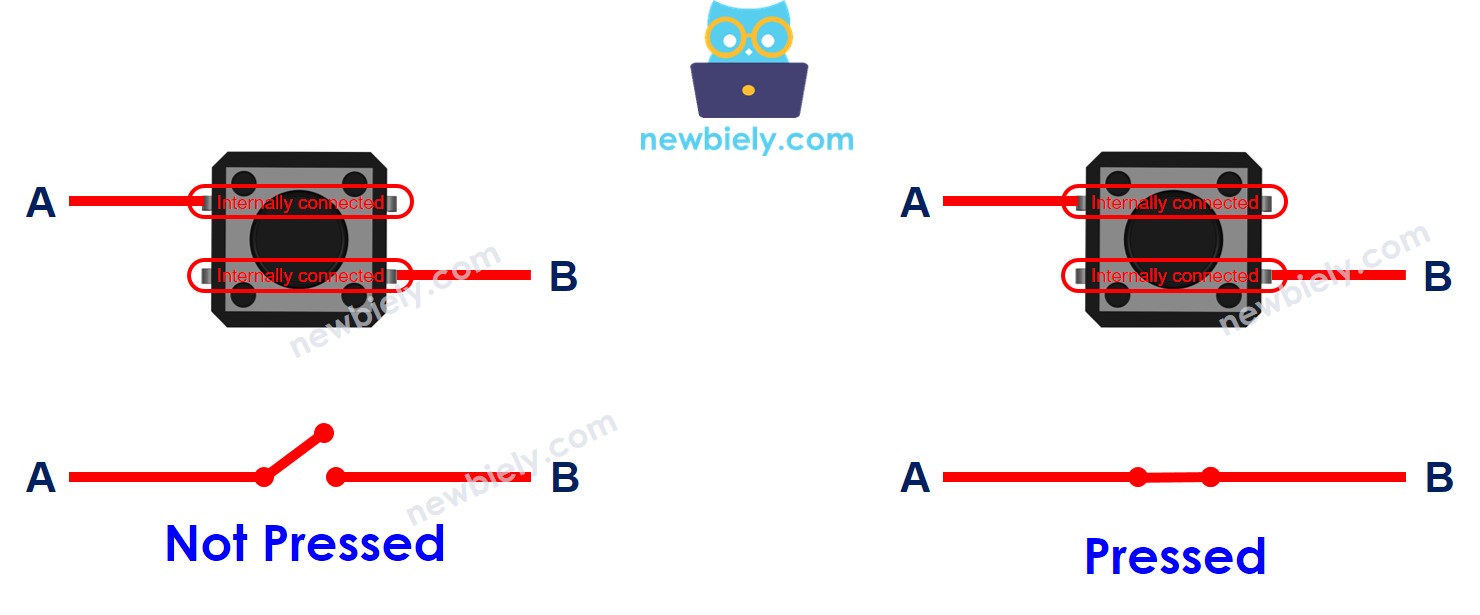
The PCB-mount buttons usually have four pins.
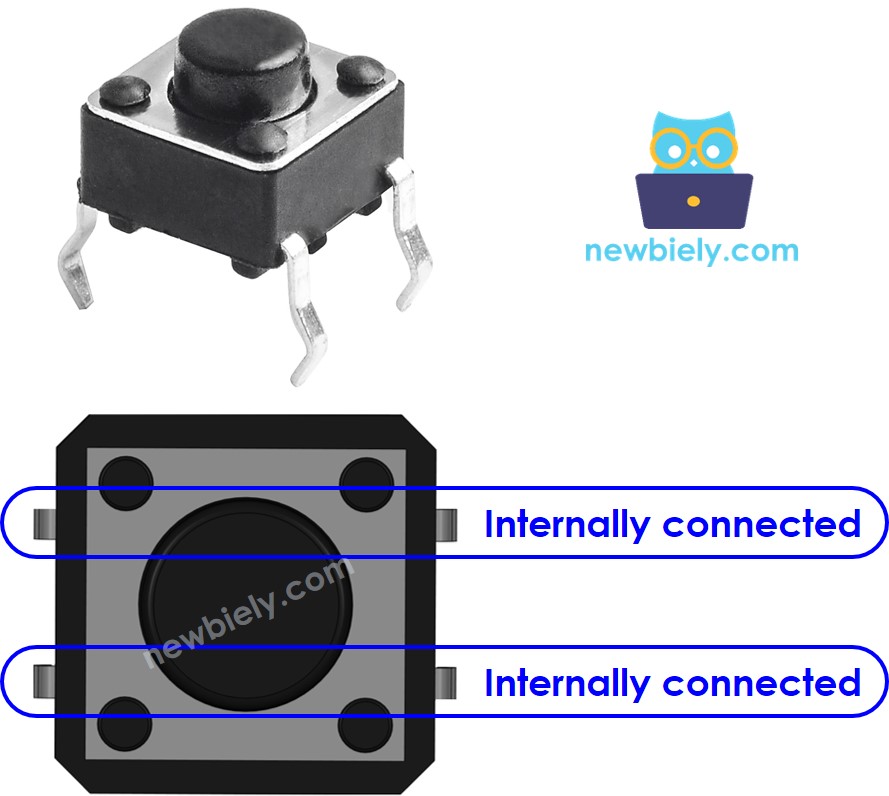
Inside, the pins are connected in pairs. So you only need to use two pins, choosing one from each pair.
There are four ways to connect the button, but really only two because they are similar. See the image.

A button has four pins, but we only use two. This helps it stay steady on the circuit board and survive when pressed.
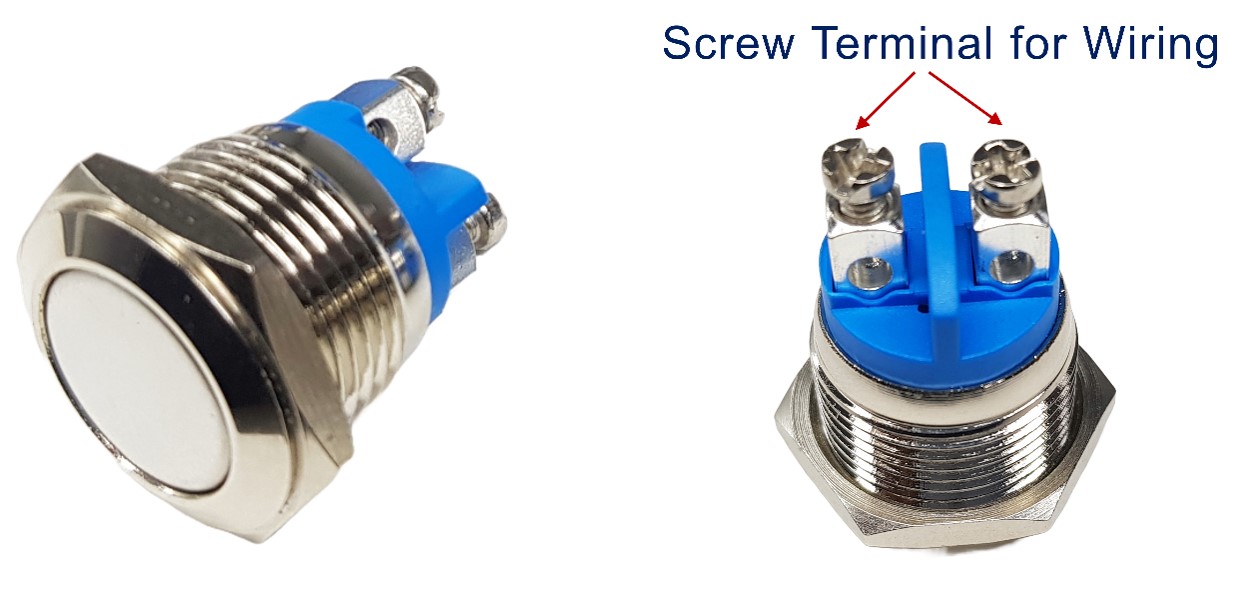
The panel-mount buttons usually have two pins.
The push button module includes an built-in pull-down resistor, which ensures that the output remains LOW when the button is not pressed. It has three pins:
- GND: Connect this pin to ground.
- VCC: Connect this pin to a 5V or 3.3V power supply.
- OUT: Connect this pin to a digital input on your Arduino.
With this setup, the module gives LOW when the button is not pressed and gives HIGH when the button is pressed.
How It Works
- If you don’t press the button, pin A is not connected to pin B.
- If you press the button, pin A is connected to pin B.
Arduino Mega - Button
One side of the button connects to power or ground, and the other side connects to a pin on the Arduino Mega.
We can tell if the button is pressed by reading the pin on the Arduino Mega that is set as an input.
Button State and Pressing State
How the button's state relates to when it's pressed depends on how we connect the button to the Arduino Mega and the pin settings on the Arduino Mega.
There are two easy ways to use a button with an Arduino Mega.
- Connect one side of the button to VCC and the other side to an Arduino Mega input pin, with a pull-down resistor to ground. When you press the button, the pin will be HIGH. When not pressed, it will be LOW. You must use an external resistor.
- Connect one side of the button to GND and the other side to an Arduino Mega input pin, with a pull-up resistor. When you press the button, the pin will be LOW. When not pressed, it will be HIGH. You can use either an internal or external resistor; the internal resistor is built into the Mega and can be turned on in code.
※ NOTE THAT:
If we don’t use a pull-down or pull-up resistor, the input pin is floating when the button isn’t pressed. That means the pin’s state can change by itself to HIGH or LOW, giving wrong readings.
- Worst practice: Set the Arduino Mega pin as an input with pinMode(BUTTON_PIN, INPUT) and no pull-down or pull-up resistor.
- Best practice: Set the Arduino Mega pin with an internal pull-up resistor using pinMode(BUTTON_PIN, INPUT_PULLUP). This doesn’t need an external resistor.
To help beginners, this guide uses the easiest method: set the Arduino Mega pin to use its built-in pull-up resistor, so you don’t need an external resistor. Beginners don’t have to worry about connecting a pull-up or pull-down resistor. They only need to use the Arduino code shown here.
Wiring Diagram
- Circuit diagram for Arduino Mega and a PCB-mounted button.
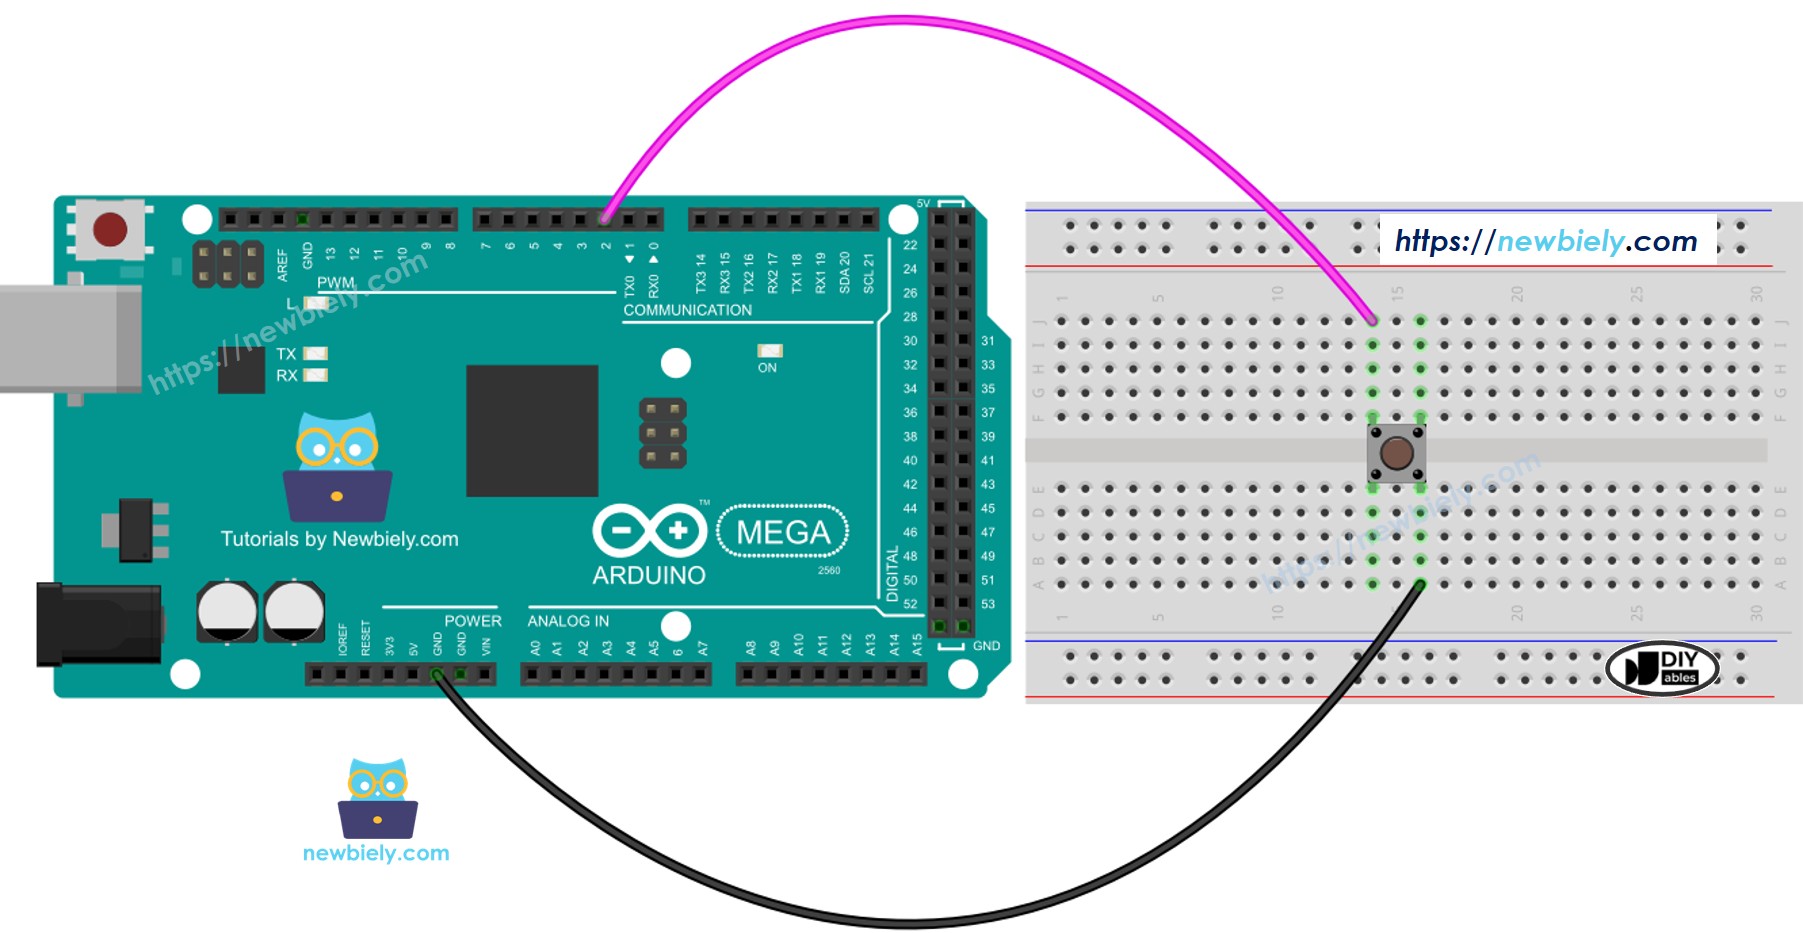
This image is created using Fritzing. Click to enlarge image
- How to wire Arduino Mega with a panel-mounted button
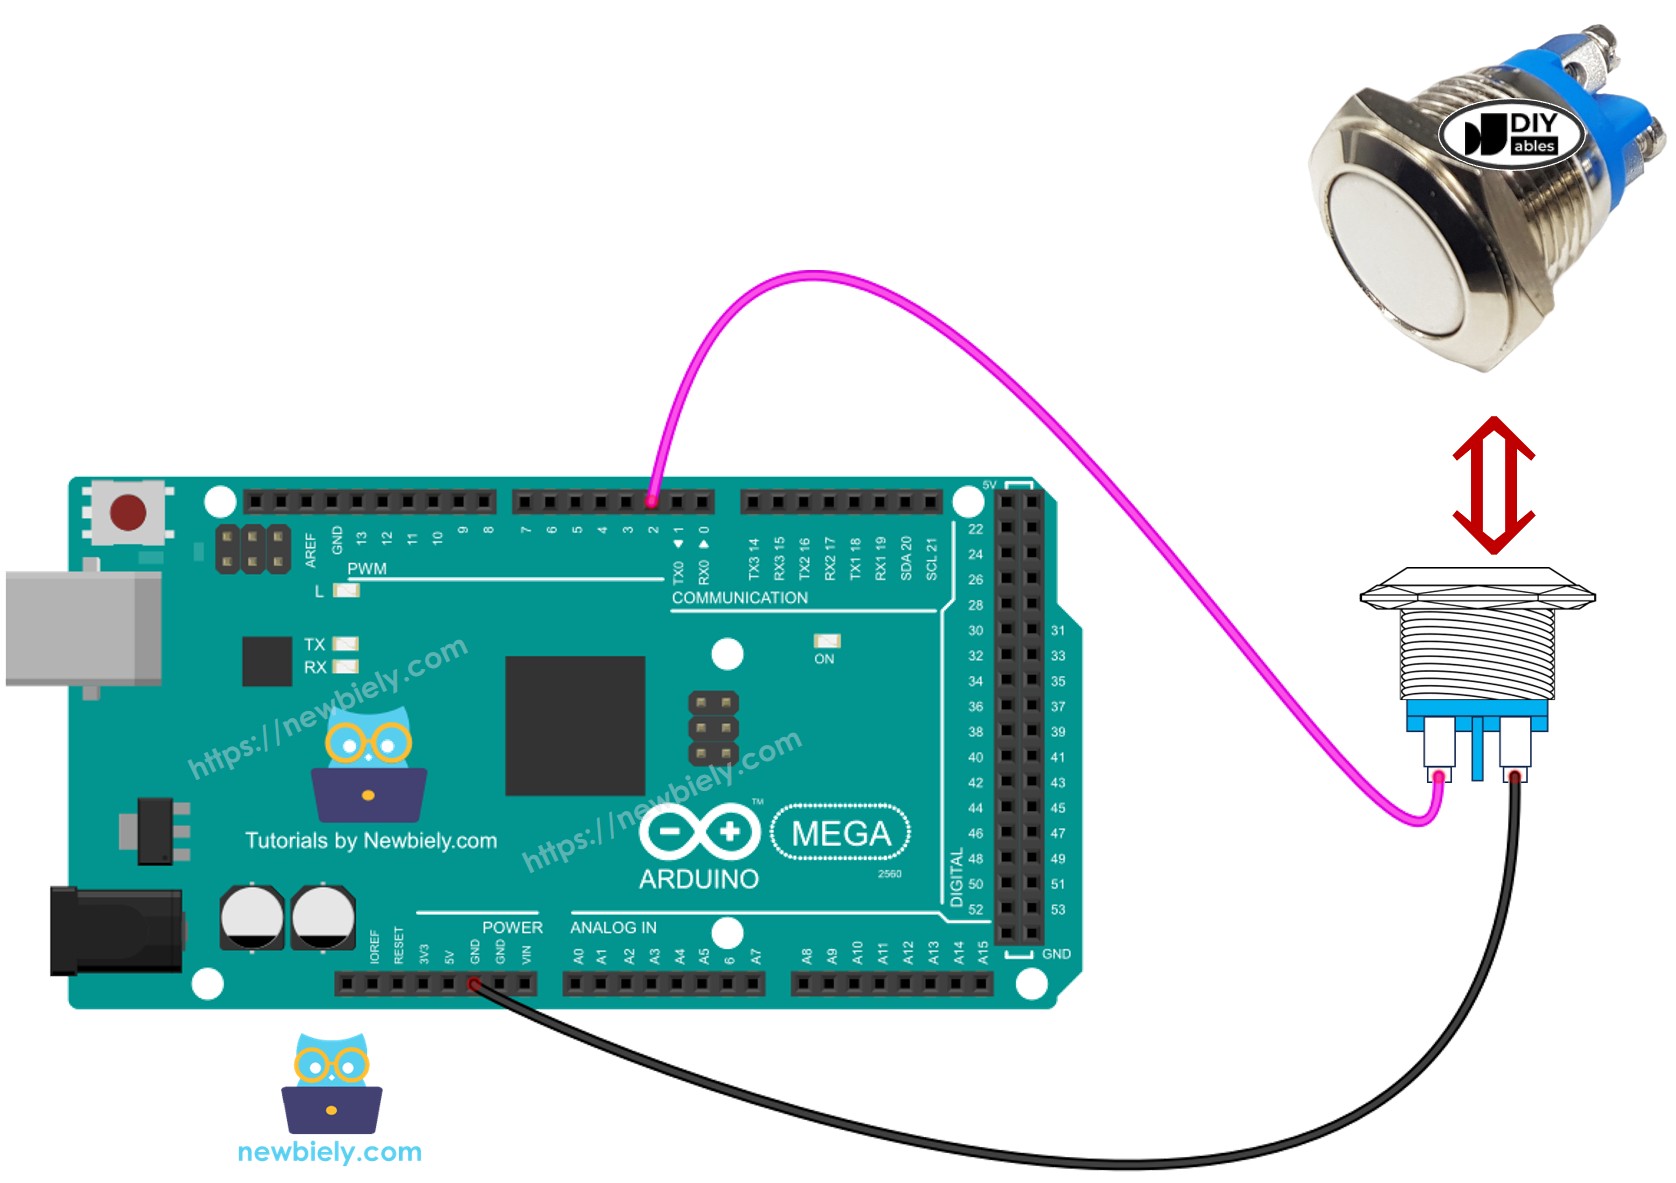
This image is created using Fritzing. Click to enlarge image
Arduino Mega Code - Reading the state of button
Detailed Instructions
Follow these steps one by one.
- If this is your first time using the Arduino Mega, see the guide for setting up the Arduino Mega in the Arduino IDE
- Connect the button to the Arduino Mega according to the diagram you were given.
- Connect the Arduino Mega board to your computer with a USB cable.
- Open the Arduino IDE on your computer.
- Choose the correct board (Arduino Mega) and the right COM port.
- Copy the code above and open it in the Arduino IDE.
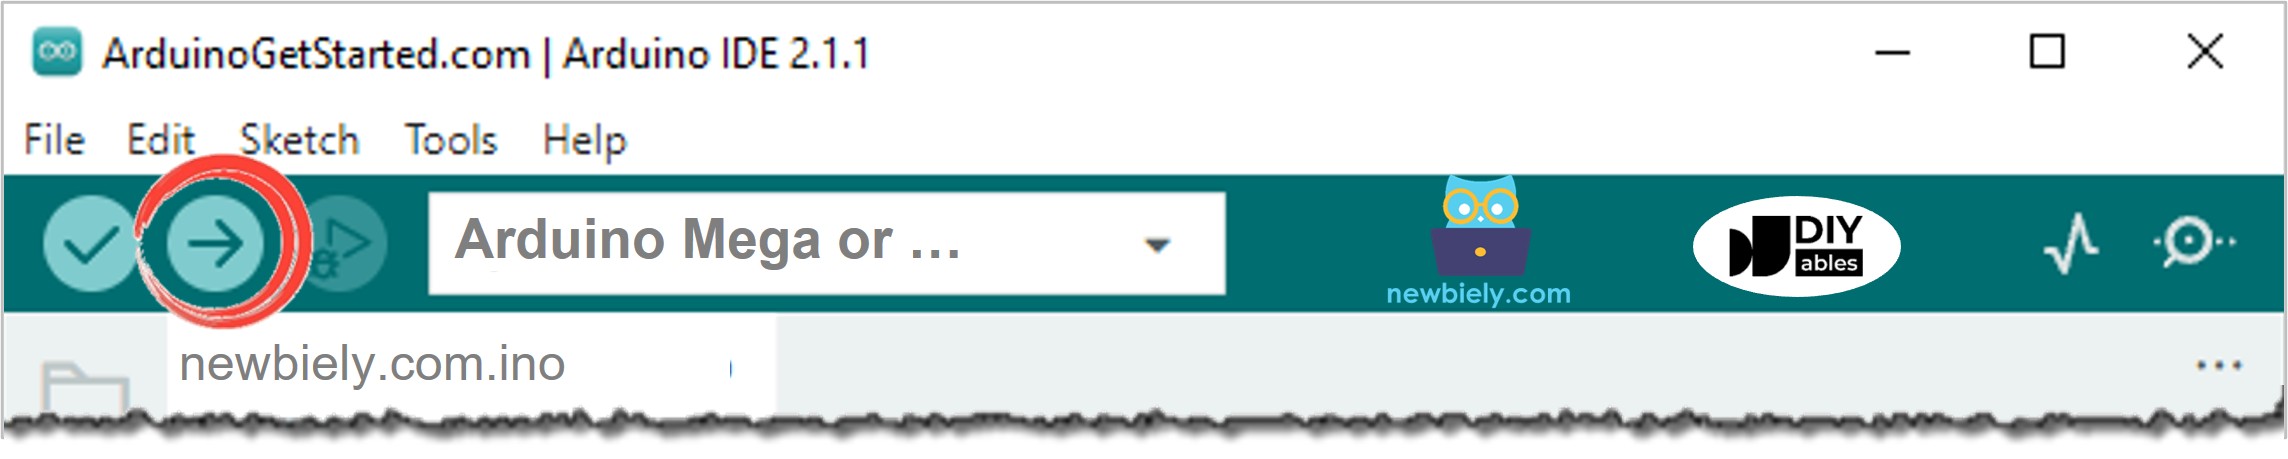
- Click the Upload button in the Arduino IDE to send the code to your Arduino Mega.
- Open the Serial Monitor.
- Press and release the button several times.
- See the result in the Serial Monitor.
1 is on, 0 is off.
Code Explanation
The explanation is in the comments in the Arduino code above.