Arduino Mega - Ultrasonic Sensor

This guide shows you how to use an ultrasonic sensor and an Arduino Mega to measure how far away an object is. Here’s what we will learn:

Arduino Mega ultrasonic sensor

Hardware Preparation

1×Arduino Mega
1×USB 2.0 cable type A/B (for USB-A PC)
1×USB 2.0 cable type C/B (for USB-C PC)
1×Ultrasonic Sensor
1×Jumper Wires

Or you can buy the following kits:

1×DIYables Sensor Kit (30 sensors/displays)
1×DIYables Sensor Kit (18 sensors/displays)
Disclosure: Some of the links provided in this section are Amazon affiliate links. We may receive a commission for any purchases made through these links at no additional cost to you.
Additionally, some of these links are for products from our own brand, DIYables .

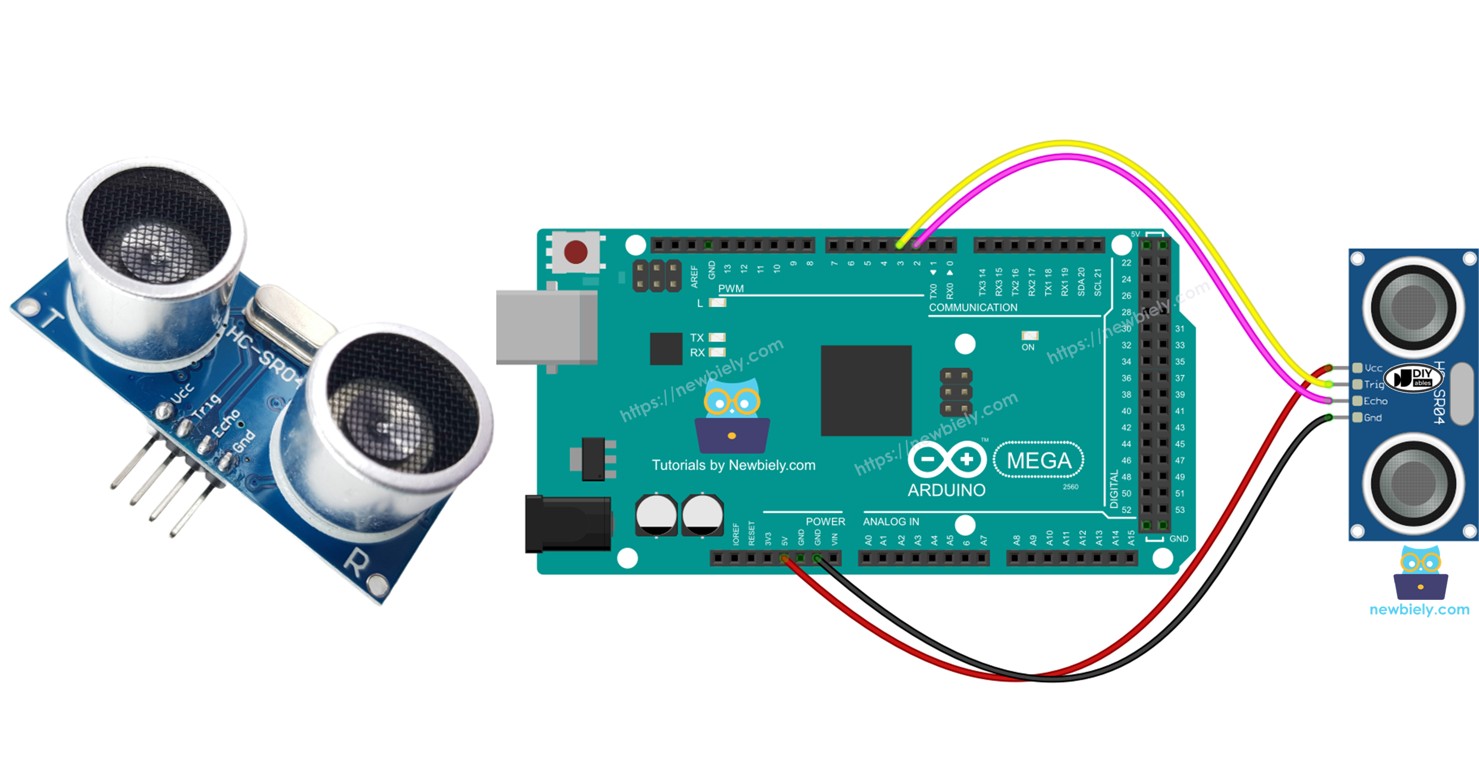
Overview of Ultrasonic Sensor

The HC-SR04 ultrasonic sensor shows how far away things are by using sound waves. It sends out a sound wave that people can't hear, then waits for the echo when the sound wave bounces back from an object. By measuring how long the sound takes to come back, the sensor can figure out the distance.
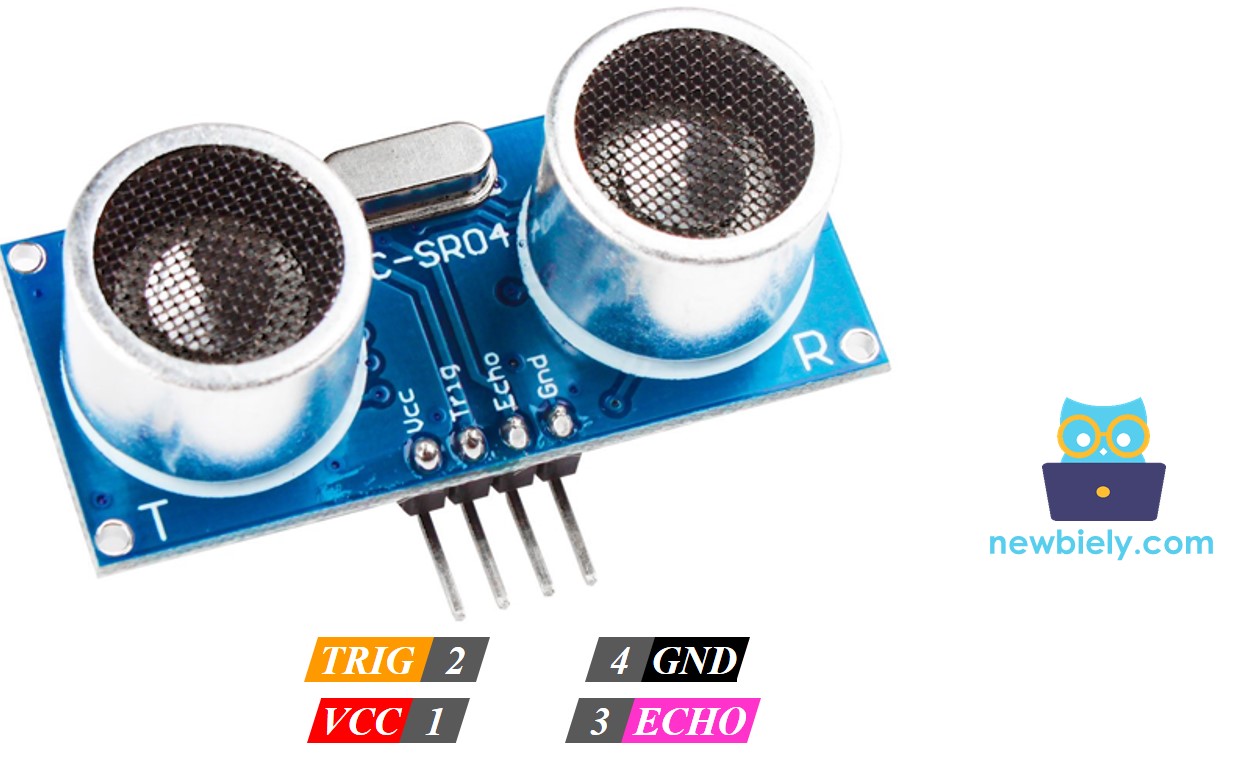
Pinout

The HC-SR04 ultrasonic sensor has four pins.

  • VCC pin: connect to 5 volts.
  • GND pin: connect to ground (0 volts).
  • TRIG pin: connect to Arduino Mega to send control signals (pulses).
  • ECHO pin: this pin sends pulses back to Arduino Mega. The Arduino Mega measures how long these pulses last to find distance.
Ultrasonic Sensor Pinout
image source: diyables.io

Wiring Diagram

The wiring diagram between Arduino Mega Ultrasonic Sensor

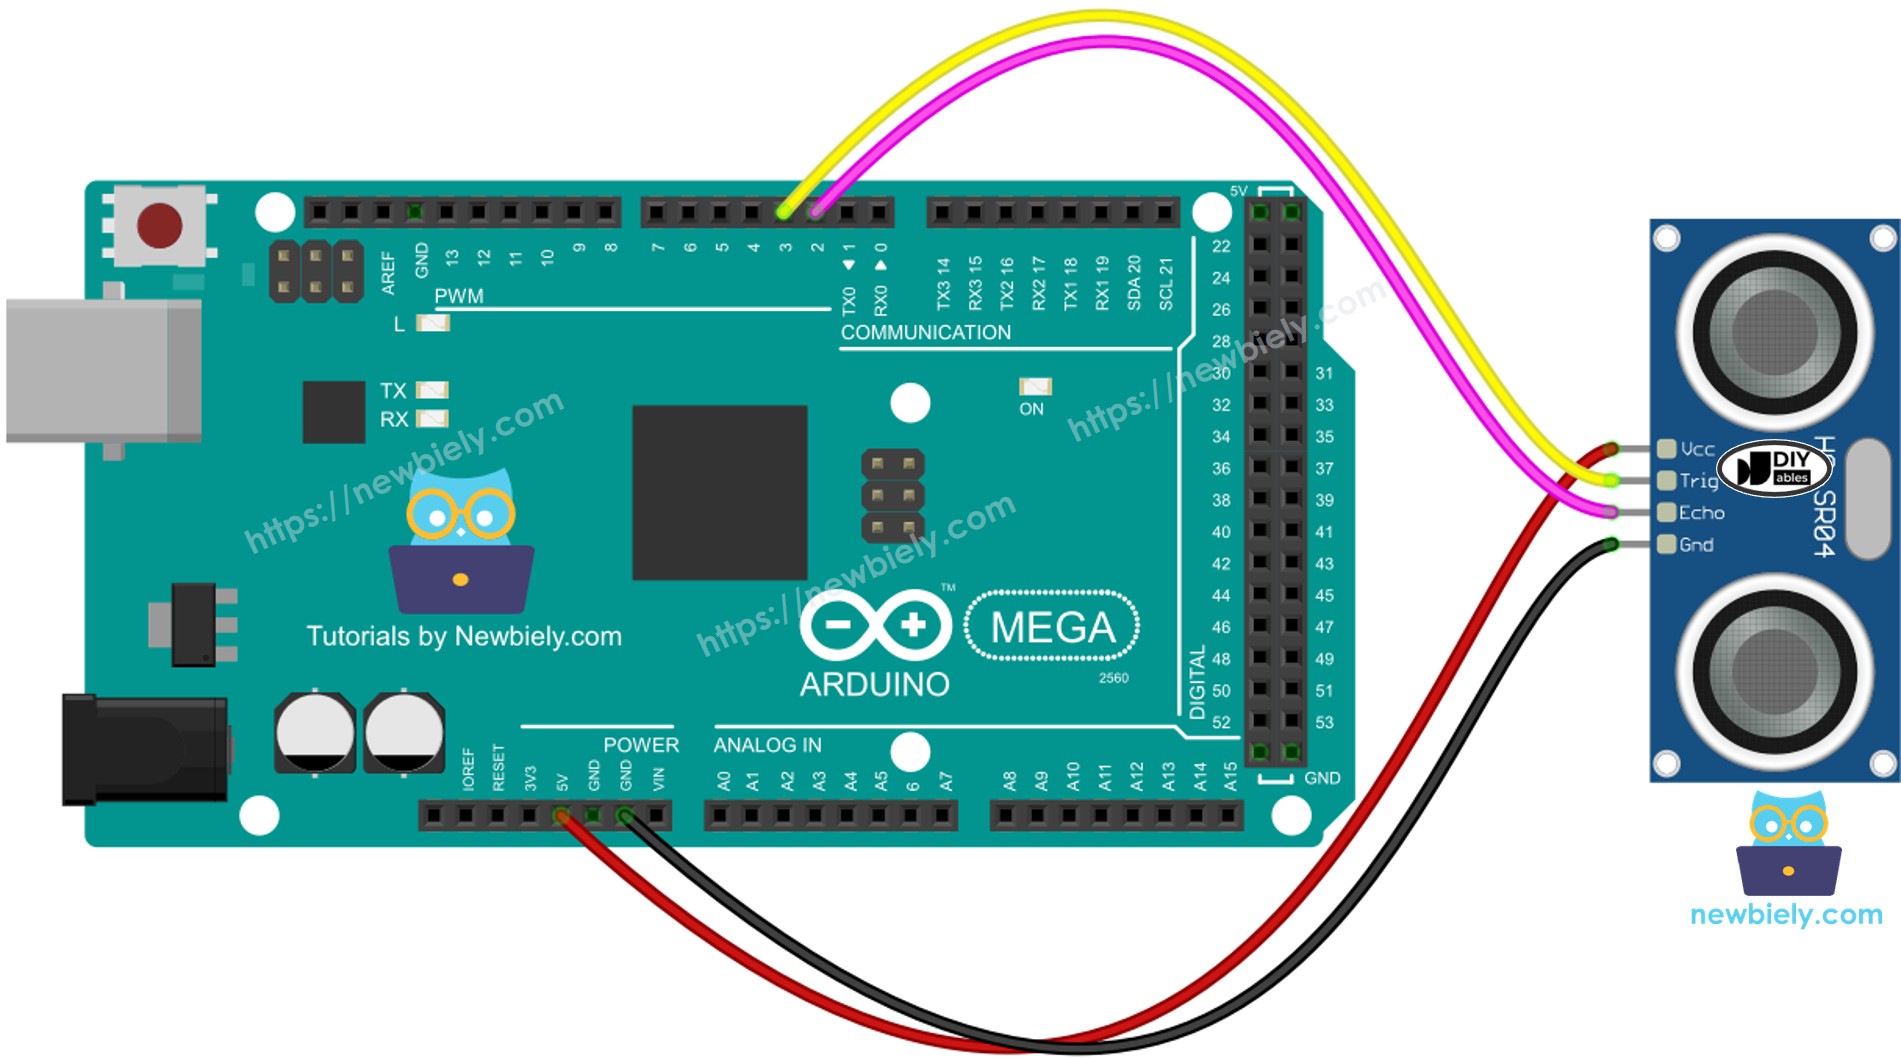
This image is created using Fritzing. Click to enlarge image

Arduino Mega Code

#define TRIG_PIN 9 // The Arduino UNO R4 pin connected to the ultrasonic sensor's TRIG pin #define ECHO_PIN 8 // The Arduino UNO R4 pin connected to the ultrasonic sensor's ECHO pin float duration_us, distance_cm; void setup() { // begin serial port Serial.begin (9600); // configure the trigger pin to output mode pinMode(TRIG_PIN, OUTPUT); // configure the echo pin to input mode pinMode(ECHO_PIN, INPUT); } void loop() { // generate 10-microsecond pulse to TRIG pin digitalWrite(TRIG_PIN, HIGH); delayMicroseconds(10); digitalWrite(TRIG_PIN, LOW); // measure duration of pulse from ECHO pin duration_us = pulseIn(ECHO_PIN, HIGH); // calculate the distance distance_cm = 0.017 * duration_us; // print the value to Serial Monitor Serial.print("distance: "); Serial.print(distance_cm); Serial.println(" cm"); delay(500); }

Detailed Instructions

Do these steps one by one.

  • Connect the parts as shown in the diagram.
  • Connect the Arduino Mega to your computer with a USB cable.
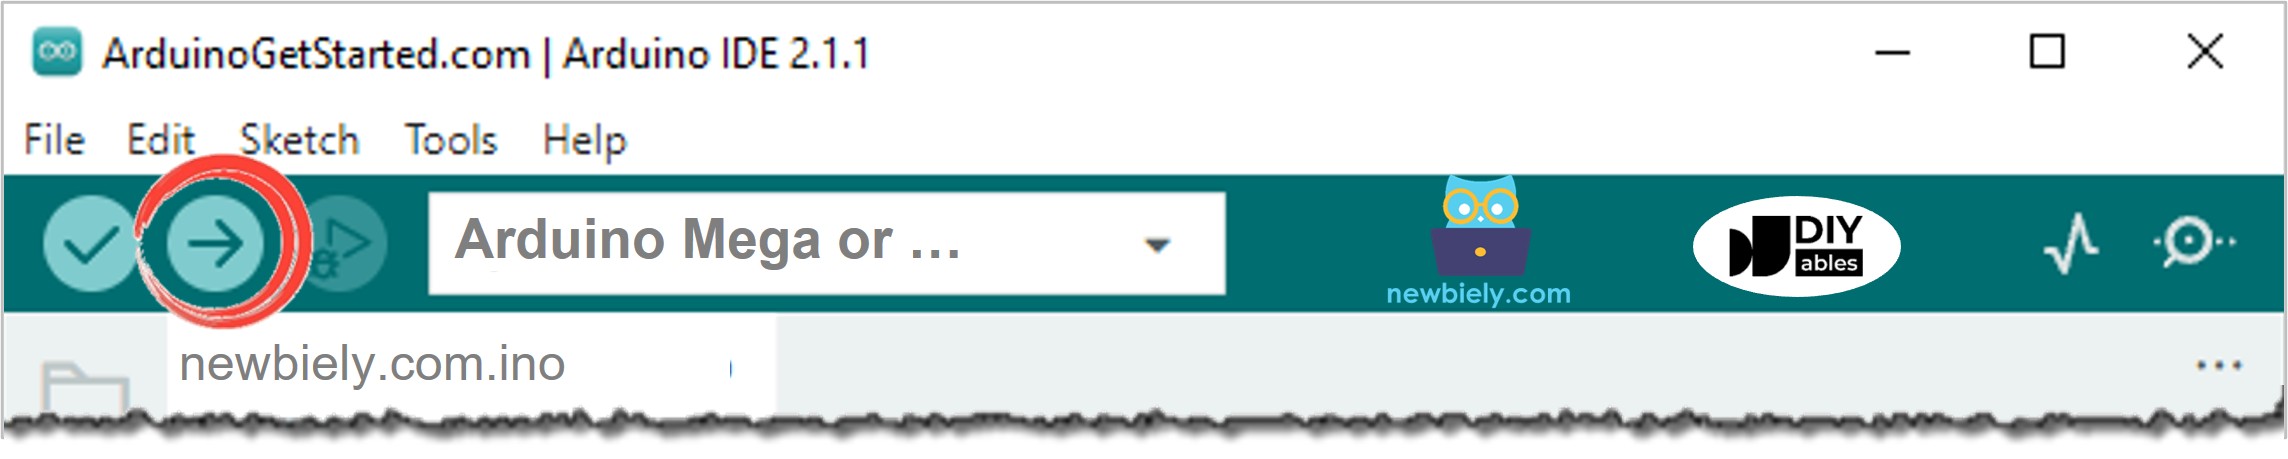
  • Open the Arduino IDE on your computer.
  • Choose the Arduino Mega board and the correct COM port.
  • Copy the code above and open it in the Arduino IDE.
  • Click the Upload button in the Arduino IDE to upload the code to the Arduino Mega.
Arduino IDE - How to Upload Code
  • Open the Serial Monitor.
  • Wave your hand in front of the ultrasonic sensor.
  • See how far your hand is from the sensor on the Serial Monitor.
COM6
Send
distance: 29.4 cm distance: 27.6 cm distance: 26.9 cm distance: 17.4 cm distance: 16.9 cm distance: 14.3 cm distance: 15.6 cm distance: 13.1 cm
Autoscroll Show timestamp
Clear output
9600 baud  
Newline  

Code Explanation

The explanation is in the notes of the Arduino code shown above.

How to Filter Noise from Distance Measurements of Ultrasonic Sensor

The reading from the ultrasonic sensor has noise. Sometimes this noisy data can cause the system to work incorrectly. We can remove the noise with this method:

  • Take several measurements and save them in a list.
  • Sort the list from smallest to largest.
  • Remove noise from the data:
    • Ignore the smallest values as noise.
    • Ignore the largest values as noise.
    • Calculate the average using the remaining middle values.

    The code below collects 20 measurements.

    • Skip the five smallest and the five largest samples because they are noise. Then find the average of the ten middle samples, from the 5th to the 14th.
    /* * This Arduino Mega code was developed by newbiely.com * * This Arduino Mega code is made available for public use without any restriction * * For comprehensive instructions and wiring diagrams, please visit: * https://newbiely.com/tutorials/arduino-mega/arduino-mega-ultrasonic-sensor */ #define TRIG_PIN 9 // The Arduino UNO R4 pin connected to the ultrasonic sensor's TRIG pin #define ECHO_PIN 8 // The Arduino UNO R4 pin connected to the ultrasonic sensor's ECHO pin float filterArray[20]; // array to store data samples from sensor float distance; // store the distance from sensor void setup() { // begin serial port Serial.begin (9600); // configure the trigger and echo pins to output mode pinMode(TRIG_PIN, OUTPUT); pinMode(ECHO_PIN, INPUT); } void loop() { // 1. TAKING MULTIPLE MEASUREMENTS AND STORE IN AN ARRAY for (int sample = 0; sample < 20; sample++) { filterArray[sample] = ultrasonicMeasure(); delay(30); // to avoid untrasonic interfering } // 2. SORTING THE ARRAY IN ASCENDING ORDER for (int i = 0; i < 19; i++) { for (int j = i + 1; j < 20; j++) { if (filterArray[i] > filterArray[j]) { float swap = filterArray[i]; filterArray[i] = filterArray[j]; filterArray[j] = swap; } } } // 3. FILTERING NOISE // + the five smallest samples are considered as noise -> ignore it // + the five biggest samples are considered as noise -> ignore it // ---------------------------------------------------------------- // => get average of the 10 middle samples (from 5th to 14th) double sum = 0; for (int sample = 5; sample < 15; sample++) { sum += filterArray[sample]; } distance = sum / 10; // print the value to Serial Monitor Serial.print("distance: "); Serial.print(distance); Serial.println(" cm"); } float ultrasonicMeasure() { // generate 10-microsecond pulse to TRIG pin digitalWrite(TRIG_PIN, HIGH); delayMicroseconds(10); digitalWrite(TRIG_PIN, LOW); // measure duration of pulse from ECHO pin float duration_us = pulseIn(ECHO_PIN, HIGH); // calculate the distance float distance_cm = 0.017 * duration_us; return distance_cm; }

Video Tutorial

Ultrasonic Sensor Applications

  • Preventing crashes
  • Knowing when it's full
  • Checking the level
  • Seeing how close something is

Learn More

※ OUR MESSAGES

  • As freelancers, We are AVAILABLE for HIRE. See how to outsource your project to us
  • Please feel free to share the link of this tutorial. However, Please do not use our content on any other websites. We invested a lot of effort and time to create the content, please respect our work!