Arduino Mega - LDR Module
This guide shows you how to use an Arduino Mega board and an LDR light sensor to check and measure light levels. We will learn the following topics in detail:
- How to connect the LDR light sensor module to an Arduino UNO R4.
- How to write code for the Arduino Mega to detect light using the digital signal from the LDR light sensor module.
- How to write code for the Arduino Mega to read how bright it is using the analog signal from the LDR light sensor module.
Hardware Preparation
Or you can buy the following kits:
| 1 | × | DIYables Sensor Kit (18 sensors/displays) |
Additionally, some of these links are for products from our own brand, DIYables .
Overview of LDR Light Sensor Module
The LDR light sensor module can tell if there is light or how bright it is around it. It has two outputs: digital and analog.
Pinout
The LDR light sensor module has four pins.
- VCC pin: Connect to power supply (3.3V to 5V).
- GND pin: Connect to ground (0V).
- DO pin: This is a digital output. It goes HIGH when it’s dark and LOW when it’s light. You can adjust how dark or light it is by turning the knob (potentiometer).
- AO pin: This is an analog output. The value goes down when it’s brighter and goes up when it’s darker.
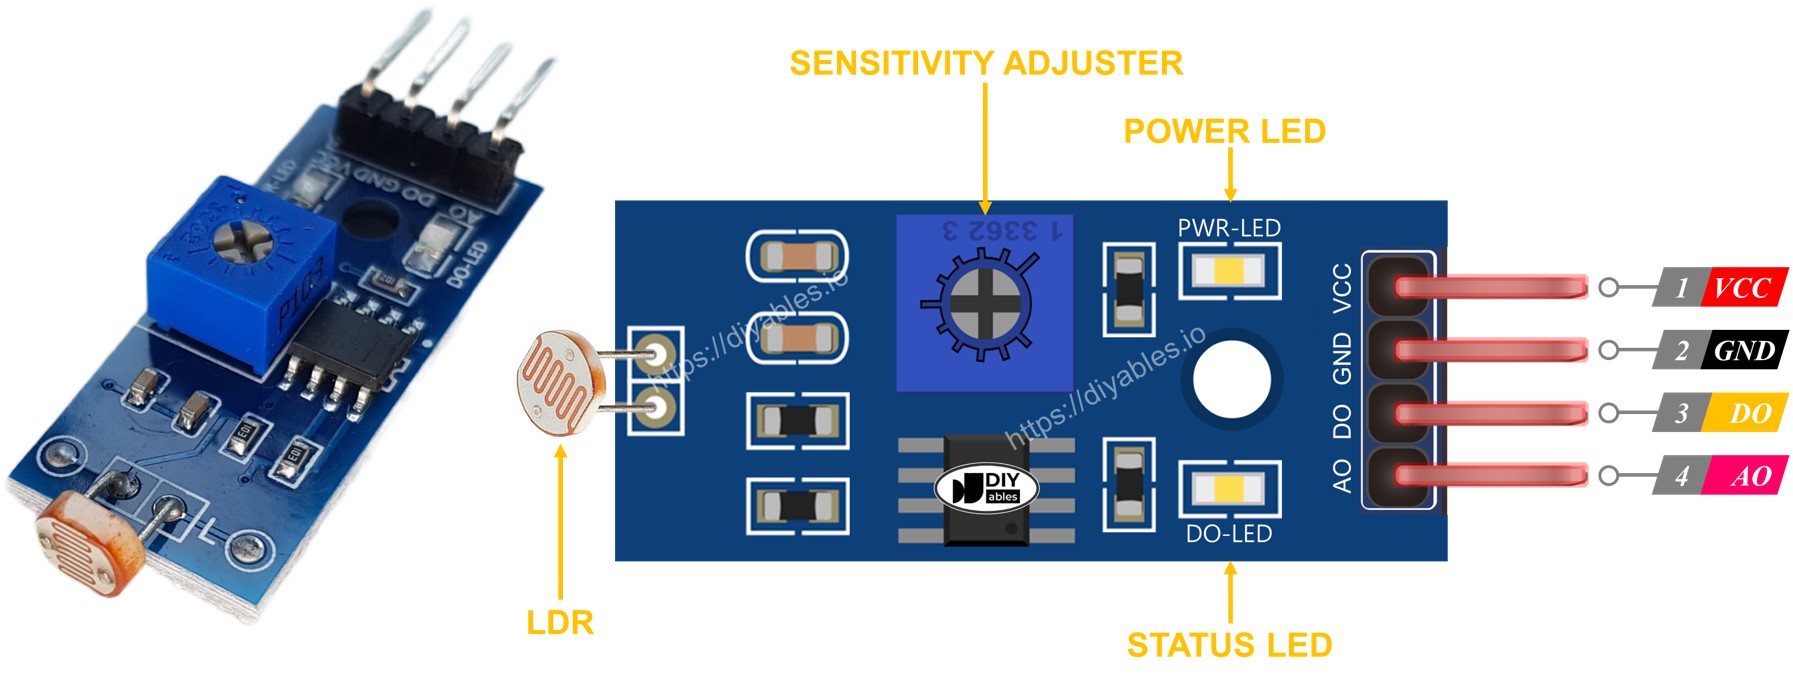
It also has two small LED lights.
- One Power LED tells you when the power is on.
- One DO LED shows the light on the DO pin: it lights up in light and turns off in the dark.
How It Works
About the DO pin:
- The module has a small knob to set the light level (the limit).
- If the light around it is brighter than this limit, the DO output is LOW, and the DO-LED (the small light on the module) is off.
- If the light around it is darker than this limit, the DO output is HIGH, and the DO-LED is on.
About the analog output pin:
- The AO pin shows a reading that changes with light.
- When there is a lot of light, the AO reading is lower.
- When it is darker, the AO reading is higher.
- The potentiometer does not affect the AO pin value. It only changes the threshold for the DO pin.
This way, you can adjust the sensitivity using the small pot for the DO pin, while still getting accurate light readings from the AO pin.
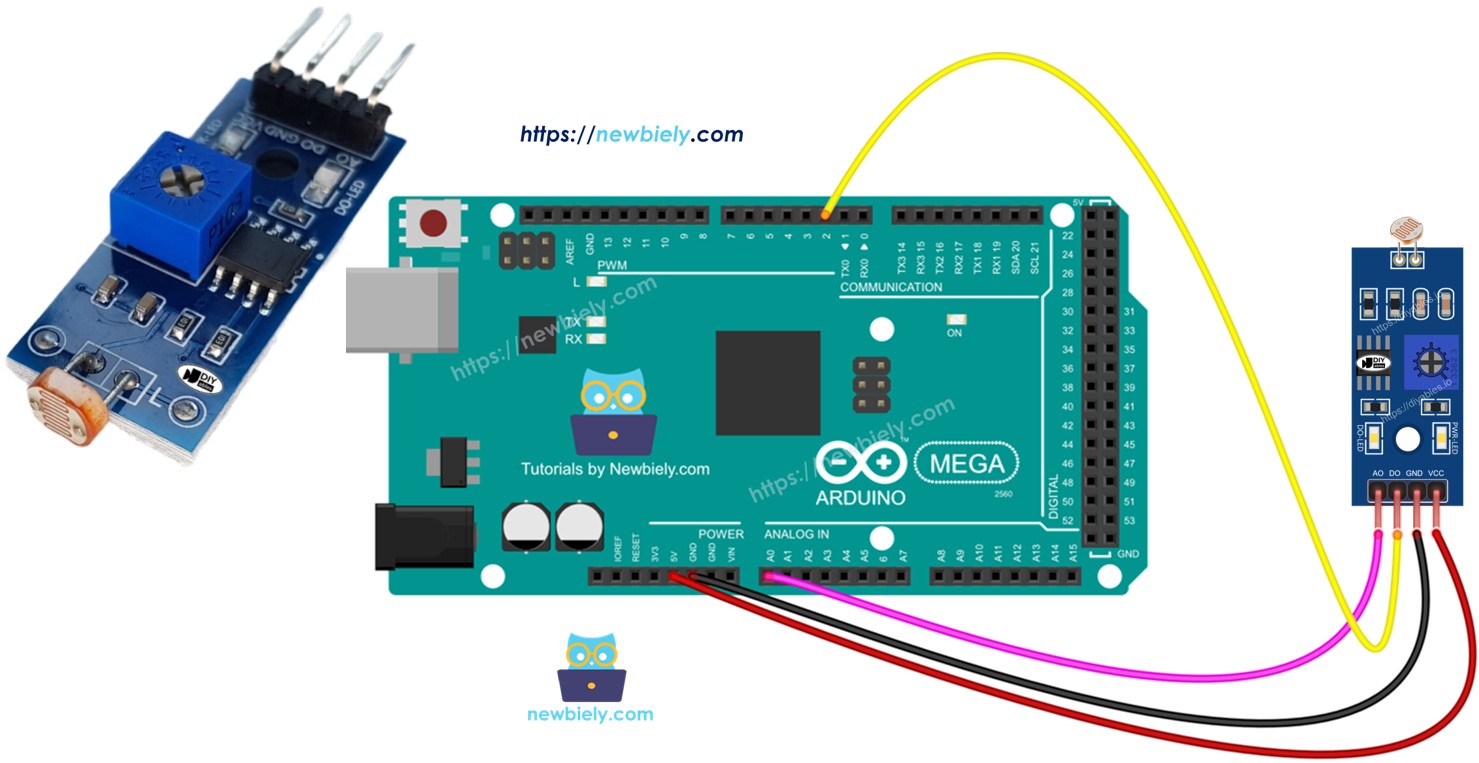
Wiring Diagram
The light sensor module has two output pins. You can use one or both, depending on what you need.
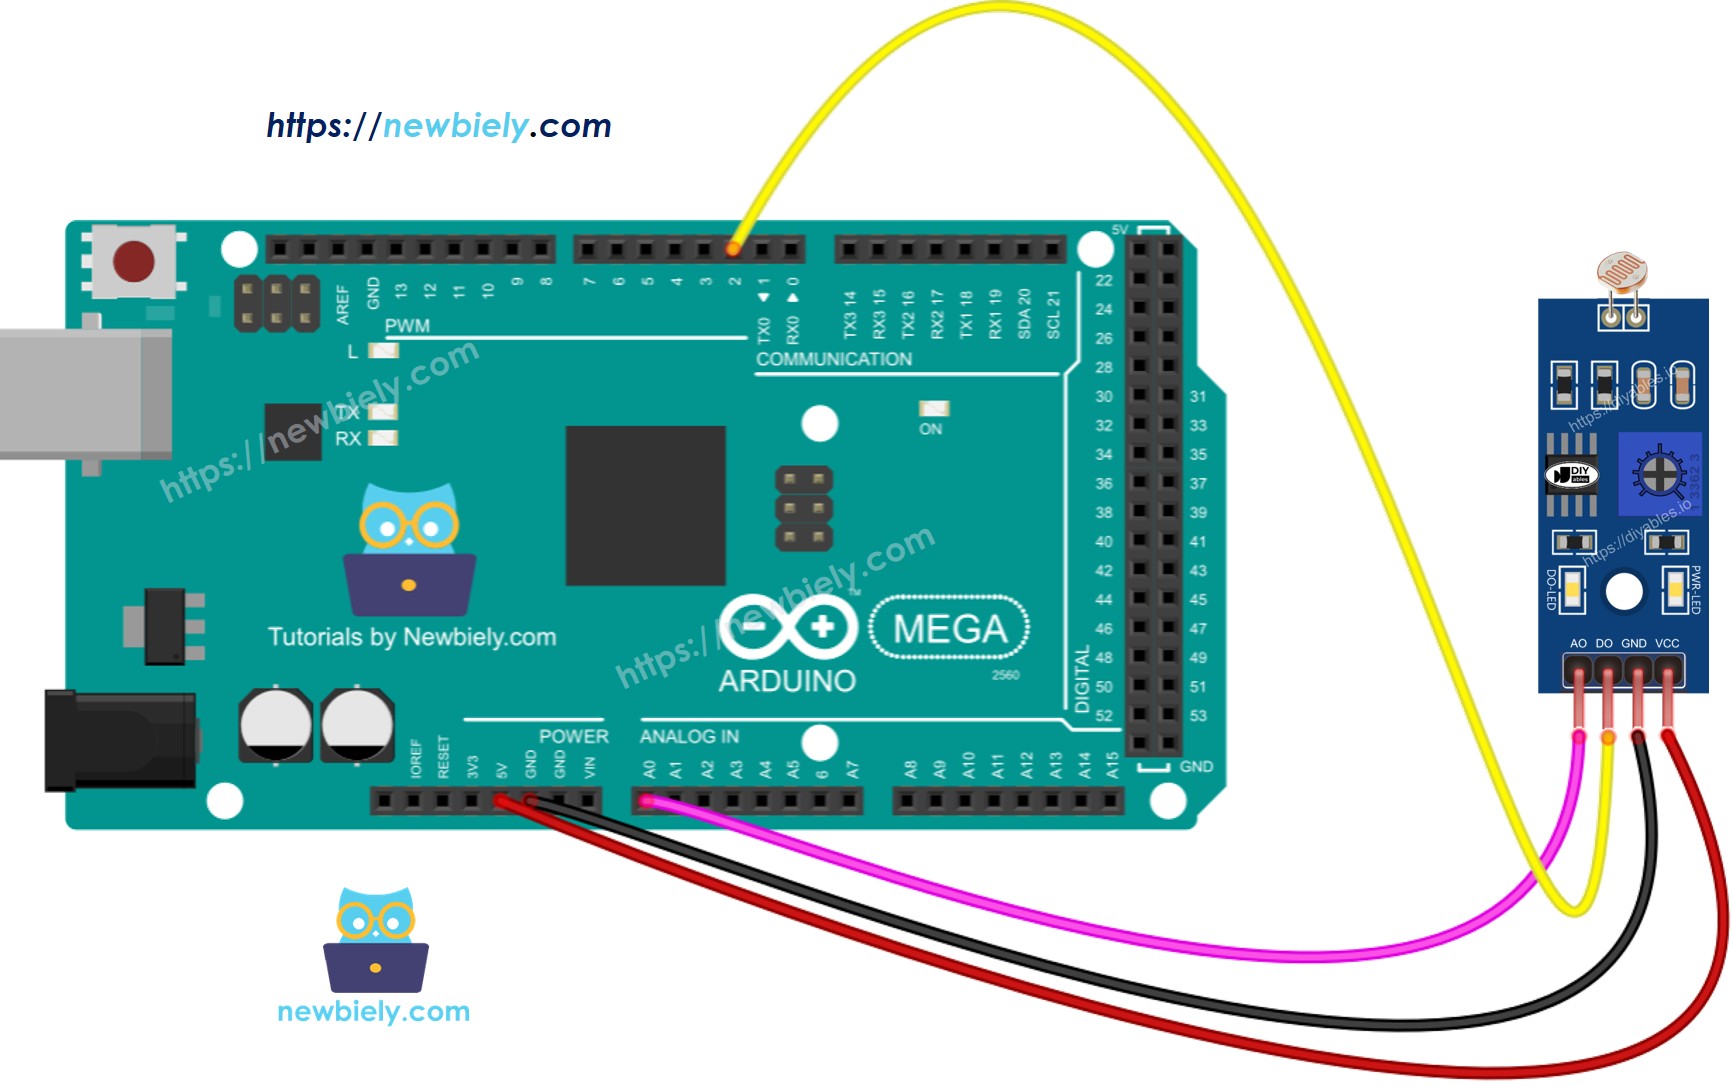
This image is created using Fritzing. Click to enlarge image
Arduino Mega Code - Read value from DO pin
Detailed Instructions
Follow these steps, one by one.
- Connect the light sensor module to the Arduino Mega following the diagram.
- Connect the Arduino Mega to your computer with a USB cable.
- Open the Arduino IDE on your computer.
- Choose the Arduino Mega board and the right COM port.
- Copy the code above and paste it into the Arduino IDE.
- Click Upload in the Arduino IDE to send the code to the Arduino Mega.
- Cover and uncover the light on the LDR sensor with your hand or an object.
- Check the results in the Serial Monitor.
If the LED stays on all the time or goes off even when there is light, you can turn the potentiometer to adjust how sensitive the sensor is to light.
You can now change the code to turn on an LED or a light when it sees light, or to make a servo motor spin. For more details and easy step-by-step guides, see the tutorials at the end of this document.
Arduino Mega Code - Read value from AO pin
Detailed Instructions
Follow these steps one by one.
- Copy the code above and open it with the Arduino IDE.
- Click the Upload button in the Arduino IDE to send the code to the Arduino Mega.
- Cover the LDR light sensor with your hand or another object, then uncover it.
- Open the Serial Monitor to see the result.