Arduino Mega - Soil Moisture Sensor
In this guide, we will learn how to use a moisture sensor with the Arduino Mega. We will cover the following:
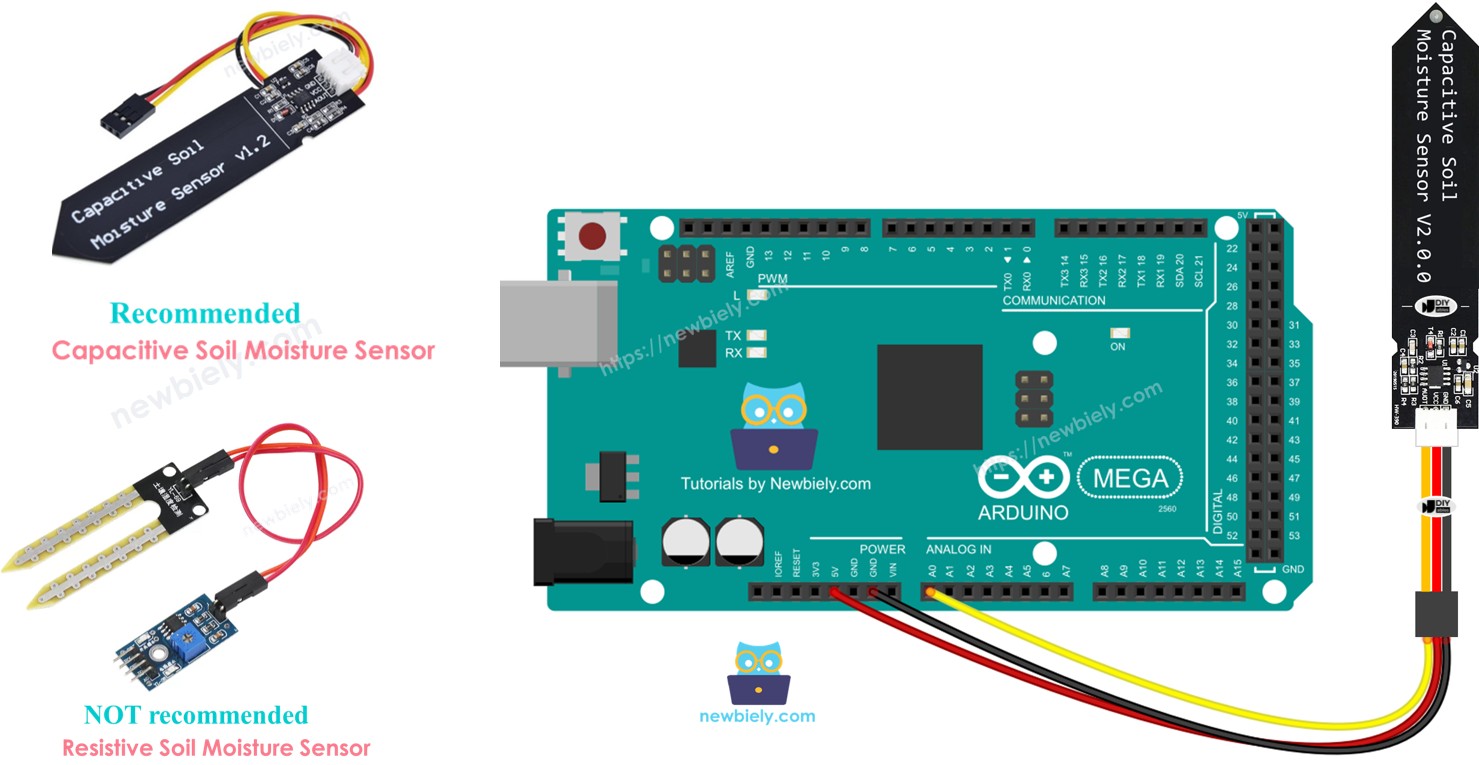
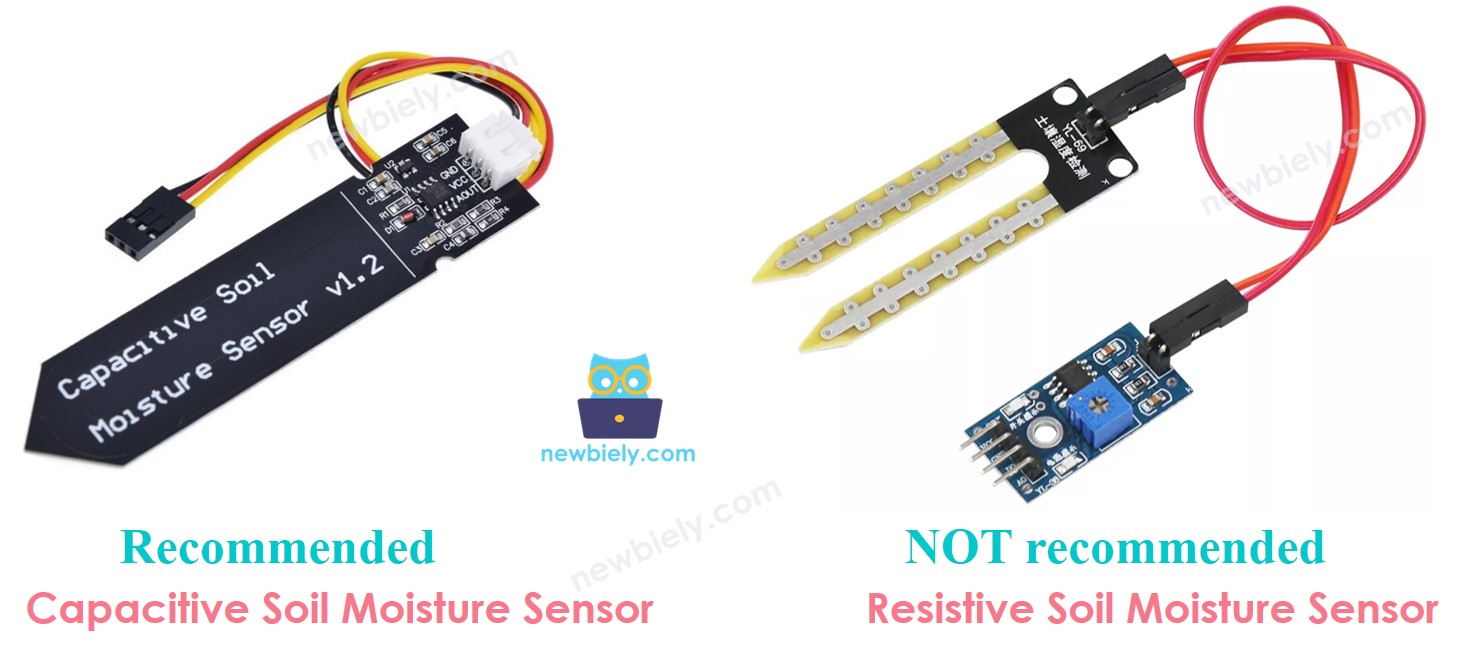
- Difference between resistive and capacitive soil moisture sensors
- How to program Arduino Mega to read values from a capacitive soil moisture sensor
- How to calibrate a capacitive soil moisture sensor
- How to tell if the soil is wet or dry
Hardware Preparation
Or you can buy the following kits:
| 1 | × | DIYables Sensor Kit (18 sensors/displays) |
Additionally, some of these links are for products from our own brand, DIYables .
Buy Note: Many soil moisture sensors available in the market are unreliable, regardless of their version. We strongly recommend buying the sensor with TLC555I Chip from the DIYables brand using the link provided above. We tested it, and it worked reliably.
Overview of Soil Moisture Sensor Sensor
Moisture sensors come in two kinds:
- Moisture sensor that uses capacitance
- Moisture sensor that uses resistance
Both sensors tell you about soil moisture, but they work in different ways. We strongly recommend using the capacitive moisture sensor for this reason:
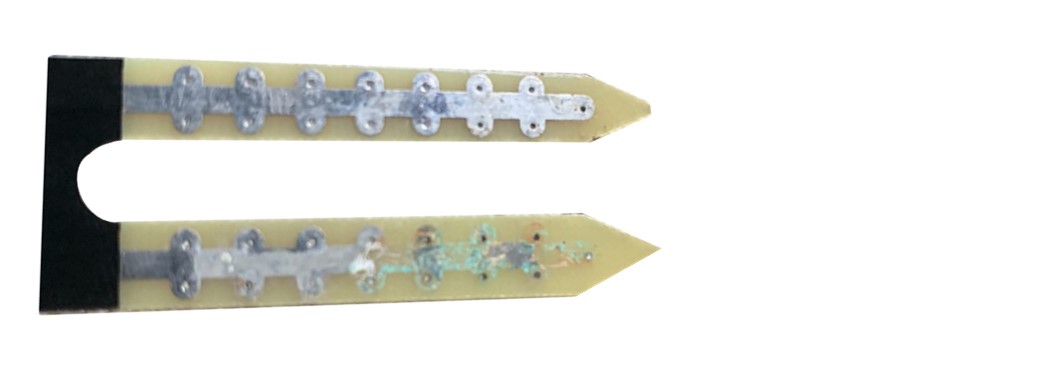
- The resistive soil moisture sensor slowly gets damaged. This happens because electricity flows between its probes, causing chemical corrosion.
- The capacitive soil moisture sensor does not get damaged over time. The reason is that its electrodes are covered and do not corrode easily.
The picture below shows a soil moisture sensor made from a material that has rusted over time.
The rest of this guide will show how to use the capacitive soil moisture sensor.
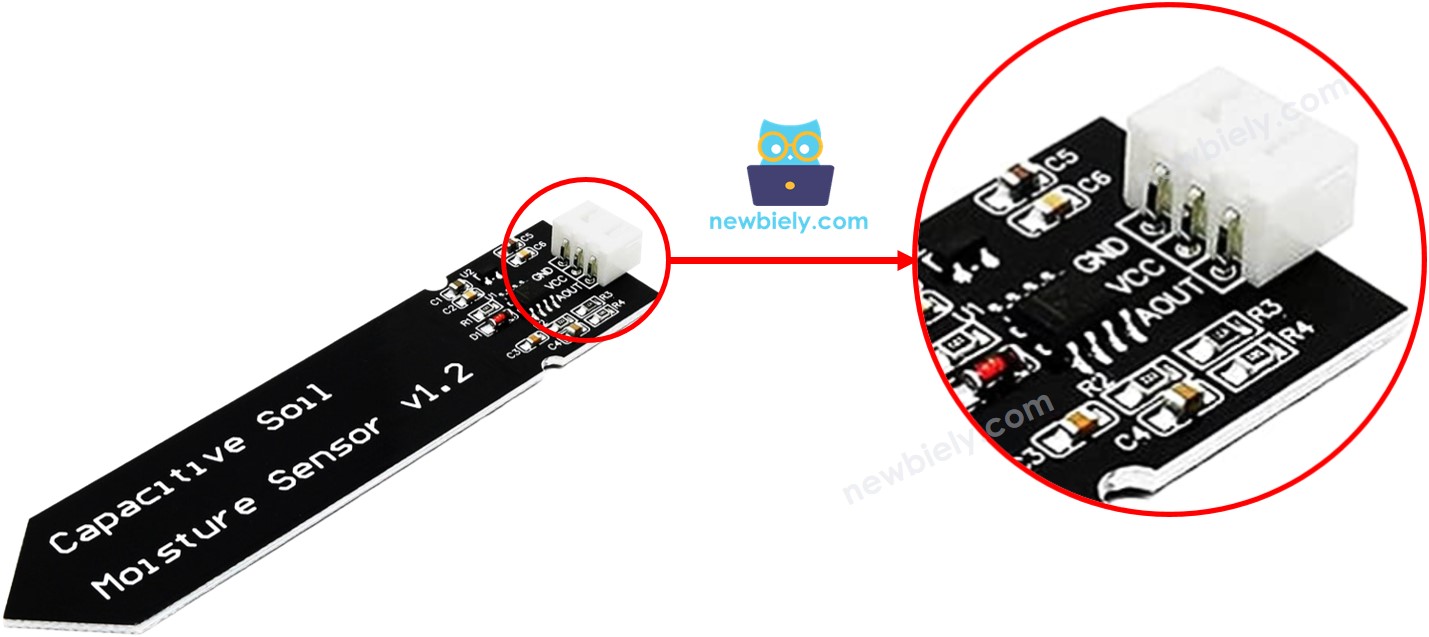
Capacitive Soil Moisture Sensor Pinout
A capacitive soil moisture sensor has three pins:
- GND pin: connect to ground (0 volts)
- VCC pin: connect to power (5 volts or 3.3 volts)
- AOUT pin: sends an analog signal that changes with soil moisture. Connect to an analog input pin on an Arduino Mega.
How It Works
More water in the soil means the AOUT pin voltage is lower.
Wiring Diagram
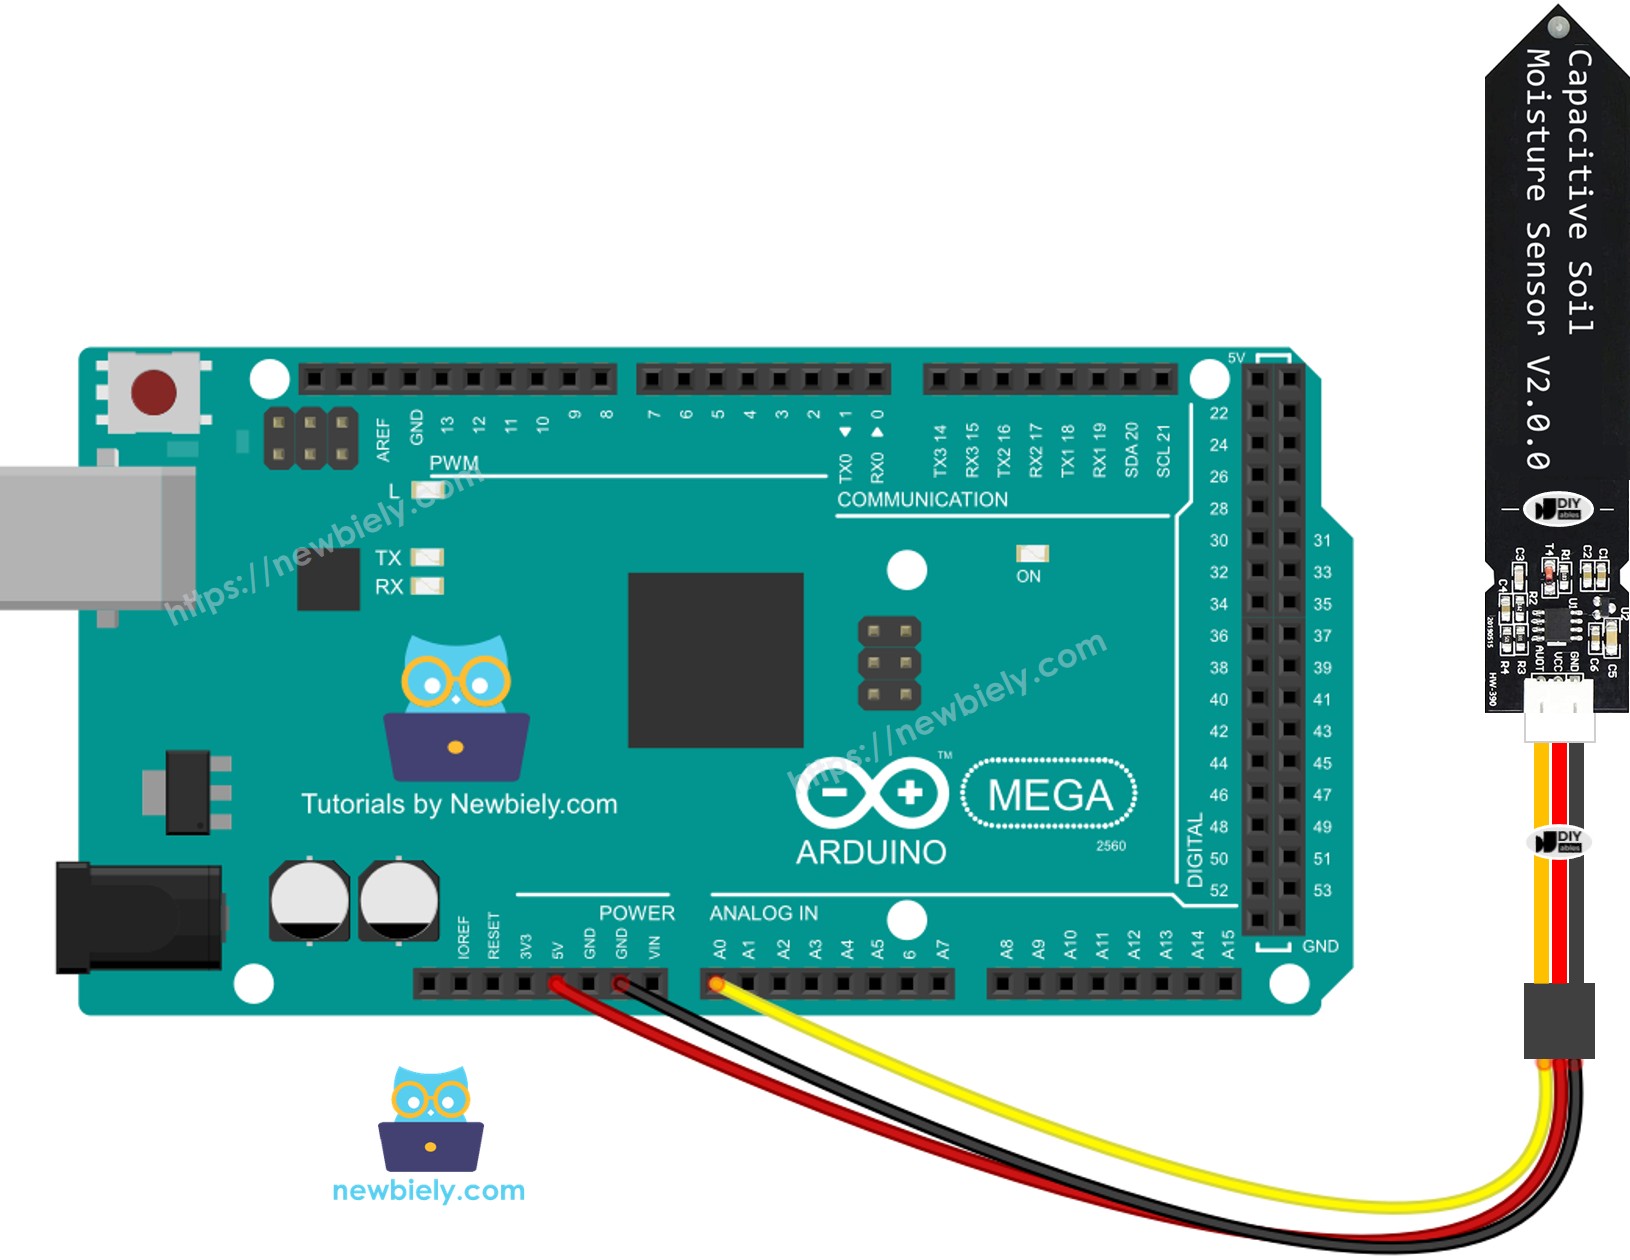
This image is created using Fritzing. Click to enlarge image
Arduino Mega Code
Detailed Instructions
Follow these steps one by one.
- Connect the soil moisture sensor to the Arduino Mega as shown in the diagram.
- Connect the Arduino Mega to your computer with a USB cable.
- Open the Arduino IDE on your computer.
- Choose the right board: Arduino Mega, and the correct COM port.
- Copy the code above and open it in the Arduino IDE.
- Click the Upload button in the Arduino IDE to send the code to the Arduino Mega.
- Put the sensor in the soil, then add water to the soil. Or you can gently place it in a cup of salt water.
- Check the results on the Serial Monitor. It will show like this:
※ NOTE THAT:
- Do not test with pure water, because it does not conduct electricity, so it won’t affect the sensor readings.
- Usually the sensor readings don’t go down to zero. They stay around 500–600, but this can change depending on how deep the sensor is in soil or water, the type of soil or water, and the power supply voltage.
- Do not insert the top part of the sensor (the circuit) into soil or water, as this can damage the sensor.
Calibration for Capacitive Soil Moisture Sensor
The moisture sensor doesn’t give the same reading every time. It changes with soil type and how wet the soil is. To use it right, we need to adjust it to find the value that shows when the soil is wet or dry.
How to Calibrate
- Use the Arduino Mega to run the given code.
- Put the moisture sensor into the soil.
- Slowly add water to the soil.
- Watch the Serial Monitor.
- Note the value when you think the soil changes from dry to wet. This value is called the threshold.
Determine if the soil is wet or dry
After you finish calibrating, replace the THRESHOLD value you wrote with this code. This code checks if the soil is wet or dry.
The result you see on the Serial Monitor.