Arduino Mega - Touch Sensor

A touch sensor, also called a touch button or touch switch, is often used to control devices like touch lamps. It works like a regular button. Many new devices use touch sensors instead of traditional buttons because they make the product look nicer and more modern.

This guide shows how to use a touch sensor with the Arduino Mega board.

Arduino Mega touch sensor

Hardware Preparation

1×Arduino Mega
1×USB 2.0 cable type A/B (for USB-A PC)
1×USB 2.0 cable type C/B (for USB-C PC)
1×Touch Sensor
1×Jumper Wires

Or you can buy the following kits:

1×DIYables Sensor Kit (30 sensors/displays)
1×DIYables Sensor Kit (18 sensors/displays)
Disclosure: Some of the links provided in this section are Amazon affiliate links. We may receive a commission for any purchases made through these links at no additional cost to you.
Additionally, some of these links are for products from our own brand, DIYables .

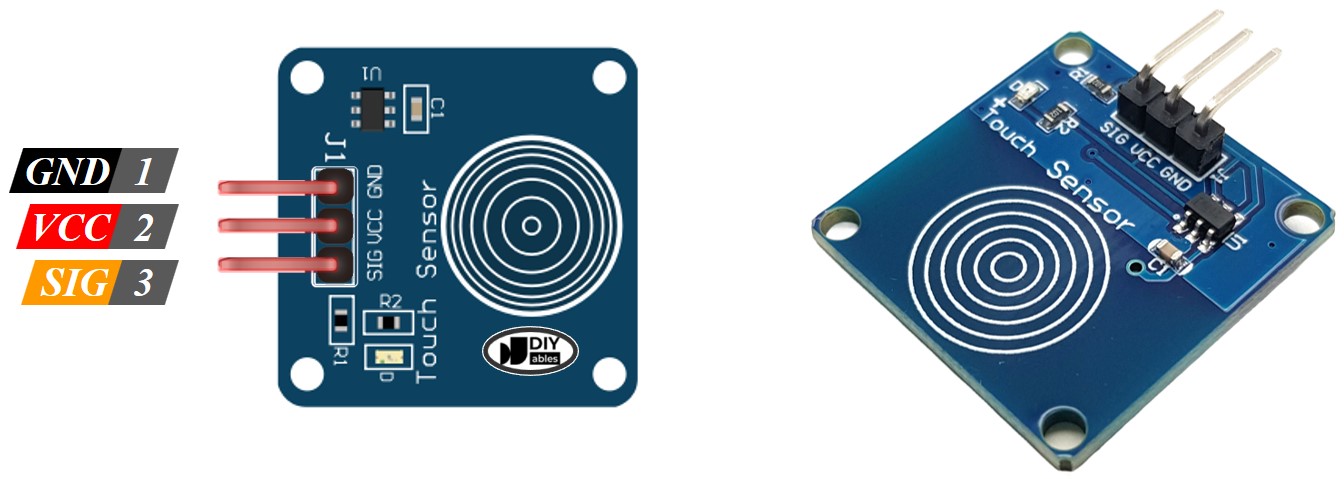
Overview of Touch Sensor
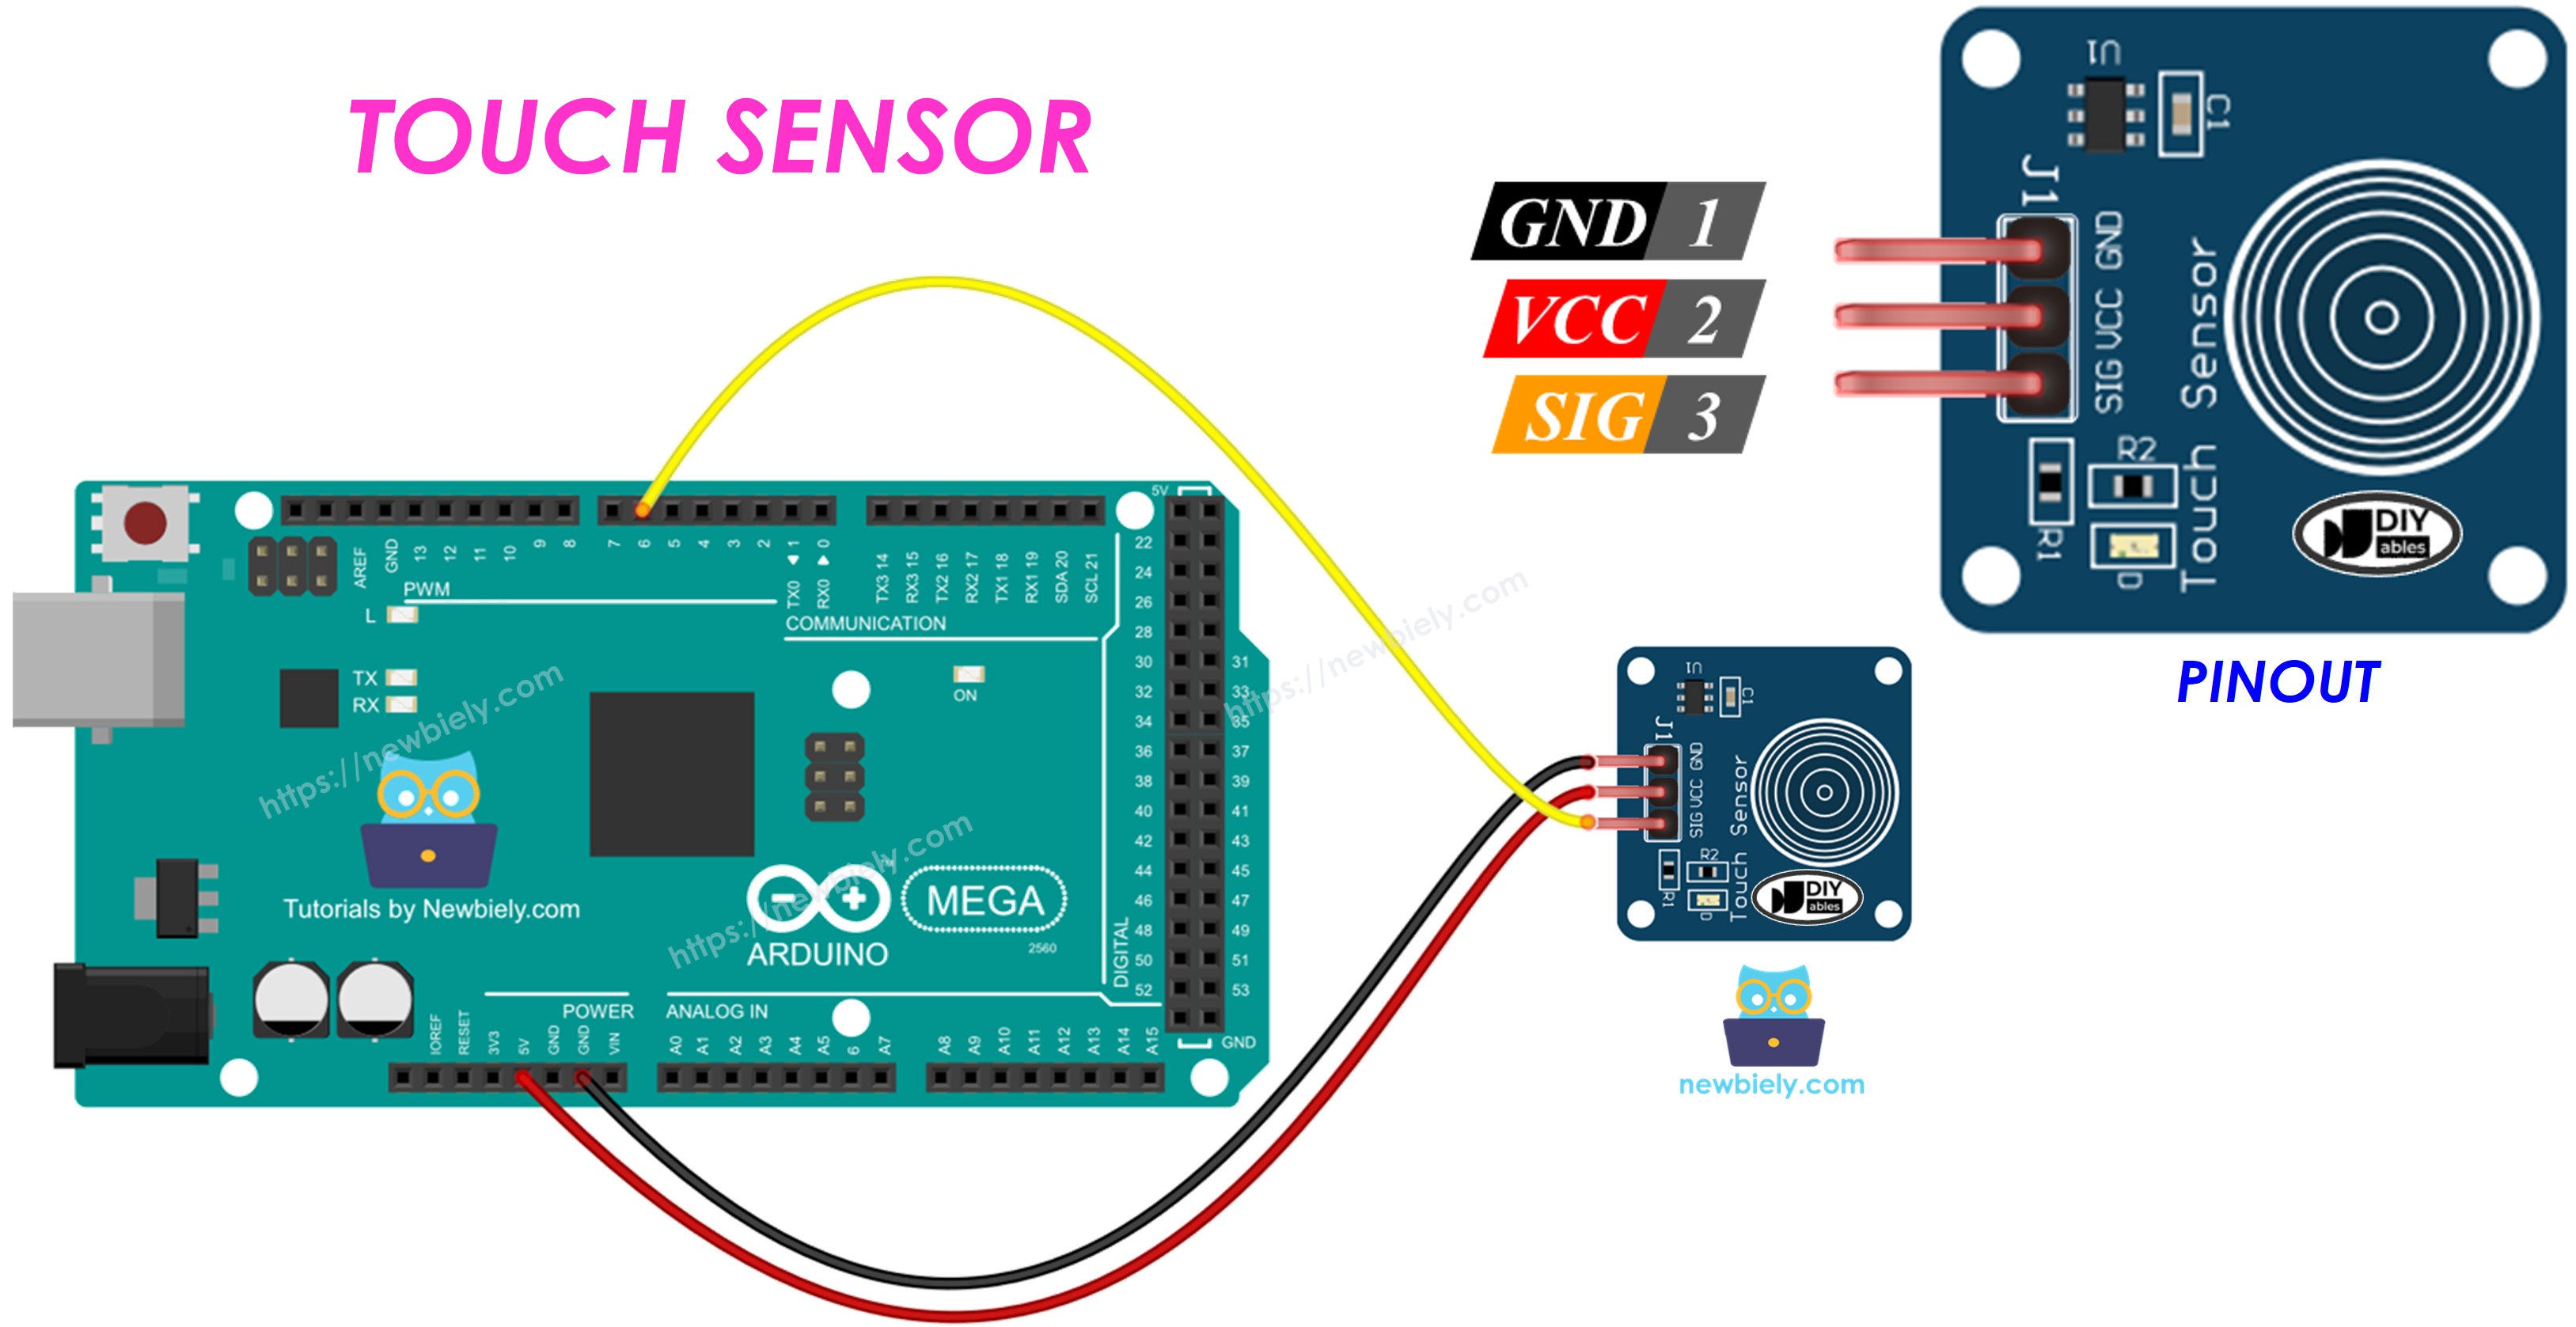
Pinout

The touch sensor has 3 pins:

  • GND pin: connect to ground (0V)
  • VCC pin: connect to power supply (5V or 3.3V)
  • SIGNAL pin: it outputs LOW when not touched, HIGH when touched. Connect this pin to an input pin on the Arduino Mega.
Touch Sensor Pinout

How It Works

  • When the sensor is not touched, the signal pin is low.
  • When the sensor is touched, the signal pin is high.

Arduino Mega - Touch Sensor

The touch sensor's signal pin is connected to an input pin on the Arduino Mega.

You can tell if the touch sensor is touched by reading an input pin on the Arduino Mega.

Wiring Diagram

The wiring diagram between Arduino Mega Touch Sensor

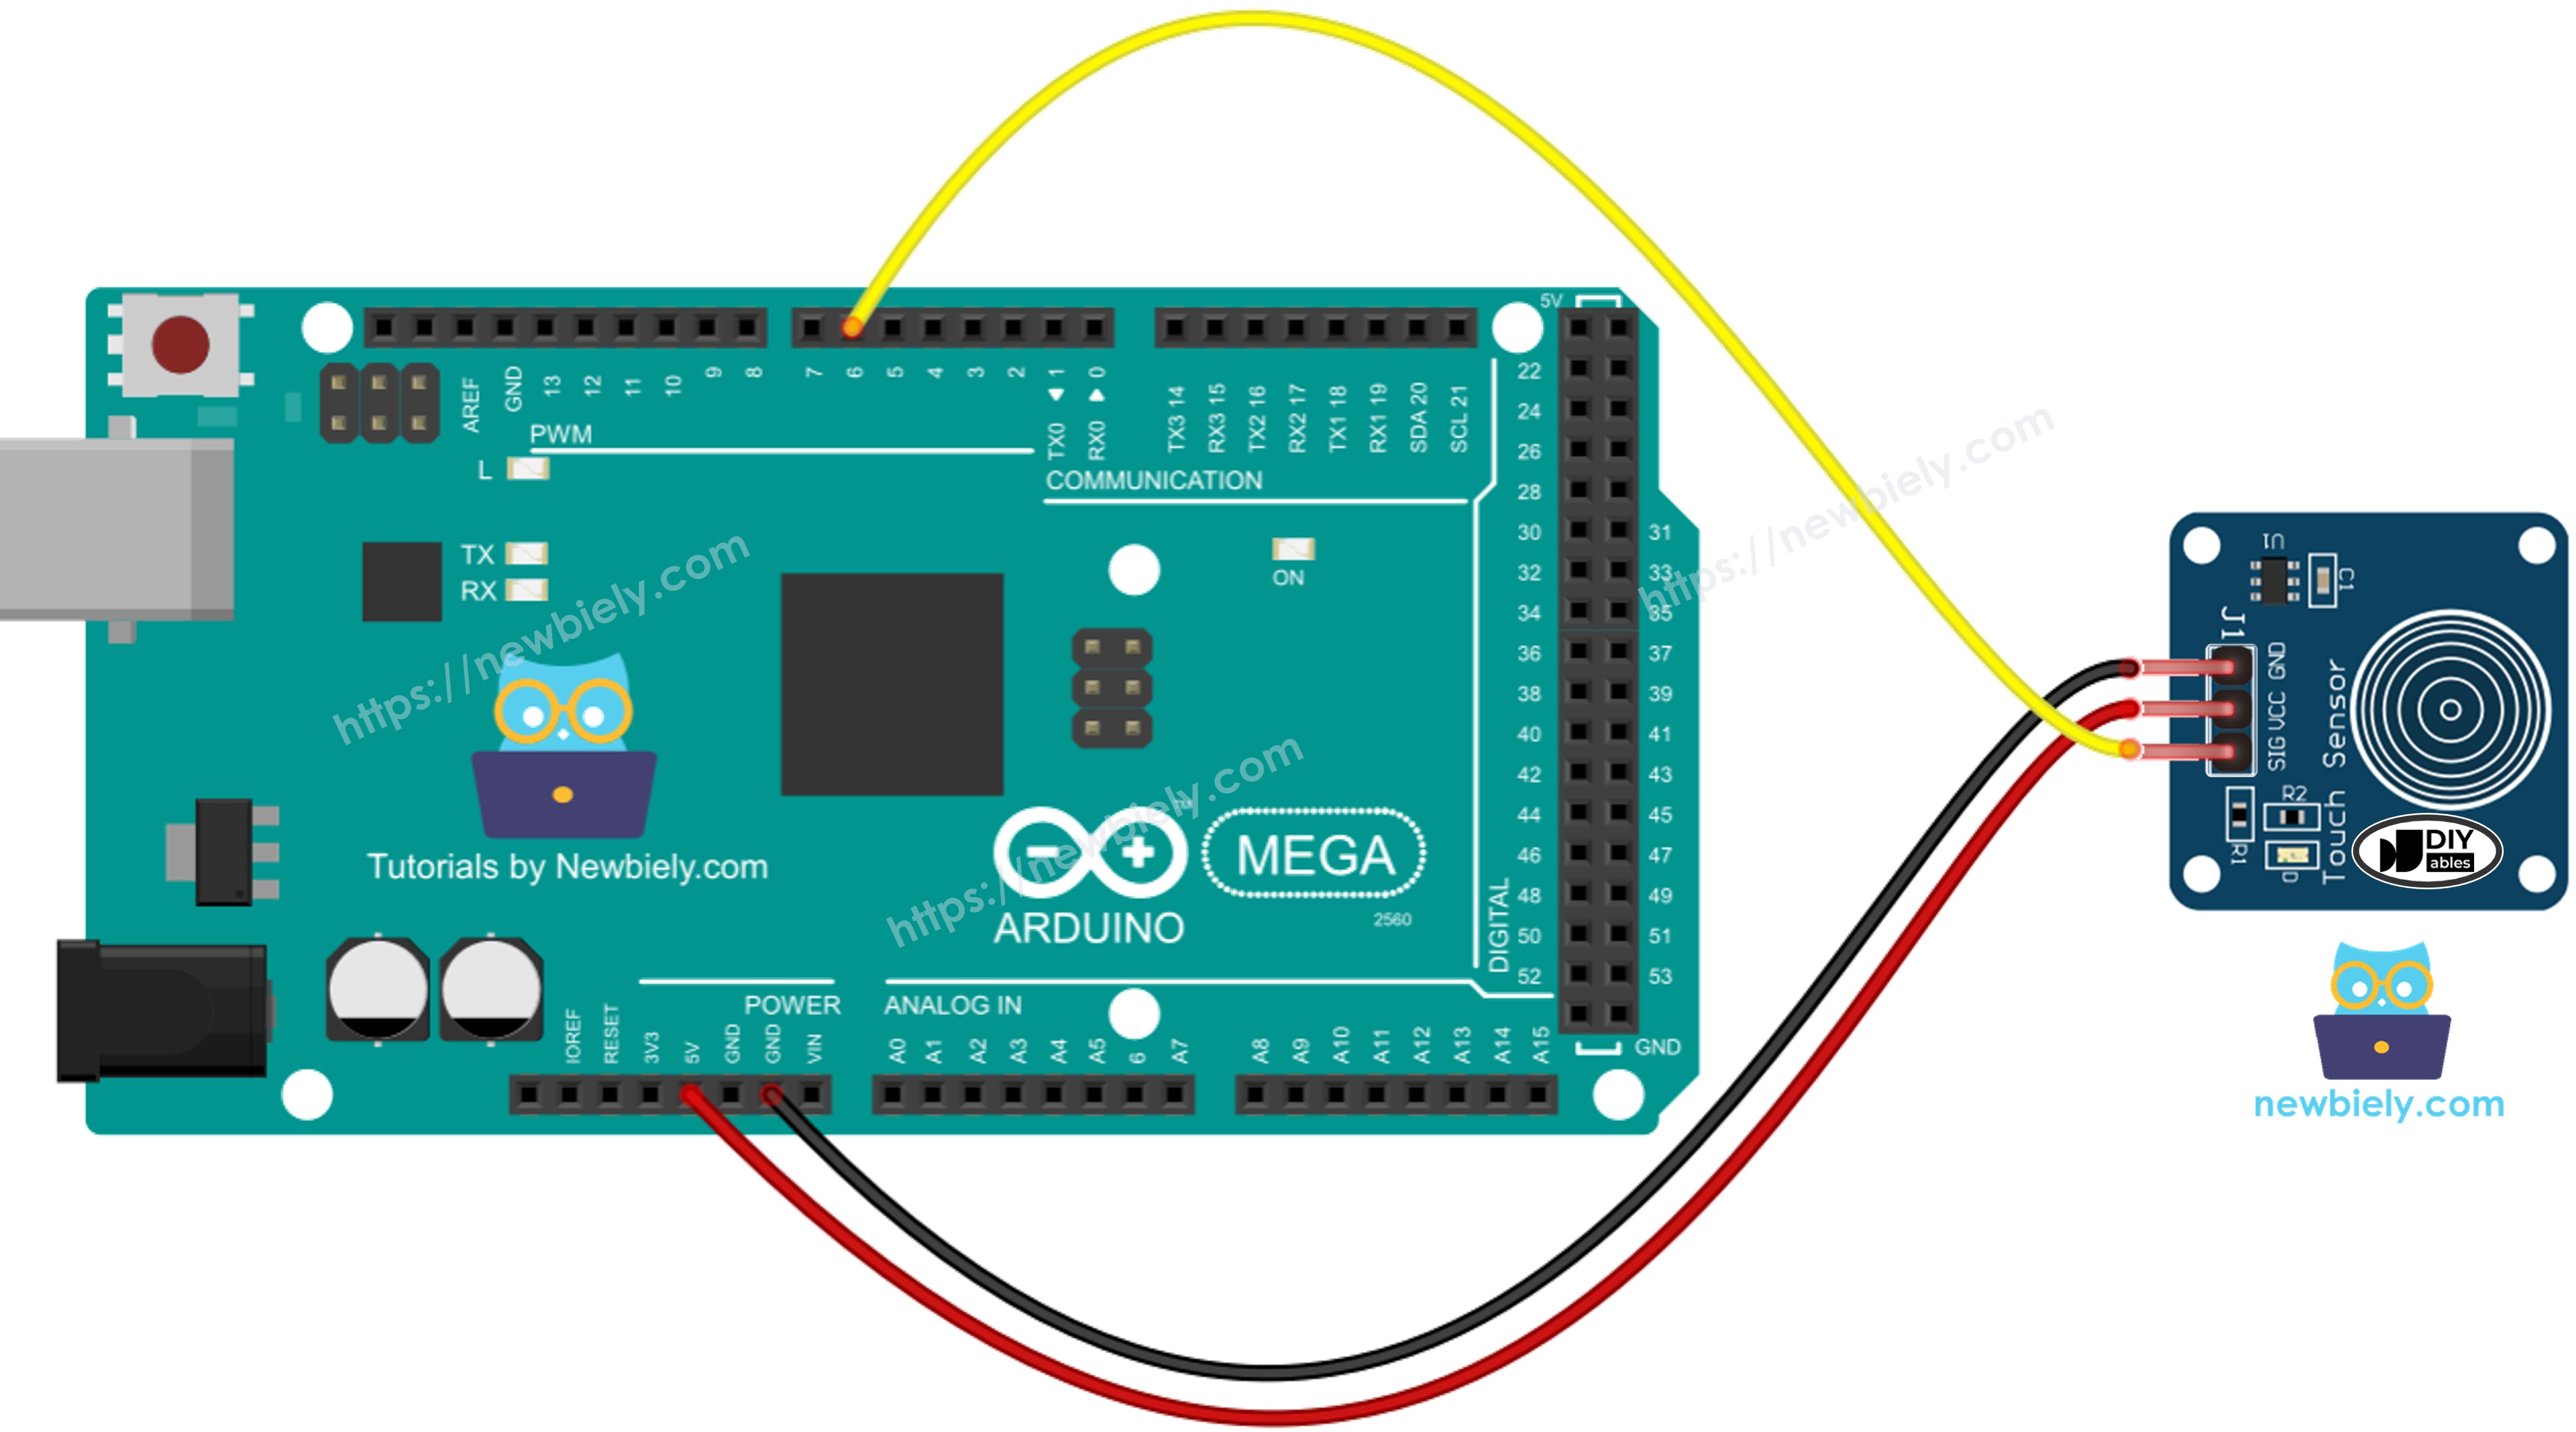
This image is created using Fritzing. Click to enlarge image

How To Program For Touch Sensor

  • Sets up a pin on the Arduino Mega as a digital input using the pinSerial() function. For example, pin 7.
pinMode(7, INPUT_PULLUP);
  • It uses the digitalRead() function to check the state of the Arduino Mega pin.
int inputState = digitalRead(7);

※ NOTE THAT:

There are two common cases:

  • Case 1: If the input is ON, do one thing. If the input is OFF, do the opposite.
  • Case 2: If the input changes from OFF to ON (or ON to OFF), do something.

We choose the right case based on what we need. For example, using a touch sensor to control an LED:

  • To turn the LED ON when the sensor is touched and OFF when it is not touched, Case 1 is suitable.
  • To switch the LED ON and OFF each time the sensor is touched, Case 2 is suitable.

Touch Sensor - Arduino Mega Code

Reads the value from the touch sensor and print to the Serial Monitor

/* * This Arduino Mega code was developed by newbiely.com * * This Arduino Mega code is made available for public use without any restriction * * For comprehensive instructions and wiring diagrams, please visit: * https://newbiely.com/tutorials/arduino-mega/arduino-mega-touch-sensor */ #define SENSOR_PIN 7 // The Arduino UNO R4 pin connected to the touch sensor's SIGNAL pin void setup() { // initialize serial communication at 9600 bits per second: Serial.begin(9600); // initialize the Arduino's pin as aninput pinMode(SENSOR_PIN, INPUT); } void loop() { // read the state of the the input pin: int state = digitalRead(SENSOR_PIN); // print state to Serial Monitor Serial.println(state); }

Detailed Instructions

Do these steps one at a time.

  • Connect the touch sensor to the Arduino Mega as shown in the diagram.
  • Connect the Arduino Mega to your computer with a USB cable.
  • Open the Arduino IDE on your computer.
  • Choose Arduino Mega as the board and select the right COM port.
  • Copy the code above and open it in the Arduino IDE.
  • Click the Upload button in the Arduino IDE to send the code to the Arduino Mega.
  • Put your finger on the sensor, then remove it.
  • Check the result in the Serial Monitor.
COM6
Send
0 0 1 1 1 1 1 0 0 0 0
Autoscroll Show timestamp
Clear output
9600 baud  
Newline  

Detects the sensor is touched or released

/* * This Arduino Mega code was developed by newbiely.com * * This Arduino Mega code is made available for public use without any restriction * * For comprehensive instructions and wiring diagrams, please visit: * https://newbiely.com/tutorials/arduino-mega/arduino-mega-touch-sensor */ #define SENSOR_PIN 7 // The Arduino UNO R4 pin connected to the touch sensor's SIGNAL pin int touch_state; // the current reading from the input pin int prev_touch_state = LOW; // the previous state from the input pin void setup() { // initialize serial communication at 9600 bits per second: Serial.begin(9600); // initialize the Arduino's pin as aninput pinMode(SENSOR_PIN, INPUT); } void loop() { // read the state of the the input pin: touch_state = digitalRead(SENSOR_PIN); if(prev_touch_state == LOW && touch_state == HIGH) Serial.println("The sensor is touched"); else if(prev_touch_state == HIGH && touch_state == LOW) Serial.println("The sensor is is released"); // save the the last state prev_touch_state = touch_state; }

Detailed Instructions

  • Copy the code and open it in the Arduino IDE.
  • Click the Upload button in the Arduino IDE to upload the code to the Arduino Mega.
  • Put your finger on the sensor and keep it there.
  • See the results in the Serial Monitor.
COM6
Send
The sensor is touched
Autoscroll Show timestamp
Clear output
9600 baud  
Newline  
  • Take your finger off the sensor.
  • Check the result in the Serial Monitor.
COM6
Send
The sensor is touched The sensor is is released
Autoscroll Show timestamp
Clear output
9600 baud  
Newline  

Video Tutorial

Learn More

※ OUR MESSAGES

  • As freelancers, We are AVAILABLE for HIRE. See how to outsource your project to us
  • Please feel free to share the link of this tutorial. However, Please do not use our content on any other websites. We invested a lot of effort and time to create the content, please respect our work!