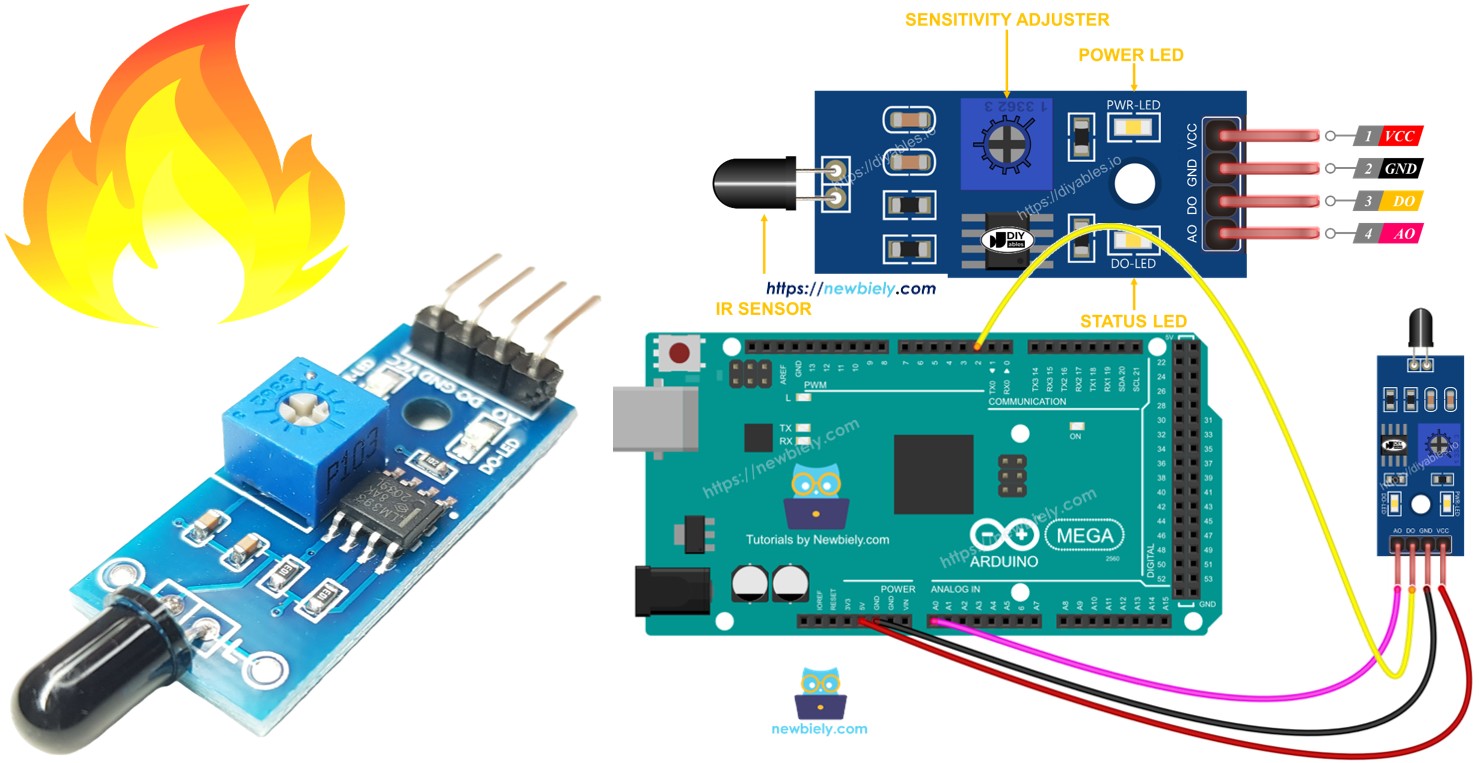
Arduino Mega - Flame Sensor
This guide shows you how to use an Arduino Mega and a flame sensor to detect and measure flames and fire. We will cover these topics:
- How to connect the flame sensor to the Arduino Mega.
- How to make the Arduino Mega detect fire using the digital signal from the flame sensor.
- How to read the flame strength using the analog signal from the flame sensor.
Next, change the code so a warning horn turns on when it detects fire (using a relay).
Hardware Preparation
Or you can buy the following kits:
| 1 | × | DIYables Sensor Kit (18 sensors/displays) |
Additionally, some of these links are for products from our own brand, DIYables .
Overview of Flame Sensor
The flame sensor can detect and measure the infrared light from a flame, which helps with fire detection. It is also called an infrared flame sensor or fire sensor. This sensor provides two kinds of signals: a digital output (LOW or HIGH) and an analog output.
Infrared flame sensors are designed to detect certain kinds of infrared light that comes from flames. They are built to reduce false alarms caused by other infrared sources like body heat or lights. However, these sensors are not perfect and sometimes they may give wrong alerts—either by picking up something that isn’t there or by missing something that is there.
Pinout
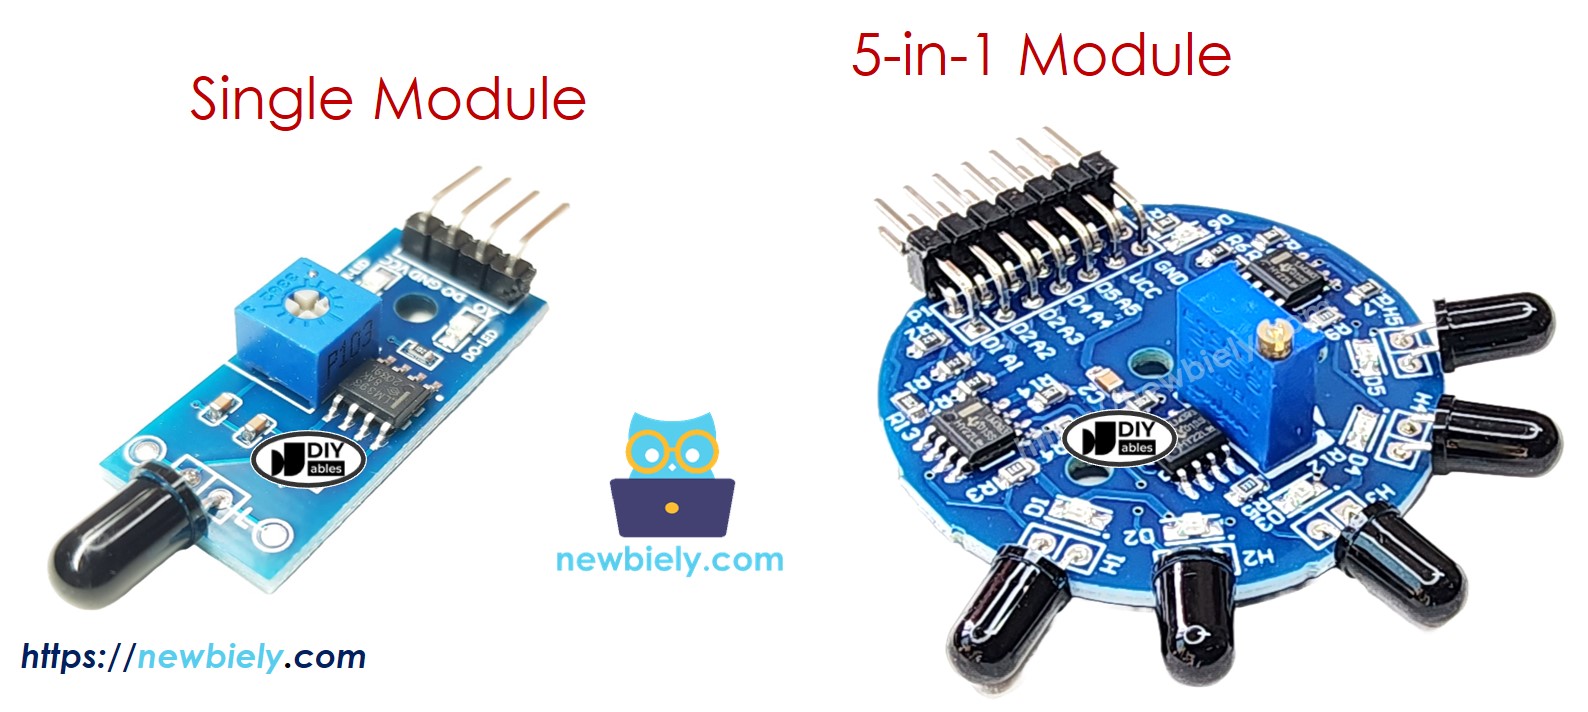
There are two kinds of flame sensor modules available:
This flame sensor has four pins:
- VCC pin: Connect to VCC (3.3V to 5V).
- GND pin: Connect to ground (0V).
- DO pin: This is a digital output. It shows HIGH when no flame is detected and LOW when a flame is detected. You can adjust how sensitive the flame detector is with a small knob on the board.
- AO pin: This is an analog output. The output value falls when the infrared level decreases and rises when the infrared level increases.
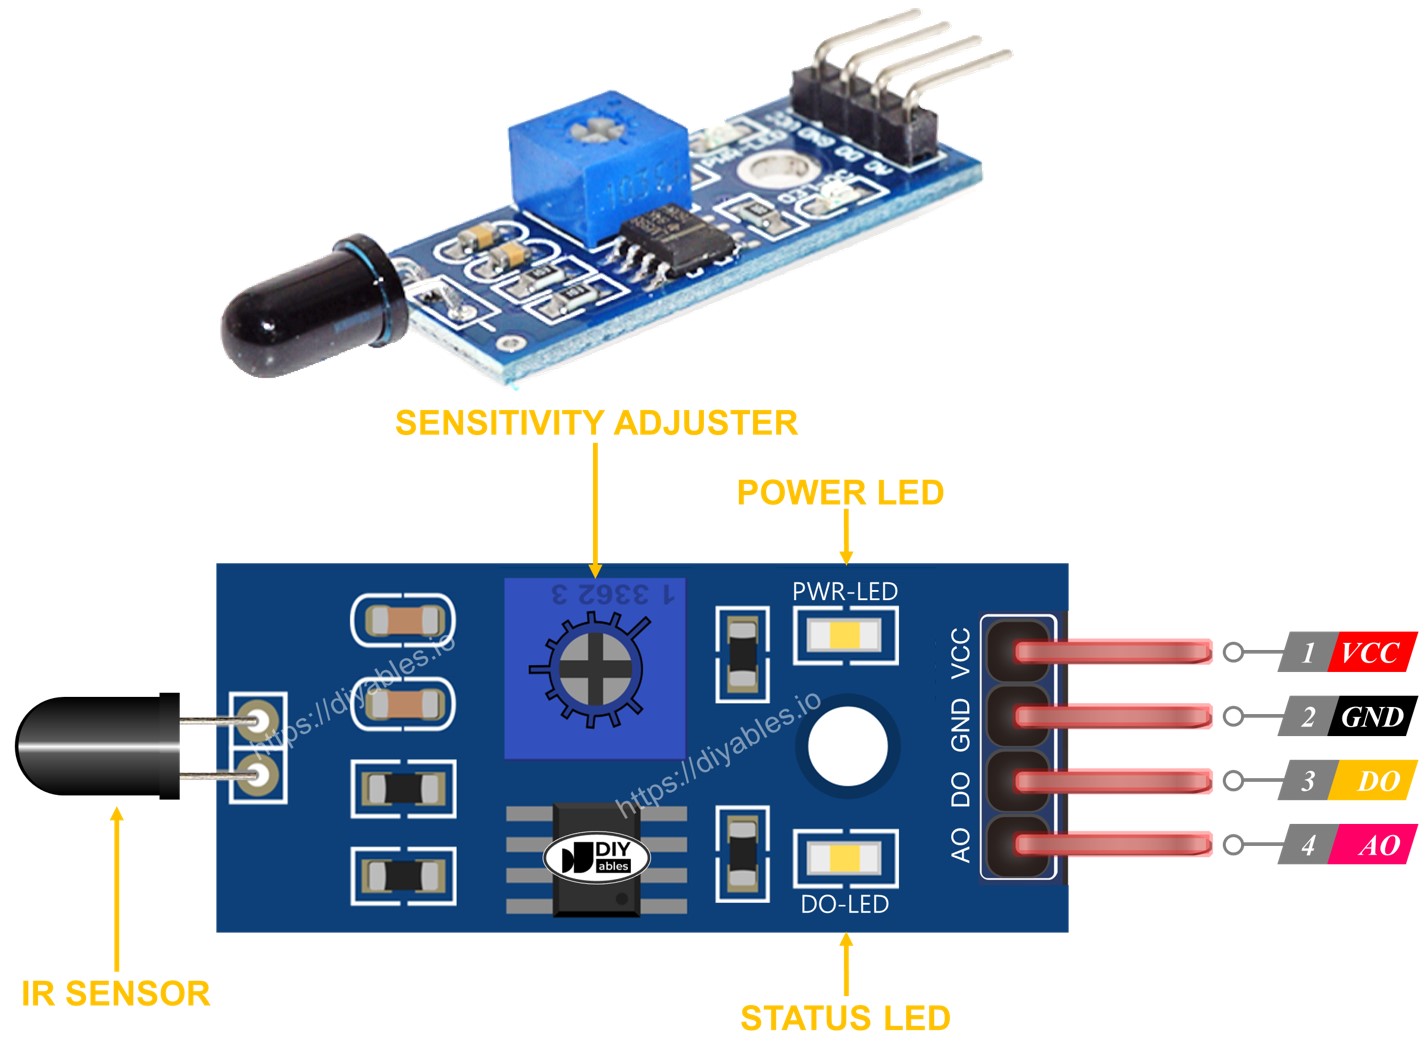
It also has two LED lights.
- One Power LED lights up when power is on.
- One Flame LED lights up when a flame is detected.
5-in-1 flame sensor brings together five flame sensors on one circuit board. All sensors share one adjustable resistor (potentiometer), plus VCC and GND power lines, making power setup easier. But each sensor has its own Digital Output (DO) and Analog Input (AI) pins, so they can detect flames at the same time and independently. Also, each sensor points in a different direction, which greatly increases the overall detection range.
How It Works
About the DO pin:
- The module has a small knob (potentiometer) to adjust how sensitive it is to infrared light.
- If the infrared light is stronger than the limit, the flame is detected, the sensor output pin goes LOW, and the DO-LED lights up.
- If the infrared light is weaker than the limit, no flame is detected, the sensor output pin goes HIGH, and the DO-LED is off.
About the analog output pin:
- If there is more infrared light nearby, the AO pin reading is higher.
- If there is less infrared light nearby, the AO pin reading is lower.
The pot does not change the voltage on the AO pin.
Wiring Diagram
The flame sensor module has two output wires, so you can use one or both, depending on what you need.
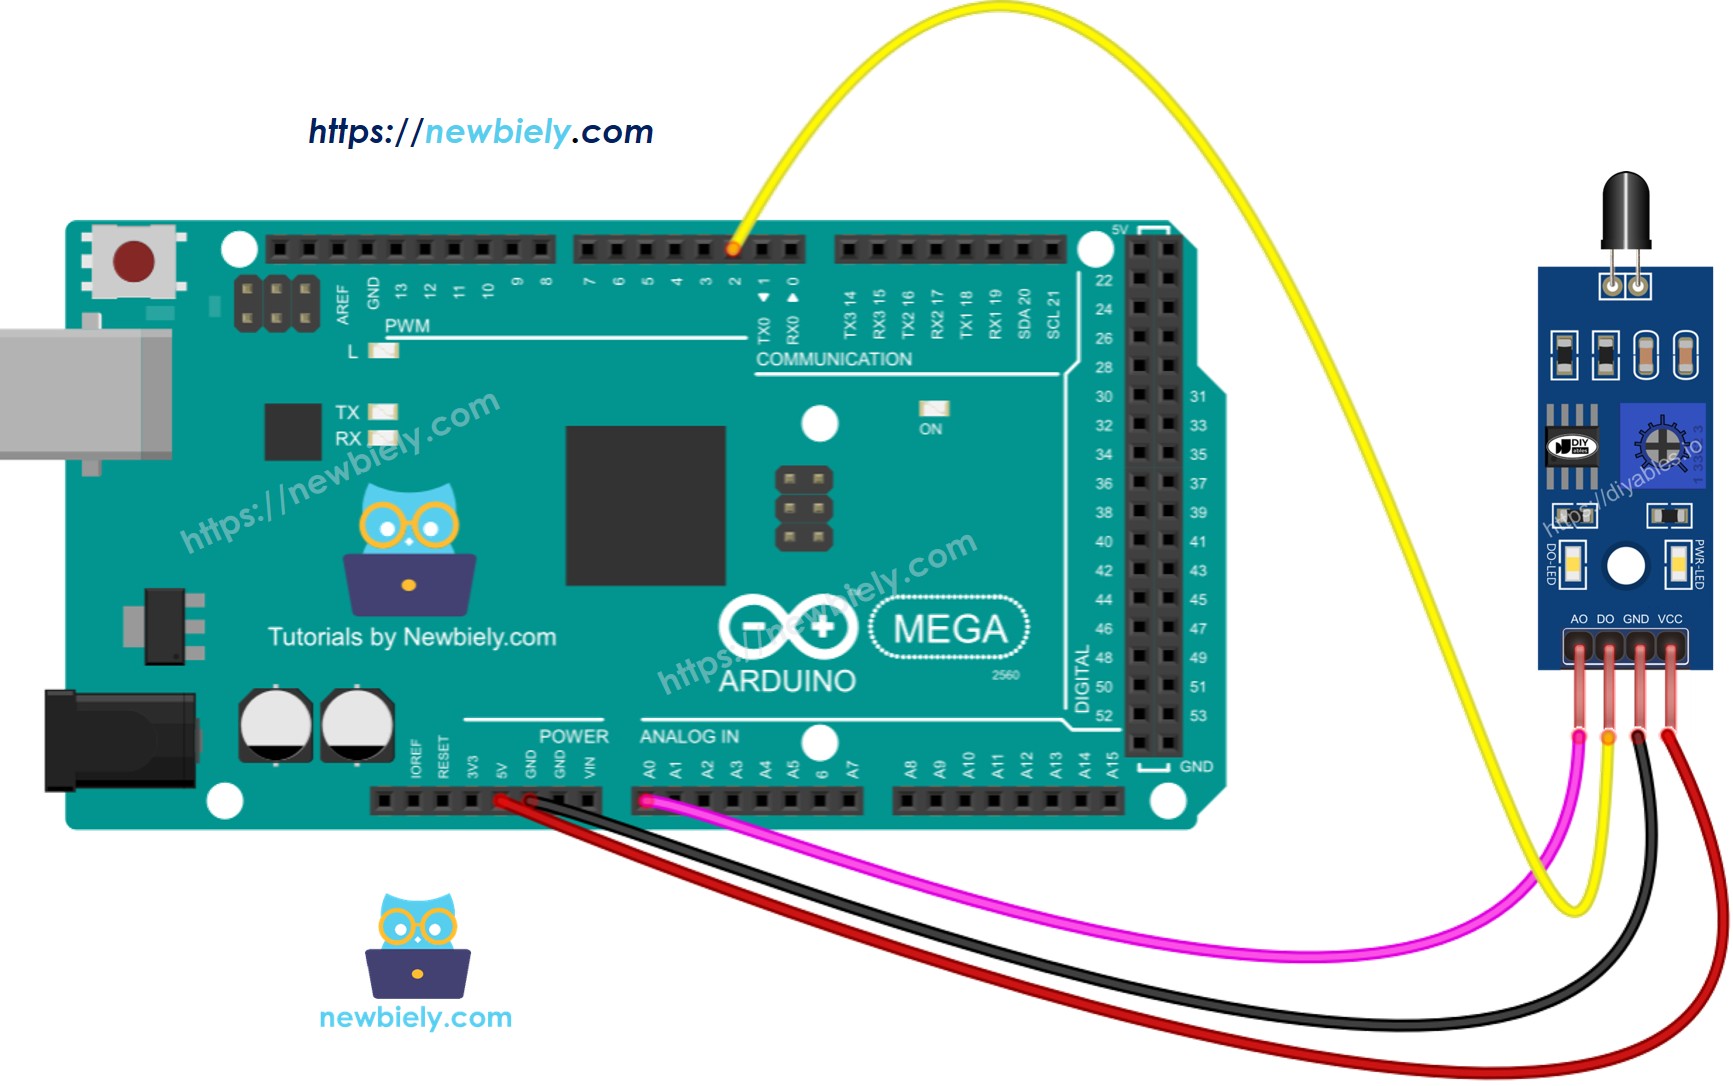
This image is created using Fritzing. Click to enlarge image
Arduino Mega Code - Read value from DO pin
Detailed Instructions
Do these steps one by one.
- Connect the flame sensor to the Arduino Mega following the diagram.
- Connect the Arduino Mega to your computer with a USB cable.
- Open the Arduino IDE on your computer.
- Choose the right board: Arduino Mega, and select the COM port.
- Copy the code above and open it in the Arduino IDE.
- Click the Upload button in the Arduino IDE to upload the code to the Arduino Mega.
- Point the flame sensor toward a flame.
- Check the results in the Serial Monitor.
If the LED stays on all the time or stays off even when the sensor is aimed at a flame, turn the small knob to adjust how sensitive the sensor is.
Arduino Mega Code - Read value from AO pin
Detailed Instructions
- Copy the code and open it in the Arduino IDE.
- Click the Upload button in the Arduino IDE to upload the code to the Arduino Mega.
- Point the flame sensor at a flame.
- See the result in the Serial Monitor.