Arduino Mega - Sound Sensor
This guide shows how to use the Arduino Mega and a sound sensor to detect sounds. We will cover the following topics:
- How to hook up a sound sensor to an Arduino Mega
- How to write a program for Arduino Mega to detect sound with a sound sensor
Later, you can change the code to turn on an LED or a light (using a relay) when it hears a sound, or even make a servo motor move.
Hardware Preparation
Or you can buy the following kits:
| 1 | × | DIYables Sensor Kit (18 sensors/displays) |
Additionally, some of these links are for products from our own brand, DIYables .
Overview of Sound Sensor
You can use a sound sensor to hear sounds around you. There are two types of sound sensor modules:
- Digital sound sensor module: gives a simple on/off signal.
- Analog sound sensor module: outputs both a range of values and on/off signals.
You can adjust how sensitive the digital output is using the built-in pot.
The Digital Sound Sensor Pinout
The digital sound sensor has three pins.
- VCC pin: connect to power (3.3V to 5V).
- GND pin: connect to ground (0V).
- OUT pin: this is an output pin. It goes HIGH when there is no sound and goes LOW when it detects sound. Connect this pin to an input pin on the Arduino Mega.
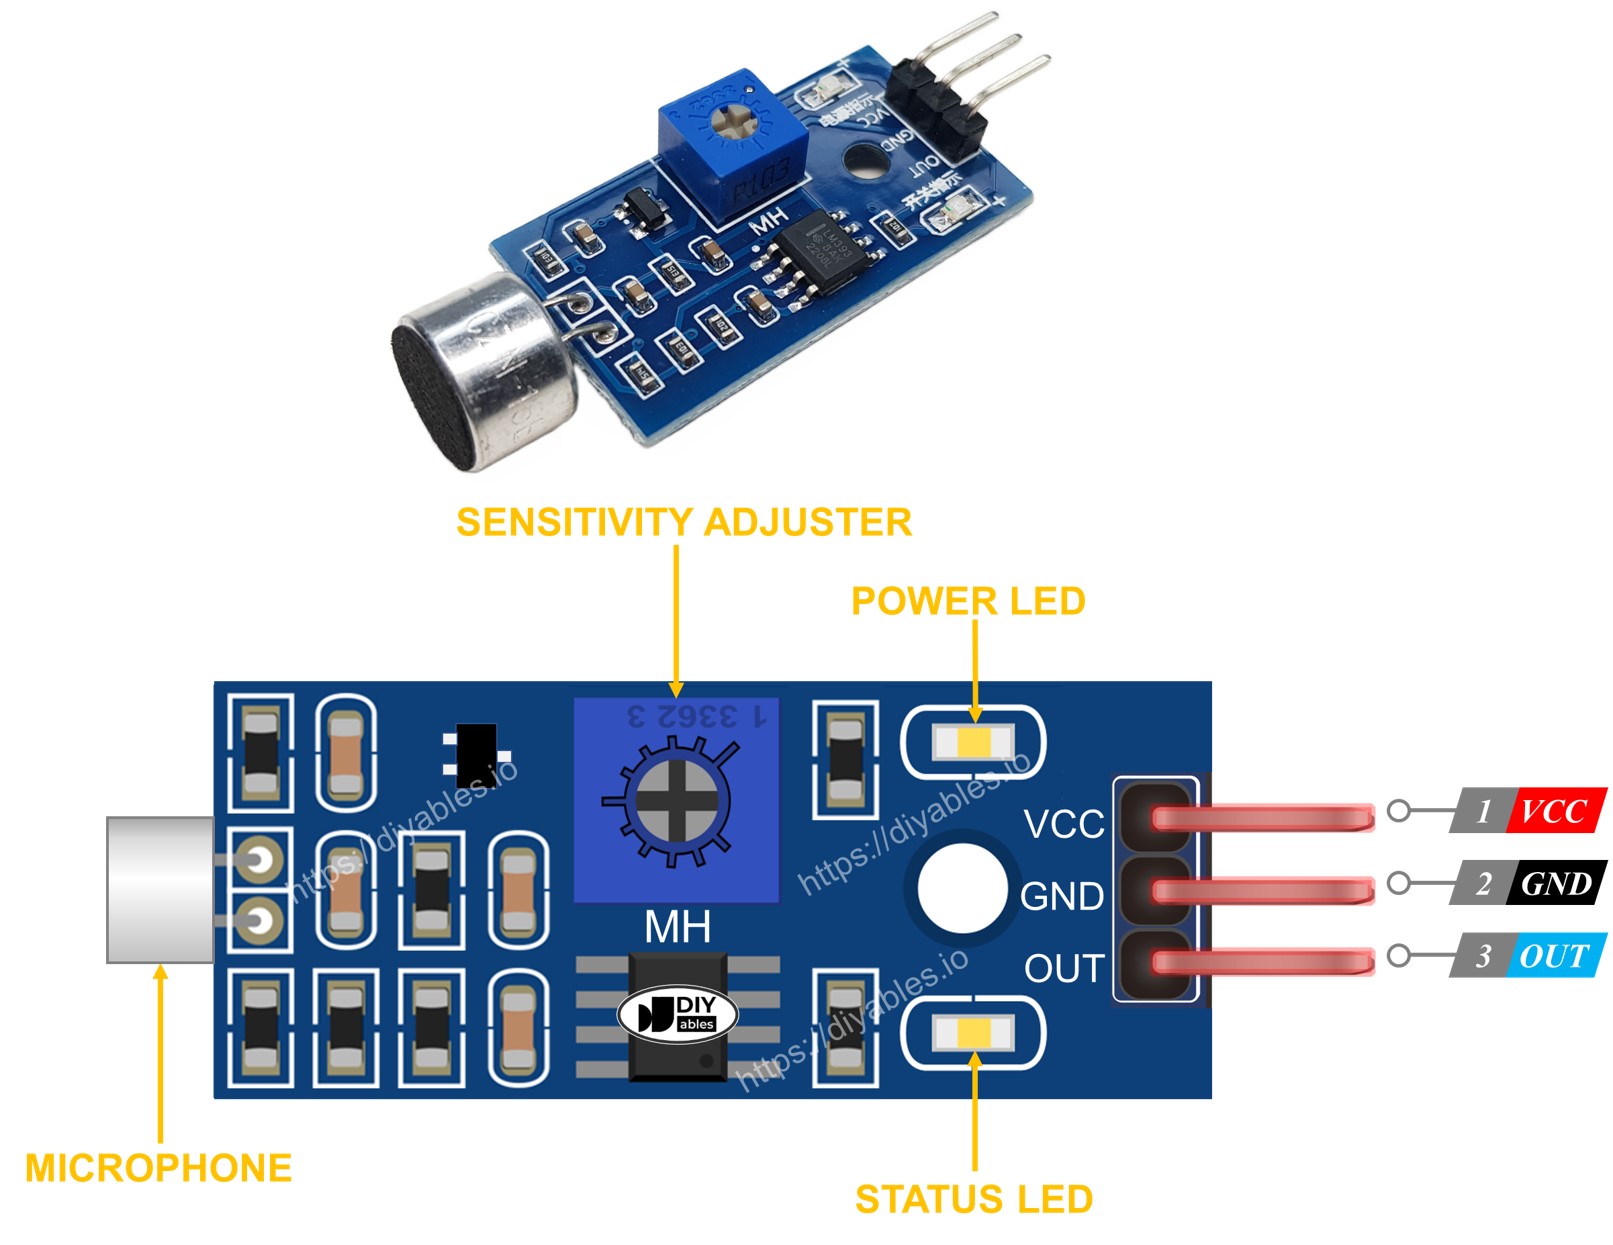
The sound sensor has a small knob to adjust how sensitive it is. It also has two LED lights.
- One LED light for power
- One LED light for sound: on when there is sound, off when it is quiet
The Analog Sound Sensor Pinout
The analog sound sensor has four pins.
- + pin: connect to 5V.
- G pin: connect to GND (0V).
- DO pin: a digital output pin. It goes HIGH when it's quiet and LOW when sound is detected. Connect this pin to the Arduino Mega's digital input pin.
- AO pin: an analog output pin. It sends the sound level as an analog value. Connect this pin to the Arduino Mega's analog input pin.
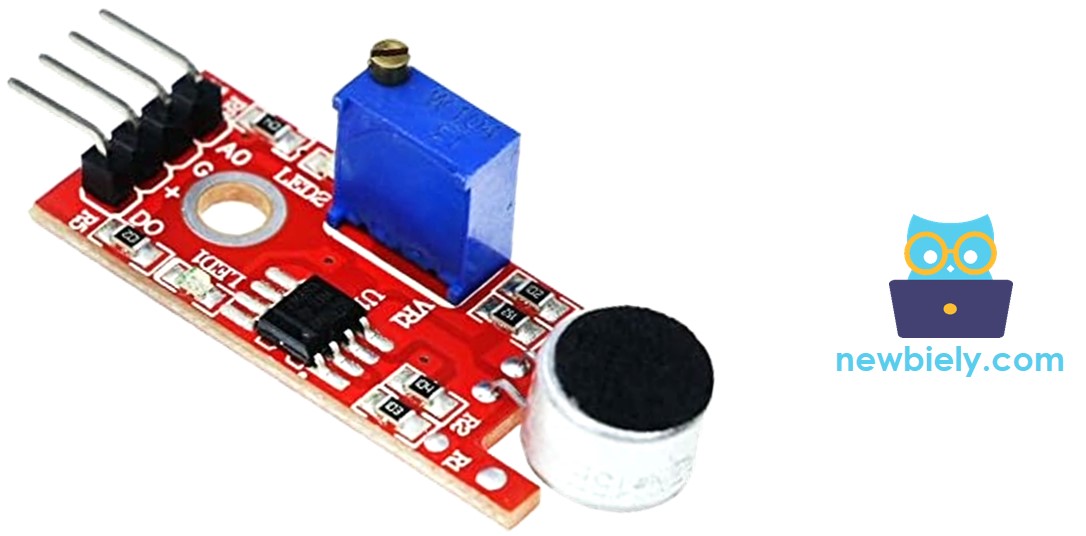
The analog sound sensor has a small built-in knob you can turn to adjust its sensitivity for the digital output. It also has two LED lights.
- One LED shows when the power is on.
- Another LED shows if there is sound. It lights up when there is sound and turns off when it is quiet.
How It Works
The module has a small knob you can turn to adjust how sensitive it is to sound.
- When the sensor hears a sound, the output pin goes low.
- When the sensor hears nothing, the output pin goes high.
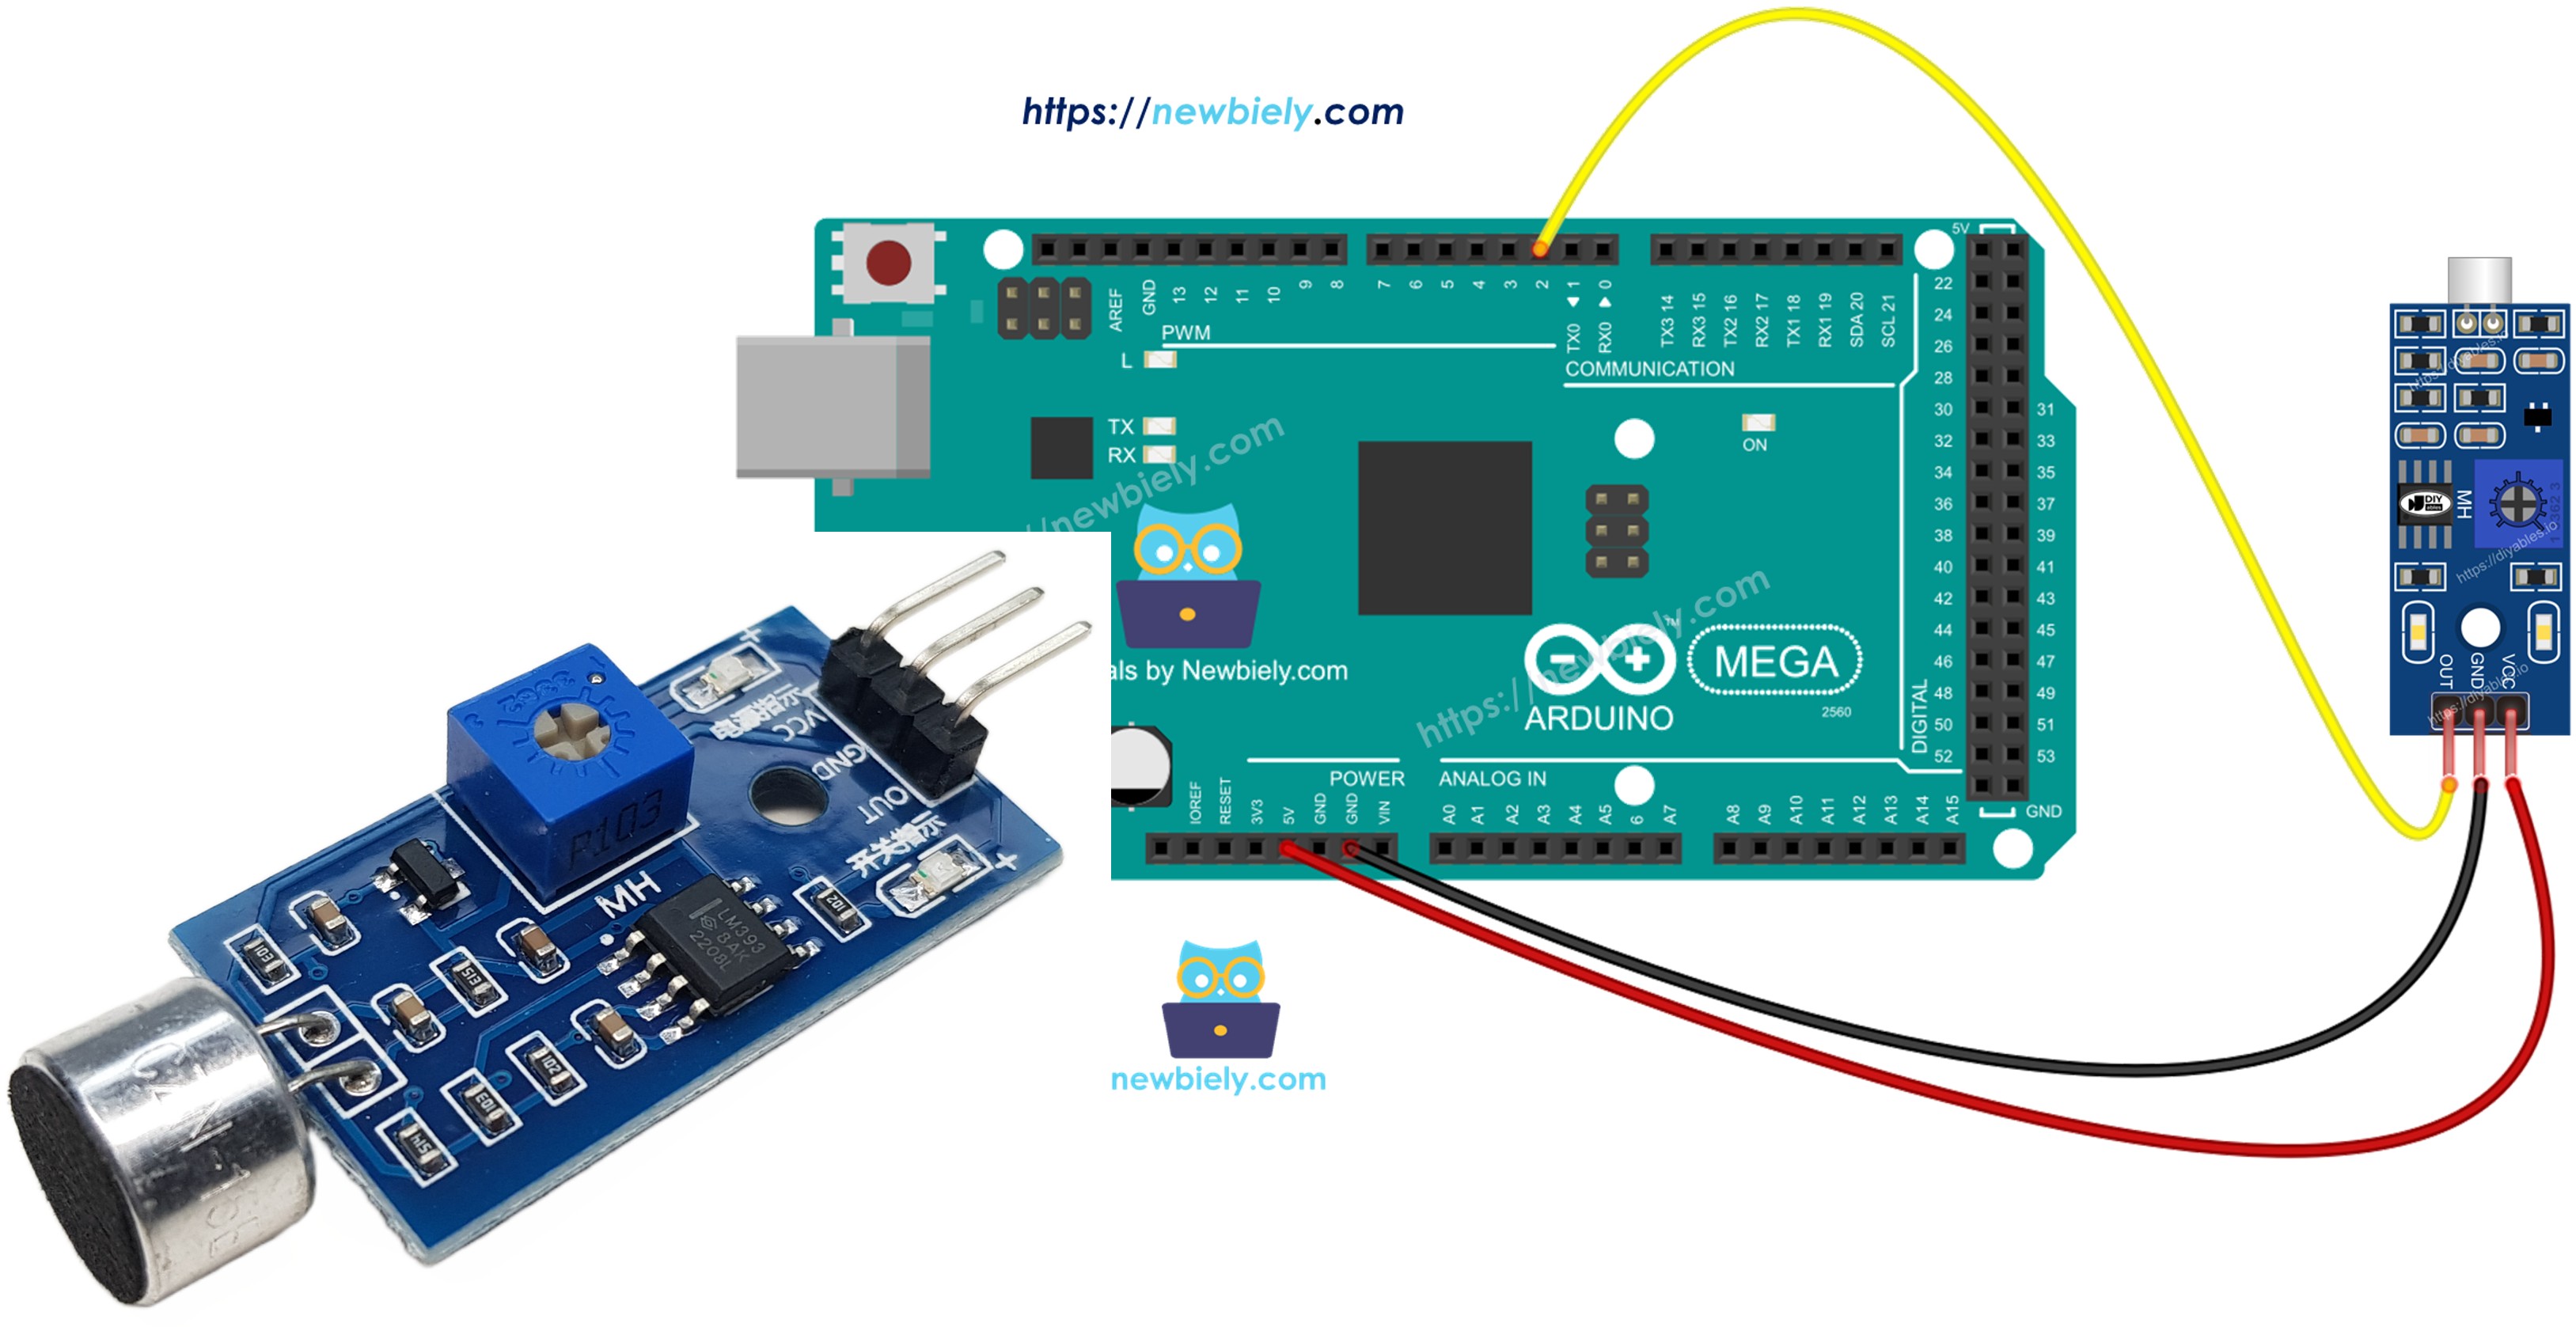
Wiring Diagram

This image is created using Fritzing. Click to enlarge image
How To Program For Sound Sensor
- Sets a pin on the Arduino Mega as a digital input using the pinMode() function. For example, pin 8.
- Uses the digitalRead() function to see a pin's state on the Arduino Mega.
Arduino Mega Code - Detecting the sound
Detailed Instructions
Do these steps one by one.
- Connect the sound sensor to the Arduino Mega following the diagram.
- Connect the Arduino Mega to your computer with a USB cable.
- Open the Arduino IDE on your computer.
- Select the correct board: Arduino Mega, and the right COM port.
- Copy the code and open it in the Arduino IDE.
- Click Upload to send the code to the Arduino Mega.
- Clap near the sound sensor.
- Check the results in the Serial Monitor.
If the LED is always on or always off even when there’s sound, you can turn the small knob (potentiometer) to adjust how the sensor reacts to sound.
Troubleshooting
If the sound sensor isn't working well, try these steps:
- Adjust the sensitivity: You can change how sensitive the sensor is by turning a small knob.
- Reduce vibrations: The sound sensor can hear vibrations and wind noise. Put it on a sturdy surface to reduce these vibrations.
- Consider the sensing range: This sound sensor can only detect sounds up to about 10 inches away. For correct readings, make sounds close to the sensor.
- Check the power supply: Make sure the power supply is stable because the sensor uses analog electronics and power noise can affect it.