ESP32 MicroPython Button
This tutorial instructs you how to use button with ESP32, using MicroPython.
Buttons can be a bit tricky when used with ESP32, especially for those new to electronics. Let's break down the basics and avoid some common pitfalls.
Two Key Issues to Address:
Floating Inputs: When you connect a button to an ESP32 without a resistor, the ESP32 might get confused about whether the button is pressed or not. This is because the input pin can be in an undefined state. To prevent this, you'll need to connect a pull-down or pull-up resistor. We'll explain how to do this in more detail later.
Chattering: Buttons can sometimes "bounce", meaning they rapidly switch between pressed and not pressed states even when only pressed once. This can cause the ESP32 to read multiple button presses. While this might not be a significant issue in all cases, it can be problematic in applications where accurate button press counting is essential. We'll cover debouncing techniques to address this.
By understanding these two issues and implementing the appropriate solutions, you'll be well-equipped to use buttons effectively with your ESP32 projects.
Or you can buy the following kits:
Disclosure: Some of the links provided in this section are Amazon affiliate links. We may receive a commission for any purchases made through these links at no additional cost to you.
Additionally, some of these links are for products from our own brand,
DIYables .
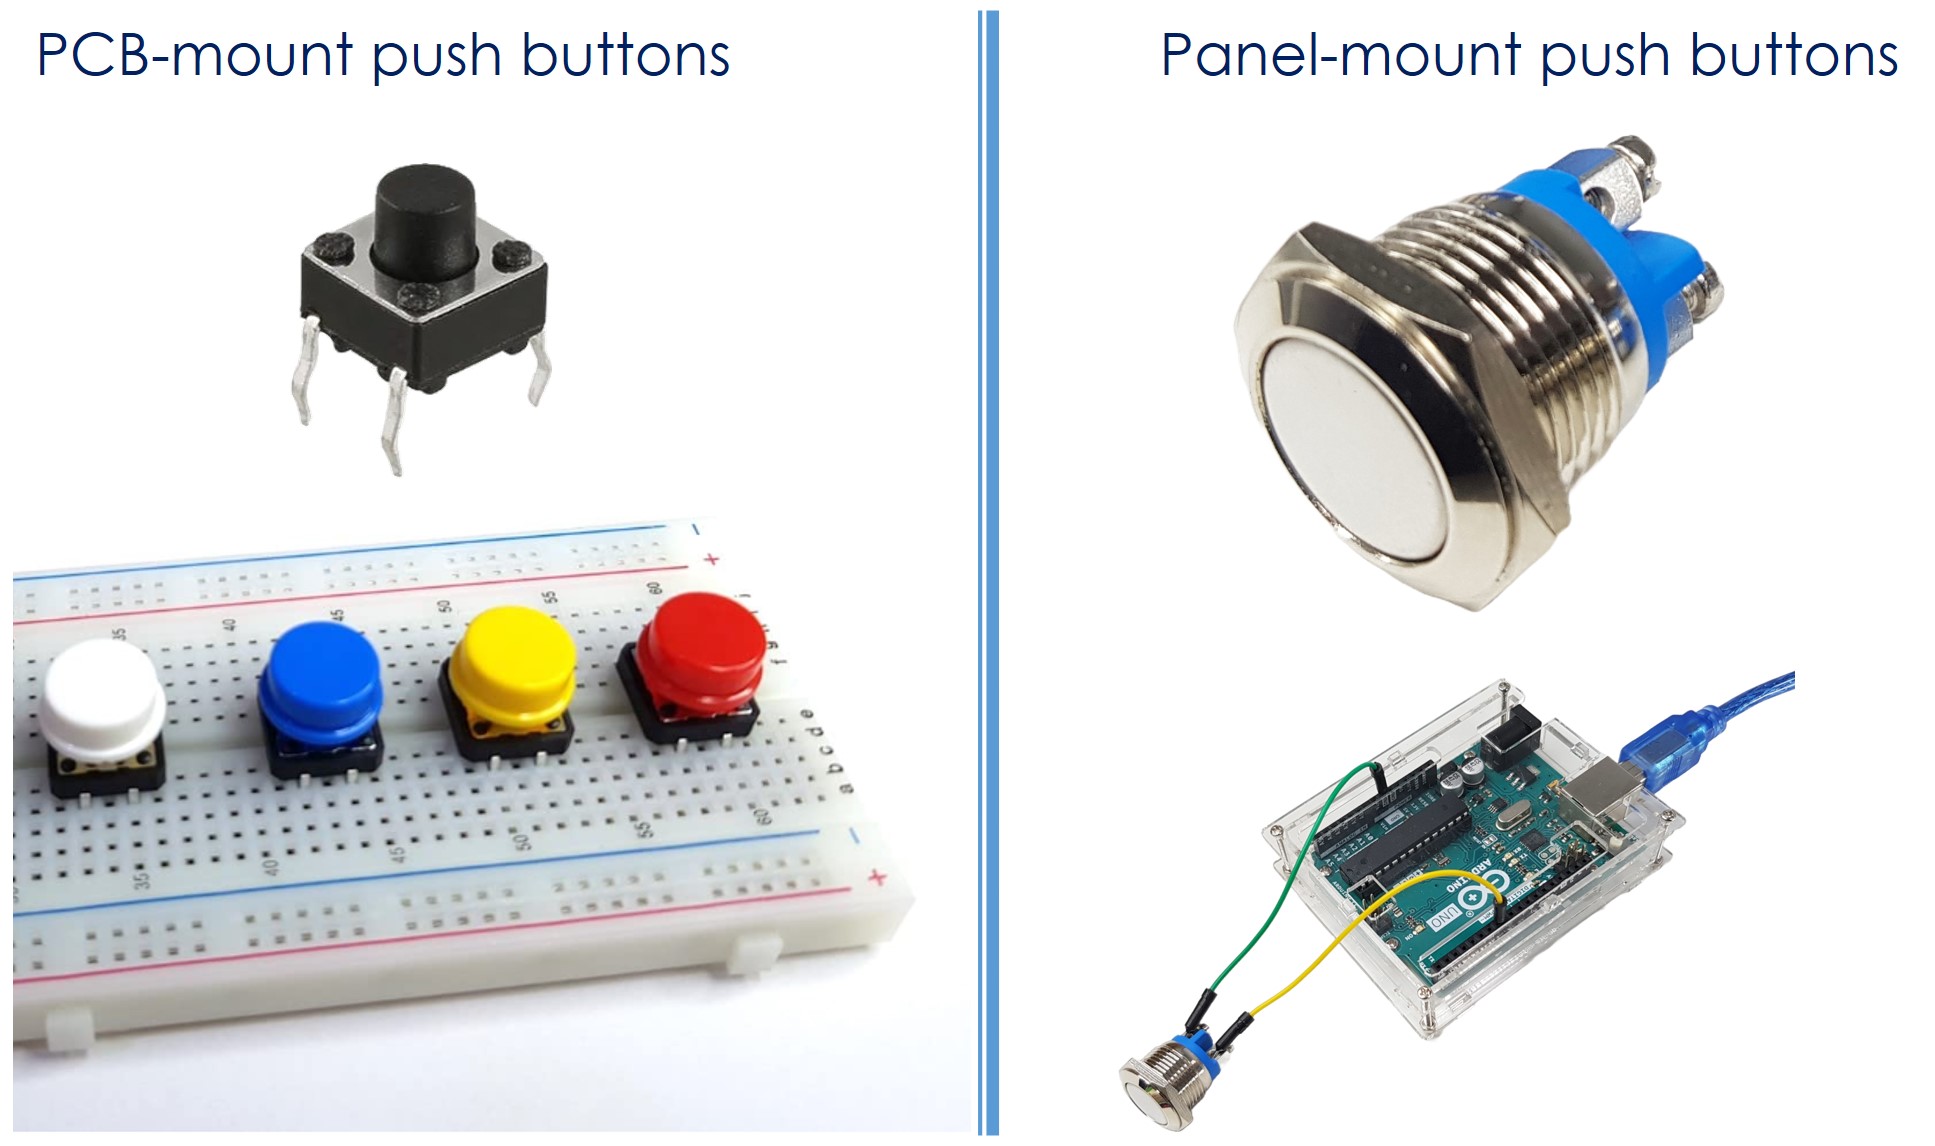
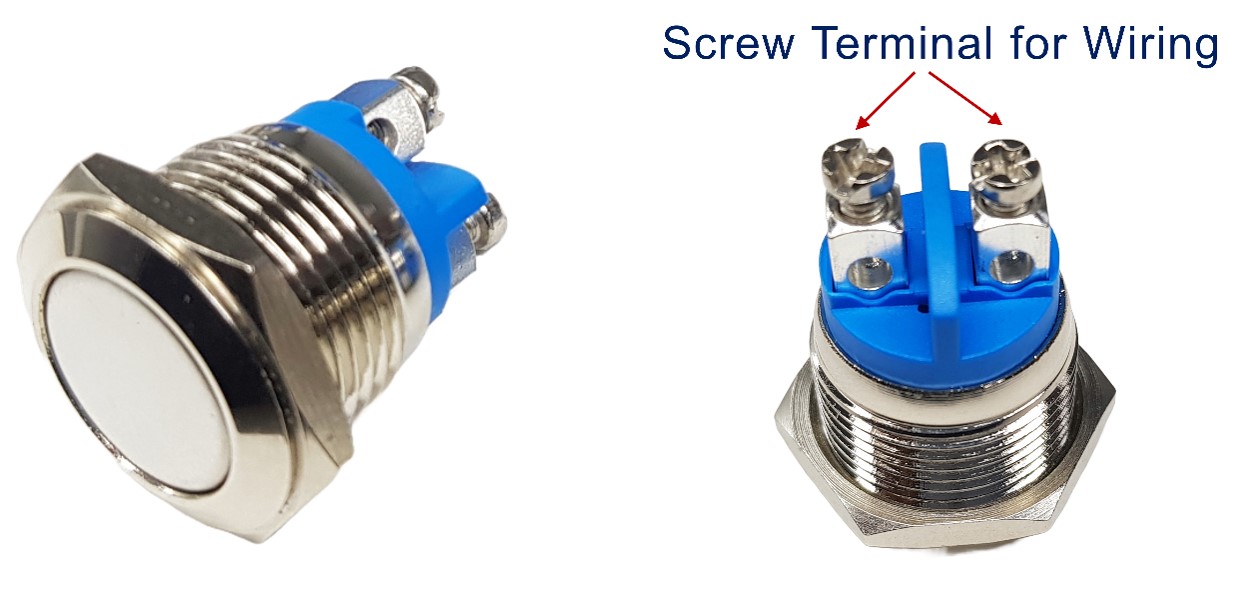
Push buttons are switches that close when pressed and open when released. They're also known as tactile buttons or momentary switches. There are two main types of push buttons:
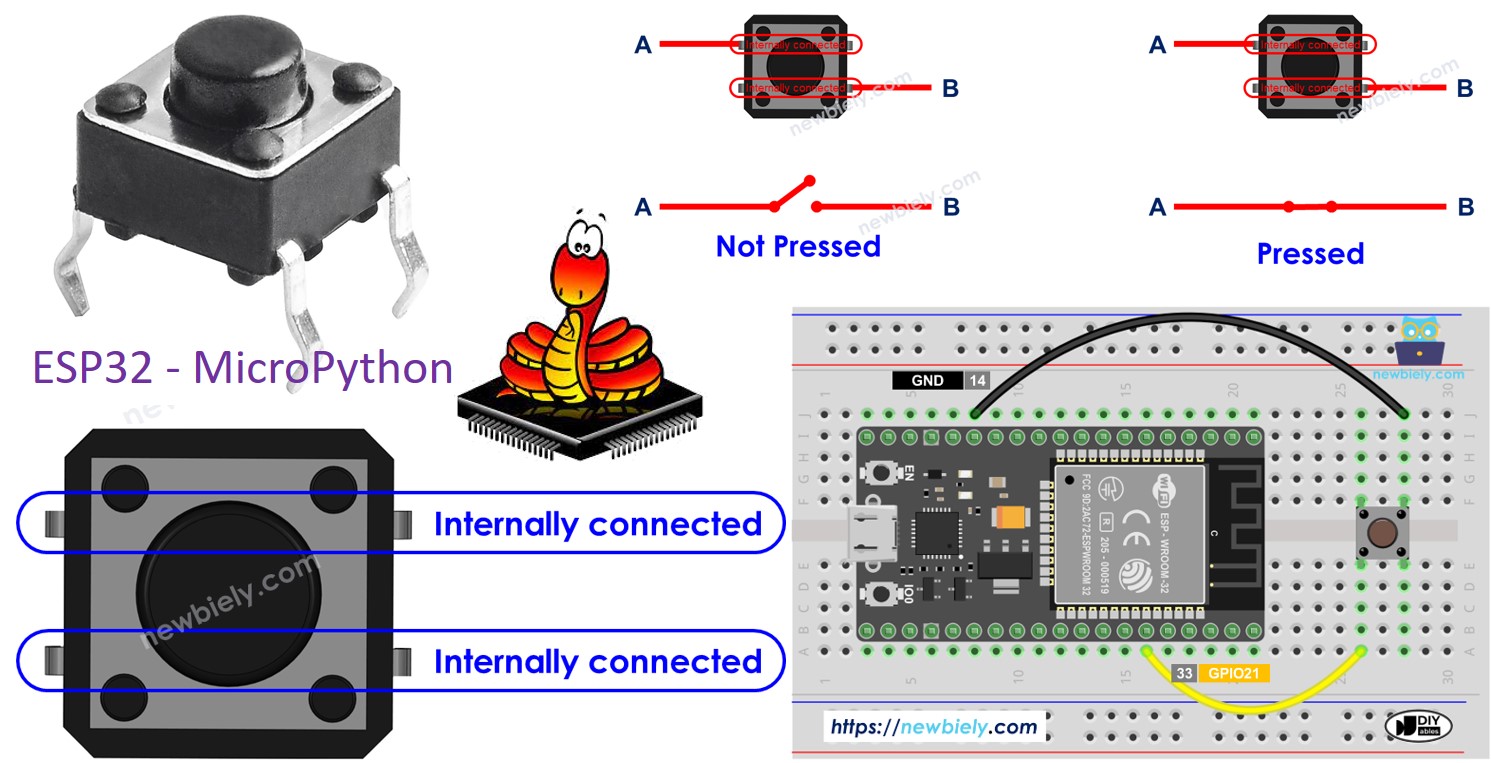
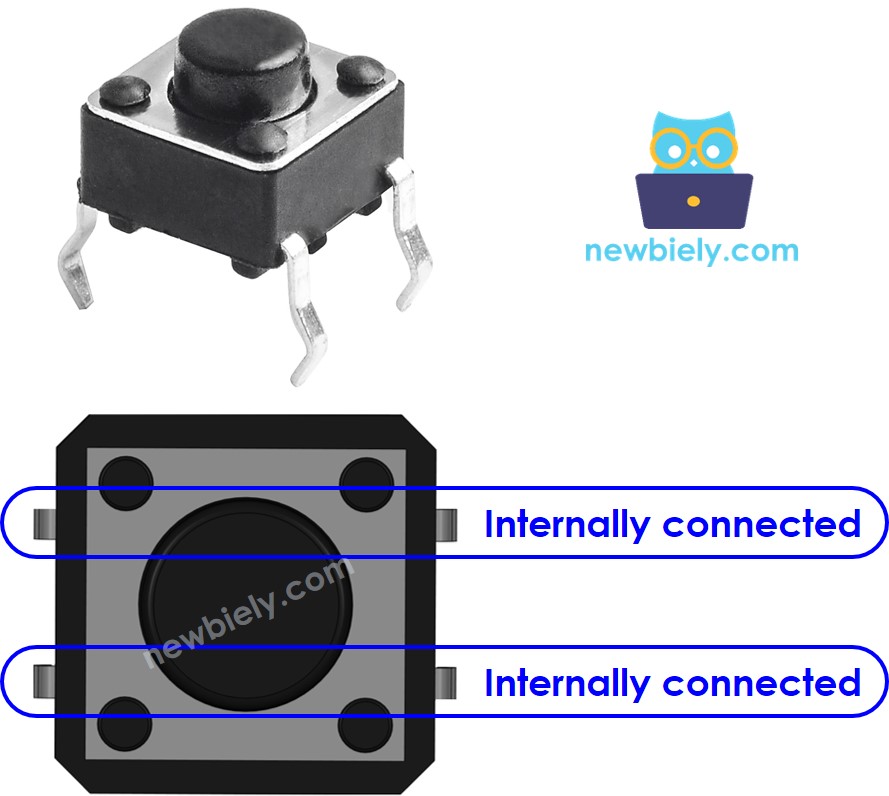
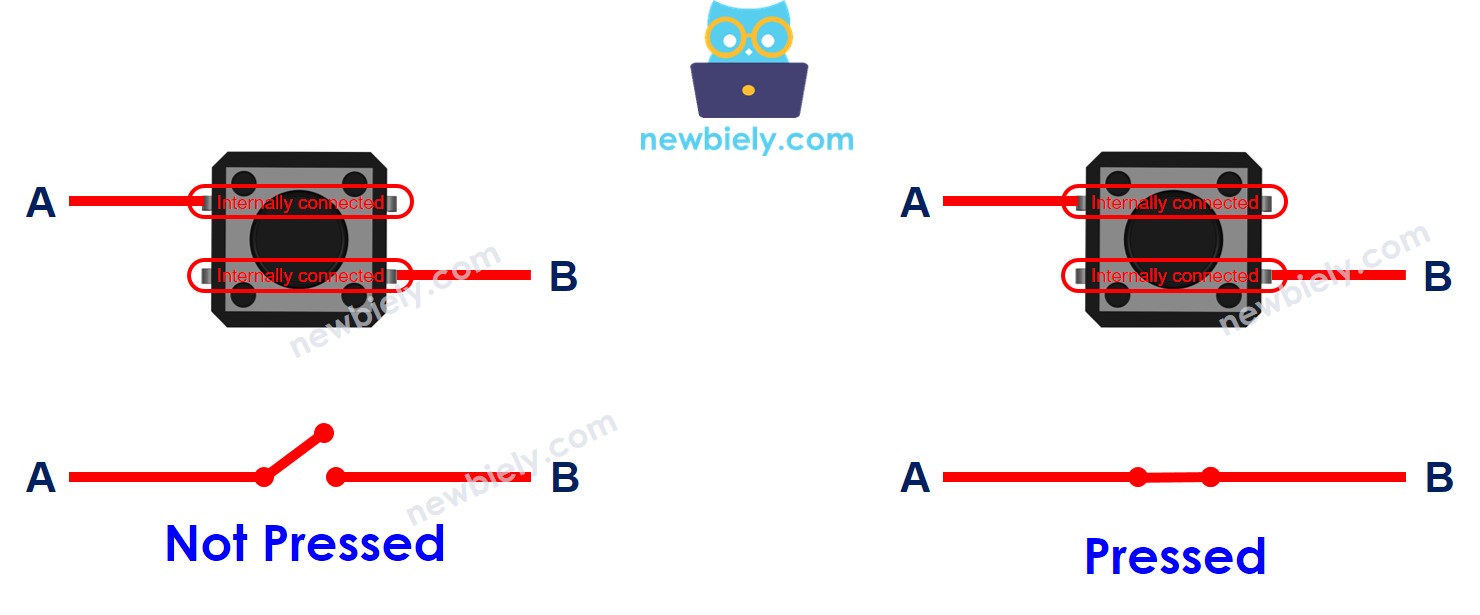
Although a button has four pins, only two are used. This is because the pins are connected internally in pairs. There are four possible ways to connect a button to a PCB, but two of these configurations are symmetrical.
Why are only two pins used on a button that has four?
⇒ To ensure secure mounting on the PCB (printed circuit board) and to withstand pressing force.
image source: diyables.io
GND: Connect this pin to ground.
VCC: Connect this pin to a 3.3V power supply.
OUT: Connect this pin to a digital input on your ESP32.
With this configuration, the module outputs LOW when the button is not pressed and outputs HIGH when the button is pressed.
When the button is not pressed, pin A and pin B are not connected.
When the button is pressed, pin A and pin B are connected.
One button pin attaches to VCC or GND, while the other pin connects to a pin on the ESP32. We can determine if the button is pressed by checking the input pin status on the ESP32.
The behavior of an ESP32 pin when a button is pressed or released depends on how the button is connected and how the pin is configured.
Two Common Connection Methods:
Pull-Down Resistor:
Connect one side of the button to VCC (power) and the other to an ESP32 pin.
Use either an internal pull-down resistor or an external pull-down resistor to the ESP32 pin.
When the button is pressed, the ESP32 pin reads HIGH. When the button is not pressed, it reads LOW.
Pull-Up Resistor:
Connect one side of the button to GND (ground) and the other to an ESP32 pin.
Use either a built-in pull-up resistor or an external resistor to the ESP32 pin.
When the button is pressed, the ESP32 pin reads LOW. When the button is not pressed, it reads HIGH.
Why Use a Pull-Up or Pull-Down Resistor?
Without a resistor, the ESP32 pin can have an unstable state when the button is not pressed. This can lead to incorrect readings. Using a pull-up or pull-down resistor ensures a stable state.
Recommended Configuration:
For beginners, we recommend using a built-in pull-up resistor on the ESP32 pin. This simplifies the wiring and eliminates the need for an external resistor. You can configure this in your MicroPython code using button = Pin(BUTTON_PIN, Pin.IN, Pin.PULL_UP).
Remember: Using a pull-up or pull-down resistor is essential for reliable button readings on an ESP32.
※ NOTE THAT:
The ESP32 pins GPIO34, GPIO35, GPIO36 (VP), and GPIO39 (VN) do not support internal pull-up or pull-down resistors. For these pins, you must use an external pull-up or pull-down resistor.
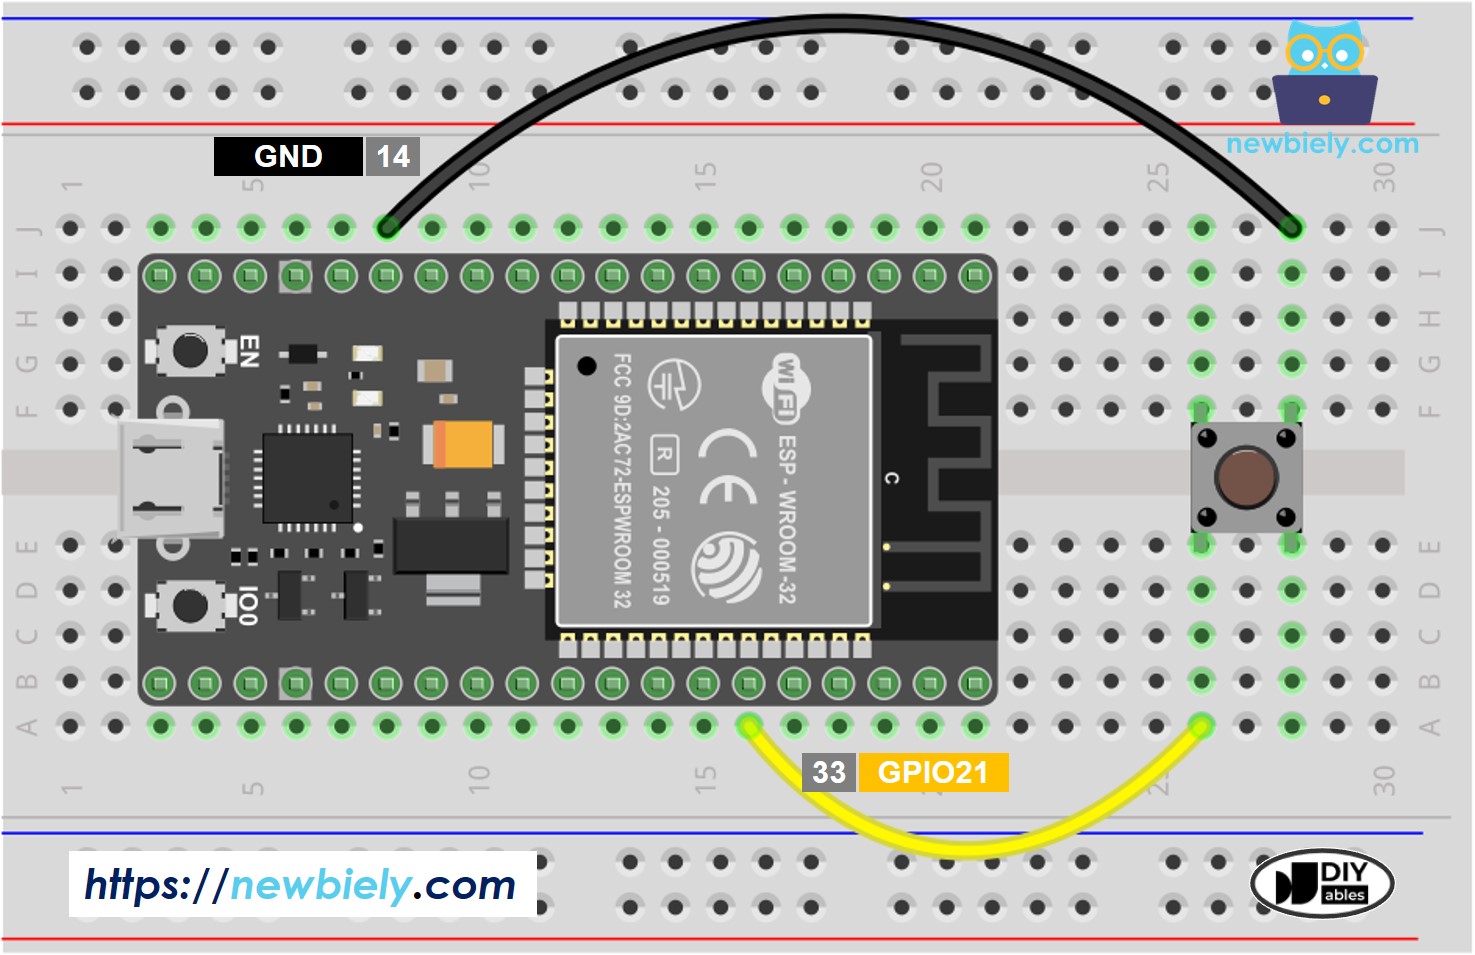
This image is created using Fritzing. Click to enlarge image
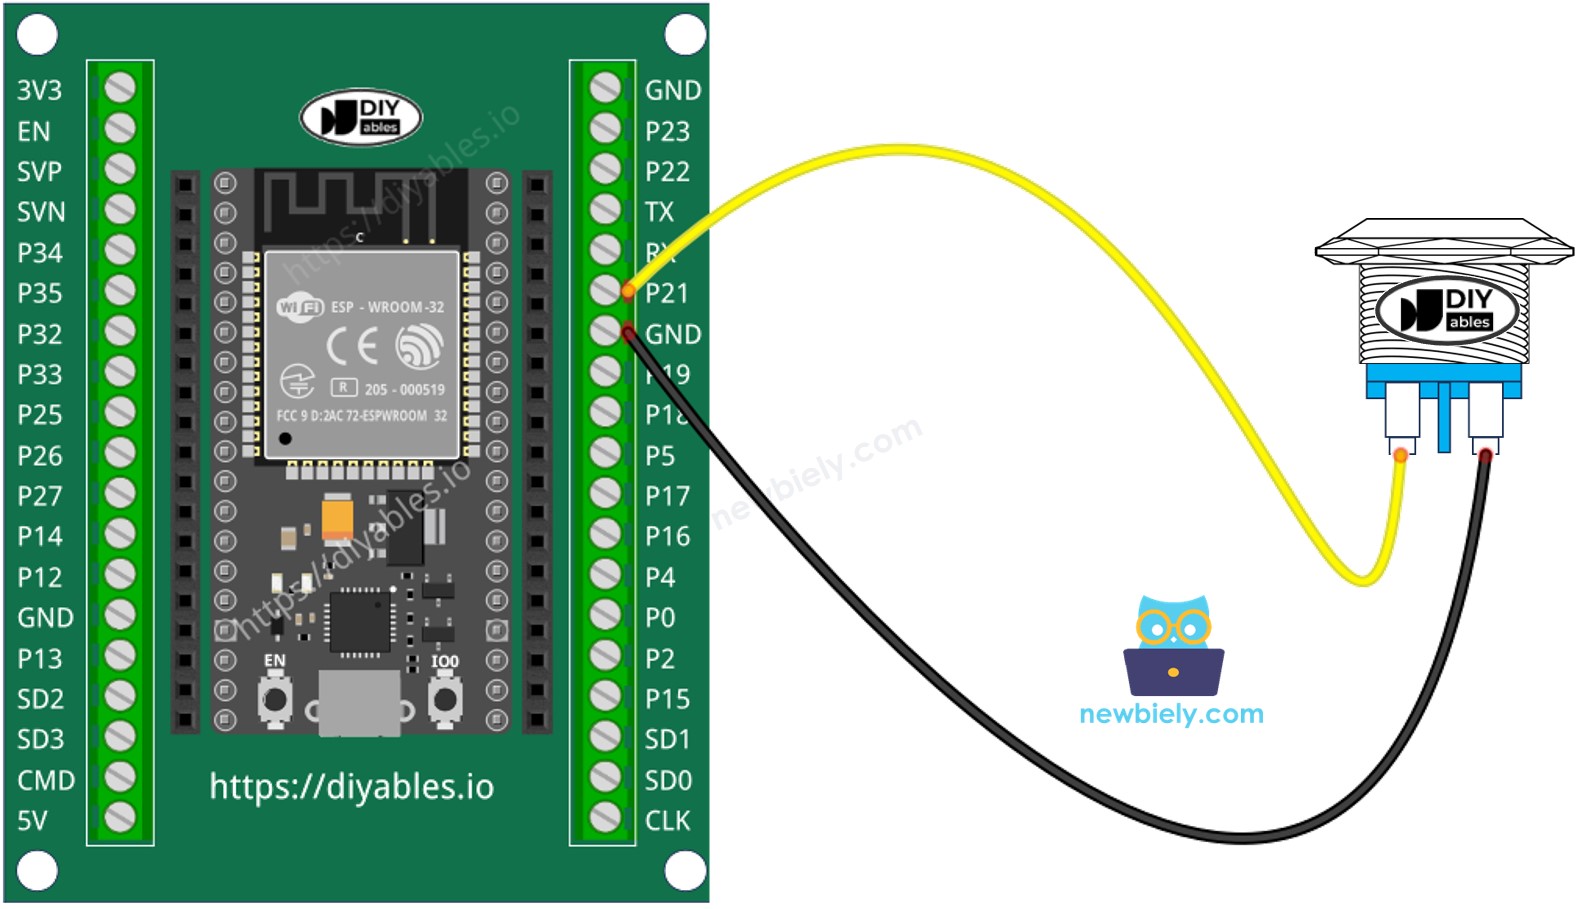
This image is created using Fritzing. Click to enlarge image
Sets up an ESP32 pin to work as an input with a built-in pull-up resistor, using the Pin(BUTTON_PIN, Pin.IN, Pin.PULL_UP) function.
button = Pin(BUTTON_PIN, Pin.IN, Pin.PULL_UP)
button_state = button.value()
※ NOTE THAT:
There are two usual cases:
The first: If the input is HIGH, act. If the input is LOW, do the opposite.
The second: If the input shifts from LOW to HIGH (or from HIGH to LOW), act.
Based on what we want, we choose one of these methods. For instance, when using a button to control the LED:
If we desire the light to turn ON when the button is pressed and turn OFF when released, we should pick the first case.
If our aim is for the light to switch ON and OFF each time the button is tapped, select the second case.
from machine import Pin
import time
BUTTON_PIN = 21
button = Pin(BUTTON_PIN, Pin.IN, Pin.PULL_UP)
while True:
button_state = button.value()
print(button_state)
time.sleep(0.5)
Here’s instructions on how to set up and run your MicroPython code on the ESP32 using Thonny IDE:
Make sure Thonny IDE is installed on your computer.
Confirm that MicroPython firmware is loaded on your ESP32 board.
Follow the provided diagram to connect the button to the ESP32.
Use a USB cable to connect the ESP32 board to your computer.
Open Thonny IDE on your computer.
In Thonny IDE, go to Tools Options.
Under the Interpreter tab, choose MicroPython (ESP32) from the dropdown menu.
Make sure the correct port is selected. Thonny IDE usually detects it automatically, but you might need to select it manually (like COM12 on Windows or /dev/ttyACM0 on Linux).
Copy the provided MicroPython code and paste it into Thonny's editor.
Save the code to your ESP32 by:
Click the green Run button (or press F5) to execute the script.
Press the green Run button or F5 to execute your script.
Check out the message in the Shell at the bottom of Thonny IDE.
>>> %Run -c $EDITOR_CONTENT
MPY: soft reboot
1
1
1
0
0
0
0
0
0
1
1
1
MicroPython (ESP32) • CP2102 USB To UART Bridge Controller @ COM12 ≡
1 indicates unpressed, 0 indicates pressed.
You can see the explanation in the comments part of the ESP32 MicroPython code that was given before.
Let's change the code so it can recognize when buttons are pressed and released
from machine import Pin
import time
BUTTON_PIN = 21
button = Pin(BUTTON_PIN, Pin.IN, Pin.PULL_UP)
prev_button_state = 1
while True:
button_state = button.value()
if prev_button_state == 0 and button_state == 1:
print("The button is released")
if prev_button_state == 1 and button_state == 0:
print("The button is pressed")
prev_button_state = button_state
Copy the code above and insert it into Thonny IDE.
Click the green Run button or press F5 to start the script.
Click the button and then release it.
Look at the message in the Shell at the bottom of Thonny.
>>> %Run -c $EDITOR_CONTENT
MPY: soft reboot
The button is pressed
The button is released
MicroPython (ESP32) • CP2102 USB To UART Bridge Controller @ COM12 ≡
※ NOTE THAT:
Occasionally, if you press a button once, it might display multiple presses in Thonny's Shell. This frequent problem is known as
chattering phenomenon, or
bouncing. You can learn more and find a solution in the
ESP32 MicroPython Button Debounce tutorial.
If you are using the
button module, set the pin to input mode with
button = Pin(BUTTON_PIN, Pin.IN). In this configuration, the module outputs
LOW when the button is not pressed and
HIGH when it is pressed.
