ESP32 MicroPython Getting Started
This tutorial instructs you on how to get started with the ESP32 using MicroPython. It covers setting up the Thonny IDE, installing MicroPython firmware on the ESP32, and running a simple Python script on the ESP32 board.
Hardware Preparation
Or you can buy the following kits:
| 1 | × | DIYables ESP32 Starter Kit (ESP32 included) | |
| 1 | × | DIYables Sensor Kit (18 sensors/displays) |
Additionally, some of these links are for products from our own brand, DIYables .
To get started with MicroPython on your ESP32 board, follow these steps:
- Flash MicroPython firmware: Upload the MicroPython firmware to your ESP32.
- Install Thonny IDE: Use Thonny as your development environment for MicroPython on ESP32.
- Run a "Hello World" program: Test your setup by running a basic "Hello World" program.
Let's explore each step in detail.
Flash MicroPython firmware
- Connect the ESP32 board to your computer using a USB cable.
- Open the Device Manager on your Windows system to identify the COM port that your ESP32 is connected to, such as COM12. If your computer doesn’t detect the COM port for the ESP32 board, please refer to the driver installation instructions at the end of this tutorial.
- Open a command prompt with administrator privileges on your computer.
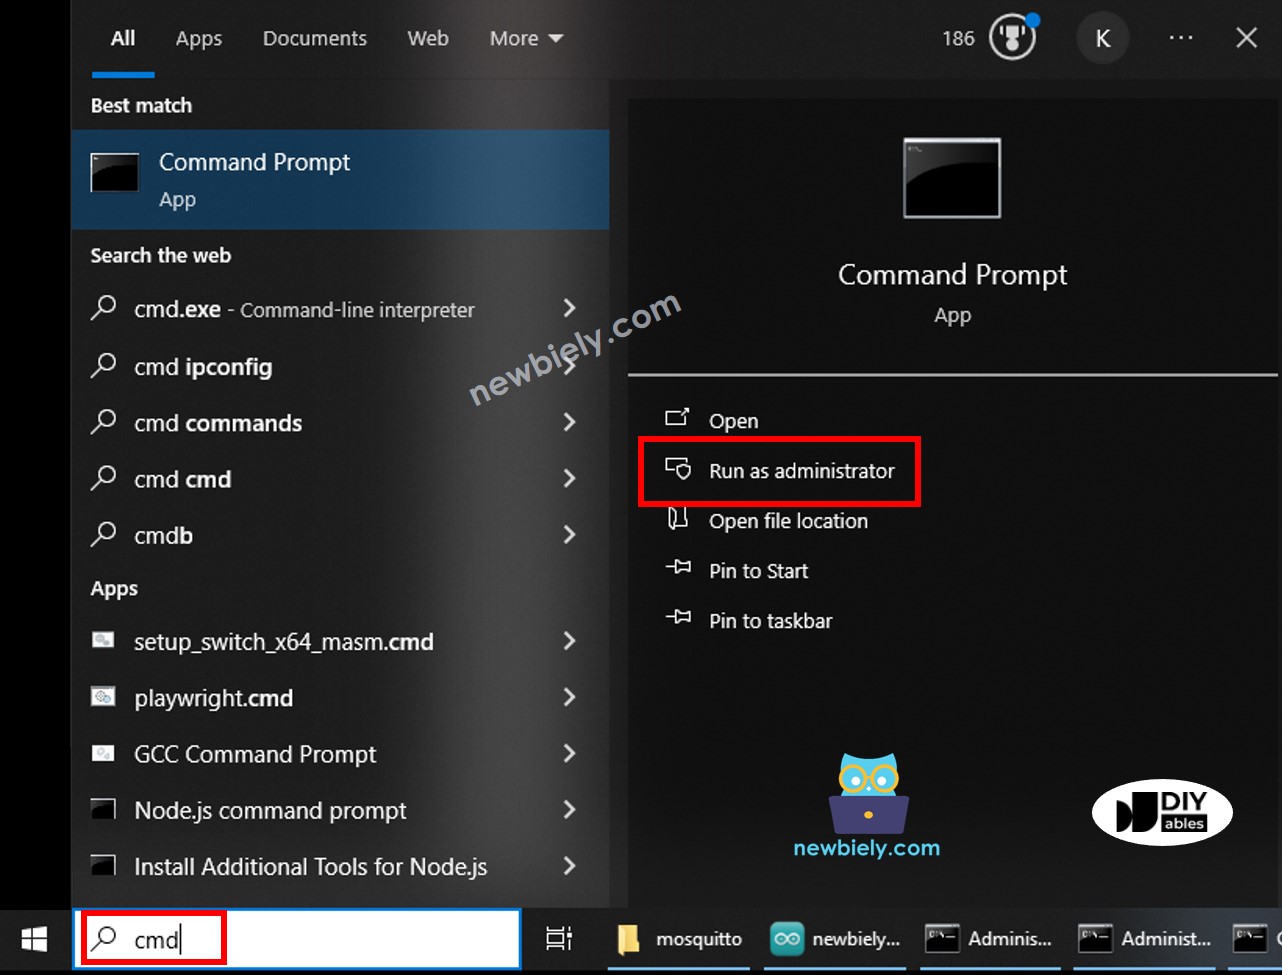
- Install esptool, a utility used to upload MicroPython firmware to your ESP32 board, by running the following command:
- Delete the code running on ESP32 by running the following command (Make sure to replace the COM port number in the command with the correct one.):
- Download the latest version of the MicroPython firmware for ESP32 and save it to a convenient location on your computer, such as D:\MicroPython\ESP32_GENERIC-20240602-v1.23.0.bin
- Enter the following command to upload the downloaded MicroPython firmware to the ESP32 board (be sure to replace the COM port number and firmware file name with the correct ones for the command):
Now, the MicroPython firmware is loaded to your ESP32 board.
Install Thonny IDE on your computer
- Download and install Thonny IDE on your computer
Running the first program on ESP32
- Open Thonny IDE on your computer.
- In Thonny IDE, go to Tools Options.
- Under the Interpreter tab, choose MicroPython (ESP32) from the dropdown menu.
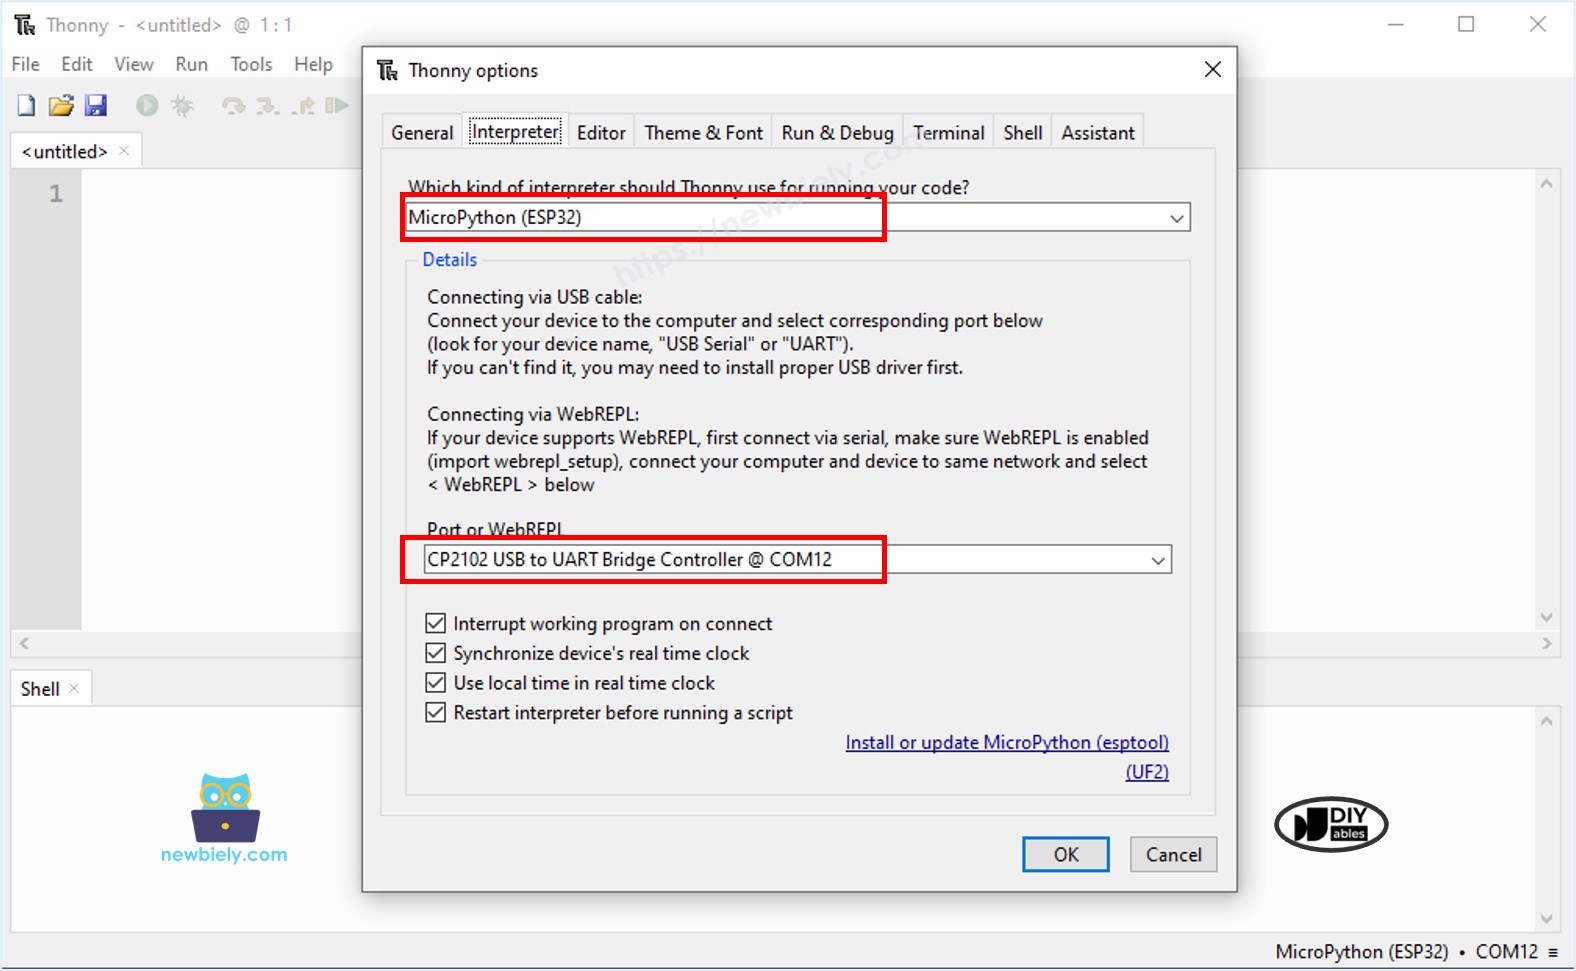
- Make sure the correct port is selected. Thonny IDE usually detects it automatically, but you might need to select it manually (like COM12 on Windows or /dev/ttyACM0 on Linux).
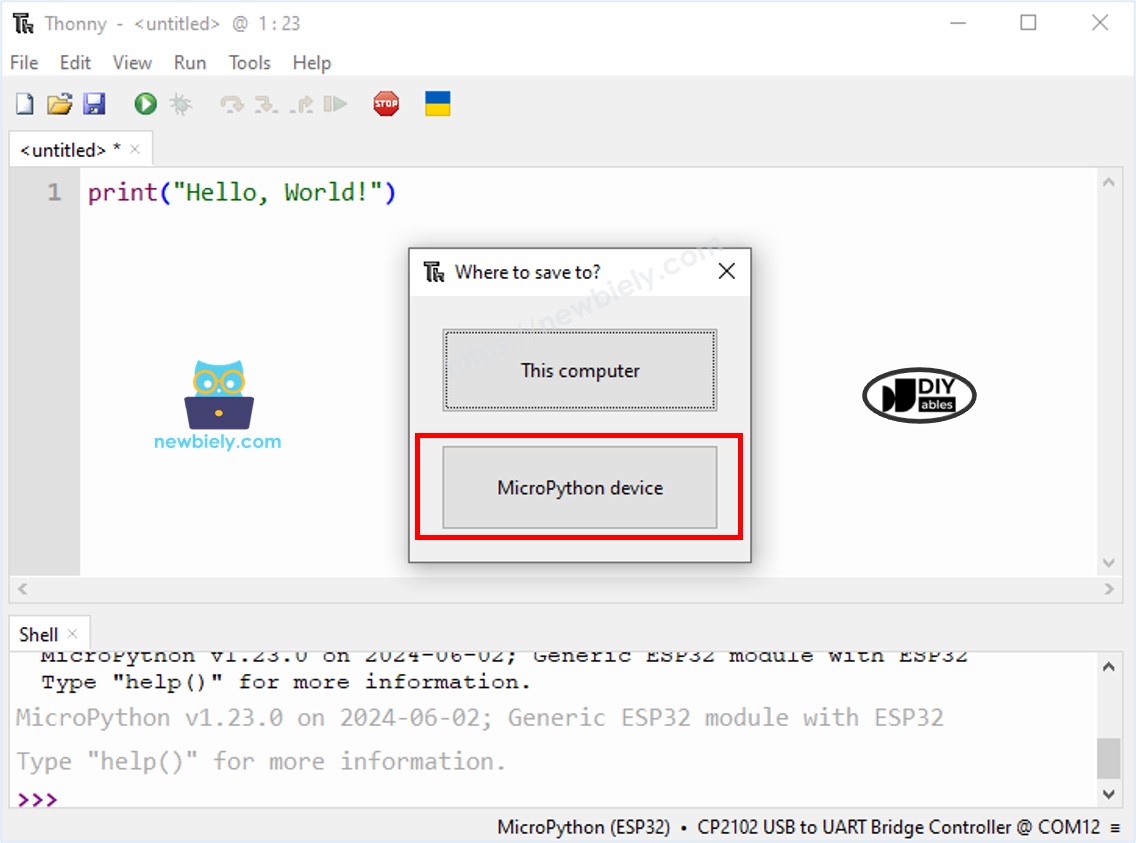
- Copy the below code and paste it to the Thonny IDE's editor.
- Save the script to your ESP32 board by:
- Click the Save button, or use Ctrl+S keys.
- In the save dialog, you will see two sections: This computer and MicroPython device. Select MicroPython device
- Save the file as main.py
- Click the green Run button (or press F5) to run the script. The script will execute.
- Check out the message in the Shell at the bottom of Thonny.
DRIVER INSTALLATION
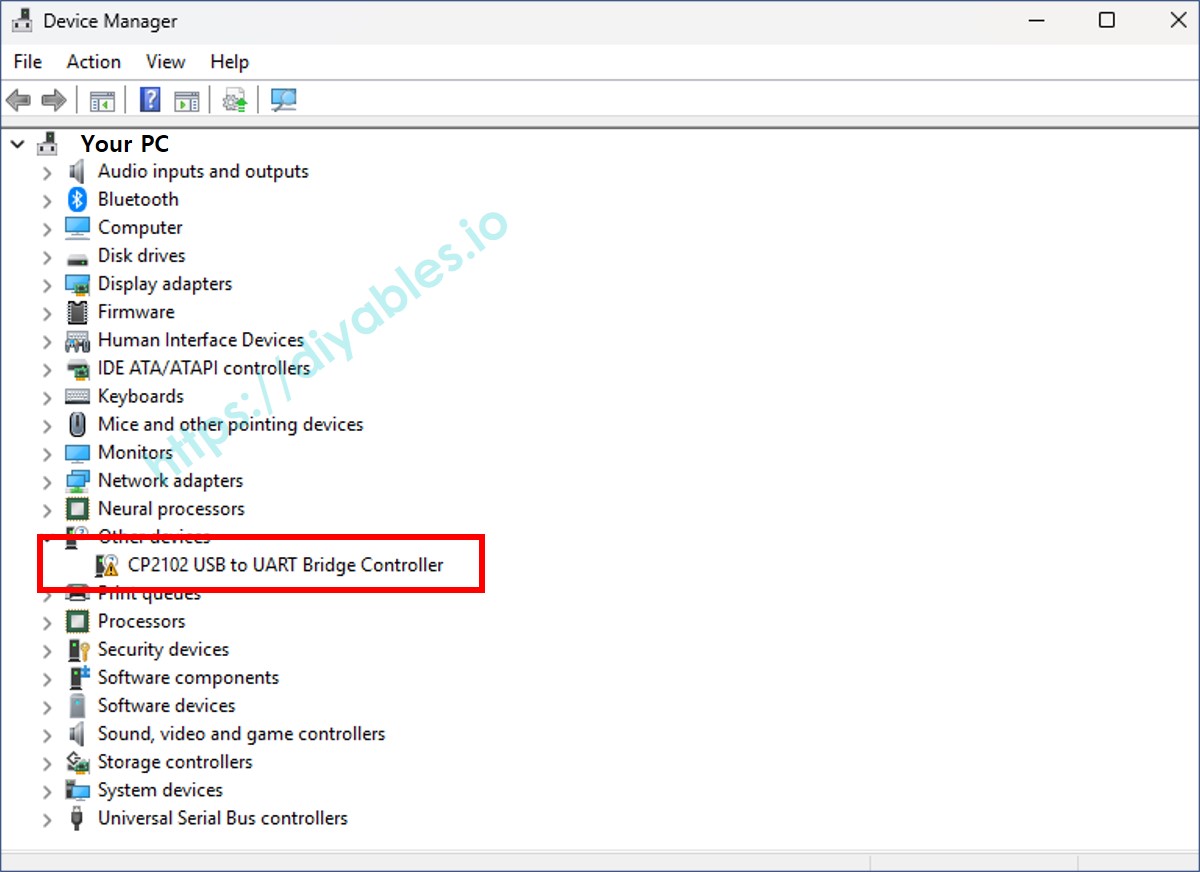
ESP32 boards from different vendors may use different USB-to-serial chips. Common ones include CH340, CP210x, and FTDI. The board we’re using in this tutorial is the DIYables ESP32, which uses the CP210x chip.
In most cases, your operating system will recognize the board automatically. However, if it doesn't show up in Thonny IDE, you may need to install the driver manually.
1. Download the CP210x Driver
2. Extract the Driver Files
Unzip the downloaded ZIP file to a folder on your computer. There is no automatic installer in the package.
3. Open Device Manager (Windows Only)
- Press Windows + X and choose Device Manager from the menu.
- In Device Manager, check under Ports (COM & LPT). A new device labeled something like USB Serial Port should appear when you plug in the board.
4. Connect the ESP32 Board
- Connect your DIYables ESP32 board to your computer using a USB cable.
- Watch Device Manager to see which COM port is added when the board is connected.
5. Install or Update the Driver
- Right-click the new device under Ports (COM & LPT) (e.g., “USB Serial Port”) and select Update driver.
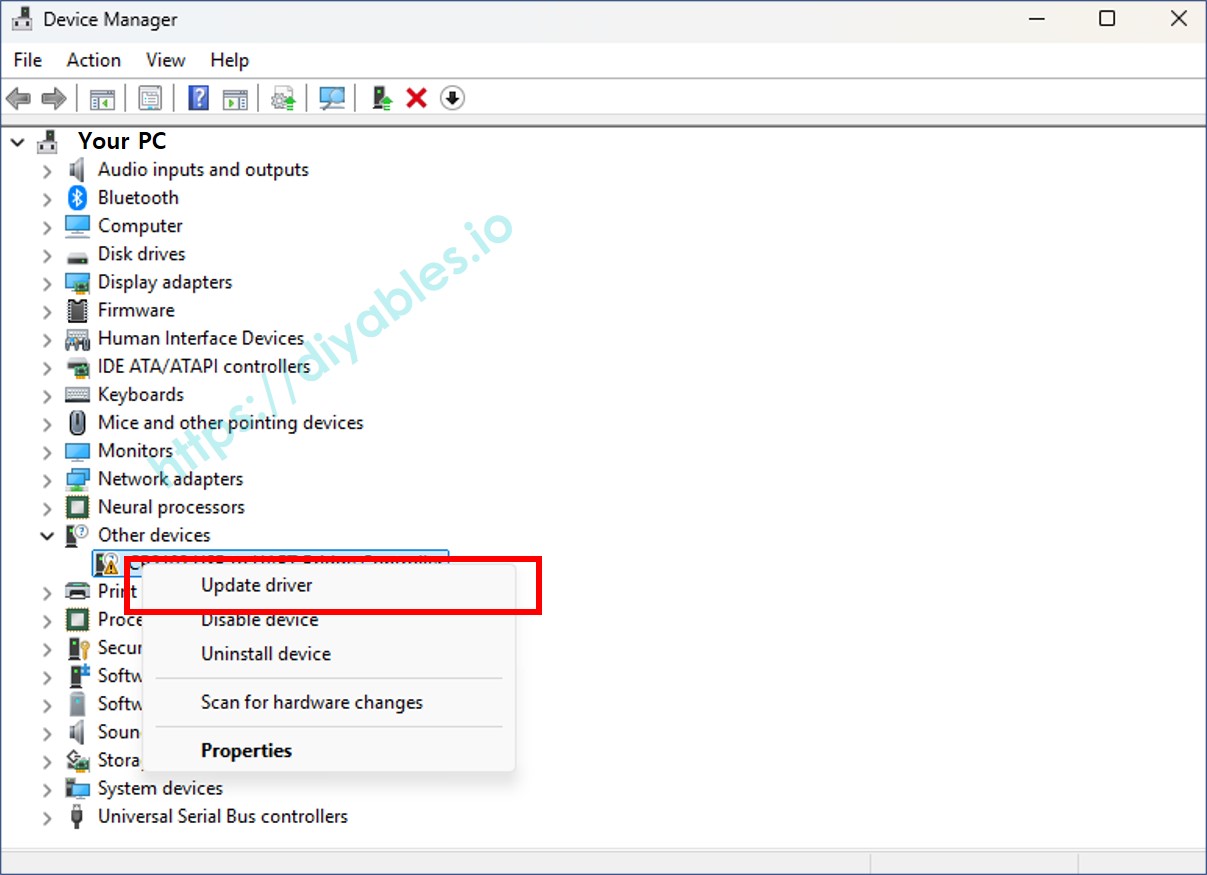
- Choose Browse my computer for drivers.
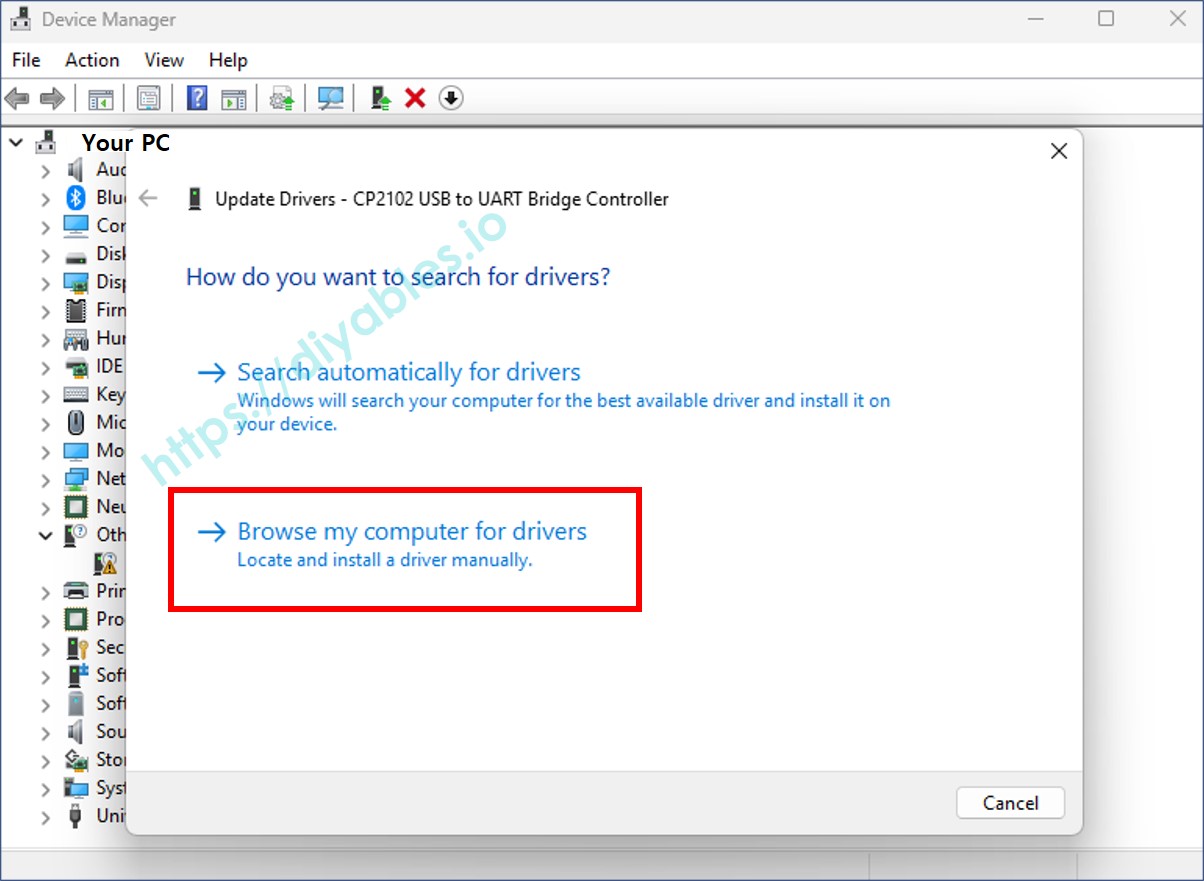
6. Select the Extracted Driver Folder
- Click Browse, navigate to the folder where you unzipped the driver, and click Next.
- Follow the prompts to complete the installation.
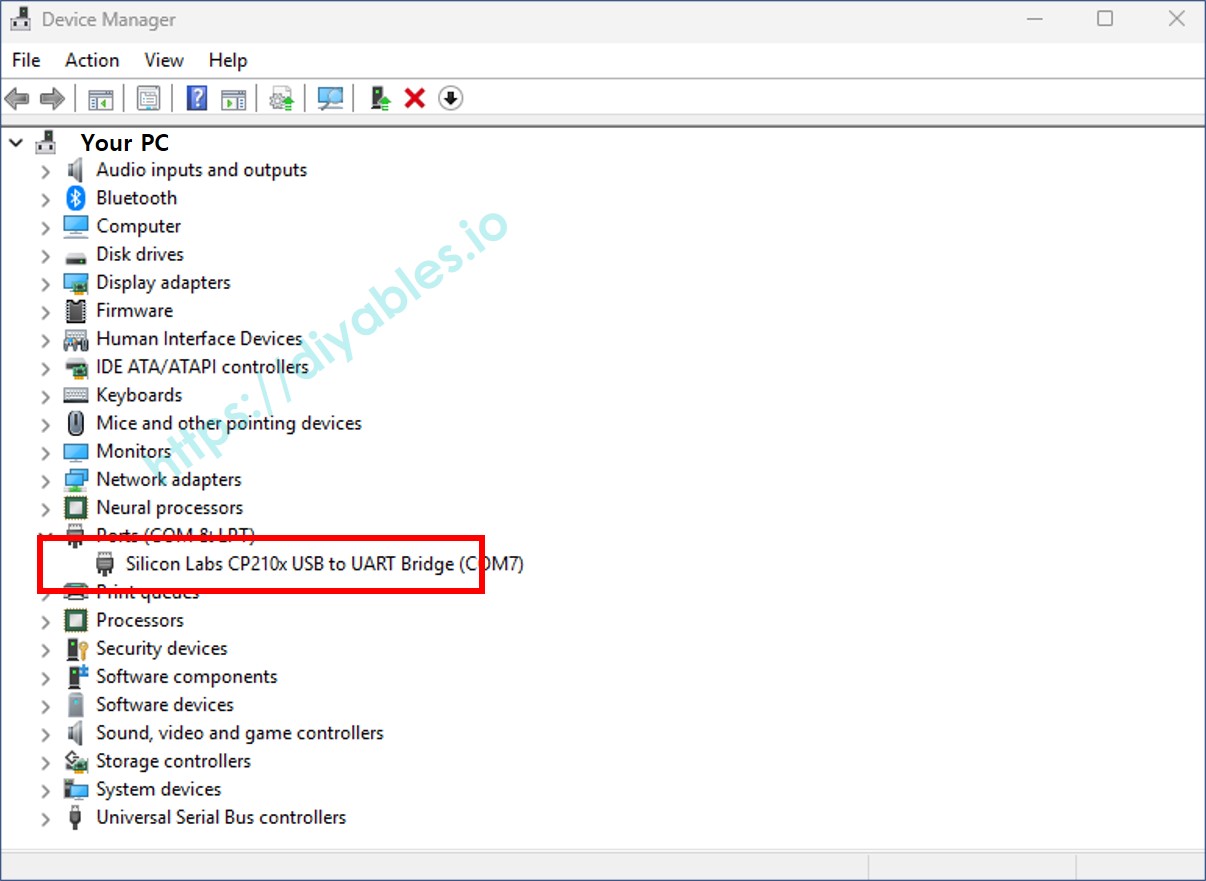
7. Verify the COM Port
Once installed, your ESP32 board should appear with a proper name under Ports (COM & LPT).
Note: If you still face issues, uninstall the existing driver for that COM port and repeat the installation process.