ESP32 MicroPython Temperature Sensor LCD
This tutorial instructs you how to use a ESP32 and MicroPython code to read the temperature from a DS18B20 temperature sensor and show it on an LCD I2C display.
Hardware Preparation
Or you can buy the following kits:
| 1 | × | DIYables ESP32 Starter Kit (ESP32 included) | |
| 1 | × | DIYables Sensor Kit (18 sensors/displays) |
Additionally, some of these links are for products from our own brand, DIYables .
Buy Note: Many DS18B20 sensors available in the market are unreliable. We strongly recommend buying the sensor from the DIYables brand using the link provided above. We tested it, and it worked reliably.
Buy Note: Alternatively, you can assemble the LCD I2C display using LCD 1602 Display and PCF8574 I2C Adapter Module.
Overview of Temperature Sensor and LCD
If you're new to DS18B20 temperature sensor, LCD I2C, or MicroPython programming for the ESP32, I recommend checking out these tutorials:
- ESP32 MicroPython Getting Started tutorial
These tutorials will provide you with a comprehensive understanding of DS18B20 temperature sensor and LCD, how to connect these components to the ESP32, and how to effectively control their behavior using MicroPython code.
Wiring Diagram
- How to connect ESP32 with temperature sensor and lcd using breadboard
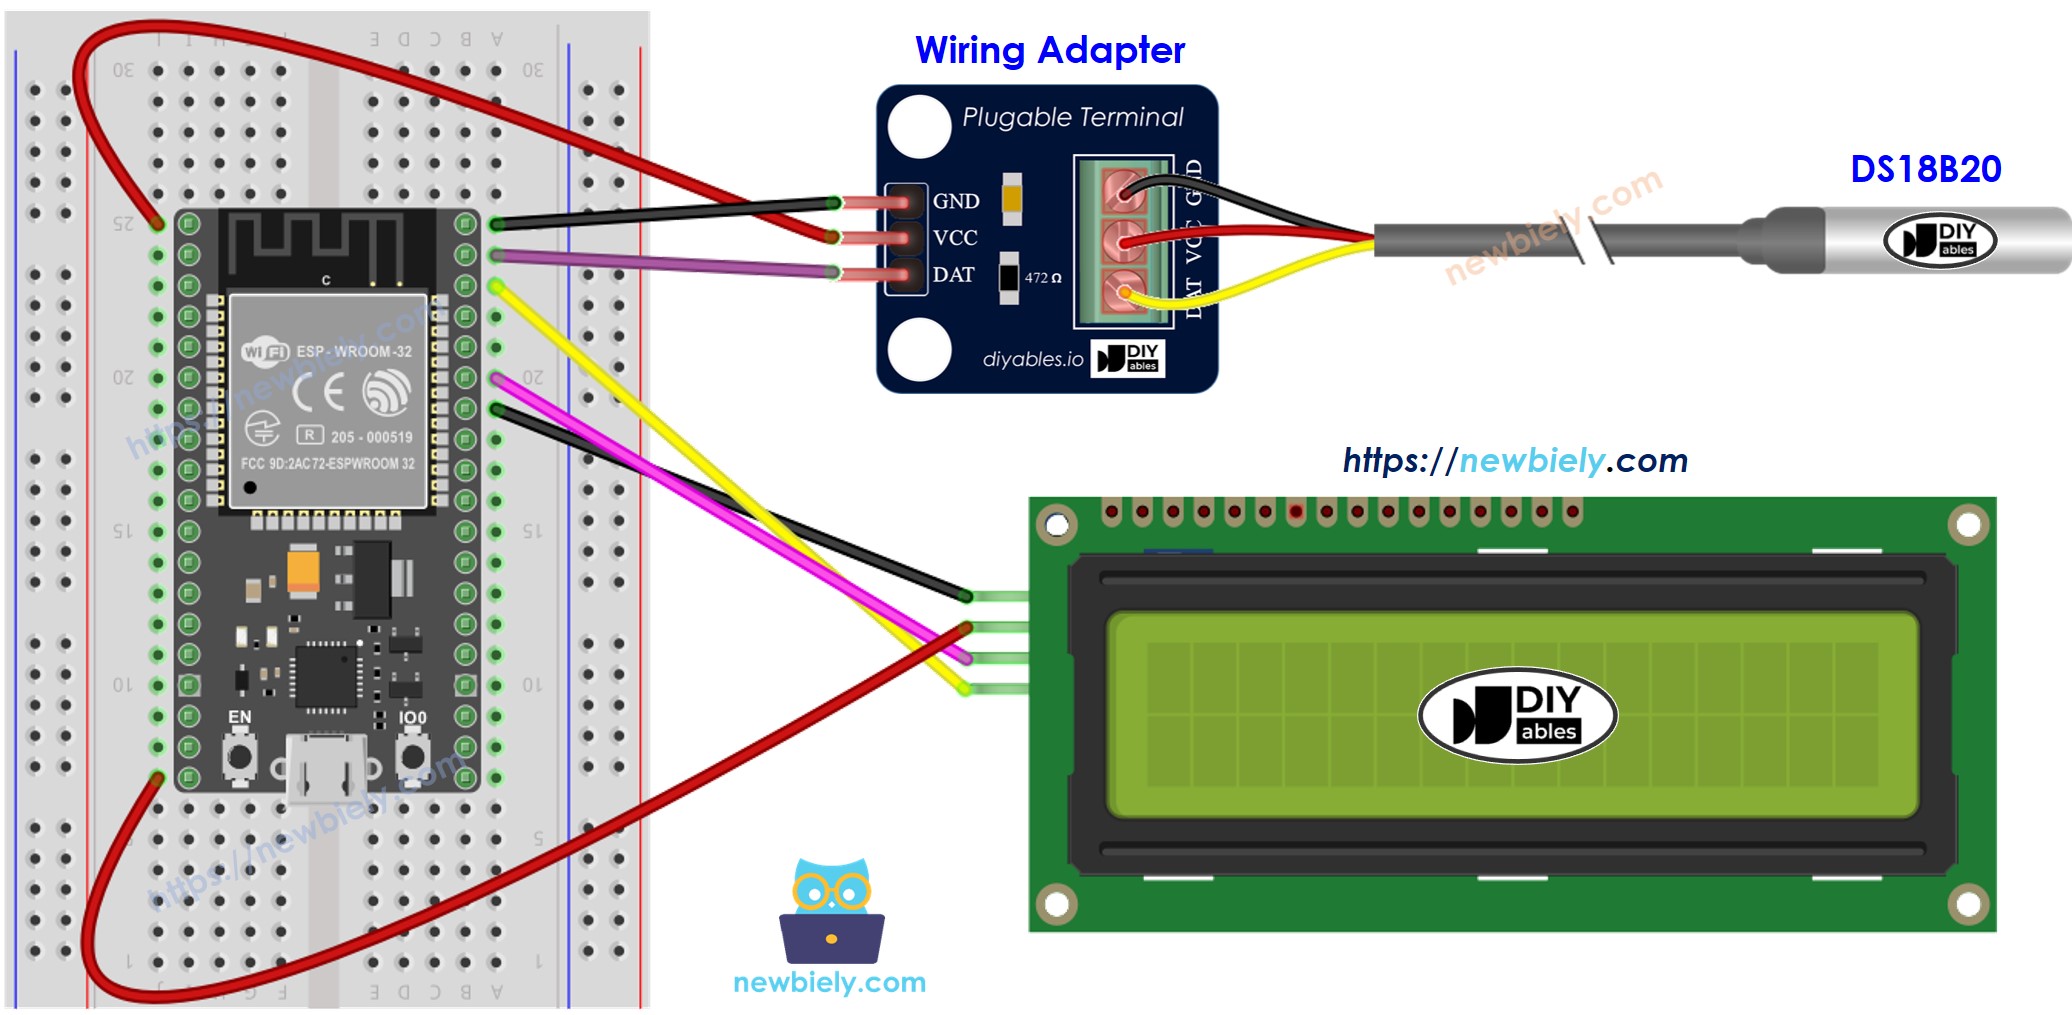
This image is created using Fritzing. Click to enlarge image
- How to connect ESP32 with temperature sensor and lcd using screw terminal block breakout board
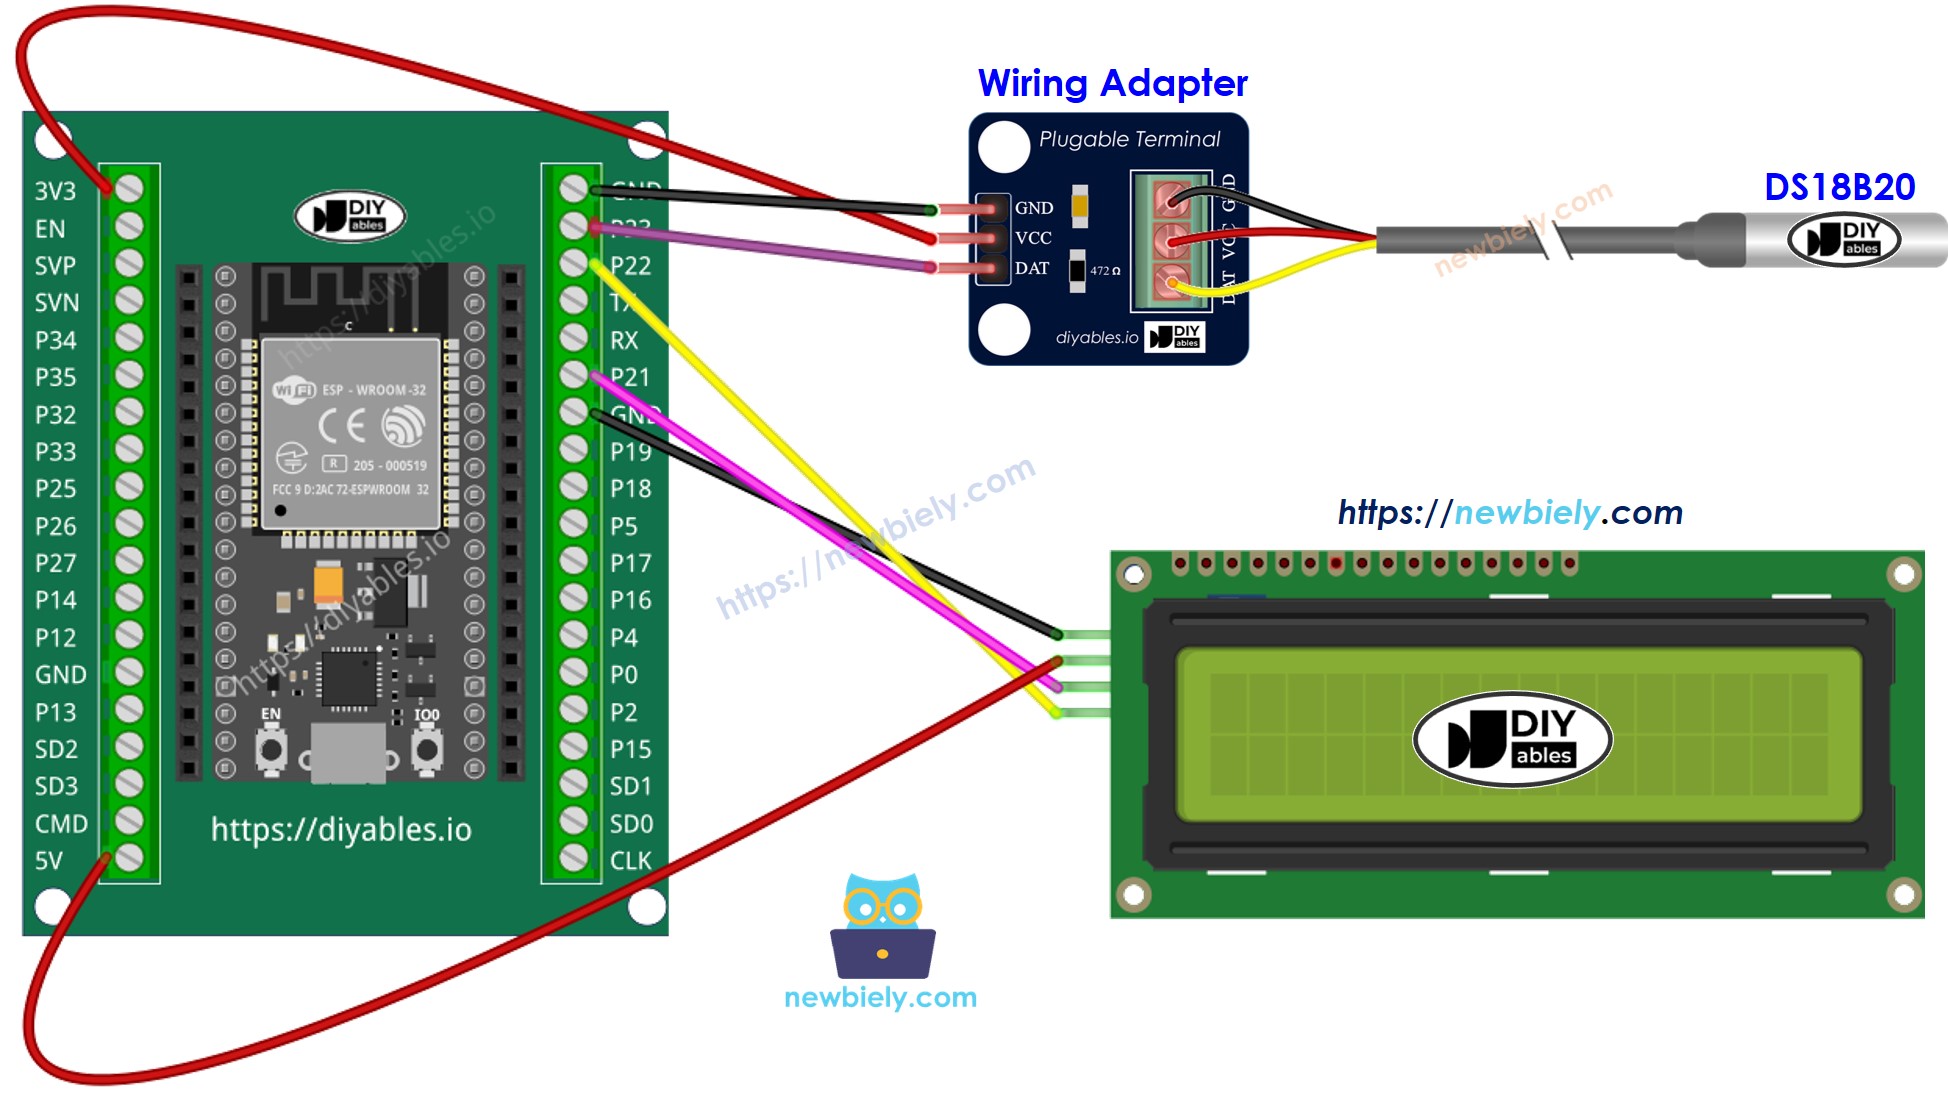
This image is created using Fritzing. Click to enlarge image
ESP32 MicroPython Code
※ NOTE THAT:
Depending on the manufacturer, the I2C address for the LCD can vary. In our example, we used address 0x27 as specified by the manufacturer, DIYables.
Detailed Instructions
Here’s instructions on how to set up and run your MicroPython code on the ESP32 using Thonny IDE:
- Make sure Thonny IDE is installed on your computer.
- Confirm that MicroPython firmware is loaded on your ESP32 board.
- If this is your first time using an ESP32 with MicroPython, check out the ESP32 MicroPython Getting Started guide for step-by-step instructions.
- Connect the ESP32 board to the DS18B20 temperature sensor and LCD I2C according to the provided diagram.
- Connect the ESP32 board to your computer with a USB cable.
- Open Thonny IDE on your computer.
- In Thonny IDE, go to Tools Options.
- Under the Interpreter tab, choose MicroPython (ESP32) from the dropdown menu.
- Make sure the correct port is selected. Thonny IDE usually detects it automatically, but you might need to select it manually (like COM12 on Windows or /dev/ttyACM0 on Linux).
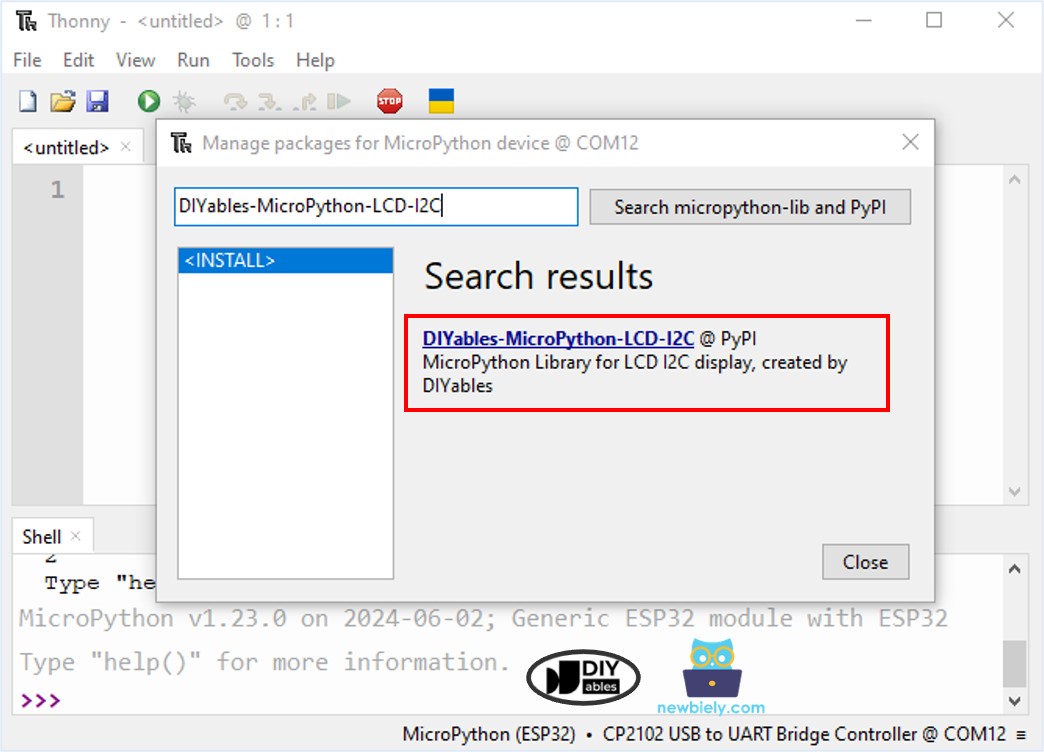
- Navigate to the Tools Manage packages on the Thonny IDE.
- Search “DIYables-MicroPython-LCD-I2C”, then find the LCD I2C library created by DIYables.
- Click on DIYables-MicroPython-LCD-I2C, then click Install button to install LCD I2C library.
- Copy the provided MicroPython code and paste it into Thonny's editor.
- Save the code to your ESP32 by:
- Clicking the Save button or pressing Ctrl+S.
- In the save dialog, choose MicroPython device.
- Name the file main.py.
- Click the green Run button (or press F5) to execute the script.
- Put the sensor on hot or cold water, or hold it in your hand.
- Look at the display on the LCD screen.
If the LCD screen is blank, please visit Troubleshooting for LCD I2C for help.
Code Explanation
Look at the comments in the source code for explanations of each line!