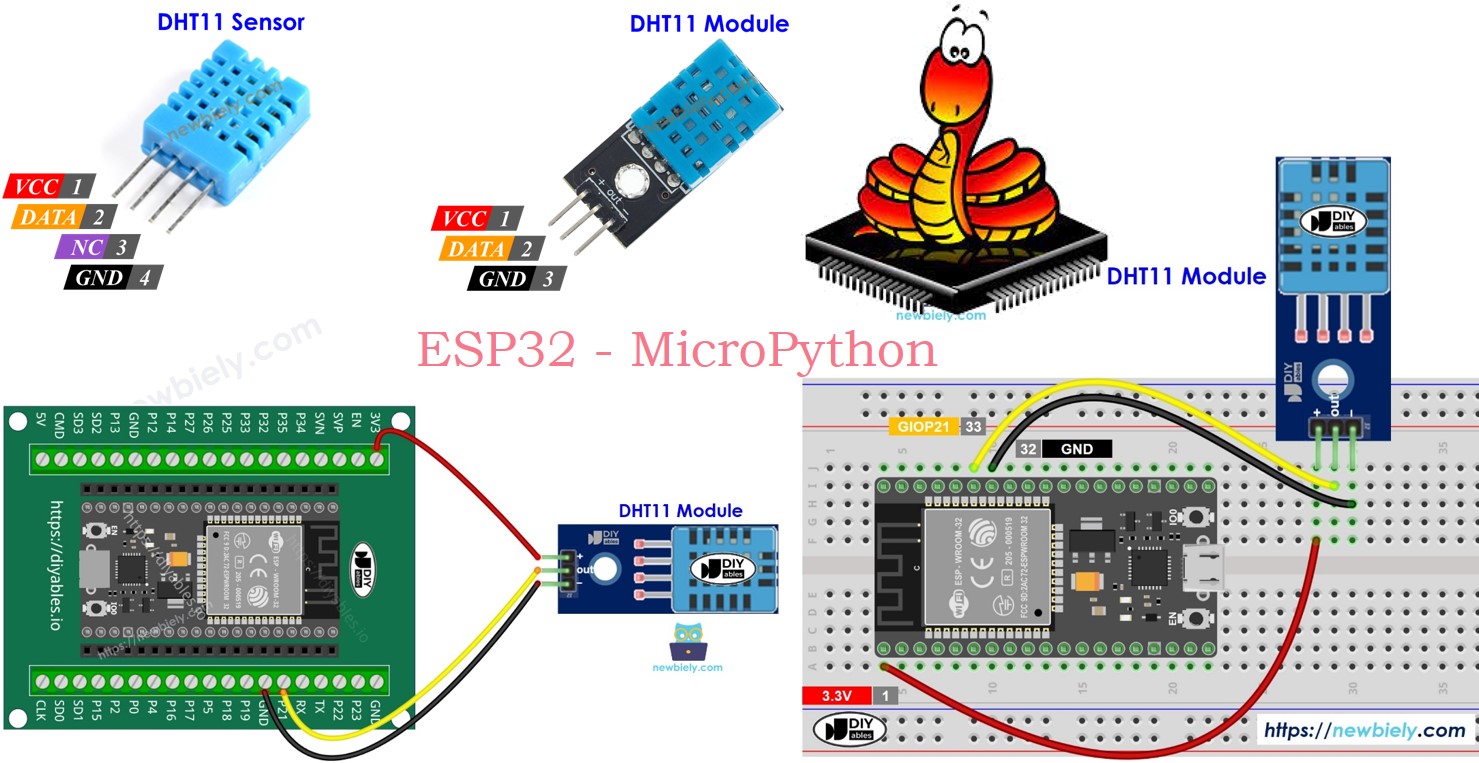
ESP32 MicroPython DHT11 Temperature Humidity Sensor
This tutorial instructs you how to use the DHT11 temperature and humidity sensor with the ESP32 and MicroPython. In detail, we will learn:
- How to connect the DHT11 sensor and module to a ESP32.
- How to write MicroPython code for the ESP32 to read temperature and humidity data from the DHT11 sensor and module.
Hardware Preparation
Or you can buy the following kits:
| 1 | × | DIYables ESP32 Starter Kit (ESP32 included) | |
| 1 | × | DIYables Sensor Kit (18 sensors/displays) |
Additionally, some of these links are for products from our own brand, DIYables .
Overview of DHT11 Temperature and Humidity Sensor
| DHT11 | |
|---|---|
| Operating Voltage | 3 to 5V |
| Temperature Range | 0°C to 50°C |
| Temperature Accuracy | ± 2°C |
| Humidity Range | 20% to 80% |
| Humidity Accuracy | 5% |
| Reading Rate | 1Hz (once every second) |
Pinout
There are two versions of the DHT11: a sensor and a module.
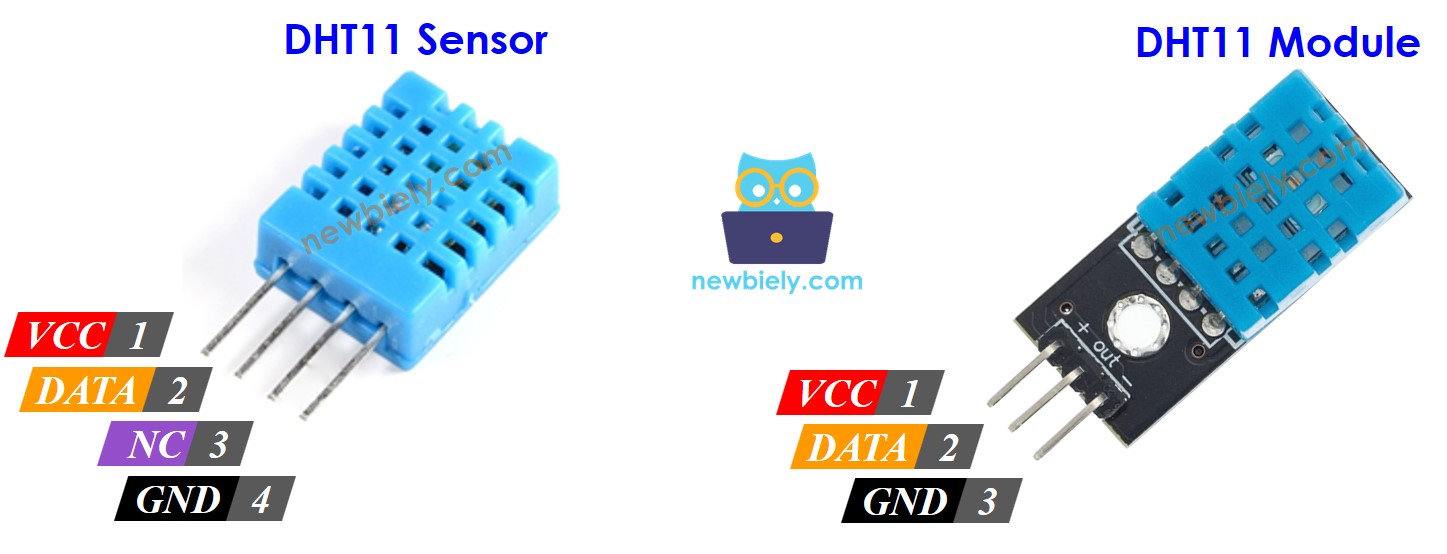
The DHT11 sensor comes with four pins.
- GND pin: connect to GND (0 volts)
- VCC pin: connect to VCC (5 volts or 3.3 volts)
- DATA pin: used for sending information to and from the sensor and ESP32
- NC pin: not used, you can ignore it
The DHT11 module comes with three pins.
- GND pin: connect to GND (0 volts).
- VCC pin: connect to VCC (5 volts or 3.3 volts).
- DATA pin: used for communication between the sensor and ESP32.
Some manufacturers provide the DHT11 sensor as a module with three pins named: GND, VCC, and DATA (or sometimes as -, +, and OUT).
Wiring Diagram
ESP32 - DHT11 Sensor Wiring Diagram
To connect the DHT11 sensor to the ESP32, use a resistor ranging from 5K to 10K Ohms. This resistor keeps the data line high, ensuring good communication between the sensor and the ESP32. We need to use a breadboard in this case.
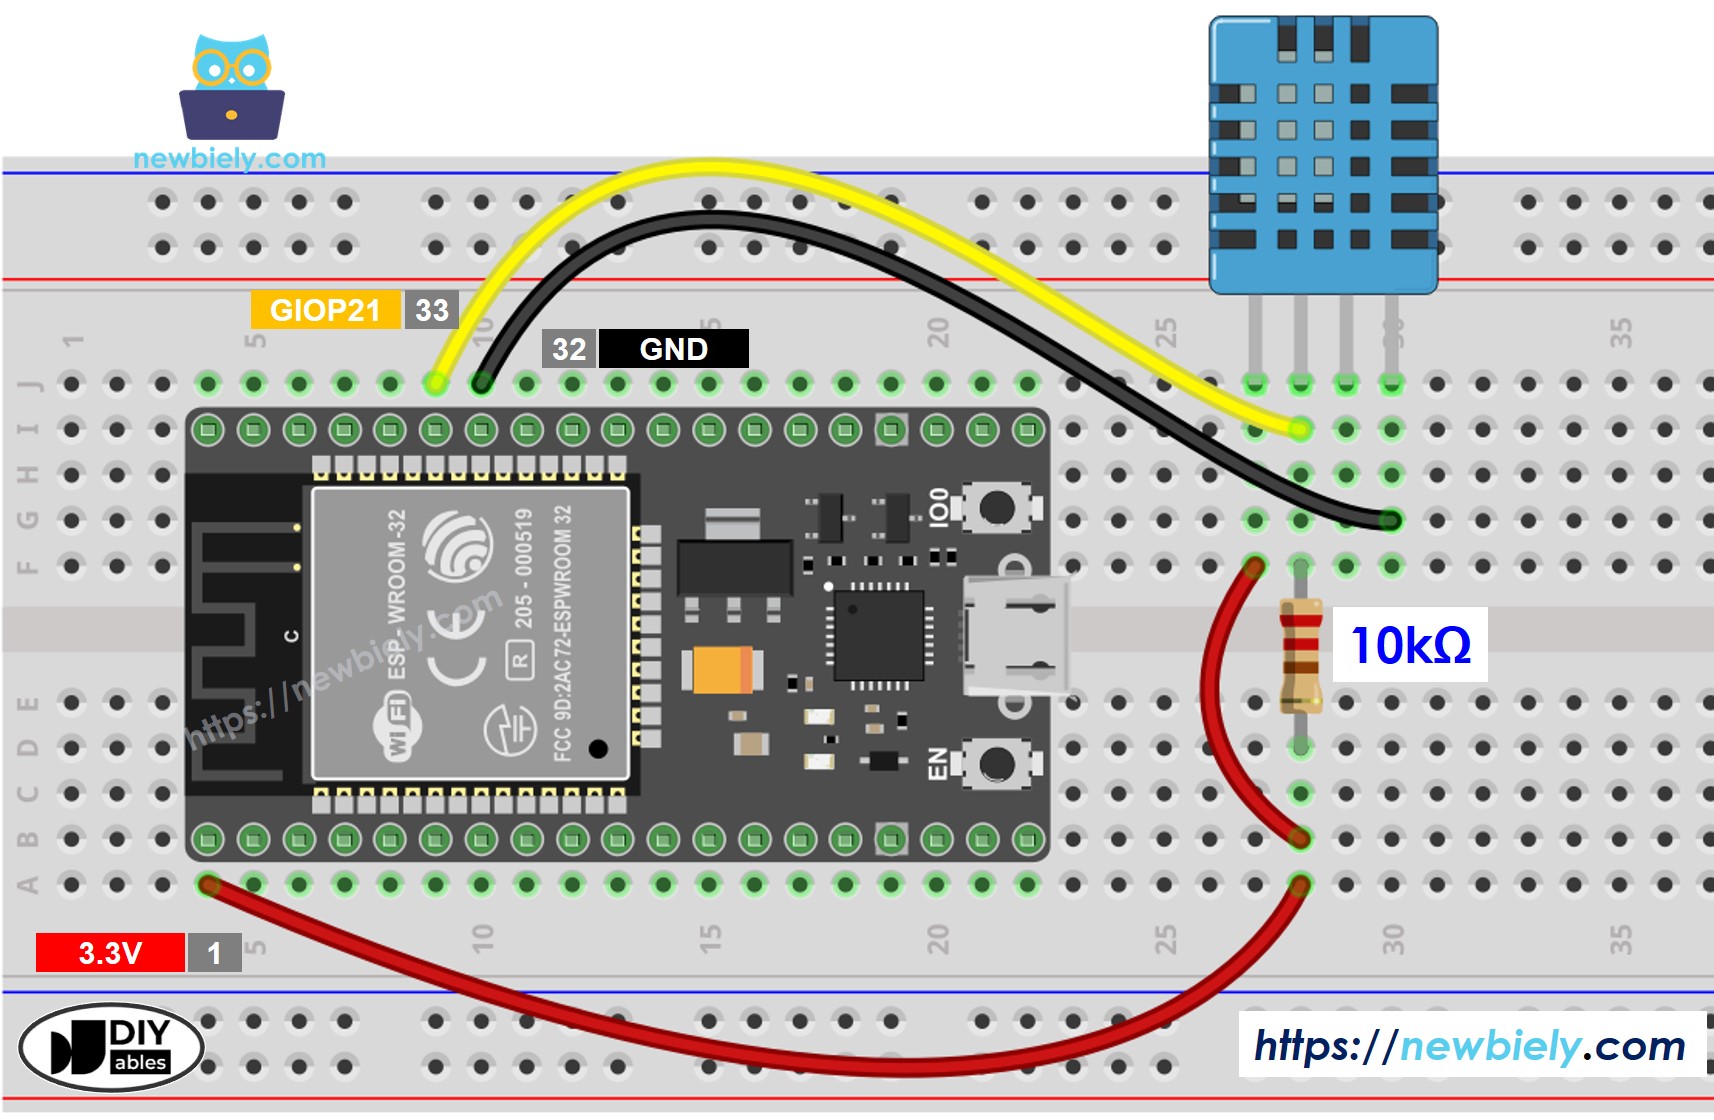
This image is created using Fritzing. Click to enlarge image
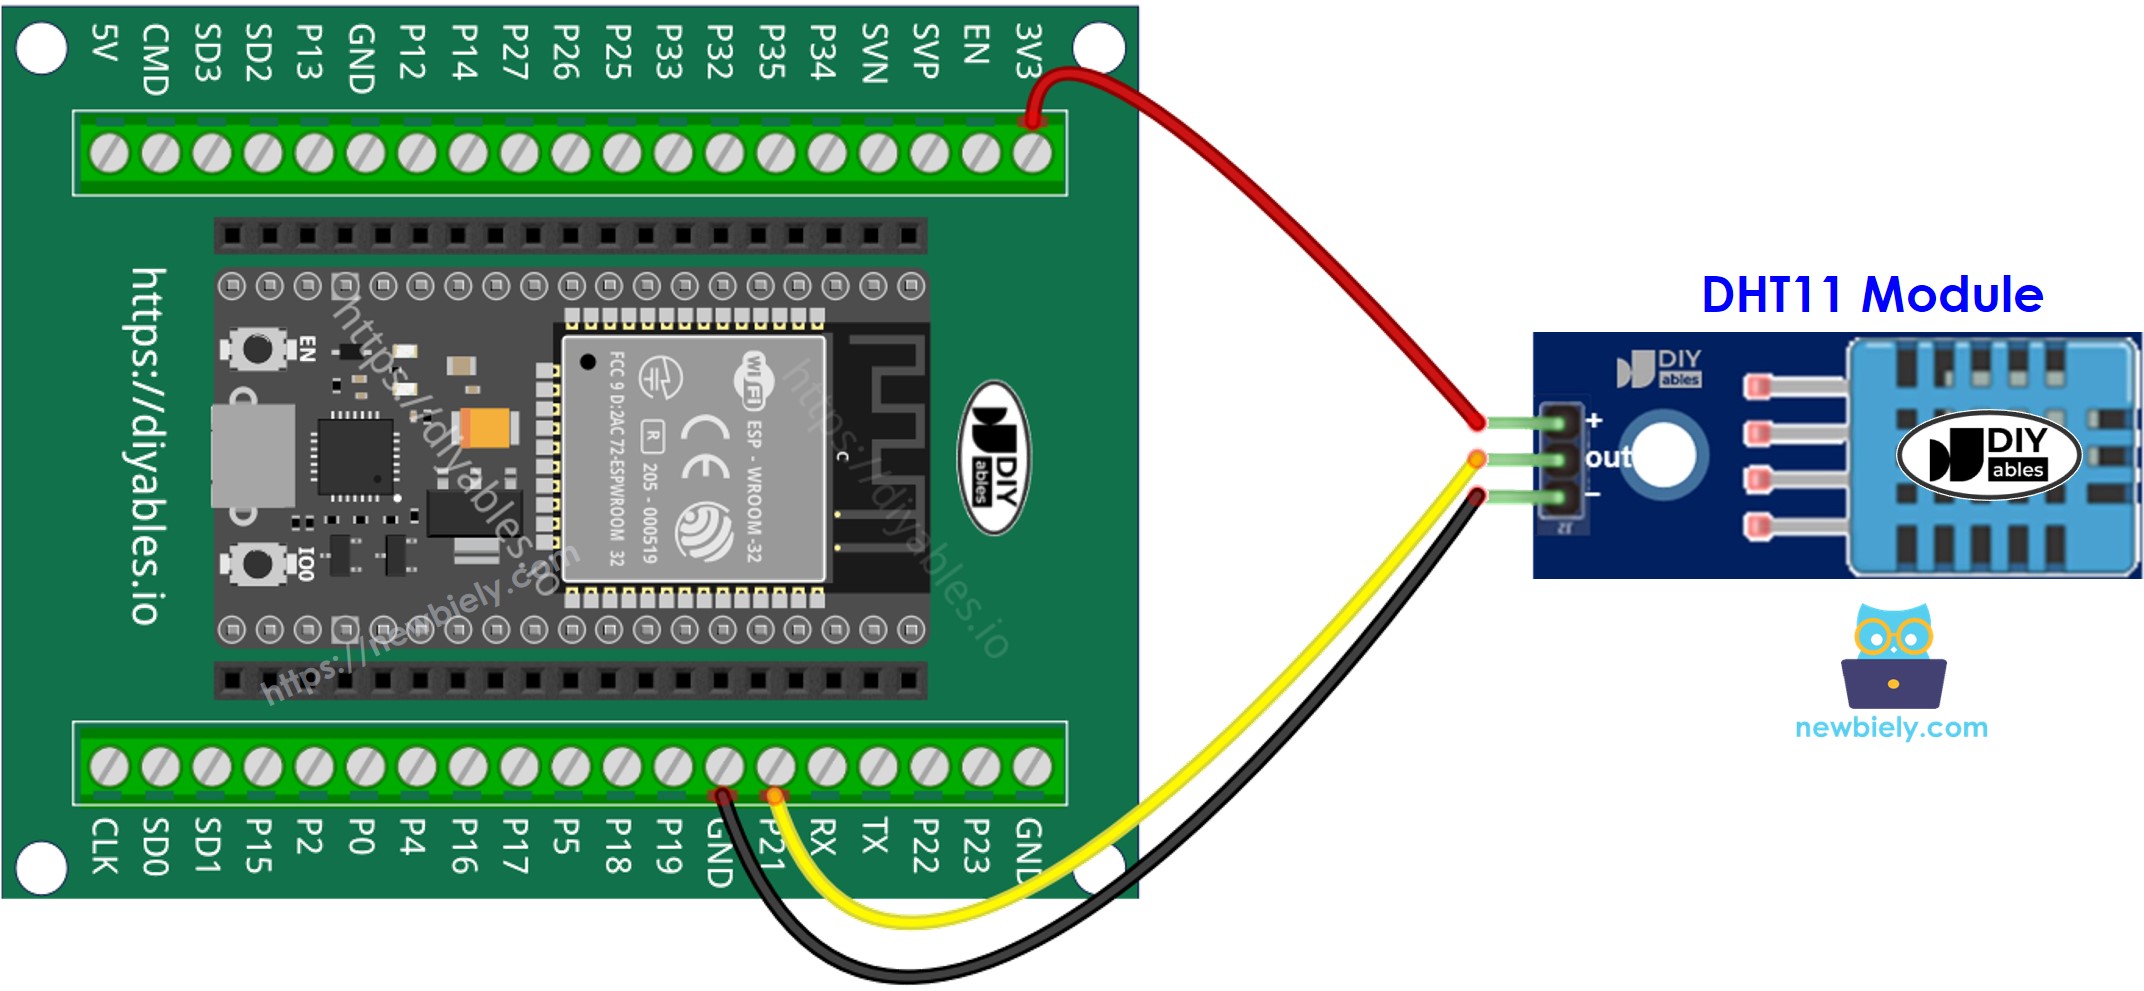
ESP32 - DHT11 Module Wiring Diagram
Most DHT11 sensor modules have a resistor already included, so you don't need to add another one. This simplifies the process of wiring or soldering.
- How to connect ESP32 and DHT11 temperature humidity module using breadboard
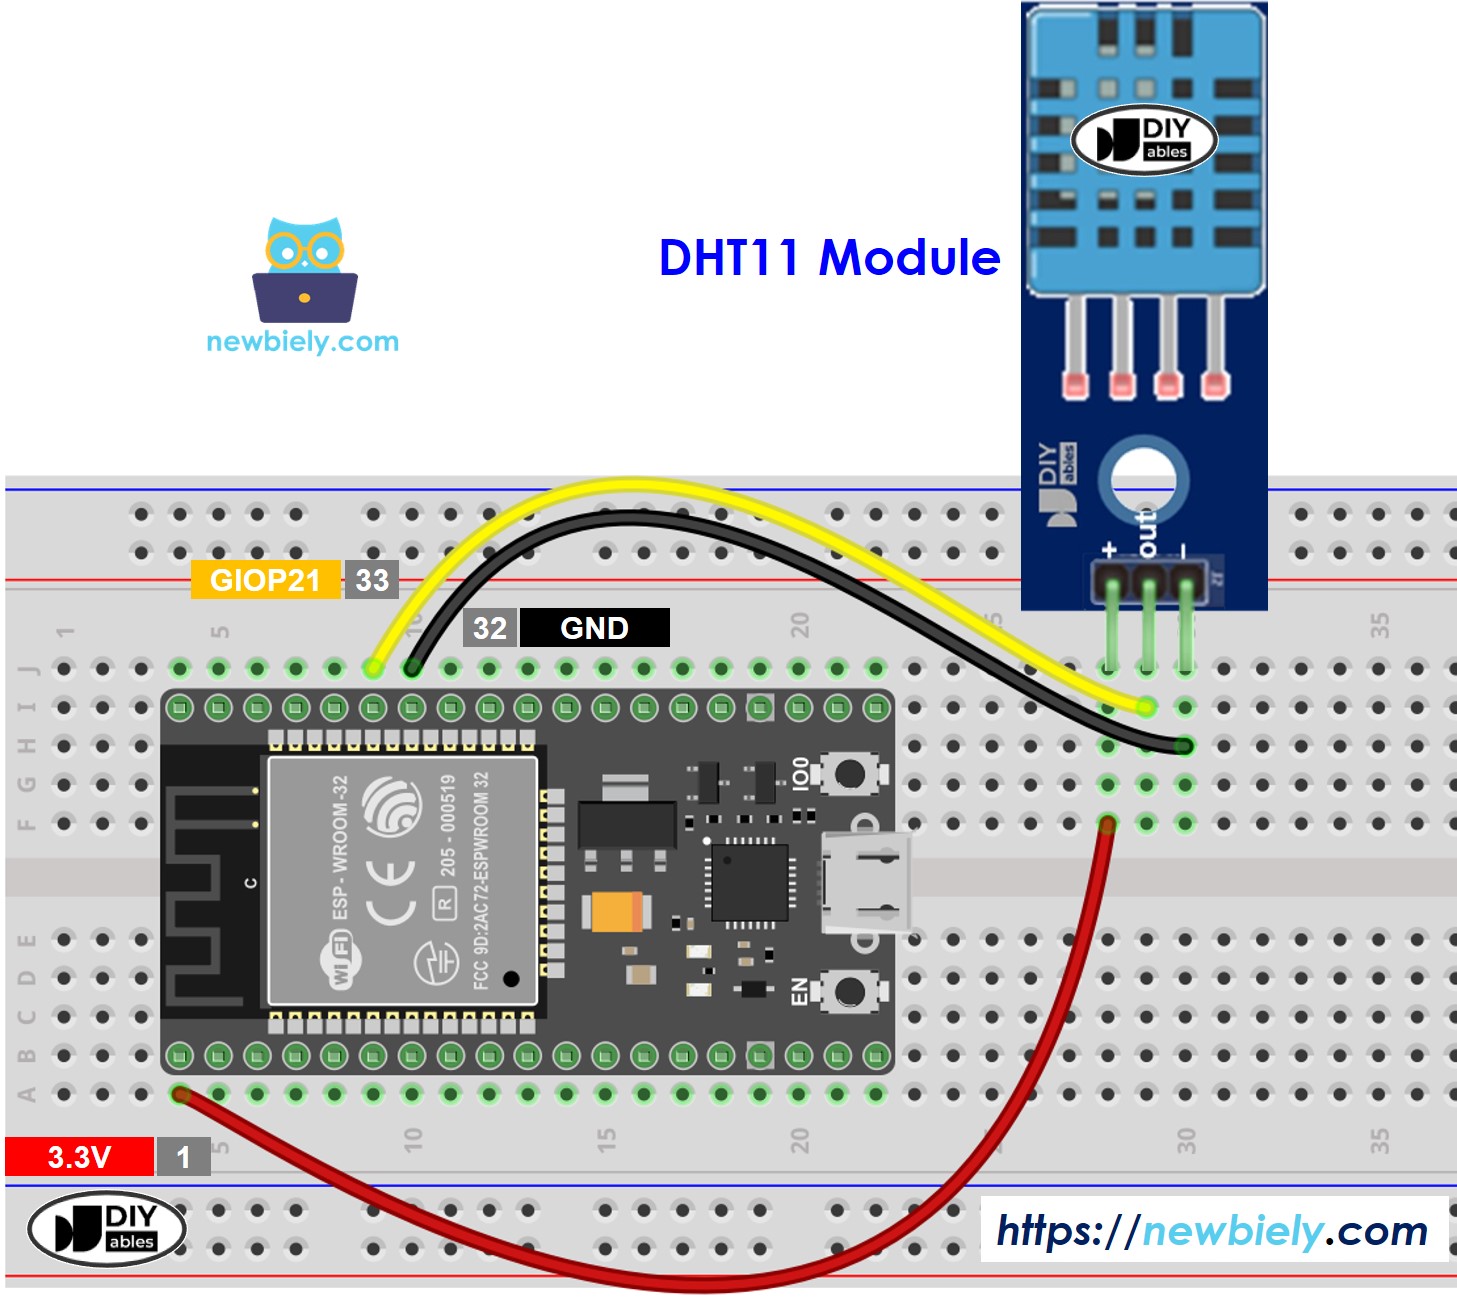
This image is created using Fritzing. Click to enlarge image
- How to connect ESP32 and DHT11 temperature humidity sensor using screw terminal block breakout board
ESP32 MicroPython Code - DHT11
Detailed Instructions
Here’s instructions on how to set up and run your MicroPython code on the ESP32 using Thonny IDE:
- Make sure Thonny IDE is installed on your computer.
- Confirm that MicroPython firmware is loaded on your ESP32 board.
- If this is your first time using an ESP32 with MicroPython, check out the ESP32 MicroPython Getting Started guide for step-by-step instructions.
- Connect the DHT11 sensor/module to ESP32 board according to the provided diagram.
- Connect the ESP32 board to your computer with a USB cable.
- Open Thonny IDE on your computer.
- In Thonny IDE, go to Tools Options.
- Under the Interpreter tab, choose MicroPython (ESP32) from the dropdown menu.
- Make sure the correct port is selected. Thonny IDE usually detects it automatically, but you might need to select it manually (like COM12 on Windows or /dev/ttyACM0 on Linux).
- Copy the provided MicroPython code and paste it into Thonny\'s editor.
- Save the code to your ESP32 by:
- Clicking the Save button or pressing Ctrl+S.
- In the save dialog, choose MicroPython device.
- Name the file main.py.
- Click the green Run button (or press F5) to execute the script.
- Adjust the temperature near the DHT11 sensor to be warmer or cooler.
- Check out the message in the Shell at the bottom of Thonny.