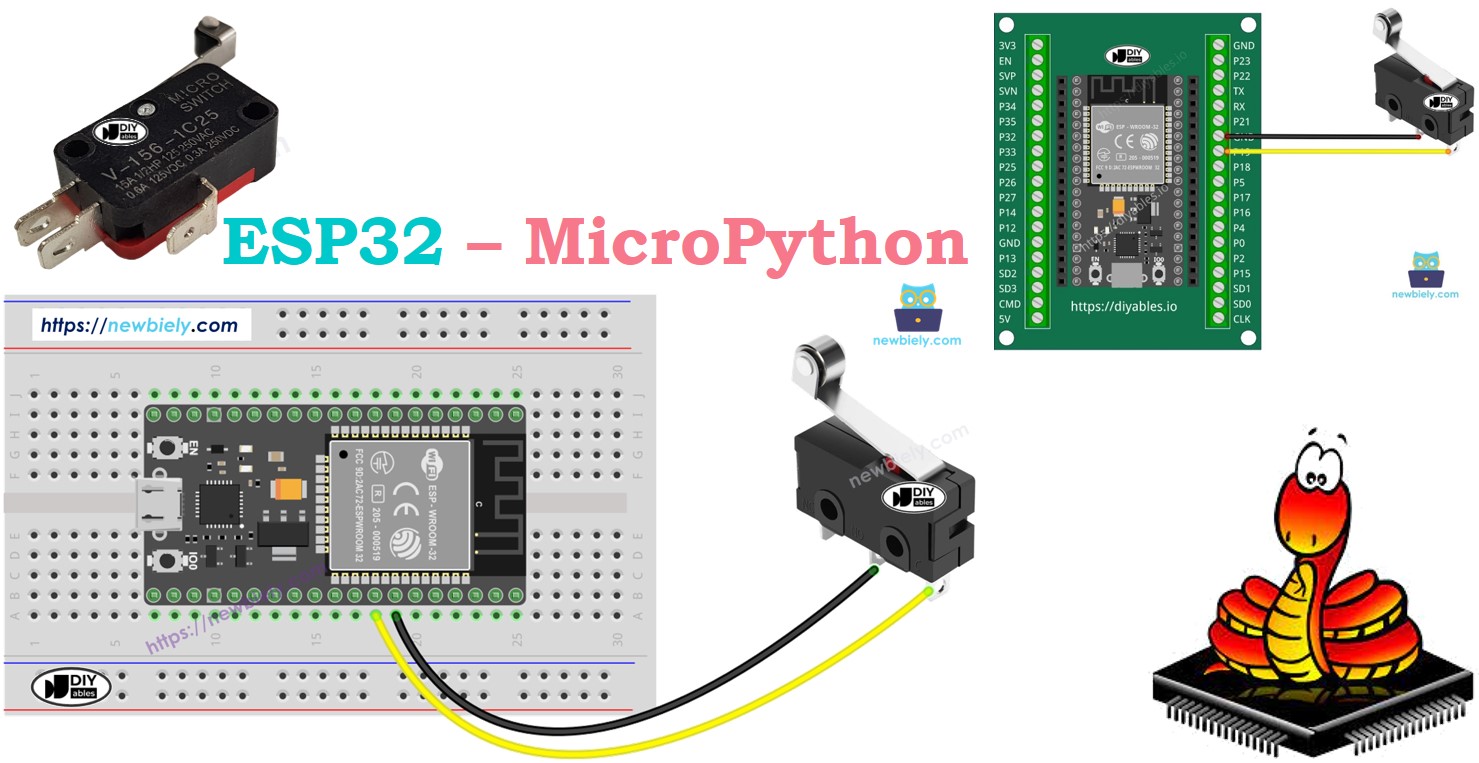
ESP32 MicroPython Limit Switch
This guide shows you how to use a limit switch with the ESP32 and MicroPython. We will cover the following details:
- How to connect the limit switch with the ESP32.
- How to write MicroPython code for the ESP32 to read the limit switch's status.
- How to write MicroPython code for the ESP32 to detect the touched and untouched event from the limit switch.
Hardware Preparation
Or you can buy the following kits:
| 1 | × | DIYables ESP32 Starter Kit (ESP32 included) | |
| 1 | × | DIYables Sensor Kit (18 sensors/displays) |
Additionally, some of these links are for products from our own brand, DIYables .
Overview of Limit Switch
It is called Limit Switch because its main function is to detect when a moving object reaches its endpoint. It is also known as a travel switch. It is also called the travel switch.
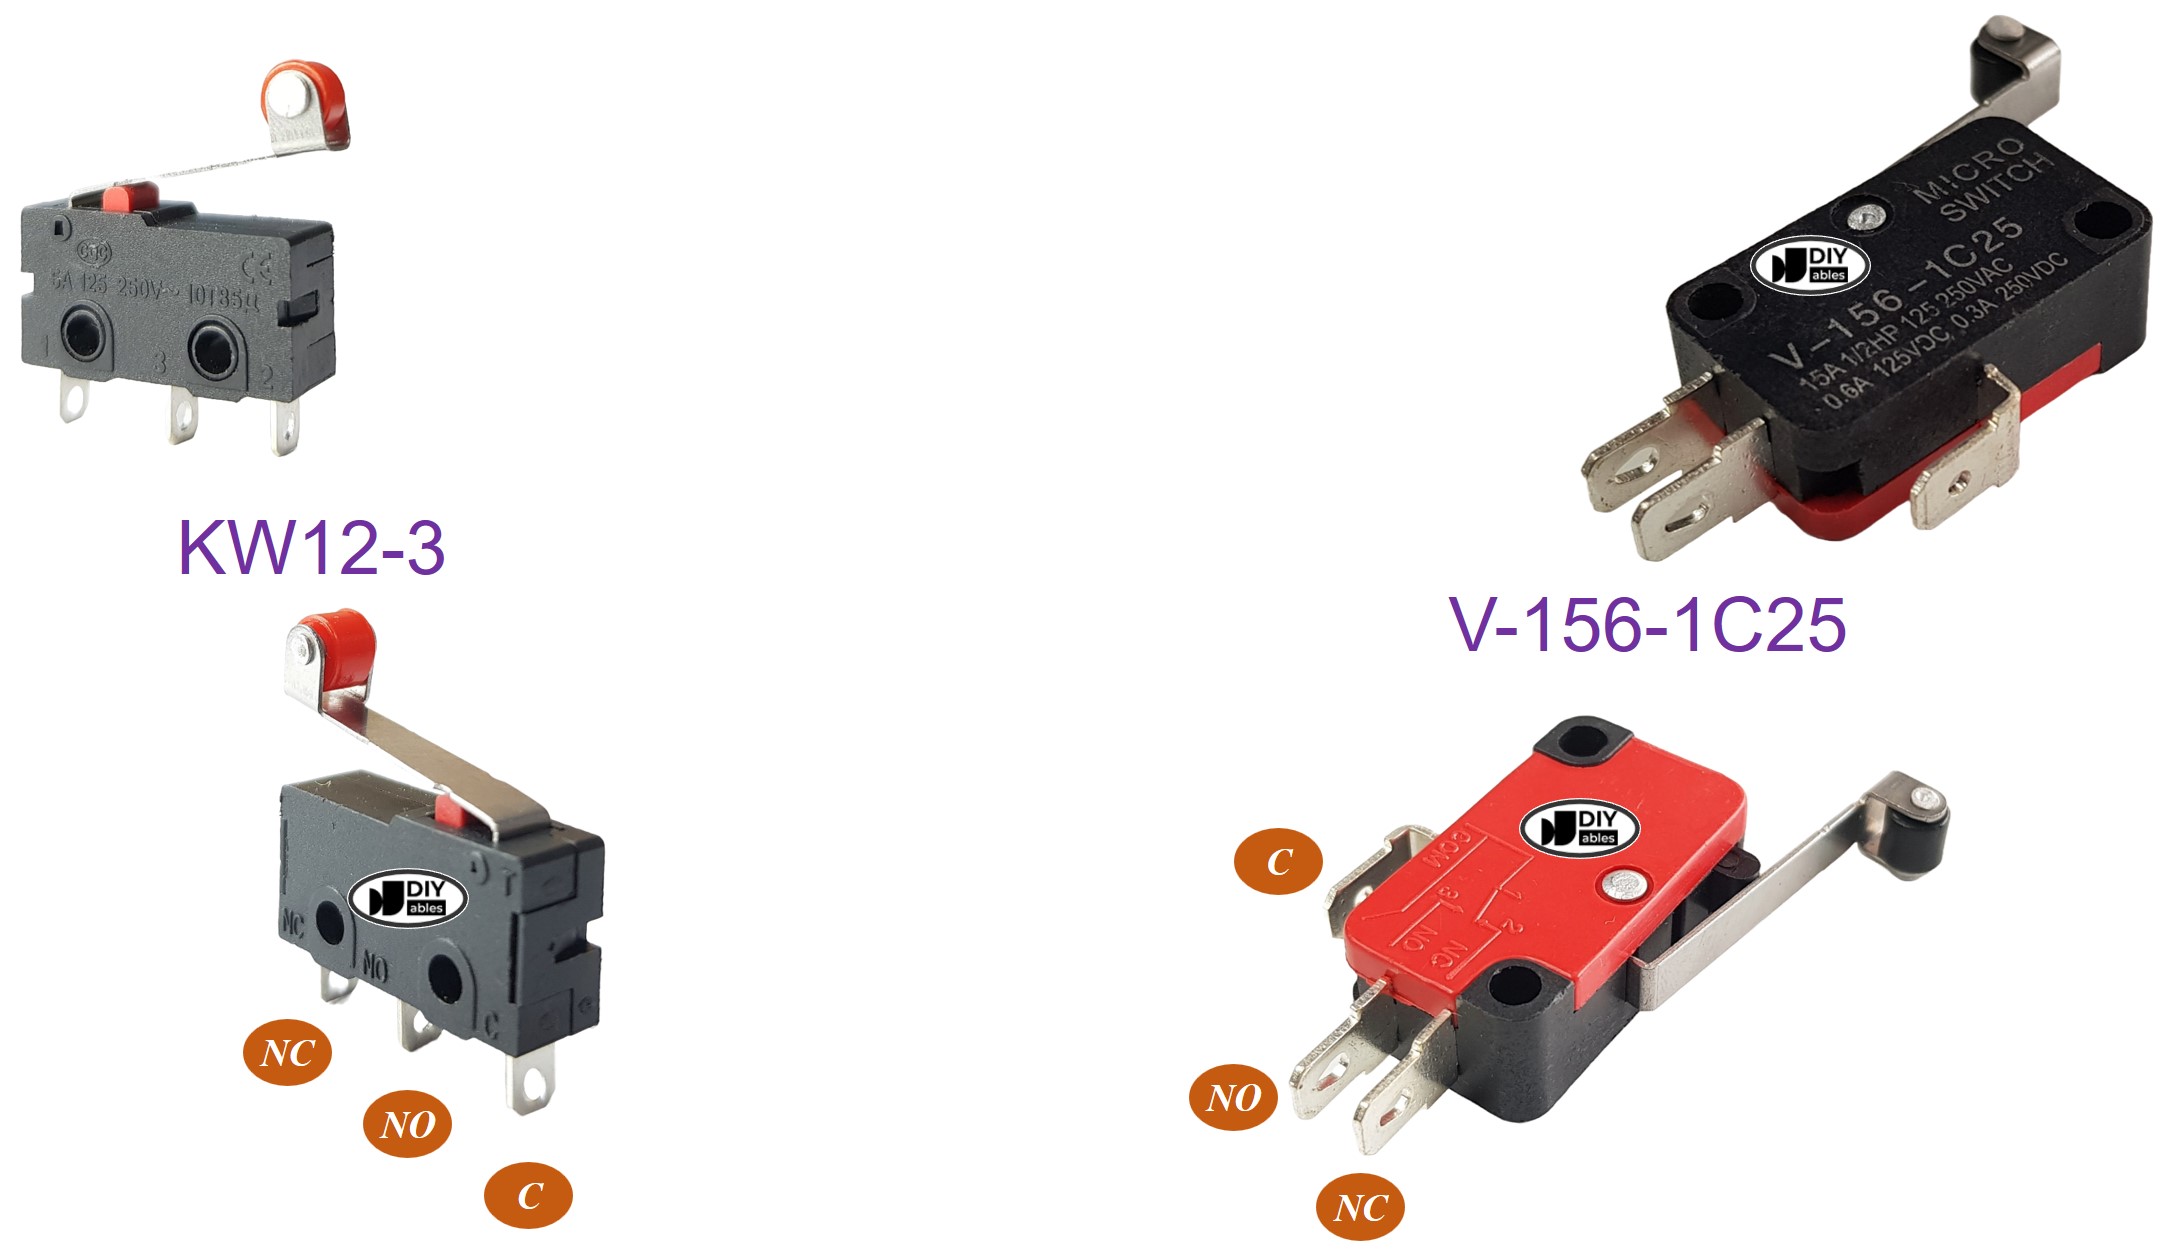
Pinout
Different types of limit switches are commonly used, such as the KW12-3 and V-156-1C25. Each model includes 3 pins.
- C pin: This is the common pin. It is used in both the open and closed settings.
- NO pin: This means the Open pin. It is used when the setting is open.
- NC pin: This means the Closed pin. It is used when the setting is closed.
How It Works
The limit switch has three pins, but usually, only two pins are used: the C pin and one of the other two pins. There are four ways to connect the limit switch. Here is a table showing the wiring of the limit switch and its readings on the ESP32 for all four methods:
| C pin | NO pin | NC pin | ESP32 Input Pin's State | |
|---|---|---|---|---|
| 1 | GND | ESP32 Input Pin (with pull-up) | NOT connected | HIGH when untouched, LOW when touched |
| 2 | GND | NOT connected | ESP32 Input Pin (with pull-up) | LOW when untouched, HIGH when touched |
| 3 | VCC | ESP32 Input Pin (with pull-down) | NOT connected | LOW when untouched, HIGH when touched |
| 4 | VCC | NOT connected | ESP32 Input Pin (with pull-down) | HIGH when untouched, LOW when touched |
We can change the positions of the GND pin and the input pin on the ESP32 for each method. This provides us with 8 different methods to connect the ESP32 to a limit switch.
We only need to choose one of the four methods mentioned earlier. For this tutorial, we will use the first method.
Wiring Diagram
- How to connect ESP32 and limit switch using breadboard
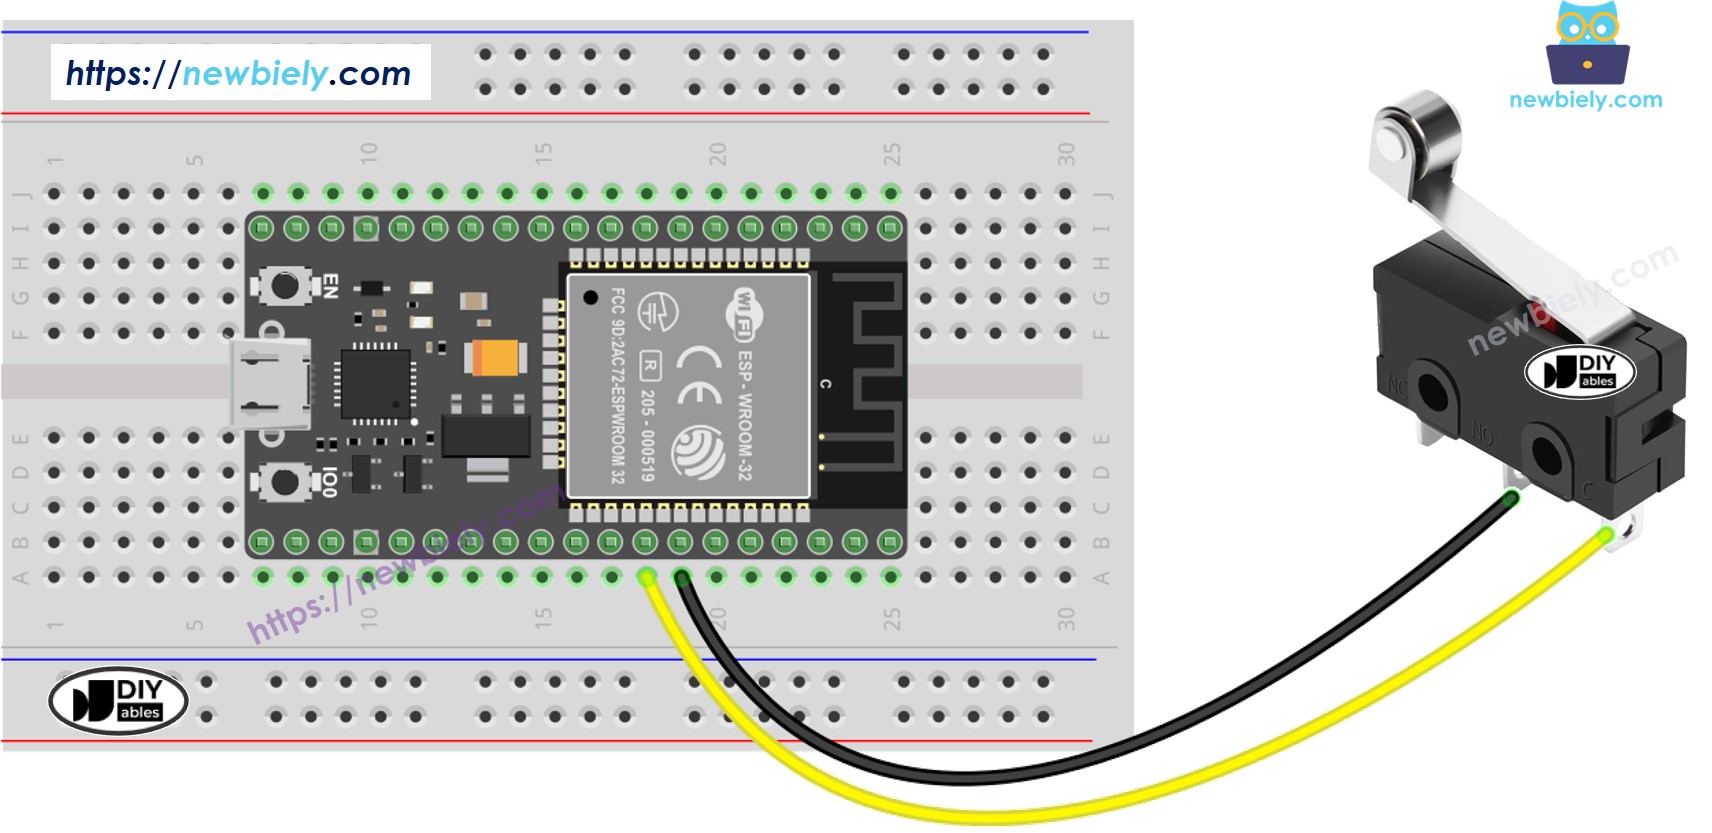
This image is created using Fritzing. Click to enlarge image
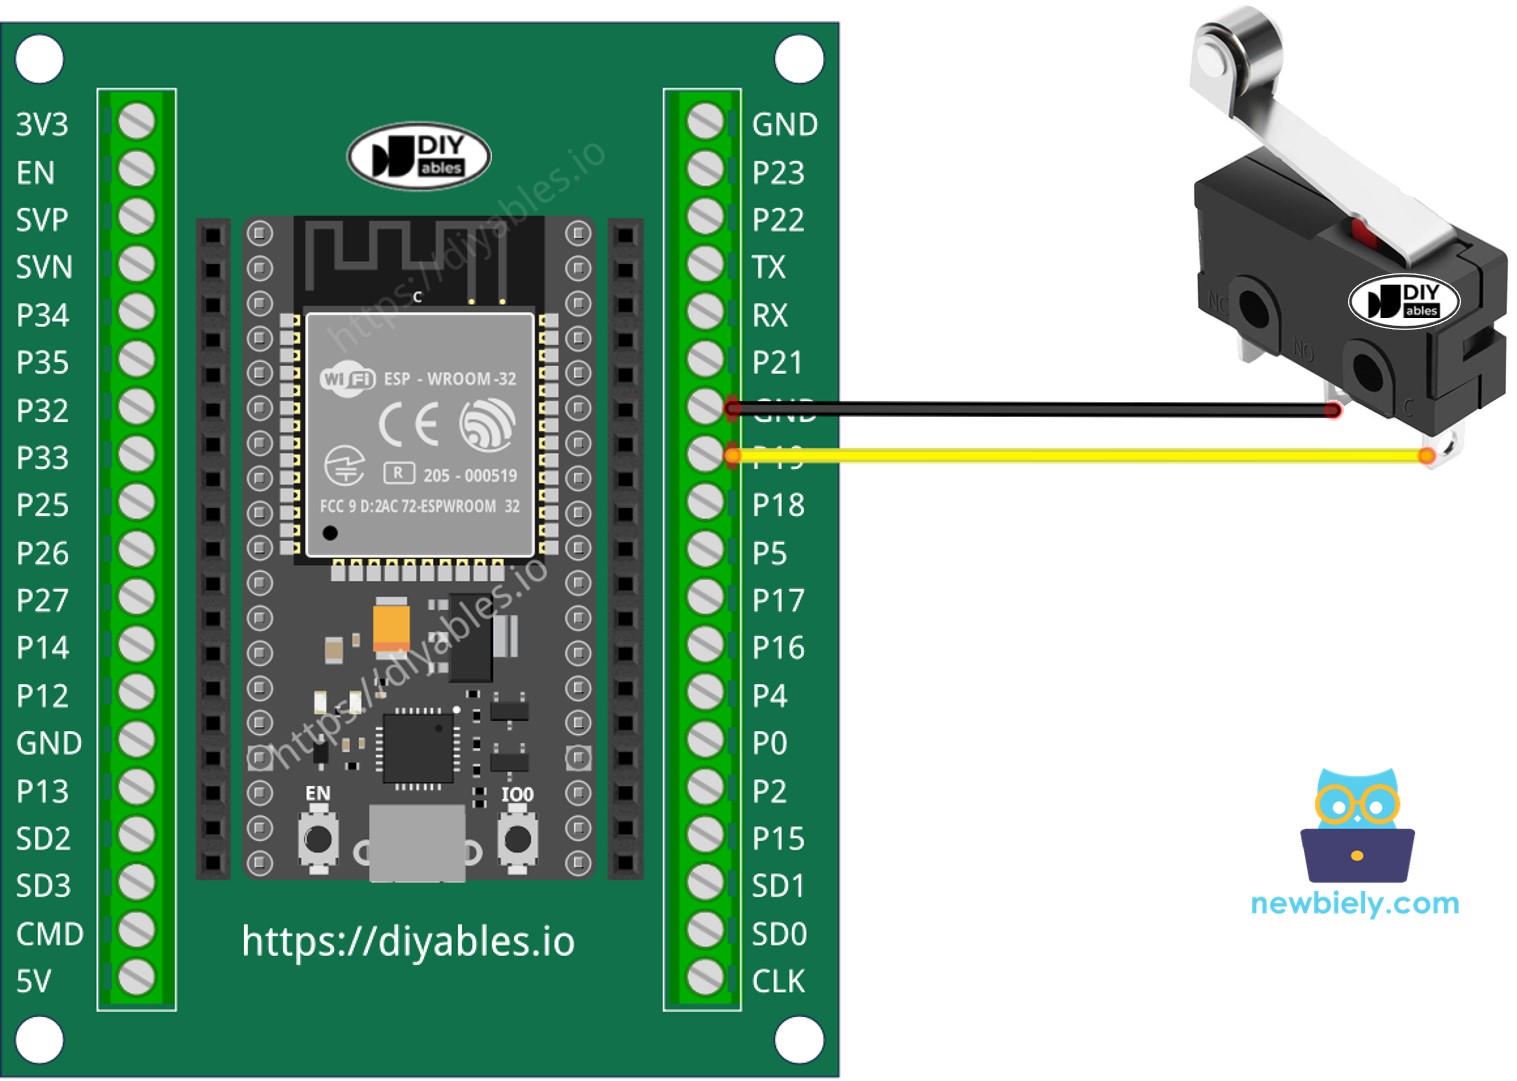
- How to connect ESP32 and limit switch using screw terminal block breakout board
ESP32 MicroPython Code - Limit Switch
A limit switch, similar to a button, requires debouncing to function properly. Debouncing can make the code more complex. Fortunately, the DIYables_MicroPython_Button library provides a debouncing feature and includes an internal pull-up resistor, which simplifies the programming process.
Here are two usual situations:
- The first: If the switch is TOUCHED, do something. If it is UNTOUCHED, do the opposite.
- The second: If the switch goes from UNTOUCHED to TOUCHED or from TOUCHED to UNTOUCHED, do something.
Let's see how to write the MicroPython script in both cases.
ESP32 MicroPython Code - Read Limit Switch's State
Detailed Instructions
Here’s instructions on how to set up and run your MicroPython code on the ESP32 using Thonny IDE:
- Make sure Thonny IDE is installed on your computer.
- Confirm that MicroPython firmware is loaded on your ESP32 board.
- If this is your first time using an ESP32 with MicroPython, check out the ESP32 MicroPython Getting Started guide for step-by-step instructions.
- Connect the ESP32 board to the limit switch according to the provided diagram.
- Connect the ESP32 board to your computer with a USB cable.
- Open Thonny IDE on your computer.
- In Thonny IDE, go to Tools Options.
- Under the Interpreter tab, choose MicroPython (ESP32) from the dropdown menu.
- Make sure the correct port is selected. Thonny IDE usually detects it automatically, but you might need to select it manually (like COM12 on Windows or /dev/ttyACM0 on Linux).
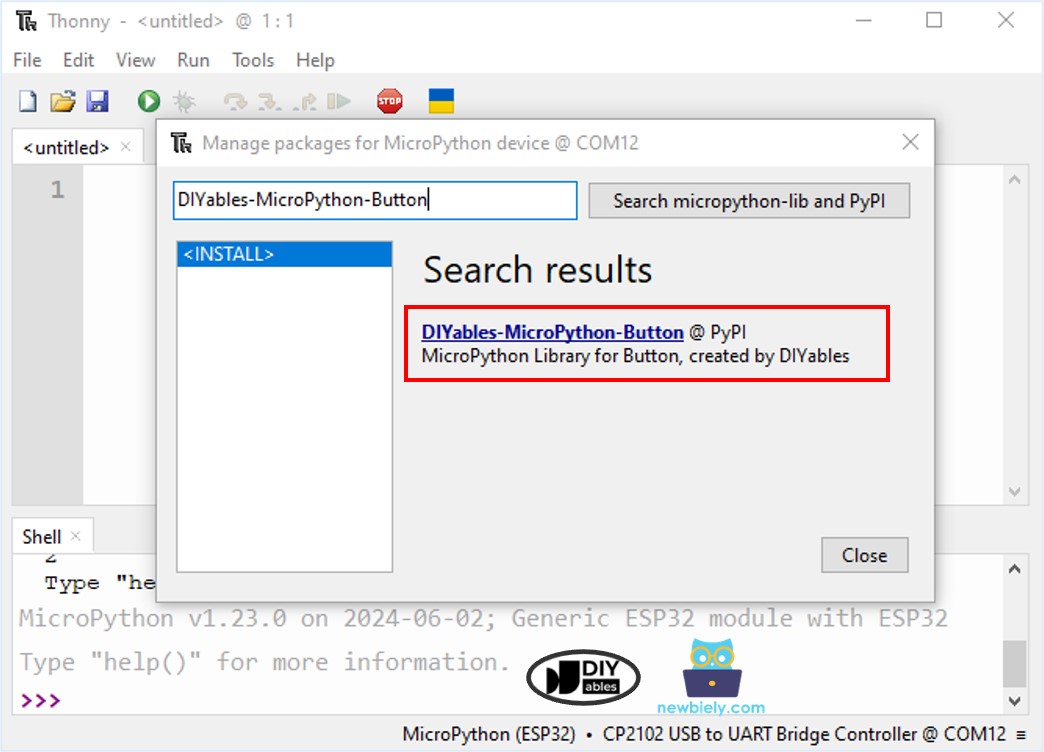
- On Thonny IDE, navigate to the Tools Manage packages on the Thonny IDE.
- Search “DIYables-MicroPython-Button”, then find the Button library created by DIYables.
- Click on DIYables-MicroPython-Button, then click Install button to install Button library.
- Copy the provided MicroPython code and paste it into Thonny's editor.
- Save the code to your ESP32 by:
- Clicking the Save button or pressing Ctrl+S.
- In the save dialog, choose MicroPython device.
- Name the file main.py.
- Click the green Run button (or press F5) to execute the script.
- Press, hold, then release the limit switch while checking out the message in the Shell at the bottom of Thonny.
ESP32 MicroPython Code - Check Limit Switch's touched/untouched event
- Copy the above code and paste it to the Thonny IDE's editor.
- Save the script to your ESP32
- Click the green Run button (or press F5) to run the script. The script will execute.
- Press, hold, then release the limit switch while checking out the message in the Shell at the bottom of Thonny.