ESP32 MicroPython Control Pump
In this guide, you will learn how to use a 12V pump with a ESP32 and MicroPython. In detail, we will learn:
- How to connect pump to ESP32
- How to write MicroPython code for ESP32 to turn the pump on and off
This tutorial will help you create systems for watering plants, aquariums, or water refill stations.
Hardware Preparation
Or you can buy the following kits:
| 1 | × | DIYables ESP32 Starter Kit (ESP32 included) | |
| 1 | × | DIYables Sensor Kit (18 sensors/displays) |
Additionally, some of these links are for products from our own brand, DIYables .
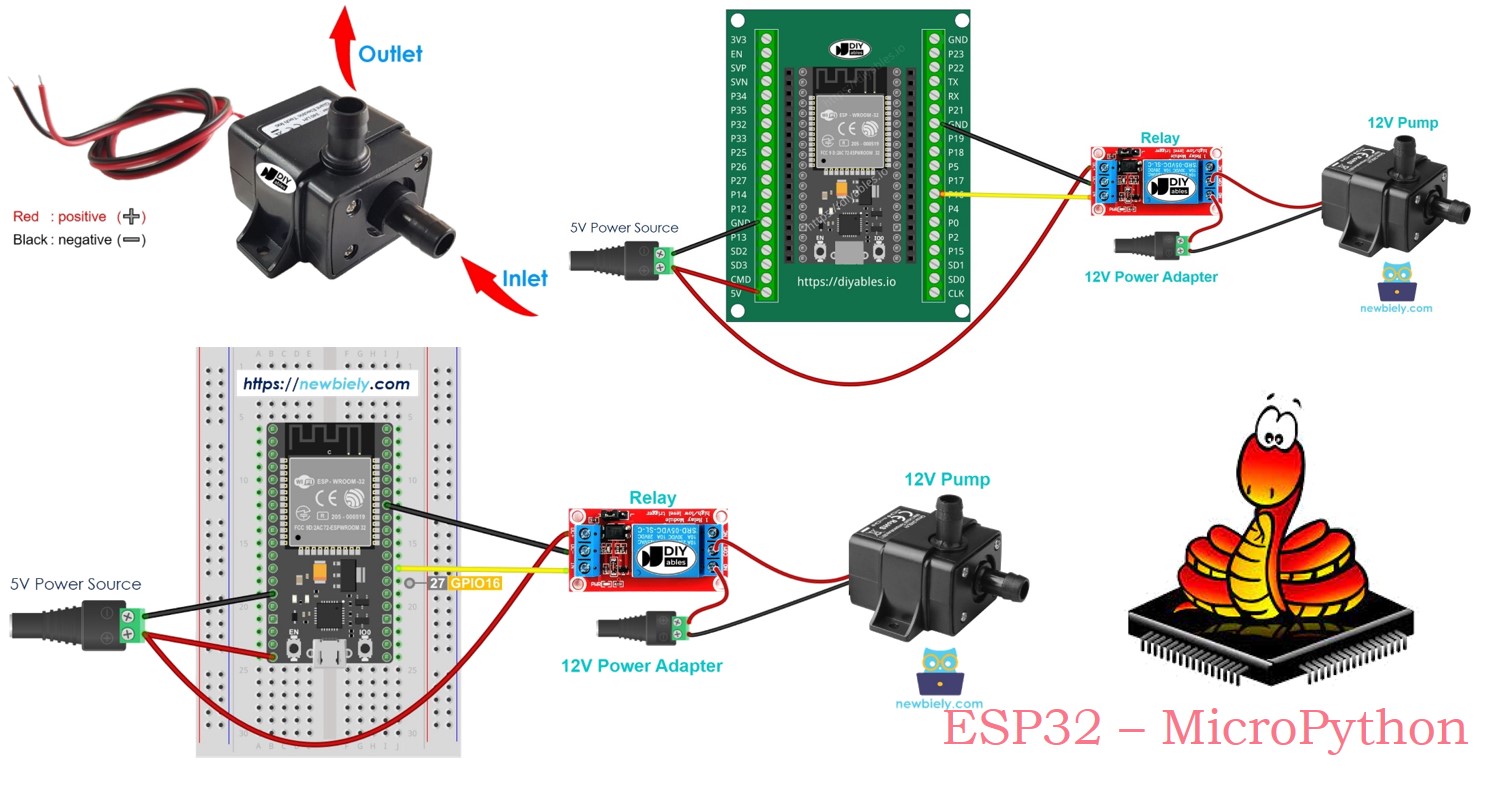
Overview of 12V Pump
Pinout
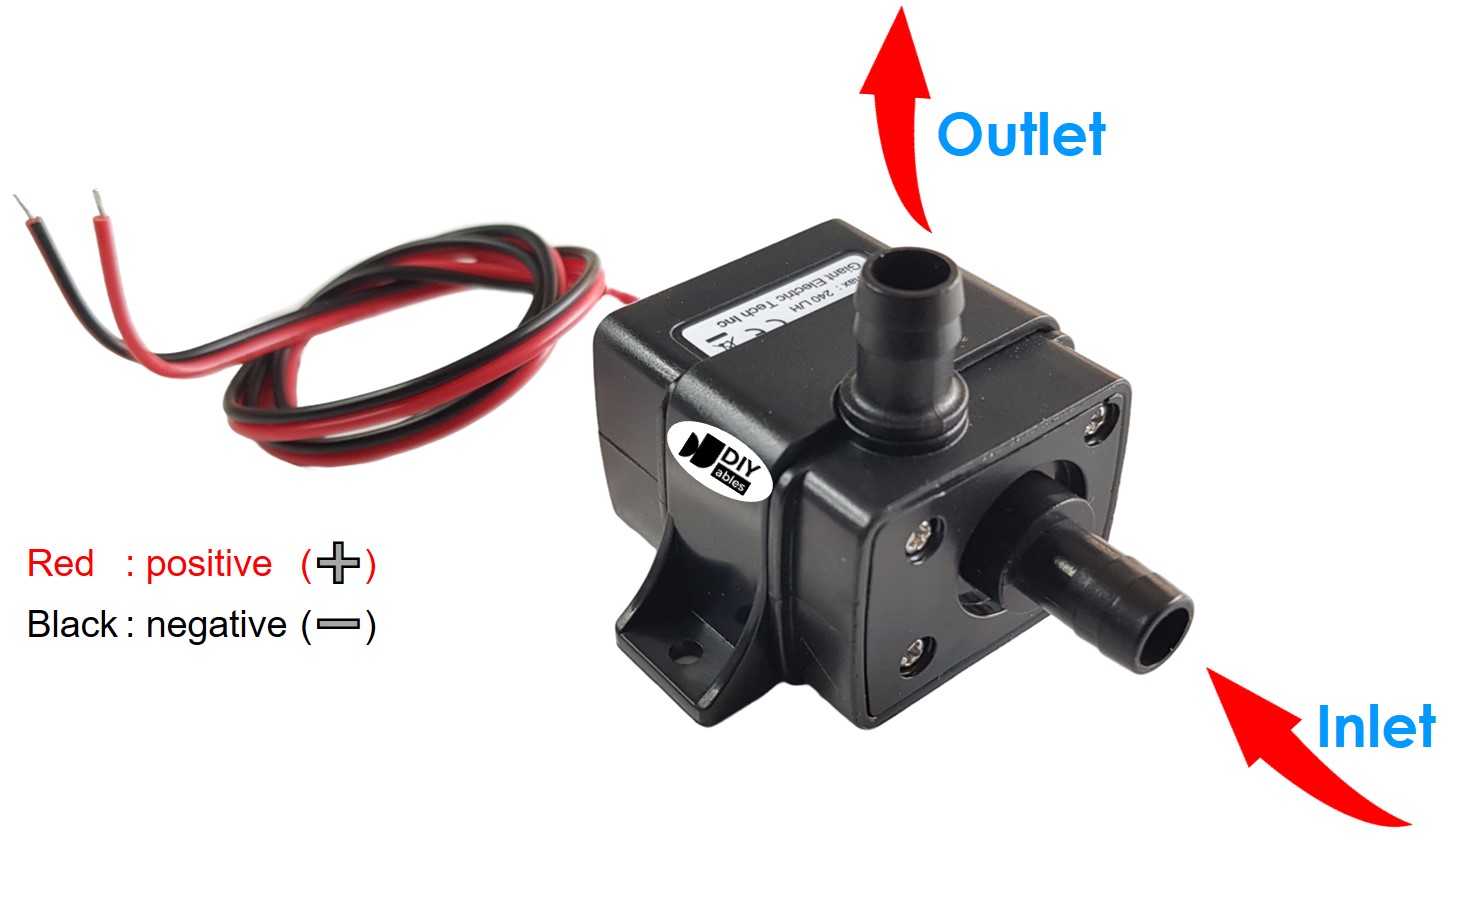
A 12V pump usually has two pins.
- Connect the negative (-) pin (black) to the GND on the DC power supply.
- Connect the positive (+) pin (red) to the 12V on the DC power supply.
How to Control Pump
A 12V power supply works perfectly for a 12V pump. To control the pump with an ESP32, connect a relay between them. The ESP32 will use the relay to turn the pump on and off. If you're new to relay or MicroPython programming for the ESP32, I recommend checking out the below tutorial:
Wiring Diagram
- How to connect ESP32 and controls pump using breadboard (powered via USB cable)
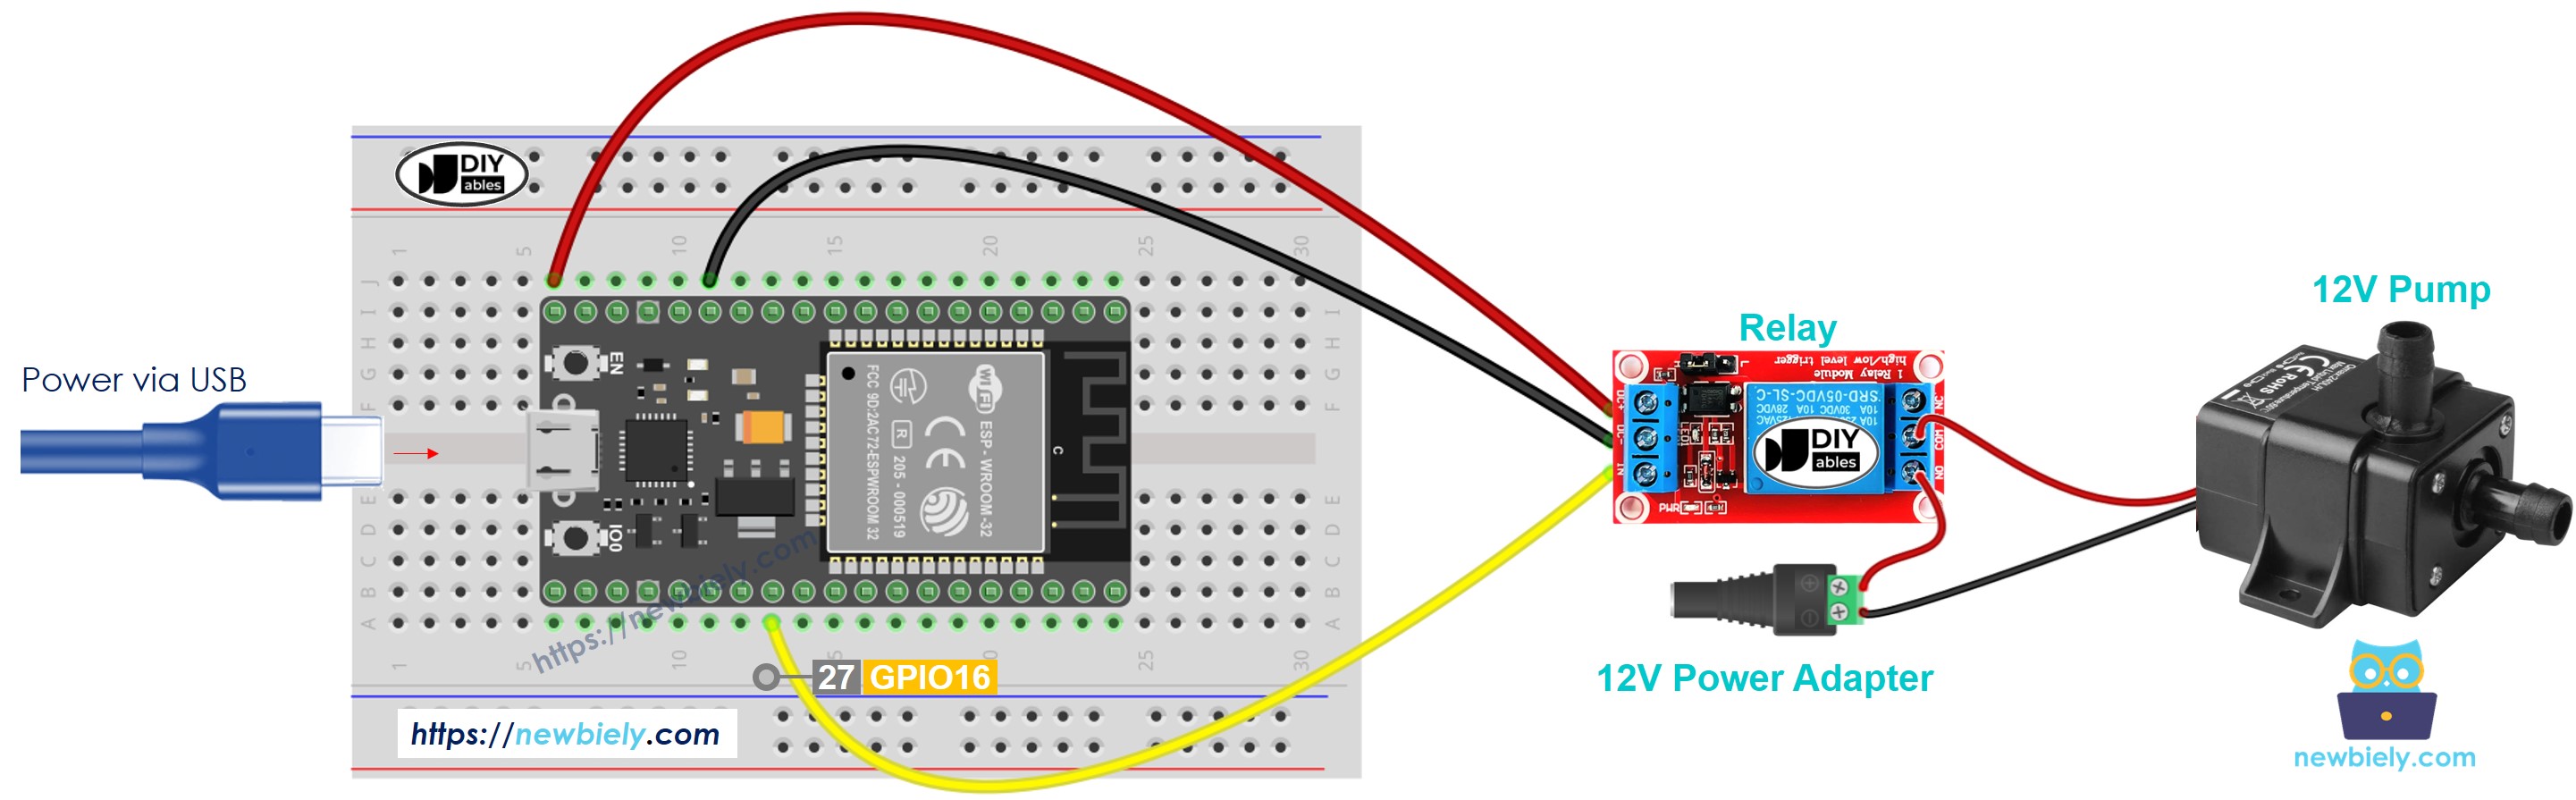
This image is created using Fritzing. Click to enlarge image
- How to connect ESP32 and controls pump using breadboard (powered via Vin pin)
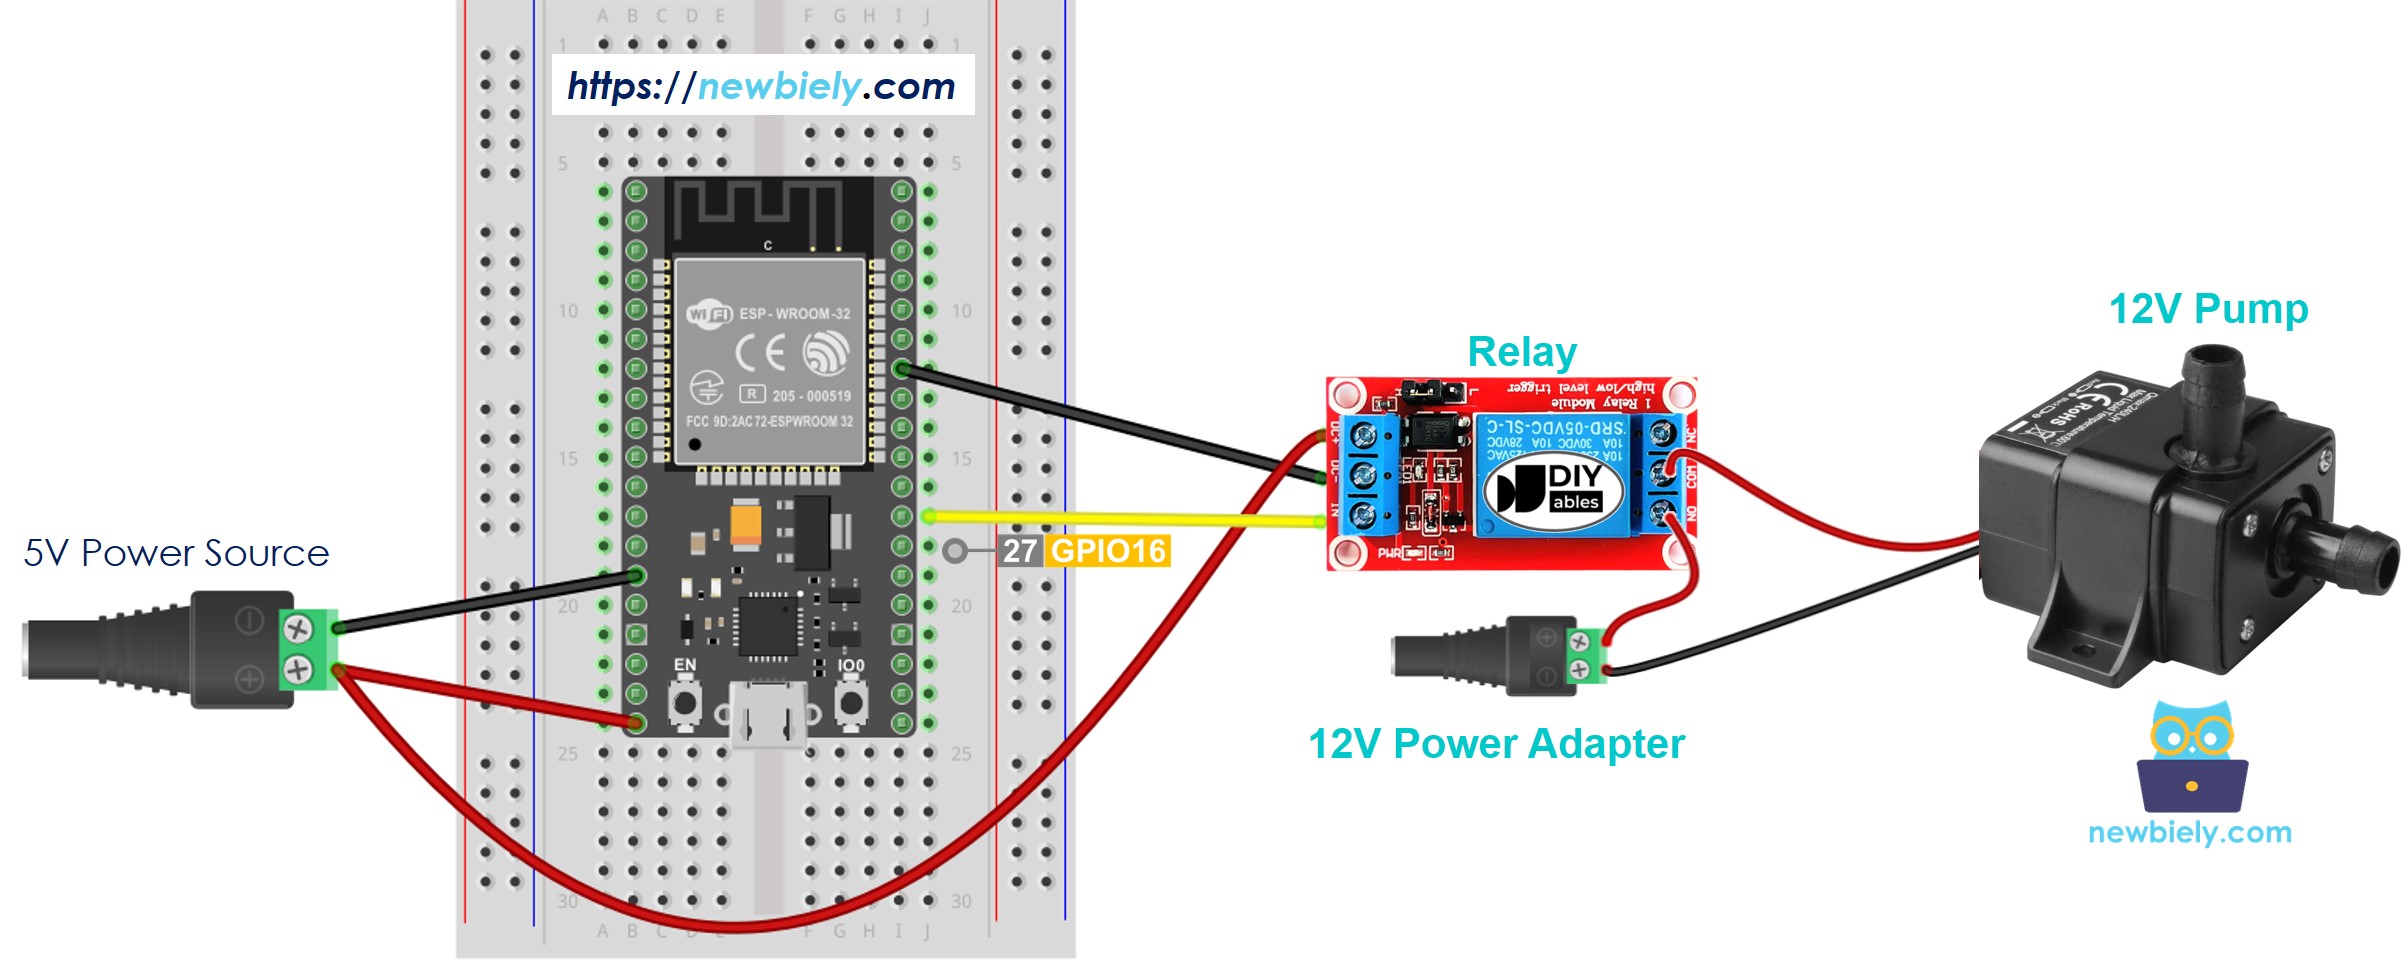
This image is created using Fritzing. Click to enlarge image
- How to connect ESP32 and controls pump using screw terminal block breakout board (powered via USB cable)
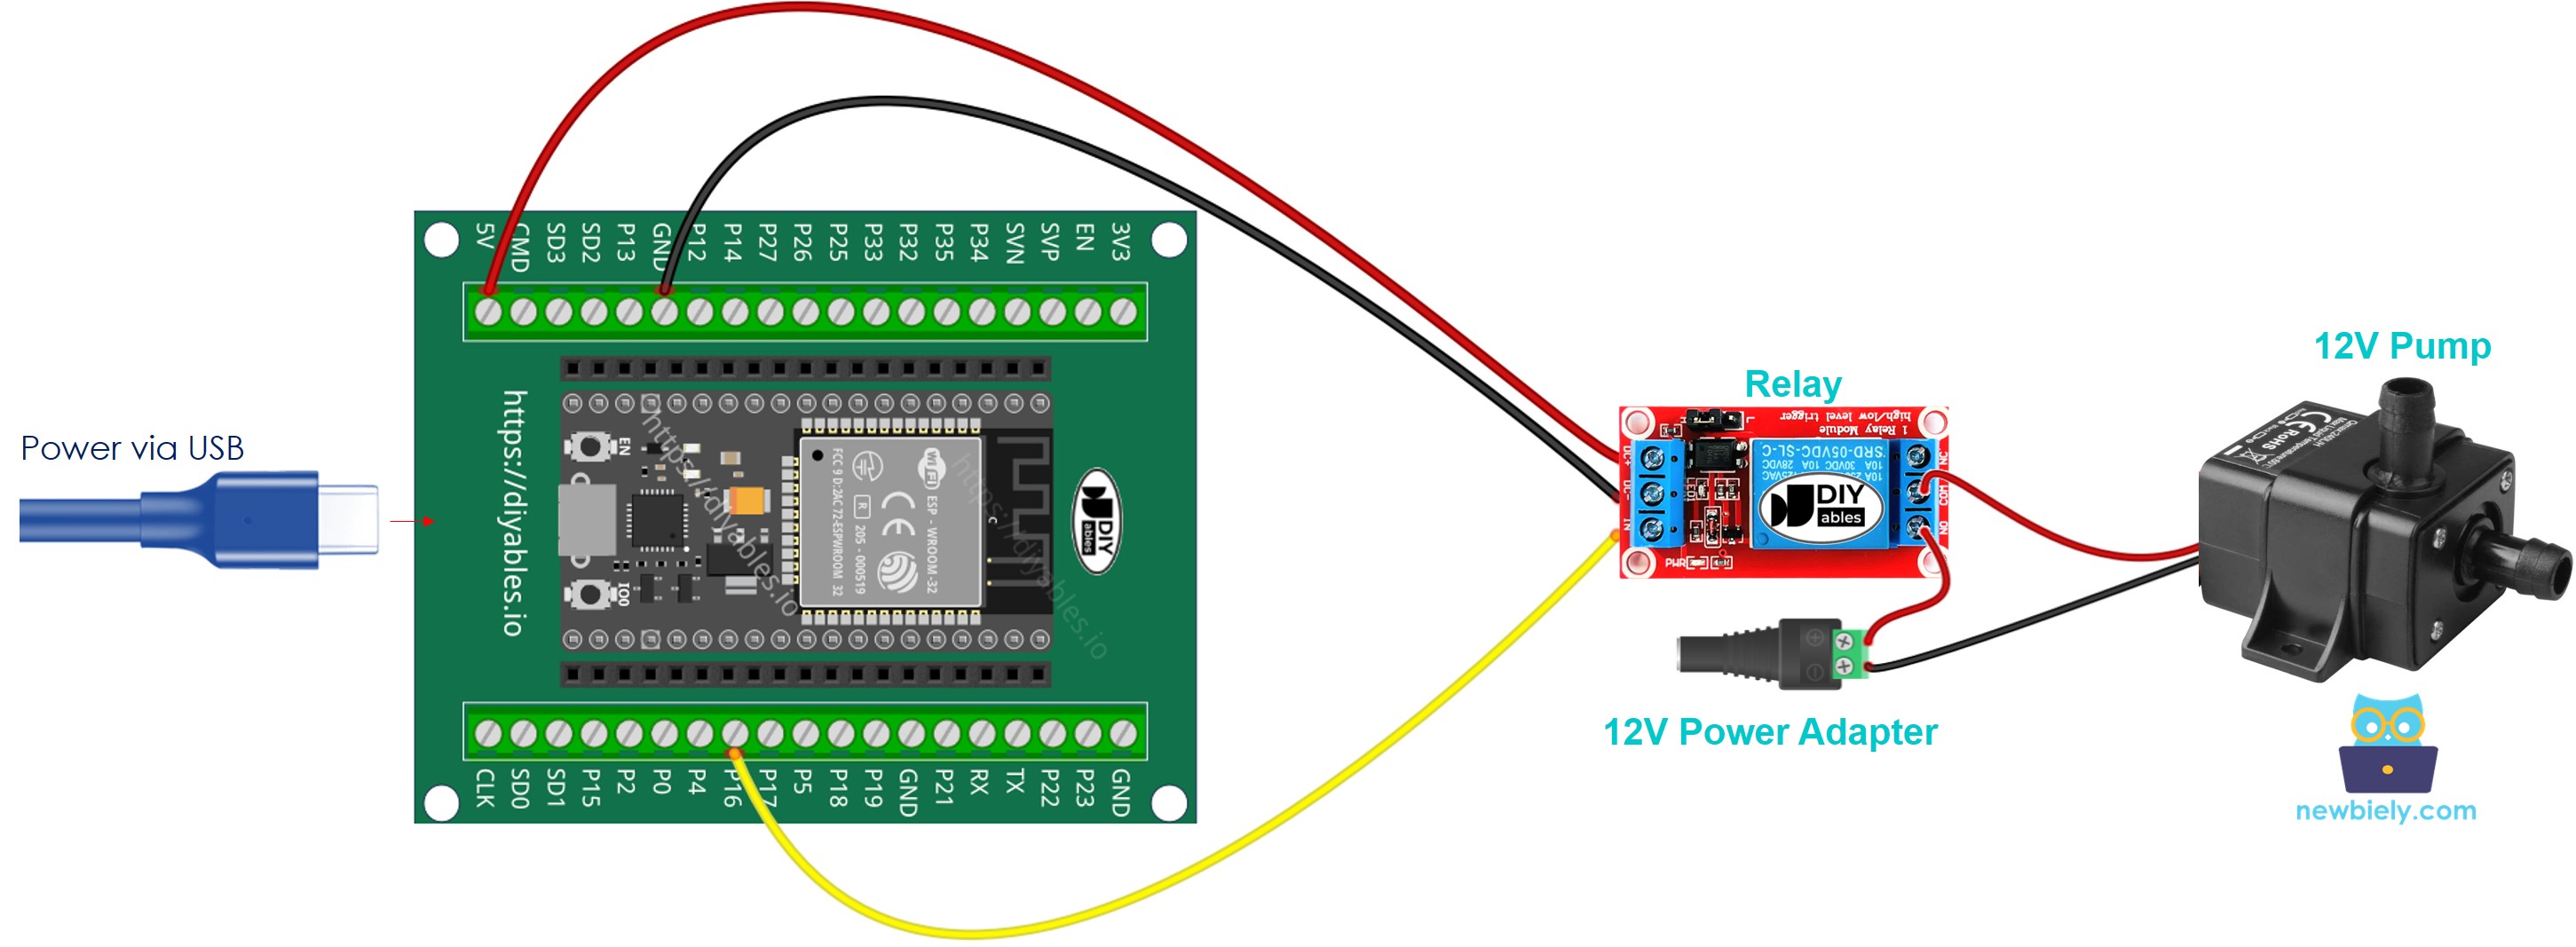
- How to connect ESP32 and controls pump using screw terminal block breakout board (powered via Vin pin)

ESP32 MicroPython Code
The code below turns the pump ON for five seconds and OFF for five cycles.
Detailed Instructions
Here’s instructions on how to set up and run your MicroPython code on the ESP32 using Thonny IDE:
- Make sure Thonny IDE is installed on your computer.
- Confirm that MicroPython firmware is loaded on your ESP32 board.
- If this is your first time using an ESP32 with MicroPython, check out the ESP32 MicroPython Getting Started guide for step-by-step instructions.
- Connect the ESP32 board to the 12V pump according to the provided diagram.
- Connect the ESP32 board to your computer with a USB cable.
- Open Thonny IDE on your computer.
- In Thonny IDE, go to Tools Options.
- Under the Interpreter tab, choose MicroPython (ESP32) from the dropdown menu.
- Make sure the correct port is selected. Thonny IDE usually detects it automatically, but you might need to select it manually (like COM12 on Windows or /dev/ttyACM0 on Linux).
- Copy the provided MicroPython code and paste it into Thonny's editor.
- Save the code to your ESP32 by:
- Clicking the Save button or pressing Ctrl+S.
- In the save dialog, choose MicroPython device.
- Name the file main.py.
- Click the green Run button (or press F5) to execute the script.
- Verify that the pump is working correctly.
Code Explanation
The comments in the ESP32 MicroPython code above explain everything.