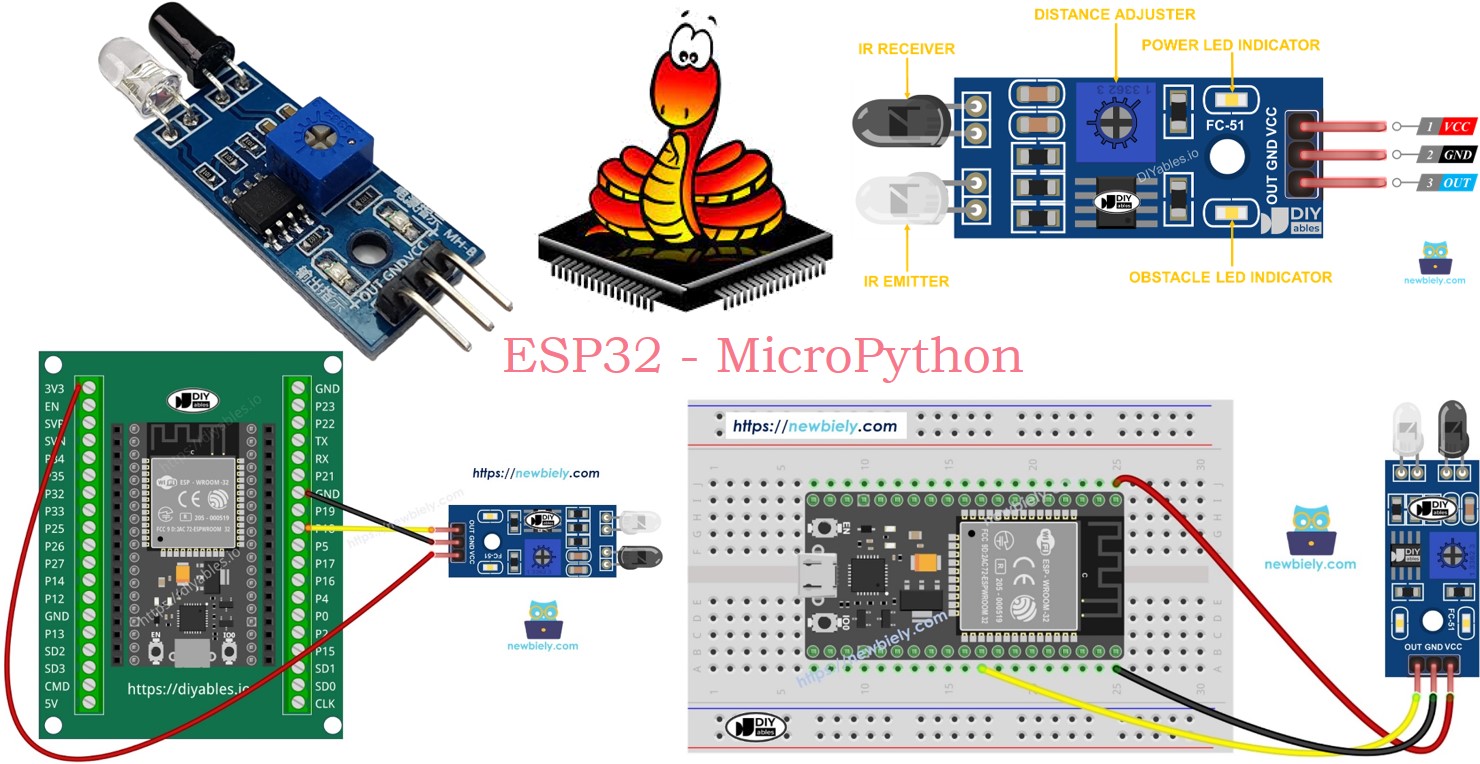
ESP32 MicroPython Obstacle Avoidance Sensor
In this guide, we will learn how to use the infrared obstacle avoidance sensor with the ESP32 and MicroPython to detect obstacles. In detail, we will learn:
- How obstacle avoidance sensor works.
- How to connect the obstacle avoidance sensor to the ESP32
- How to write MicroPython code for ESP32 to detect obstacle.
Hardware Preparation
Or you can buy the following kits:
| 1 | × | DIYables ESP32 Starter Kit (ESP32 included) | |
| 1 | × | DIYables Sensor Kit (18 sensors/displays) |
Additionally, some of these links are for products from our own brand, DIYables .
Overview of IR Obstacle Avoidance Sensor
The infrared (IR) obstacle sensor detects obstacles using an infrared signal. It can identify objects located between 2 cm and 30 cm away. The detection range can be adjusted using an onboard potentiometer.
Pinout
The IR obstacle avoidance sensor has three pins:
- GND pin: Connect to ground (0 volts).
- VCC pin: Connect to a voltage supply (5 volts or 3.3 volts).
- OUT pin: This output pin goes LOW when an obstacle is detected and HIGH when no obstacle is present. Connect it to an input pin on the ESP32.
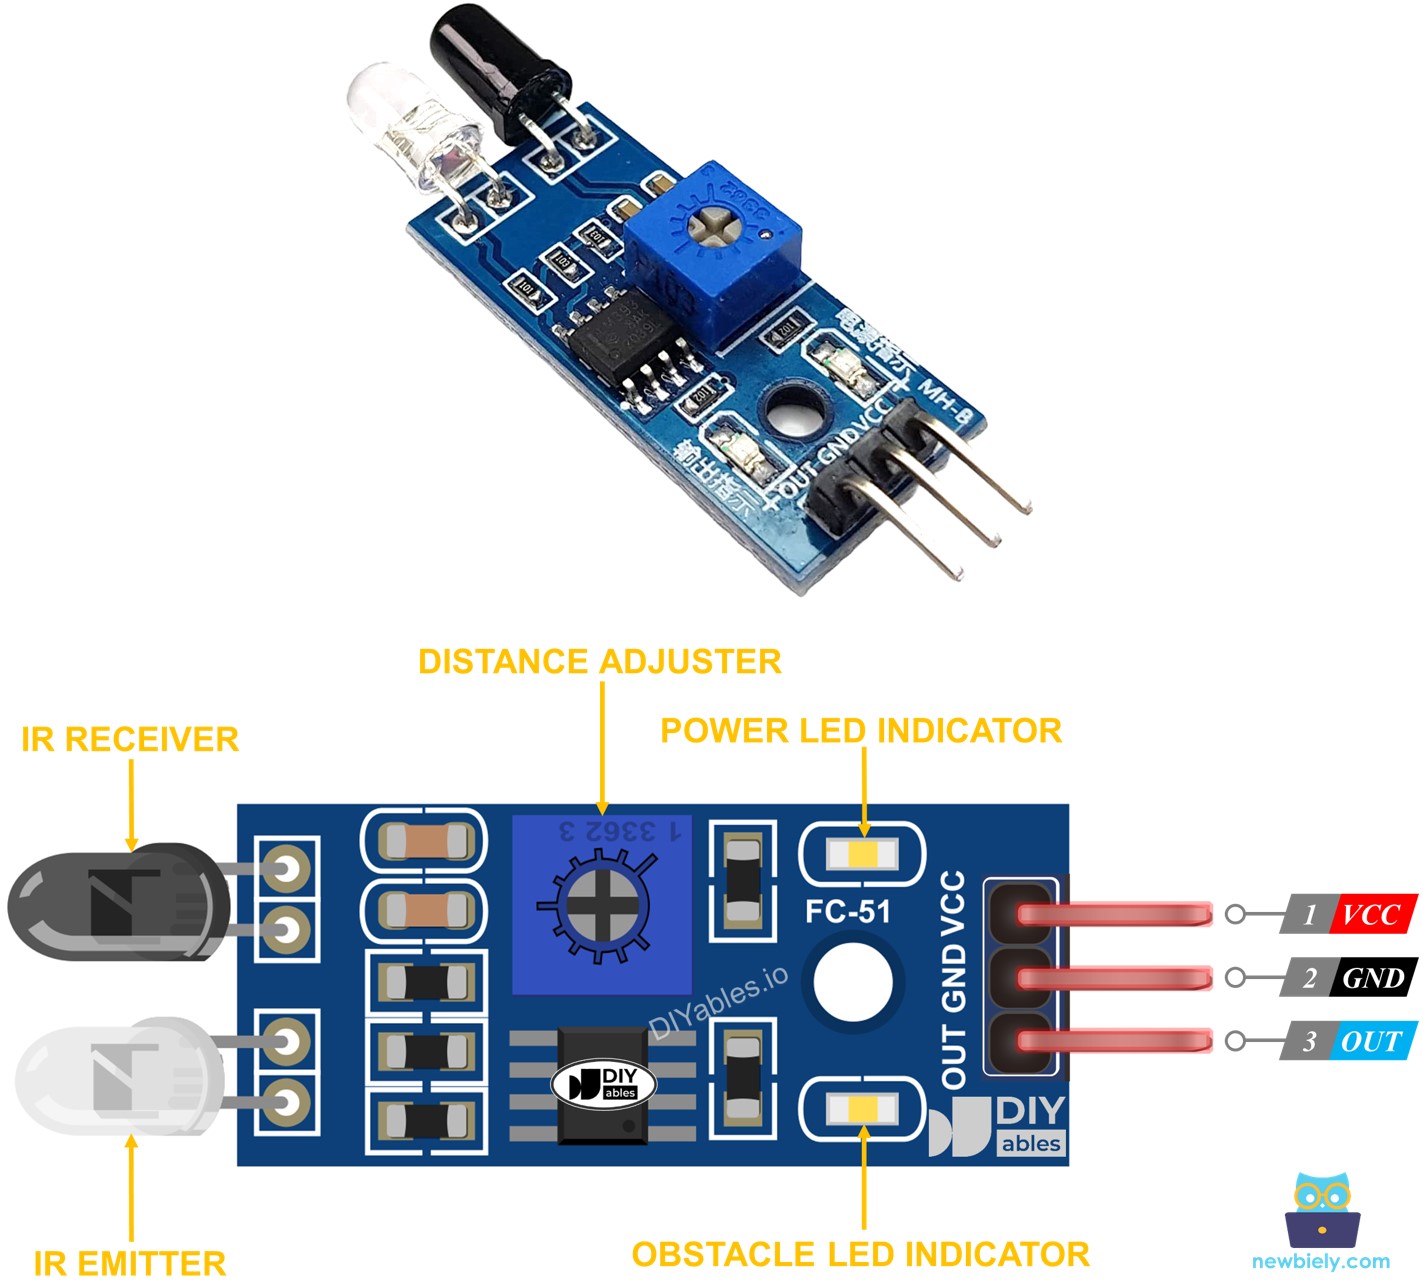
How It Works
An infrared obstacle sensor module contains an IR transmitter and an IR receiver. The IR transmitter emits an infrared signal, while the IR receiver detects the reflected signal to determine whether an object is present. The presence of an obstacle is indicated by the OUT pin:
- If an obstacle is in front of the sensor, the OUT pin is LOW.
- If no obstacle is in front of the sensor, the OUT pin is HIGH.
※ NOTE THAT:
The sensor may become deformed during shipment, leading to malfunction. If the sensor is not functioning correctly, adjust the IR transmitter and receiver to ensure they are aligned parallel to each other.
Wiring Diagram
- How to connect ESP32 and obstacle avoidance sensor using breadboard
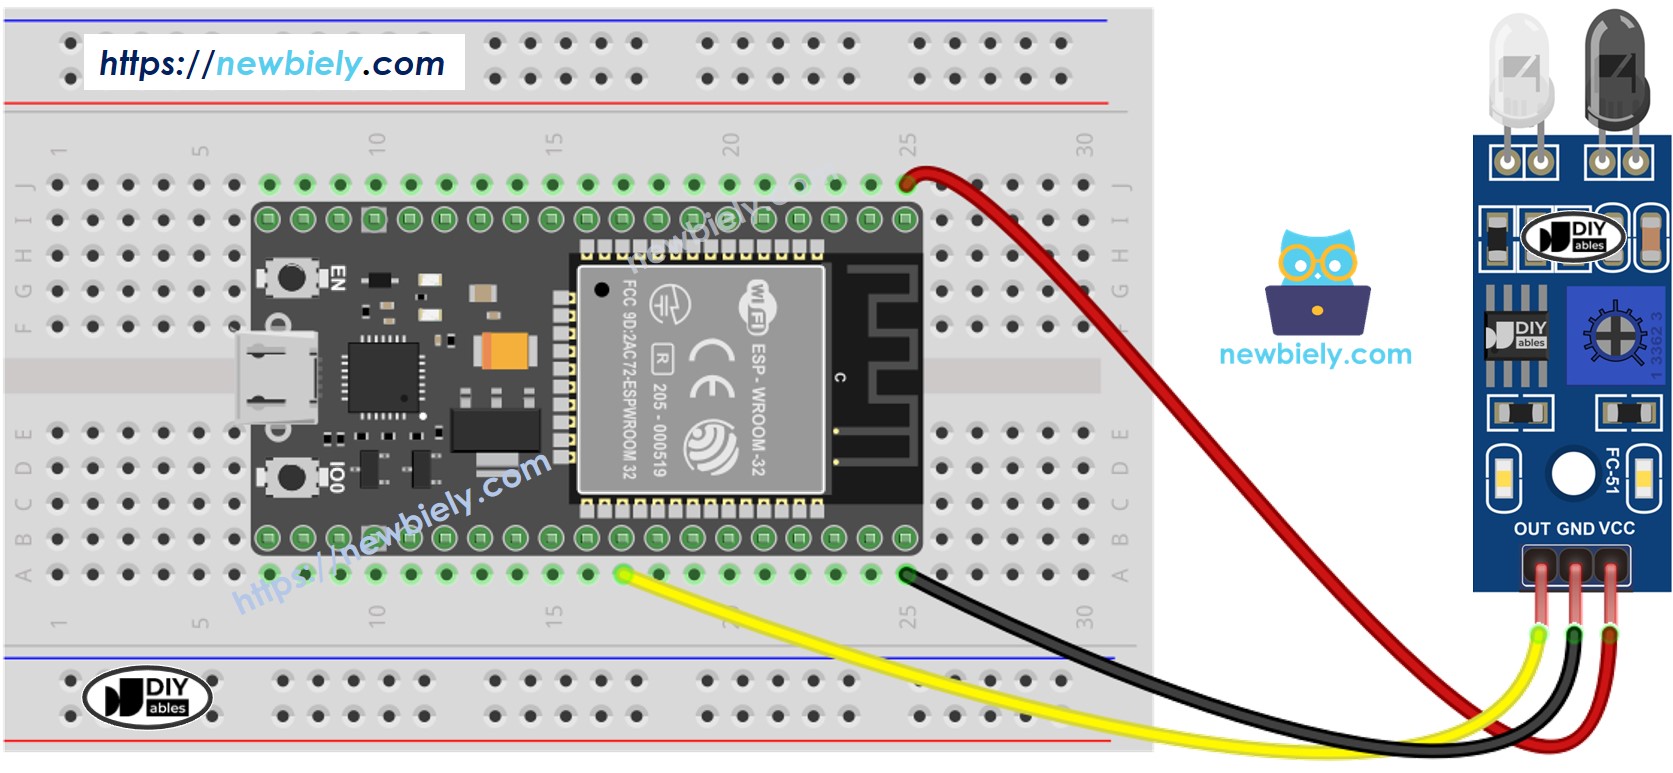
This image is created using Fritzing. Click to enlarge image
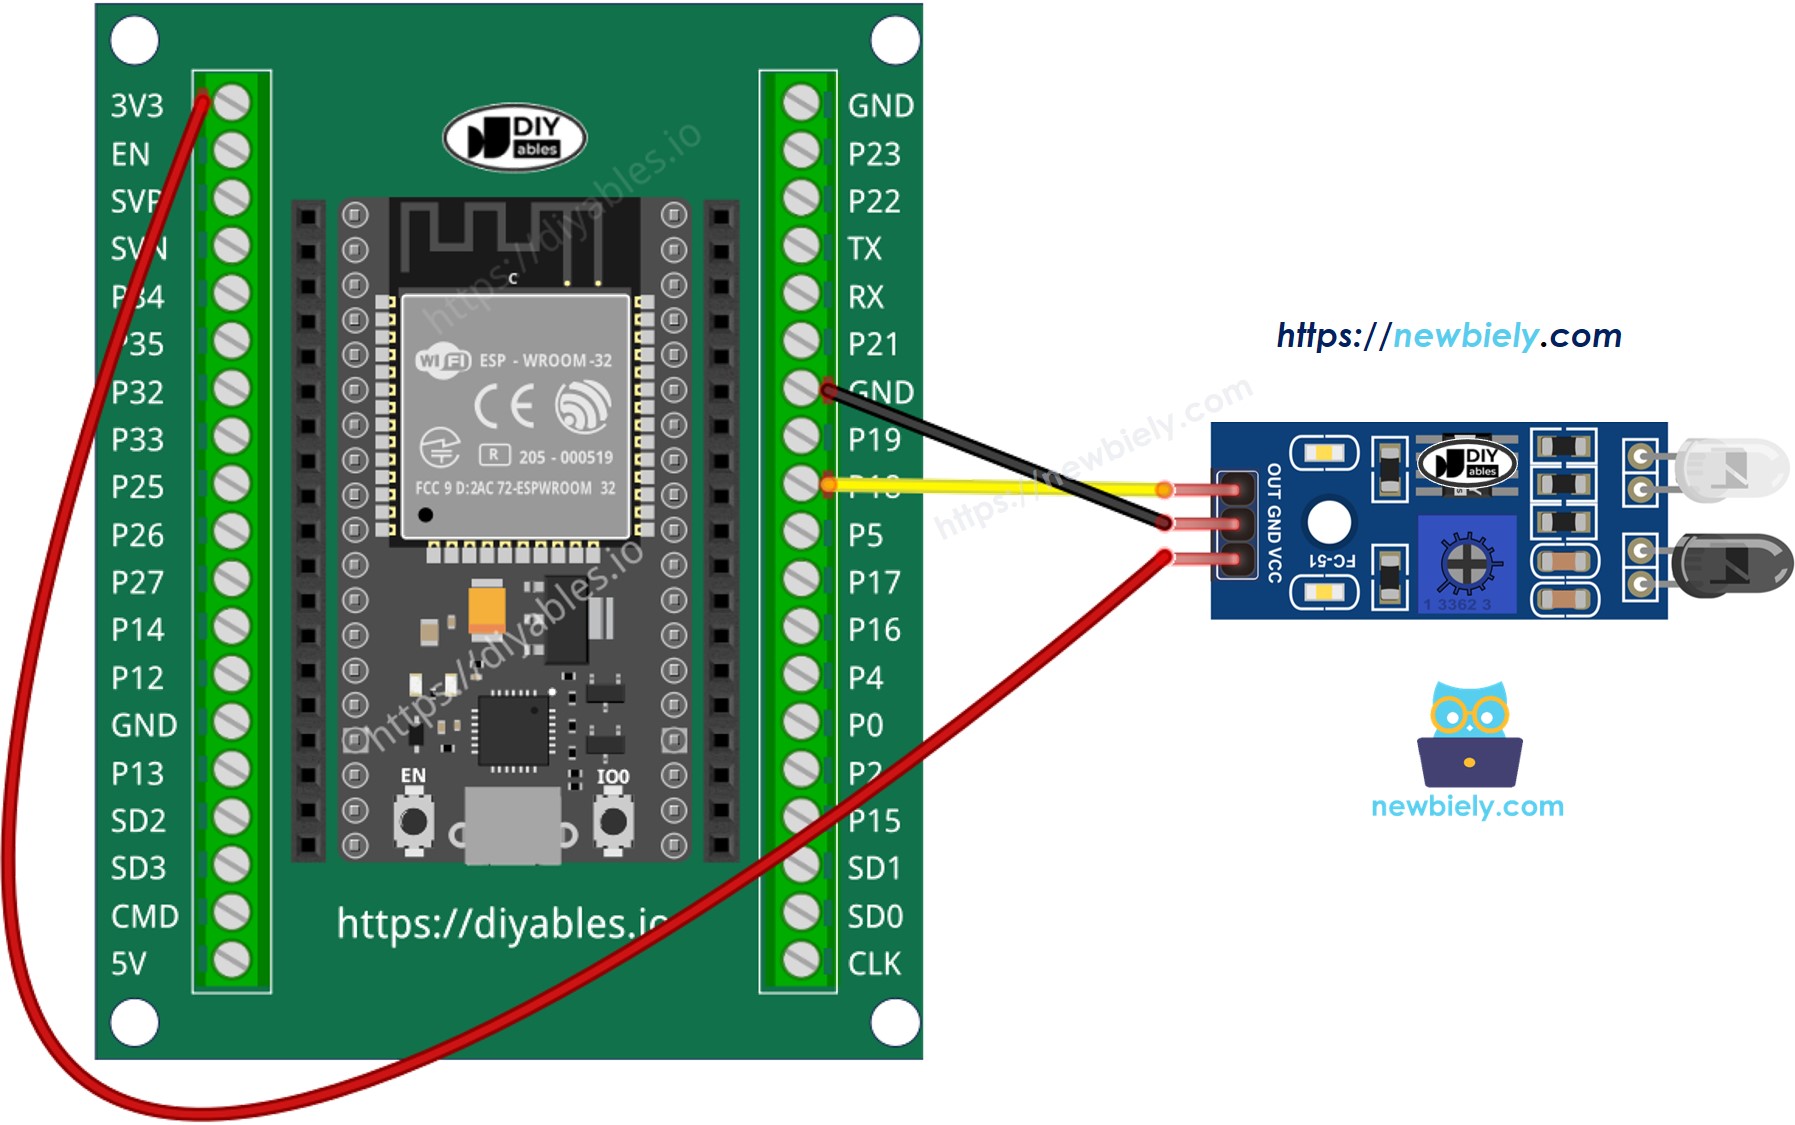
- How to connect ESP32 and obstacle avoidance sensor using screw terminal block breakout board
ESP32 MicroPython Code
There are two approaches to programming an obstacle avoidance application:
- Perform or skip an action based on whether the obstacle is present or absent.
- Perform or skip an action when the obstacle is detected or cleared.
ESP32 MicroPython code for checking if the obstacle is present
Detailed Instructions
Here’s instructions on how to set up and run your MicroPython code on the ESP32 using Thonny IDE:
- Make sure Thonny IDE is installed on your computer.
- Confirm that MicroPython firmware is loaded on your ESP32 board.
- If this is your first time using an ESP32 with MicroPython, check out the ESP32 MicroPython Getting Started guide for step-by-step instructions.
- Wire the obstacle avoidance sensor to the ESP32 according to the provided diagram.
- Connect the ESP32 board to your computer with a USB cable.
- Open Thonny IDE on your computer.
- In Thonny IDE, go to Tools Options.
- Under the Interpreter tab, choose MicroPython (ESP32) from the dropdown menu.
- Make sure the correct port is selected. Thonny IDE usually detects it automatically, but you might need to select it manually (like COM12 on Windows or /dev/ttyACM0 on Linux).
- Copy the provided MicroPython code and paste it into Thonny's editor.
- Save the code to your ESP32 by:
- Clicking the Save button or pressing Ctrl+S.
- In the save dialog, choose MicroPython device.
- Name the file main.py.
- Click the green Run button (or press F5) to execute the script.
- Put an obstacle in front of the sensor for a while, then remove it.
- Check out the message in the Shell at the bottom of Thonny.
ESP32 MicroPython code for detecting obstacle
Detailed Instructions
- Copy the provided MicroPython code and paste it into Thonny's editor.
- Save the code to your ESP32.
- Click the green Run button (or press F5) to execute the script.
- Put something in front of the sensor briefly, then remove it.
- Check out the message in the Shell at the bottom of Thonny.