ESP32 MicroPython Servo Motor
This tutorial instructs you how to control a servo motor using a ESP32 and MicroPython. In detail, We will learn:
- How to connect the ESP32 to a servo motor
- How to write MicroPython code for the ESP32 to control a servo motor
- How to control the speed of a servo motor
Hardware Preparation
Or you can buy the following kits:
| 1 | × | DIYables ESP32 Starter Kit (ESP32 included) | |
| 1 | × | DIYables Sensor Kit (18 sensors/displays) |
Additionally, some of these links are for products from our own brand, DIYables .
Buy Note: For controlling multiple servo motors, use the PCA9685 16 Channel PWM Servo Driver Module to save MCU pins and simplify wiring.
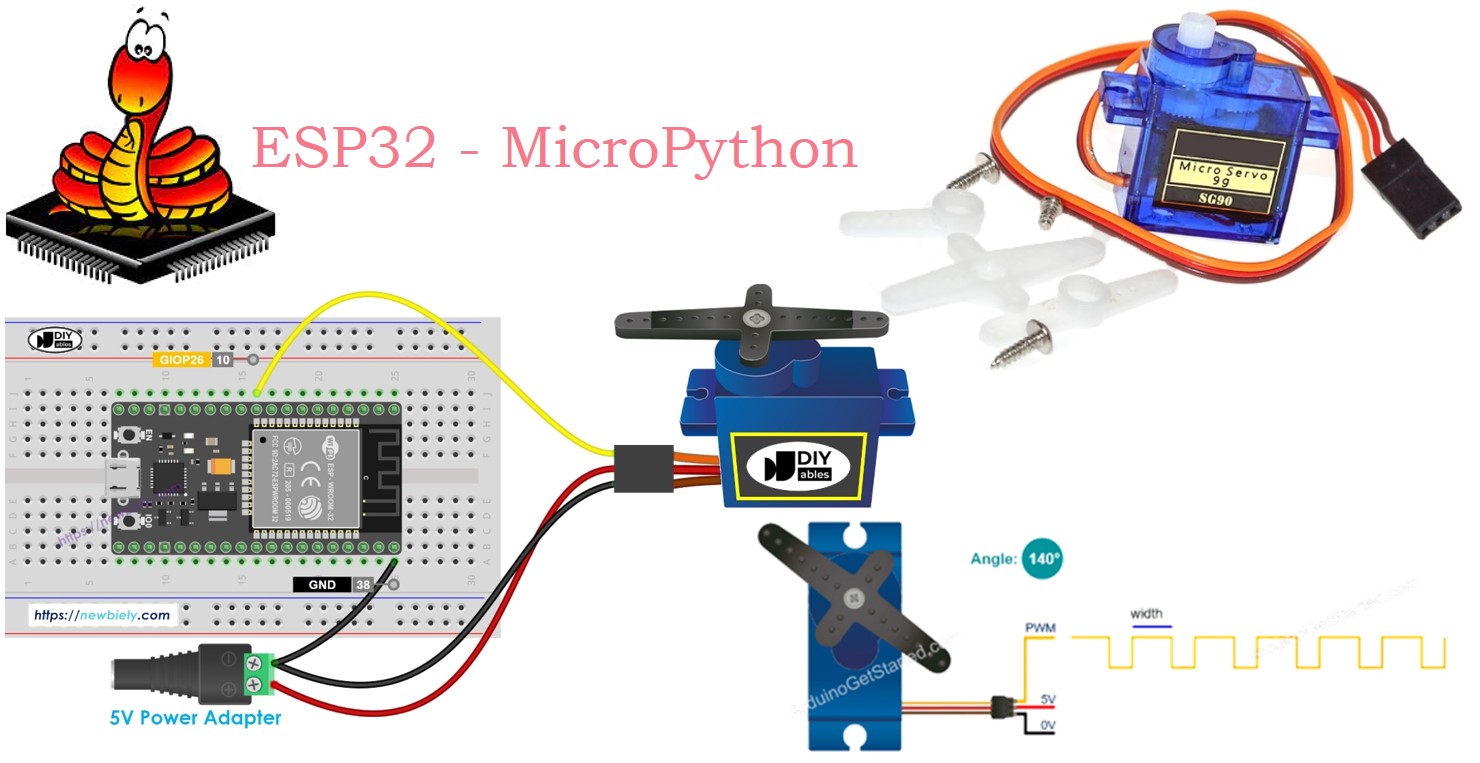
Overview of Servo Motor
A servo motor is a part that can rotate its handle, typically from 0 to 180 degrees. It is used to adjust the position of an object.
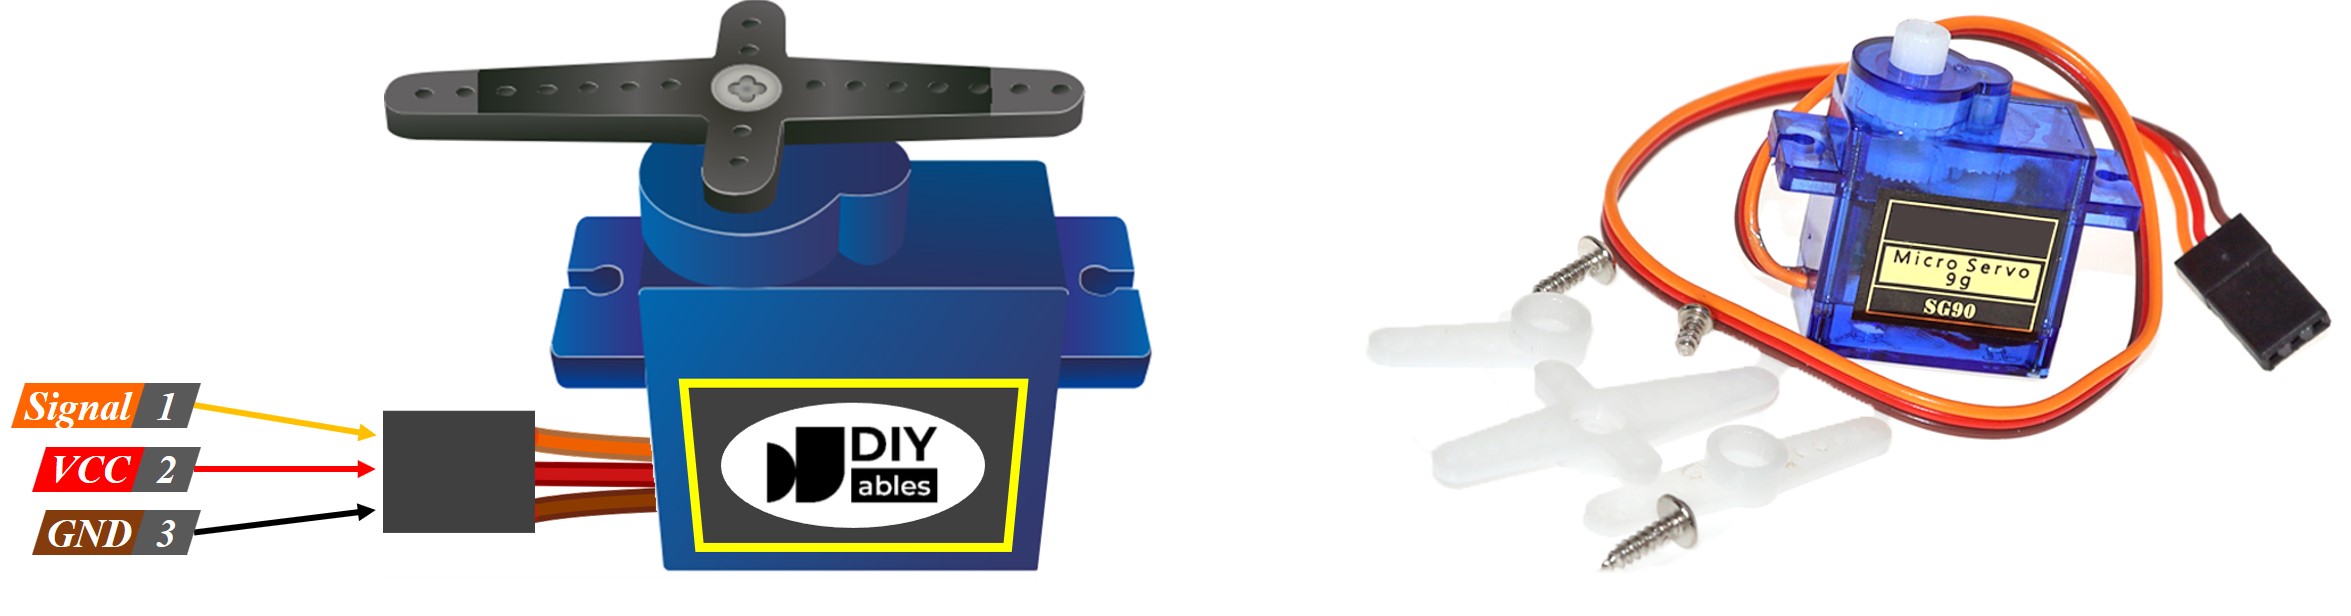
Pinout
This example shows how to use a servo motor that has three pins:
- VCC pin: Attach the red wire to VCC (5 volts).
- GND pin: Connect the black or brown wire to GND (0 volts).
- Signal pin: Connect the yellow or orange wire to get the PWM control signal from a ESP32 pin.
Wiring Diagram
Online diagrams might show a connection between the VCC pin of a servo motor and the VBUS pin of the ESP32 board. Avoid doing this as it can damage the ESP32 board.
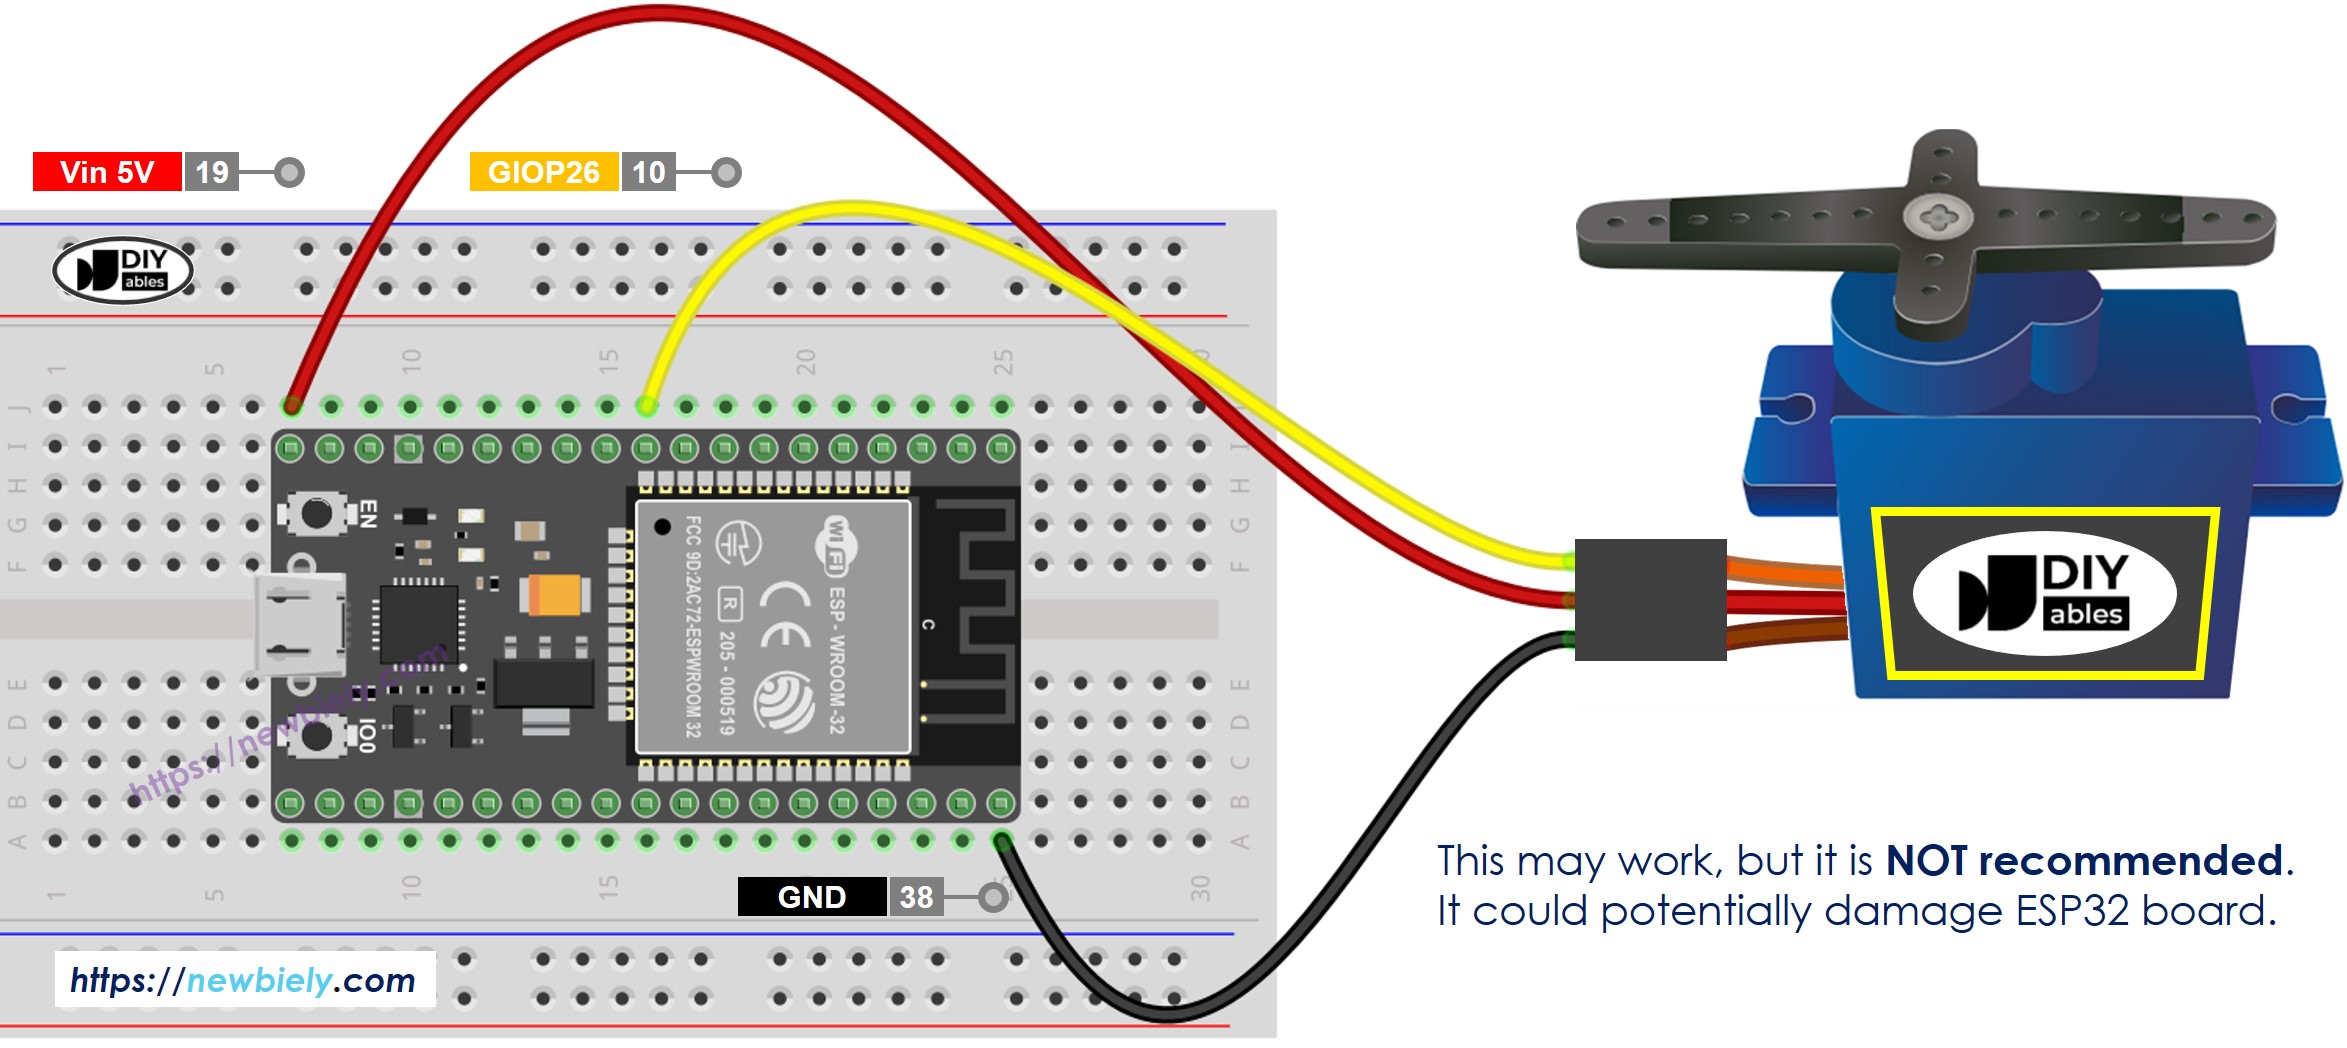
This image is created using Fritzing. Click to enlarge image
To keep your ESP32 board safe, use a separate power supply for the servo motor. The diagram below explains how to connect the servo motor to this power source.
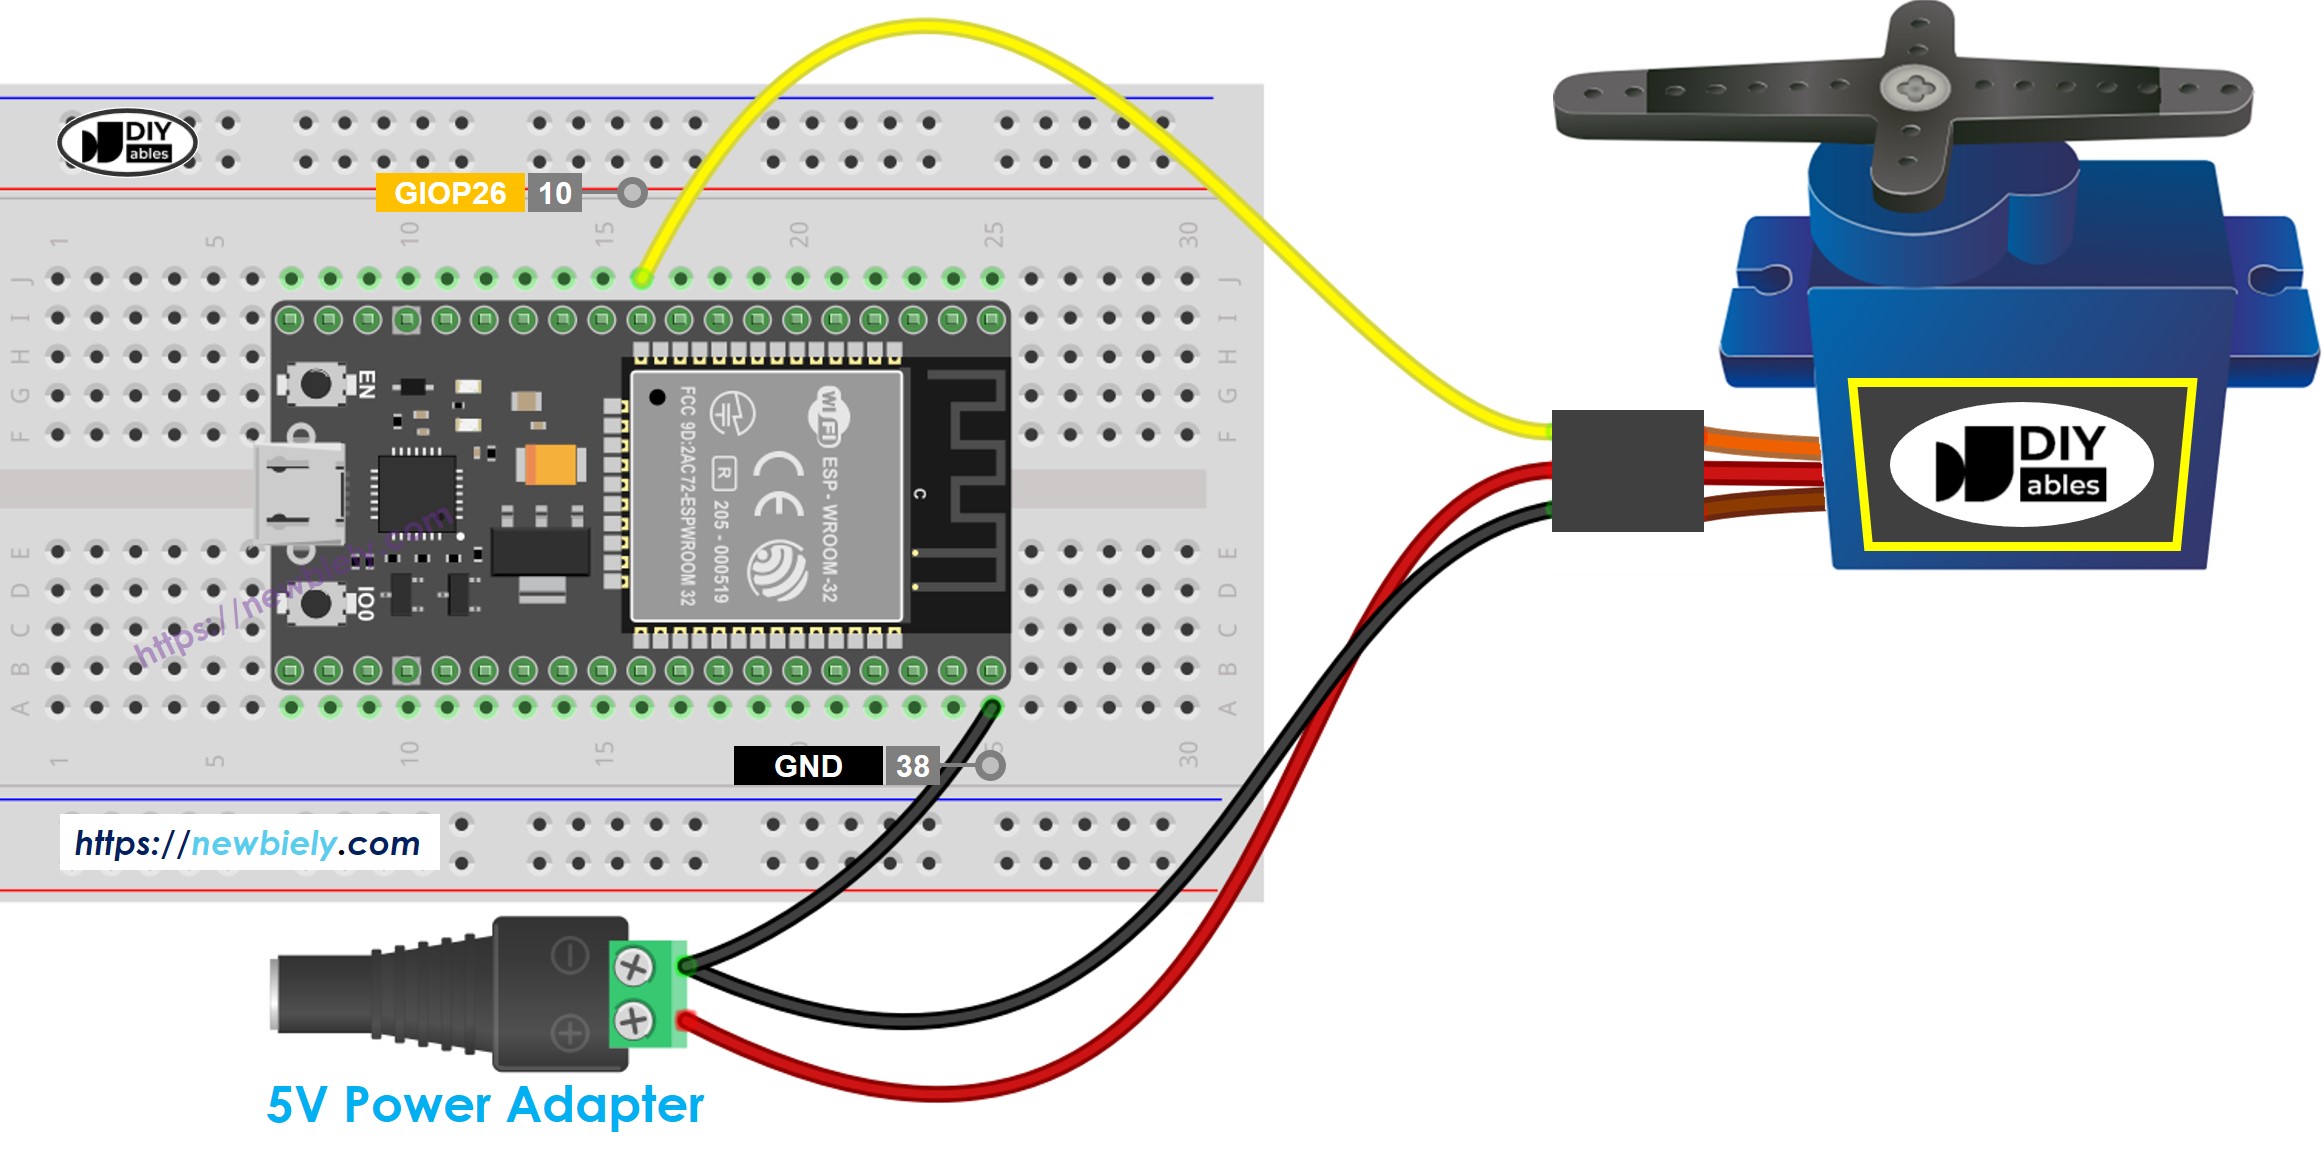
This image is created using Fritzing. Click to enlarge image
- How to connect ESP32 and servo motor using screw terminal block breakout board
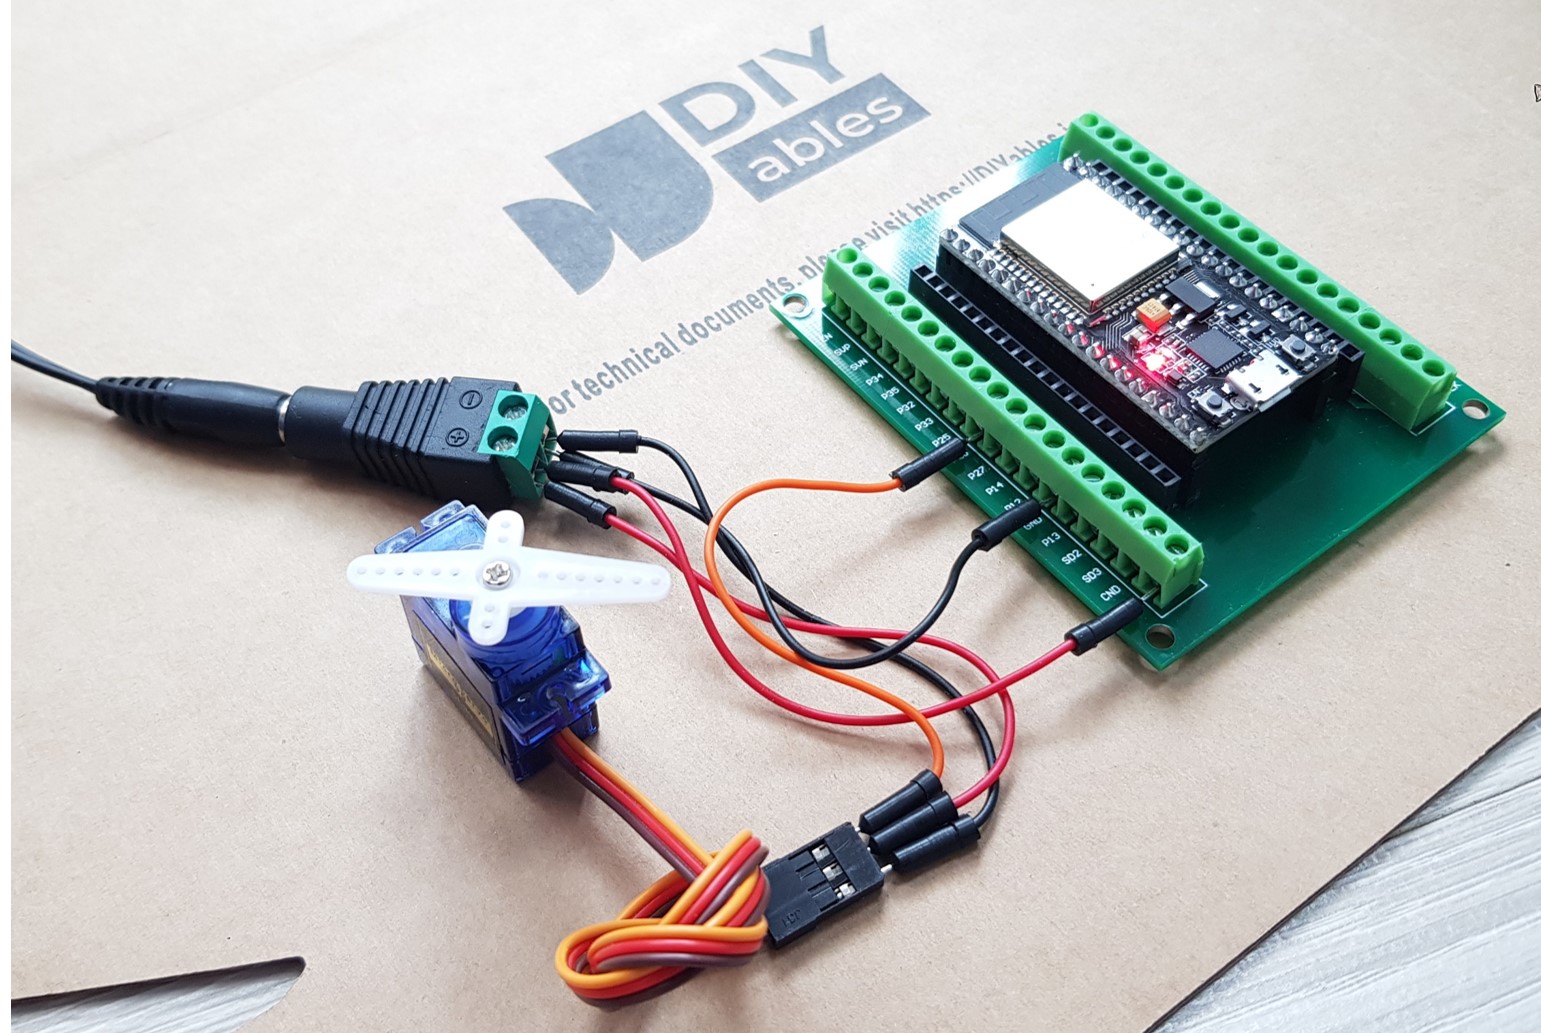
Ensure that you connect the GND (ground) from the external power supply to the GND of the ESP32 board. This is crucial for it to function properly.
ESP32 MicroPython Code
Detailed Instructions
Here’s instructions on how to set up and run your MicroPython code on the ESP32 using Thonny IDE:
- Make sure Thonny IDE is installed on your computer.
- Confirm that MicroPython firmware is loaded on your ESP32 board.
- If this is your first time using an ESP32 with MicroPython, check out the ESP32 MicroPython Getting Started guide for step-by-step instructions.
- Connect the ESP32 board to the servo motor according to the provided diagram.
- Connect the ESP32 board to your computer with a USB cable.
- Open Thonny IDE on your computer.
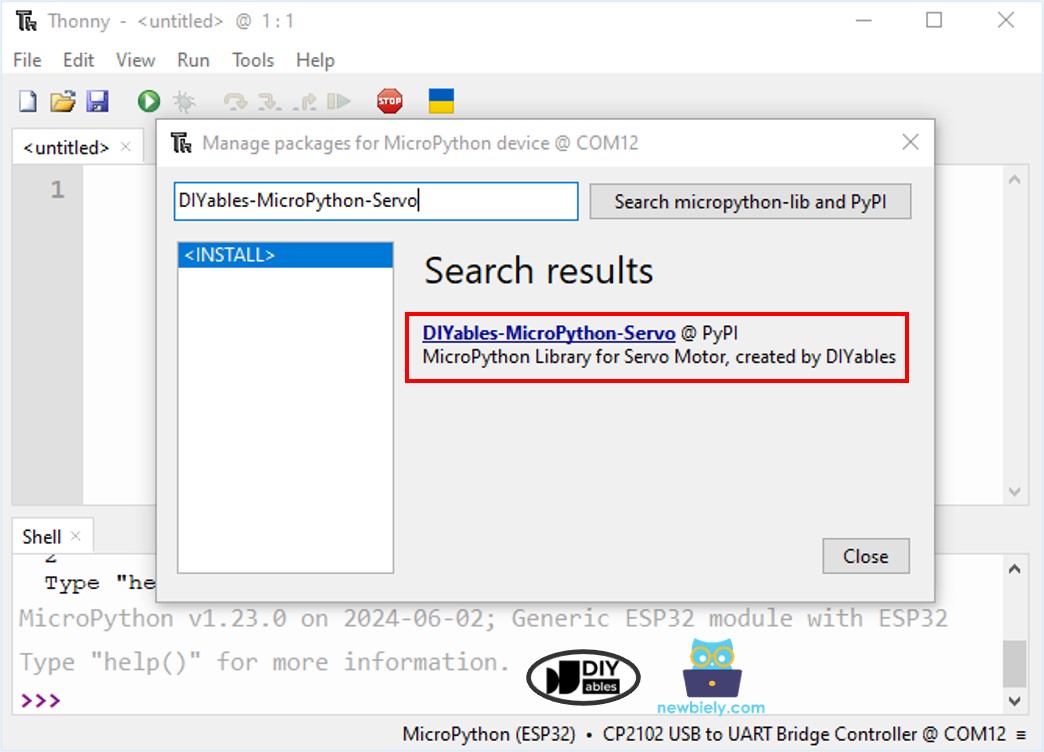
- In Thonny IDE, go to Tools Options.
- Under the Interpreter tab, choose MicroPython (ESP32) from the dropdown menu.
- Make sure the correct port is selected. Thonny IDE usually detects it automatically, but you might need to select it manually (like COM12 on Windows or /dev/ttyACM0 on Linux).
- Navigate to the Tools Manage packages on the Thonny IDE.
- Search “DIYables-MicroPython-Servo”, then find the Servo Motor library created by DIYables.
- Click on DIYables-MicroPython-Servo, then click Install button to install Servo Motor library.
- Copy the provided MicroPython code and paste it into Thonny's editor.
- Save the code to your ESP32 by:
- Clicking the Save button or pressing Ctrl+S.
- In the save dialog, choose MicroPython device.
- Name the file main.py.
- Click the green Run button (or press F5) to execute the script.
- Watch the servo motor: The servo motor slowly rotates from 0 to 180 degrees and then returns gradually from 180 back to 0 degrees.
Code Explanation
You can find the explanation in the comments section of the above ESP32 MicroPython code.
How to Control Speed of Servo Motor
The following MicroPython script controls a servo on the ESP32 to transition smoothly between angles without blocking the program. It uses utime for timing, periodically updating the servo's position while keeping the main loop responsive to other tasks.