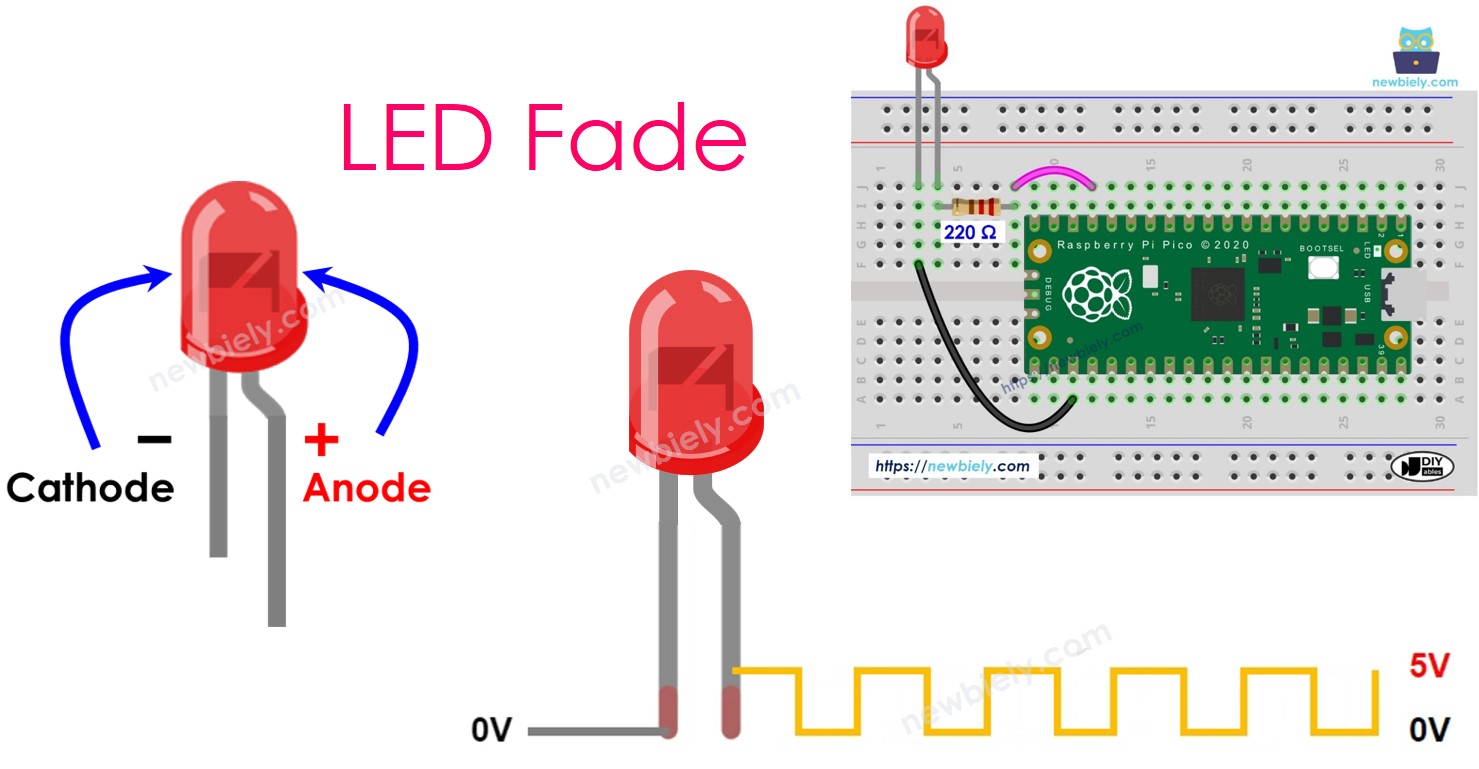
Raspberry Pi Pico - Fade LED
This guide shows you how to make a Raspberry Pi Pico control an LED to slowly brighten and dim. Here's what we will cover:
- How to fade LED.
- How to program Raspberry Pi Pico changes the brightness of an LED.
- How to program Raspberry Pi Pico changes the brightness of an LED without blocking other function.
Hardware Preparation
Or you can buy the following kits:
| 1 | × | DIYables Sensor Kit (18 sensors/displays) |
Additionally, some of these links are for products from our own brand, DIYables .
Buy Note: Use the LED Module for easier wiring. It includes an integrated resistor.
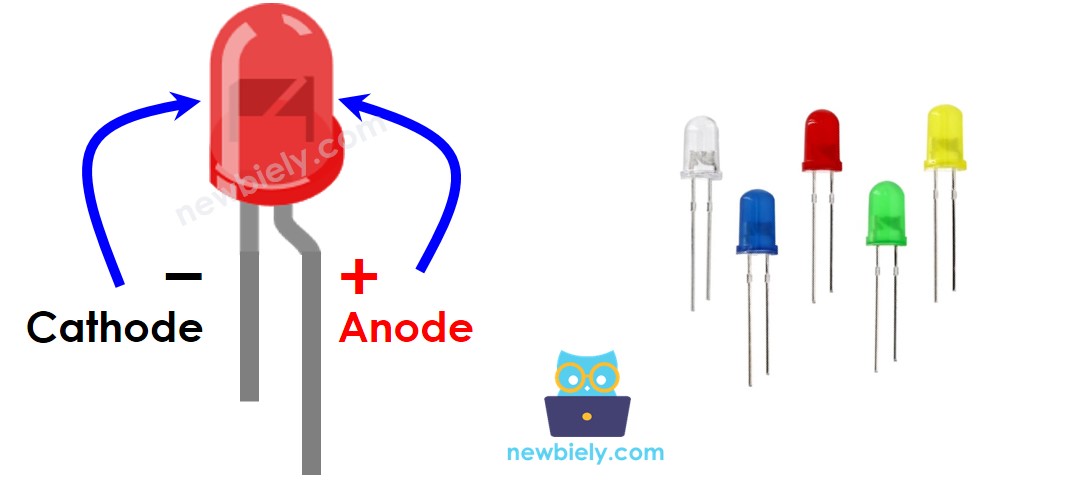
Overview of LED
Pinout
LED has two metal legs.
- Cathode(-) pin: Connect it to GND (0V).
- Anode(+) pin: Use it to control the LED's state.
How It Works
After attaching the negative side, known as the cathode, to the ground (GND):
- When you connect the ground (GND) to the anode (positive side) of the LED, the LED turns off.
- When you connect the power supply (VCC) to the anode of the LED, the LED turns on.
- By sending a Pulse Width Modulation (PWM) signal to the anode of the LED, you can adjust its brightness. The PWM value ranges from 0 to 255. The LED gets brighter with a higher PWM value and dimmer with a lower one.
- If the PWM value is 0, the LED turns off, similar to connecting it to GND.
- If the PWM value is 255, the LED is fully on, similar to connecting it to VCC.
※ NOTE THAT:
For most LEDs, you should attach a resistor between the positive terminal (anode) and the power source (VCC). The value of the resistor changes based on the LED's specifications.
Raspberry Pi Pico - fade LED
You can dim an LED using certain pins on the Raspberry Pi Pico that generate a PWM signal. First, attach the positive pin (+) of the LED to a pin on the Raspberry Pi Pico. Next, connect the negative pin (-) of the LED to the ground (GND). Then, configure the selected Raspberry Pi Pico pin to output a PWM signal.
Wiring Diagram
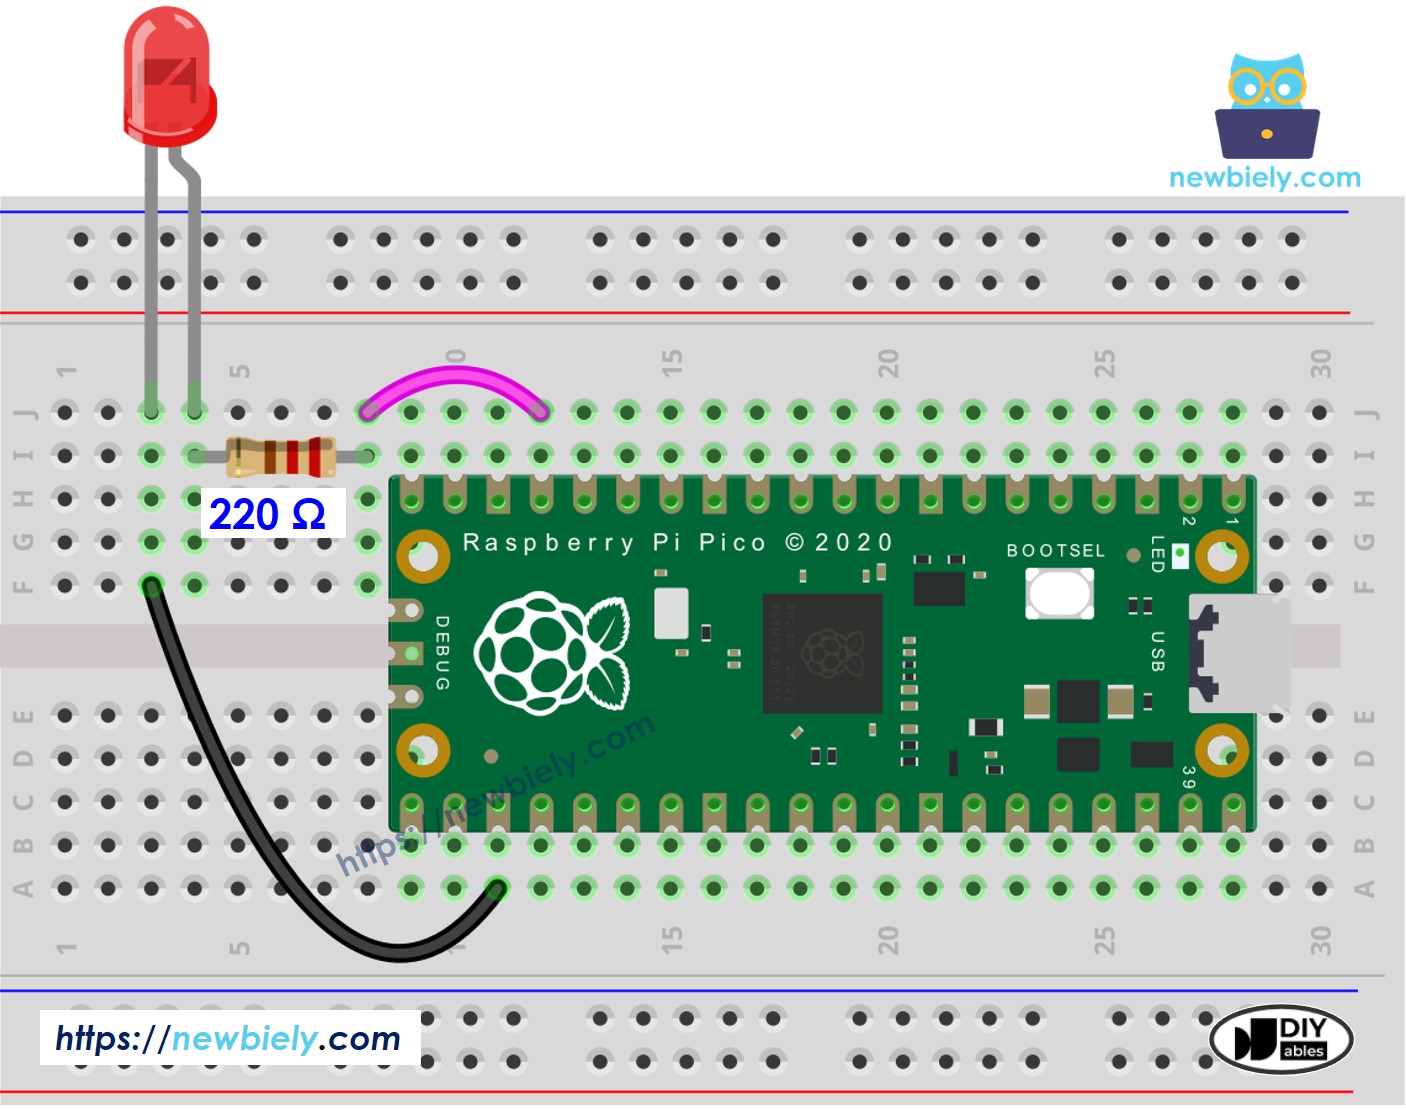
This image is created using Fritzing. Click to enlarge image
Raspberry Pi Pico Code
Detailed Instructions
Please follow these instructions step by step:
- Ensure that Thonny IDE is installed on your computer.
- Ensure that MicroPython firmware is installed on your Raspberry Pi Pico.
- If this is your first time using a Raspberry Pico, refer to the Raspberry Pi Pico - Getting Started tutorial for detailed instructions.
- Connect the Raspberry Pi Pico to the LED according to the provided diagram.
- Connect the Raspberry Pi Pico to your computer using a USB cable.
- Launch the Thonny IDE on your computer.
- On Thonny IDE, select MicroPython (Raspberry Pi Pico) Interpreter by navigating to Tools Options.
- In the Interpreter tab, select MicroPython (Raspberry Pi Pico) from the drop-down menu.
- Ensure the correct port is selected. Thonny IDE should automatically detect the port, but you may need to select it manually (e.g., COM3 on Windows or /dev/ttyACM0 on Linux).
- Copy the above code and paste it to the Thonny IDE's editor.
- Save the script to your Raspberry Pi Pico by:
- Click the Save button, or use Ctrl+S keys.
- In the save dialog, you will see two sections: This computer and Raspberry Pi Pico. Select Raspberry Pi Pico
- Save the file as main.py
- Click the green Run button (or press F5) to run the script. The script will execute.
- Check out the LED state.
Code Explanation
The explanation is in the comments above in the Raspberry Pi Pico code.
※ NOTE THAT:
In the example, we used a function named sleep() to gradually change the light's brightness. But, this function causes the light adjustment to be less smooth and halts other parts of the program. Next, we will learn to fade the light smoothly while keeping the rest of the program running using LED library provided by DIYables.
How to fade in/out LED
With the LED library created by DIYables, fading LED in/out is a piece of cake, you can set the brightness range, and fade time.
Detailed Instructions
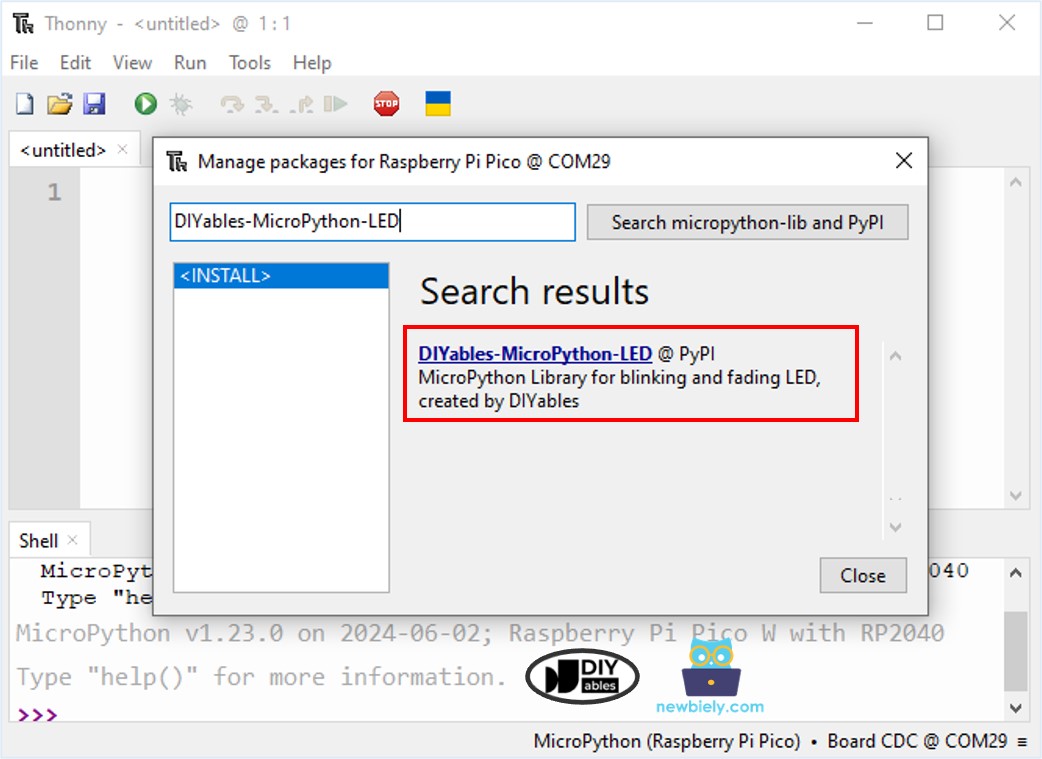
- On Thonny IDE, Navigate to the Tools Manage packages on the Thonny IDE.
- Search “DIYables-MicroPython-LED”, then find the LED library created by DIYables.
- Click on DIYables-MicroPython-LED, then click Install button to install LED library.
- Copy the above code and paste it to the Thonny IDE's editor.
- Save the script to main.py on your Raspberry Pi Pico
- Click the green Run button (or press F5) to run the script. The script will execute.
- Check out the LED state.