Raspberry Pi Pico - LDR Module
This guide will show you how to use a Raspberry Pi Pico and an LDR light sensor to monitor and measure light levels. We will explore the following topics in detail:
- Connect the LDR light sensor module to a Raspberry Pi Pico UNF R4.
- Program the Raspberry Pi Pico to recognize light with the LDR light sensor's digital signal.
- Program the Raspberry Pi Pico to measure light intensity using the LDR light sensor's analog signal.
Hardware Preparation
| 1 | × | Raspberry Pi Pico W | |
| 1 | × | Raspberry Pi Pico Alternatively, | |
| 1 | × | Micro USB Cable | |
| 1 | × | LDR Light Sensor Module | |
| 1 | × | Jumper Wires | |
| 1 | × | Breadboard | |
| 1 | × | Recommended: Screw Terminal Expansion Board for Raspberry Pi Pico |
Or you can buy the following kits:
| 1 | × | DIYables Sensor Kit (18 sensors/displays) |
Additionally, some of these links are for products from our own brand, DIYables .
Overview of LDR Light Sensor Module
The LDR light sensor module helps detect light or measure the amount of light around it. It provides two options: a digital output and an analog output.
Pinout
The LDR light sensor module comes with four pins:
- VCC pin: Attach this pin to VCC (3.3V to 5V).
- GND pin: Attach this pin to GND (0V).
- DO pin: This is a digital output pin. It shows HIGH in the dark and LOW in the light. Adjust the potentiometer to change the sensitivity to light and dark.
- AO pin: This is an analog output pin. The output value decreases in bright conditions and increases in dark conditions.
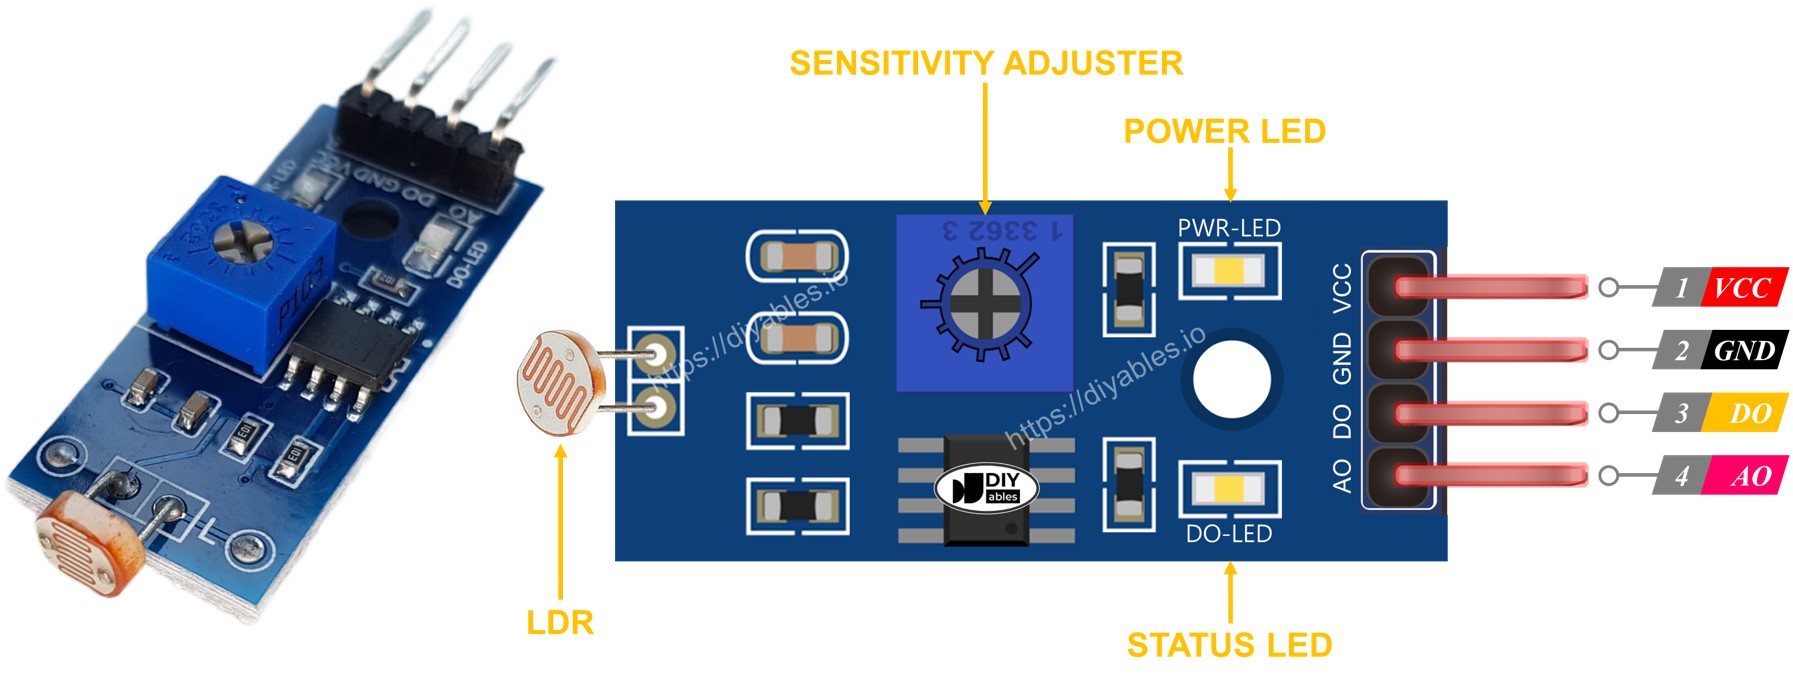
It also features two LED lights:
- A PWR-LED indicator lights up to show the power is on.
- A DO-LED indicator displays the light status on the DO pin: it lights up when there is light and turns off in the dark.
How It Works
About the DO pin:
- This module includes a potentiimeter to adjust the light threshold. When the surrounding light is brighter than the threshold, the output pin (DO) of the sensor is LOW and the DO-LED (a tiny light on the module) is off. If the light around is dimmer than the threshold, the sensor's DO pin is HIGH and the DO-LED lights up.
For the AO pin:
- The AO pin reading varies depending on the amount of light.
- The reading is lower when there is more light.
- The reading is higher in darker conditions.
- The potentiometer does not change the AO pin's value. It only adjusts the threshold for the DO pin.
This method allows you to change how sensitive the DO pin is with the potentiometer, while you can still get accurate light measurements from the AO pin.
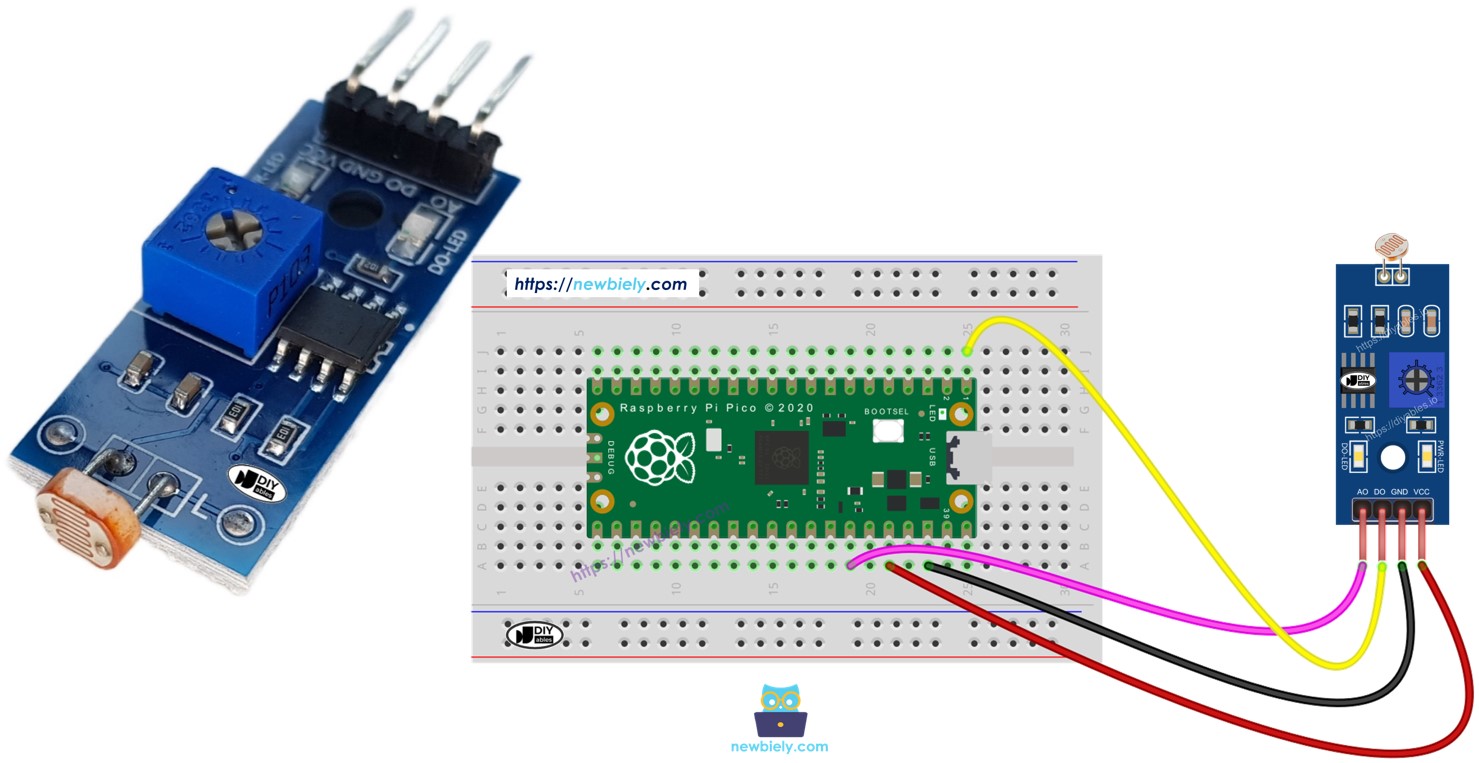
Wiring Diagram
The light sensor module offers two outputs. You can use either one or both, depending on what you need.
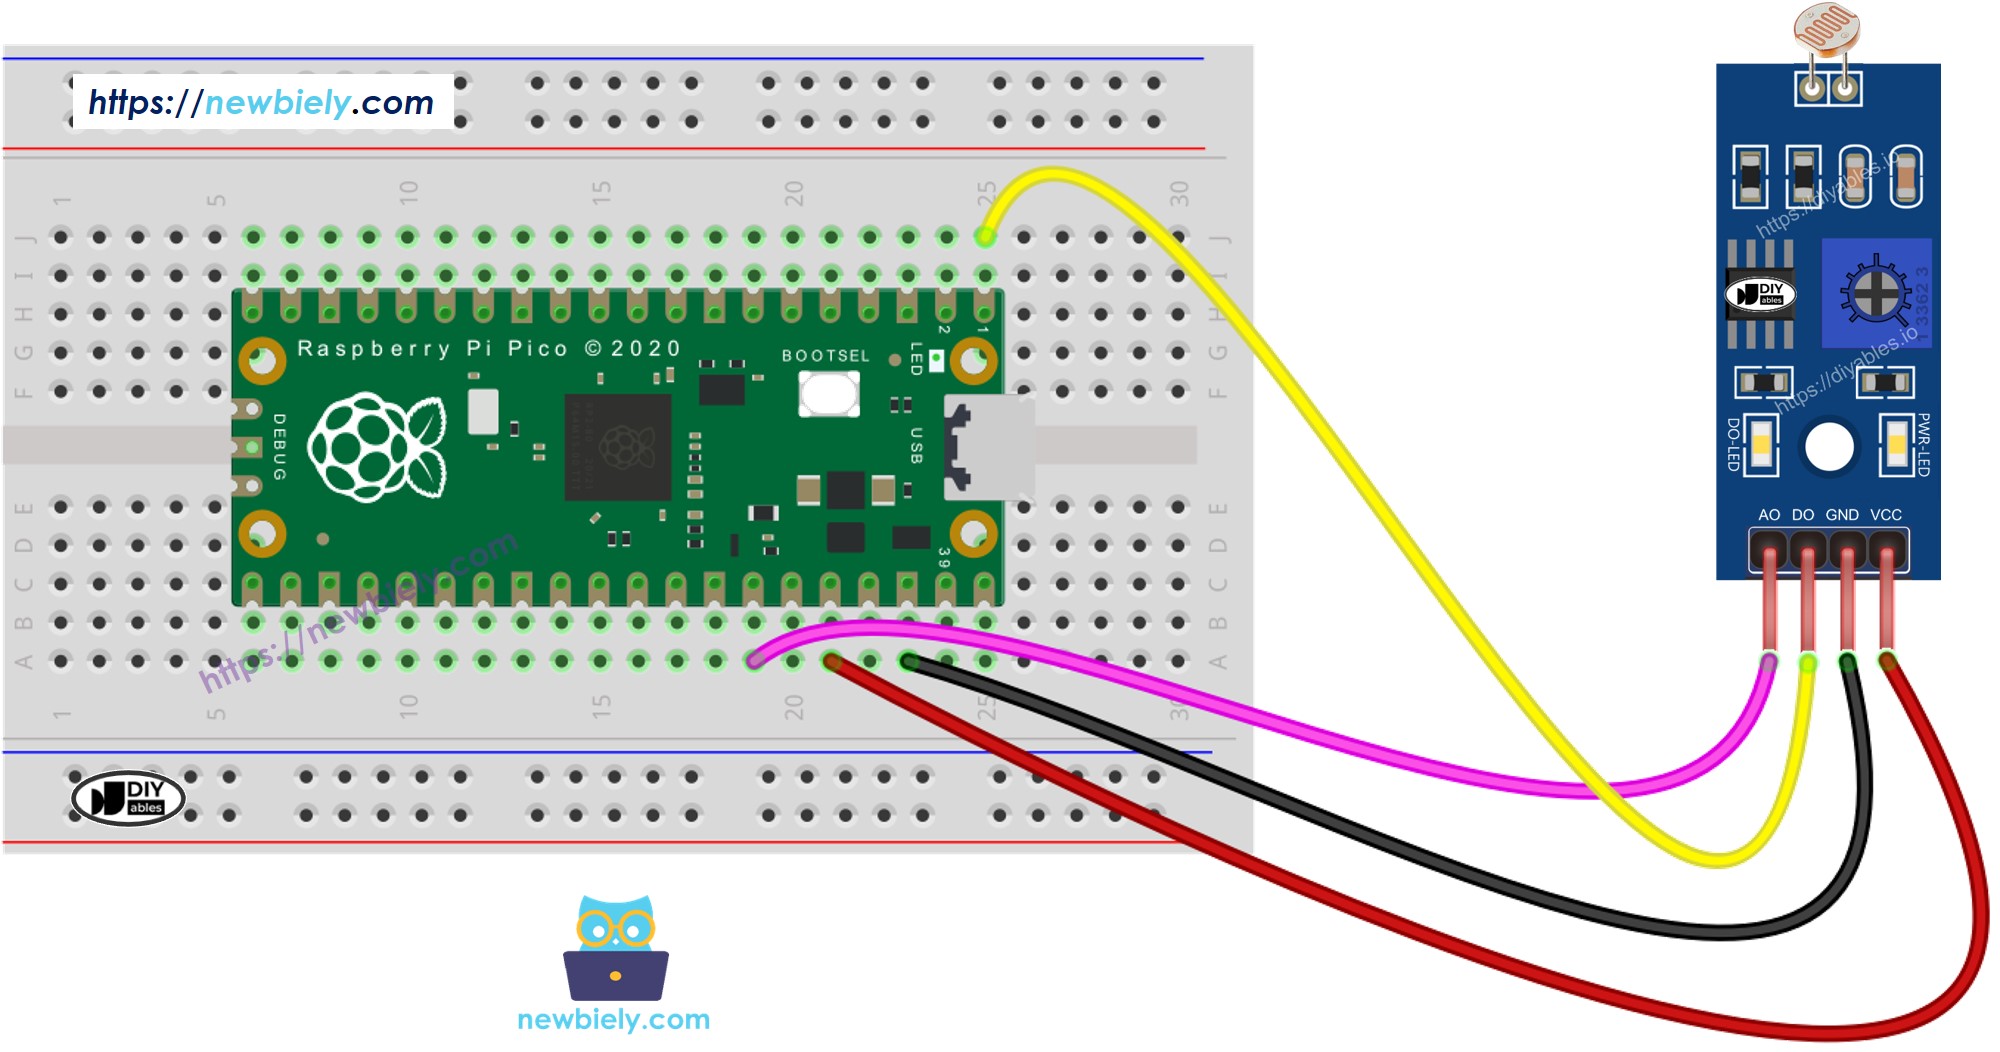
This image is created using Fritzing. Click to enlarge image
Raspberry Pi Pico Code - Read value from DO pin
Detailed Instructions
Please follow these instructions step by step:
- Ensure that Thonny IDE is installed on your computer.
- Ensure that MicroPython firmware is installed on your Raspberry Pi Pico.
- If this is your first time using a Raspberry Pico, refer to the Raspberry Pi Pico - Getting Started tutorial for detailed instructions.
- Connect the Raspberry Pi Pico the LDR module according to the provided diagram.
- Connect the Raspberry Pi Pico to your computer using a USB cable.
- Launch the Thonny IDE on your computer.
- On Thonny IDE, select MicroPython (Raspberry Pi Pico) Interpreter by navigating to Tools Options.
- In the Interpreter tab, select MicroPython (Raspberry Pi Pico) from the drop-down menu.
- Ensure the correct port is selected. Thonny IDE should automatically detect the port, but you may need to select it manually (e.g., COM3 on Windows or /dev/ttyACM0 on Linux).
- Copy the above code and paste it to the Thonny IDE's editor.
- Save the script to your Raspberry Pi Pico by:
- Click the Save button, or use Ctrl+S keys.
- In the save dialog, you will see two sections: This computer and Raspberry Pi Pico. Select Raspberry Pi Pico
- Save the file as main.py
- Click the green Run button (or press F5) to run the script. The script will execute.
- Use your hand or an object to cover and uncover the light on the LDR sensor module.
- Check out the message in the Shell at the bottom of Thonny.
If you name your script main.py and save it to the root directory of the Raspberry Pi Pico, it will automatically run each time the Pico is powered on or reset. This is useful for standalone applications that need to start running immediately upon power-up. If you name your script another name other than main.py, you will need to manually run it from Thonnys's Shell.
If the LED is always on or stays off even in daylight, you can adjust the light sensitivity of the sensor by turning the potentiiconductor.
Now, you can change the code to make an LED or a light switch on when light is detected, or to make a servo motor rotate. For further instructions and detailed steps, please refer to the tutorials at the end of this document.
Raspberry Pi Pico Code - Read value from AO pin
Detailed Instructions
Please follow these instructions one by one:
- Copy the above code and open it in the Thonny IDE.
- Click the green Run button (or press F5) to run the script. The script will execute.
- Cover the LDR light sensor with your hand or an object and then remove it.
- Check out the message in the Shell at the bottom of Thonny.