Raspberry Pi Pico - Control Heating Element
This guide will show you how to control a heating element with the Raspberry Pi Pico. In the next tutorial, you will learn to build a heating system.
Hardware Preparation
Or you can buy the following kits:
| 1 | × | DIYables Sensor Kit (18 sensors/displays) |
Additionally, some of these links are for products from our own brand, DIYables .
Overview of Heating Element
Pinout
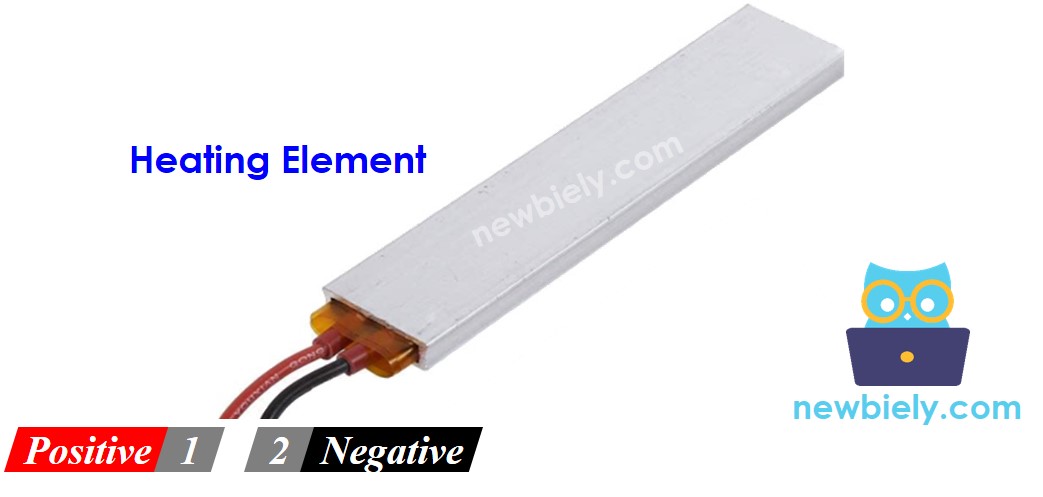
A heating element usually has two pins.
- Connect the positive (+) pin (red) to the 12V DC power supply.
- Connect the negative (-) pin (black) to the ground (GND) of the DC power supply.
How to Control Heating Element
When a 12V heating part is linked to a 12V power source, it generates heat. We utilize a relay to join the Raspberry Pi Pico and the Heating Element. The Raspberry Pi Pico can control the Heating Element by using the relay. If you're new to relay or MicroPython programming for the Raspberry Pi Pico, I recommend checking out the below tutorial:
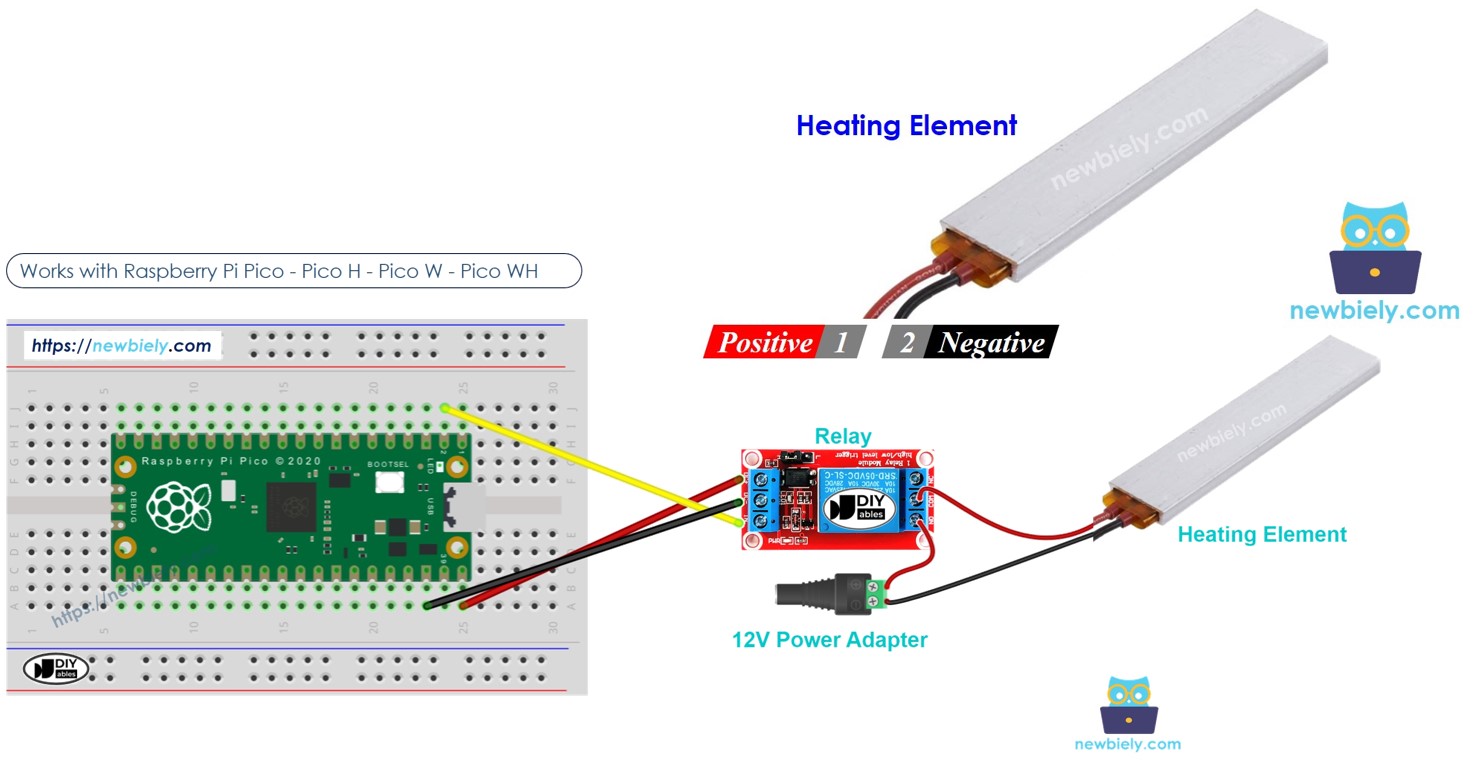
Wiring Diagram
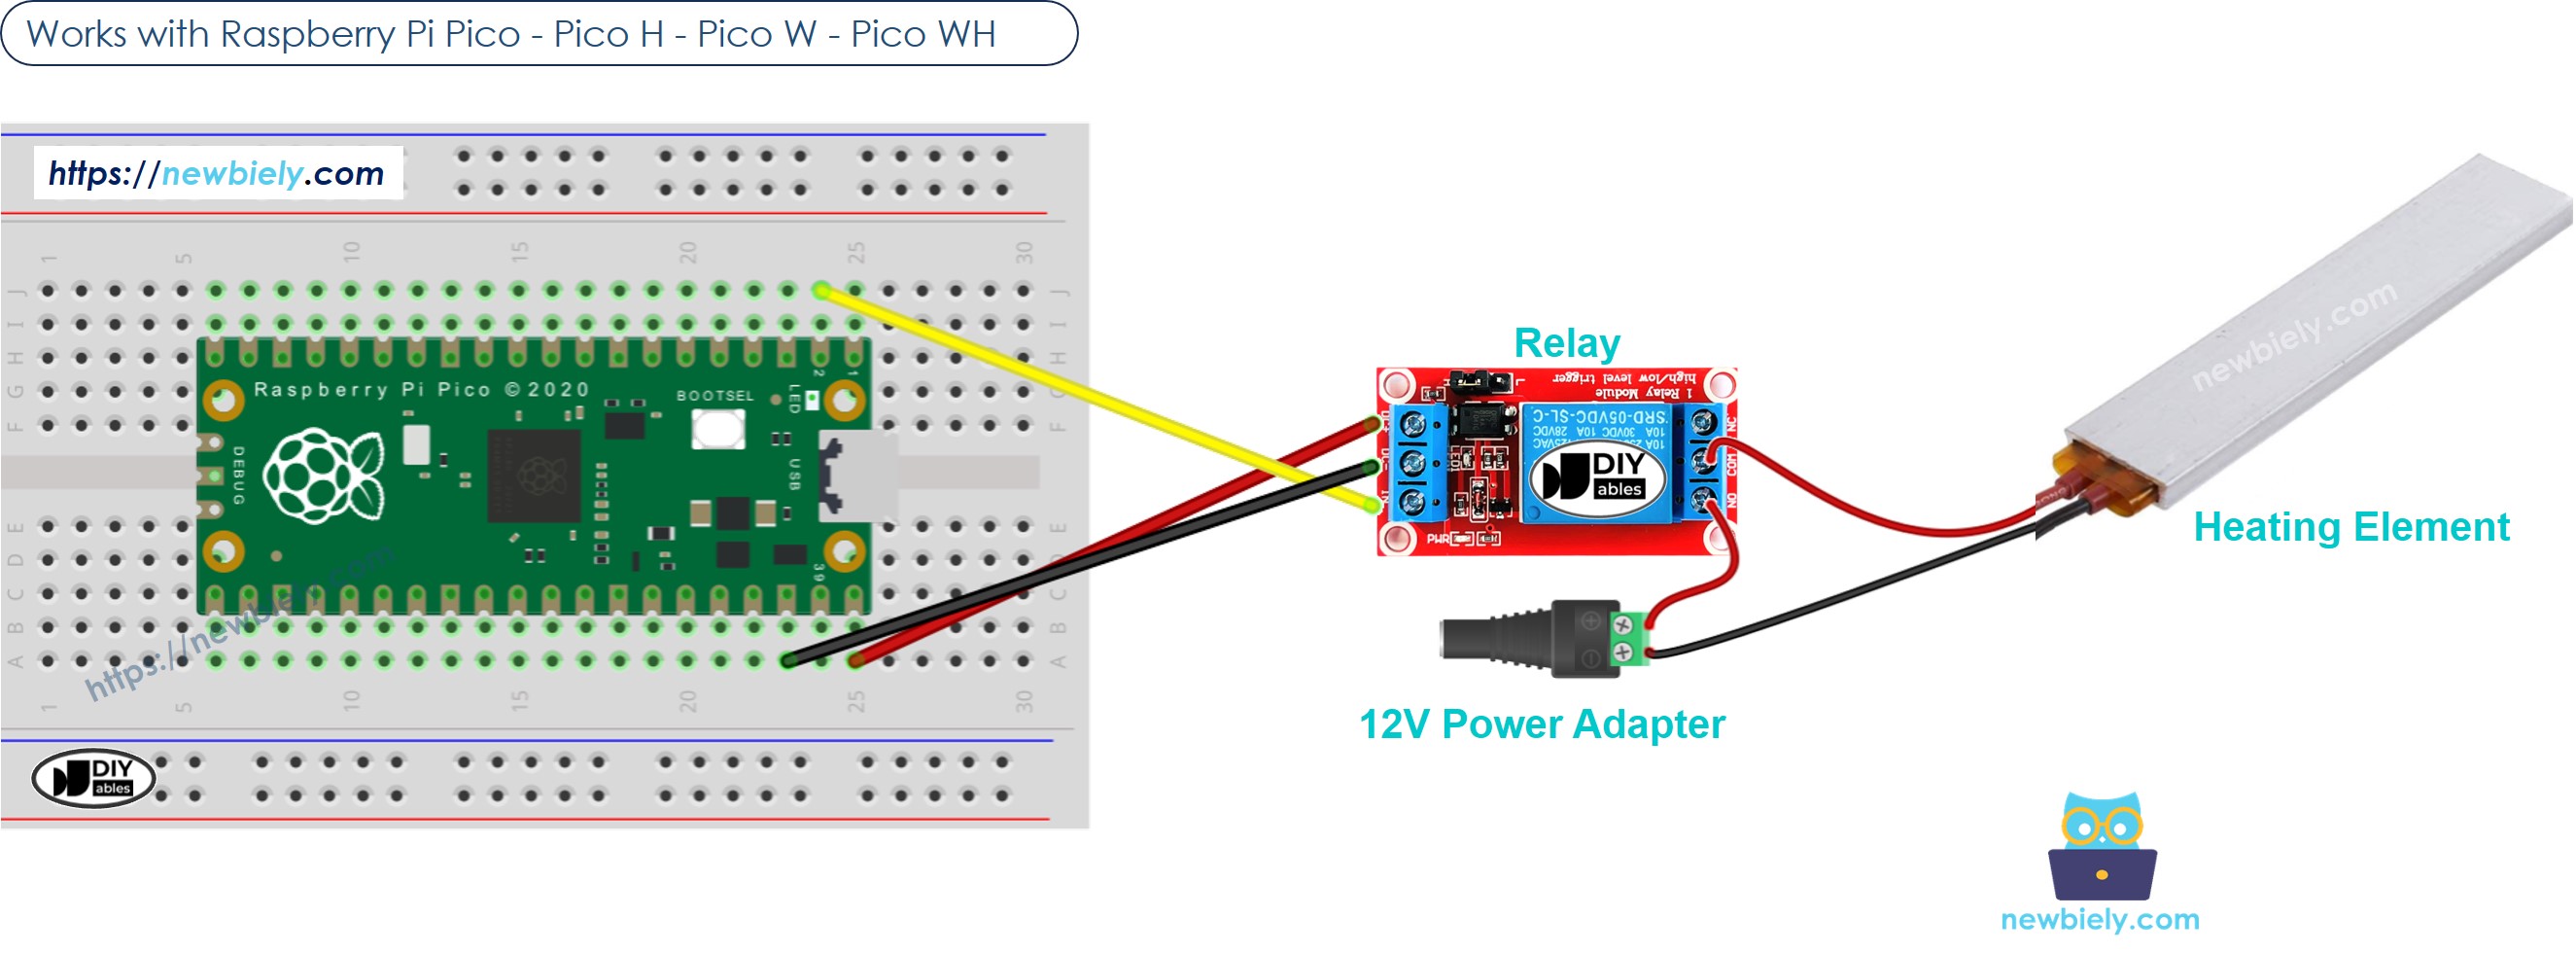
This image is created using Fritzing. Click to enlarge image
Raspberry Pi Pico Code
This code switches the heating element ON for five seconds and then turns it OFF for five also, doing this continuously.
Detailed Instructions
Please follow these instructions step by step:
- Ensure that Thonny IDE is installed on your computer.
- Ensure that MicroPython firmware is installed on your Raspberry Pi Pico.
- If this is your first time using a Raspberry Pico, refer to the Raspberry Pi Pico - Getting Started tutorial for detailed instructions.
- Connect the Raspberry Pi Pico to the heating element according to the provided diagram.
- Connect the Raspberry Pi Pico to your computer using a USB cable.
- Launch the Thonny IDE on your computer.
- On Thonny IDE, select MicroPython (Raspberry Pi Pico) Interpreter by navigating to Tools Options.
- In the Interpreter tab, select MicroPython (Raspberry Pi Pico) from the drop-down menu.
- Ensure the correct port is selected. Thonny IDE should automatically detect the port, but you may need to select it manually (e.g., COM3 on Windows or /dev/ttyACM0 on Linux).
- Copy the above code and paste it to the Thonny IDE's editor.
- Save the script to your Raspberry Pi Pico by:
- Click the Save button, or use Ctrl+S keys.
- In the save dialog, you will see two sections: This computer and Raspberry Pi Pico. Select Raspberry Pi Pico
- Save the file as main.py
- Click the green Run button (or press F5) to run the script. The script will execute.
- Check the temperature of the heating element.
WARNING
Please be cautious as it can lead to burns or fire at home. It's important for your safety. If you are unsure, do not try to handle it yourself. Ask someone experienced for help. We are not liable for your safety.
If you name your script main.py and save it to the root directory of the Raspberry Pi Pico, it will automatically run each time the Pico is powered on or reset. This is useful for standalone applications that need to start running immediately upon power-up. If you name your script another name other than main.py, you will need to manually run it from Thonnys's Shell.
Code Explanation
The explanation can be found in the comments section above this Raspberry Pi Pico code.