Raspberry Pi Pico - Button
The button is a basic but essential part used in many Raspberry Pi Pico projects. It might look complex due to its mechanical and physical features, which might be hard for beginners. This guide is meant to make it easy for beginners to understand. Let's start!
※ NOTE THAT:
Before we start using a button with Raspberry Pi Pico, please be aware of two typical issues that beginners often face:
- The floating input problem:
- Symptom: The state of the input pin connected to a button on the Raspberry Pi Pico is unstable and does not accurately reflect the button's state.
- Cause: The button's pin lacks a connection to either a pull-down or a pull-up resistor.
- Solution: Attach a pull-down or pull-up resistor to the input pin. We will explain this more later in the guide.
- Symptom: The code in Raspberry Pi Pico reads the button's state to notice presses by detecting state changes (from HIGH to LOW, or vice versa). But it might register multiple presses with just one actual button press.
- Cause: The mechanical attributes of the button may cause the input pin’s state to quickly switch back and forth multiple times with a single press.
- Solution: Use a method called debounce. Details will be provided in a later tutorial on debouncing.
Note, chattering mainly affects situations where you need to count button presses accurately. It might not be a significant issue in other scenarios.
Hardware Preparation
Or you can buy the following kits:
| 1 | × | DIYables Sensor Kit (18 sensors/displays) |
Additionally, some of these links are for products from our own brand, DIYables .
Overview of Button
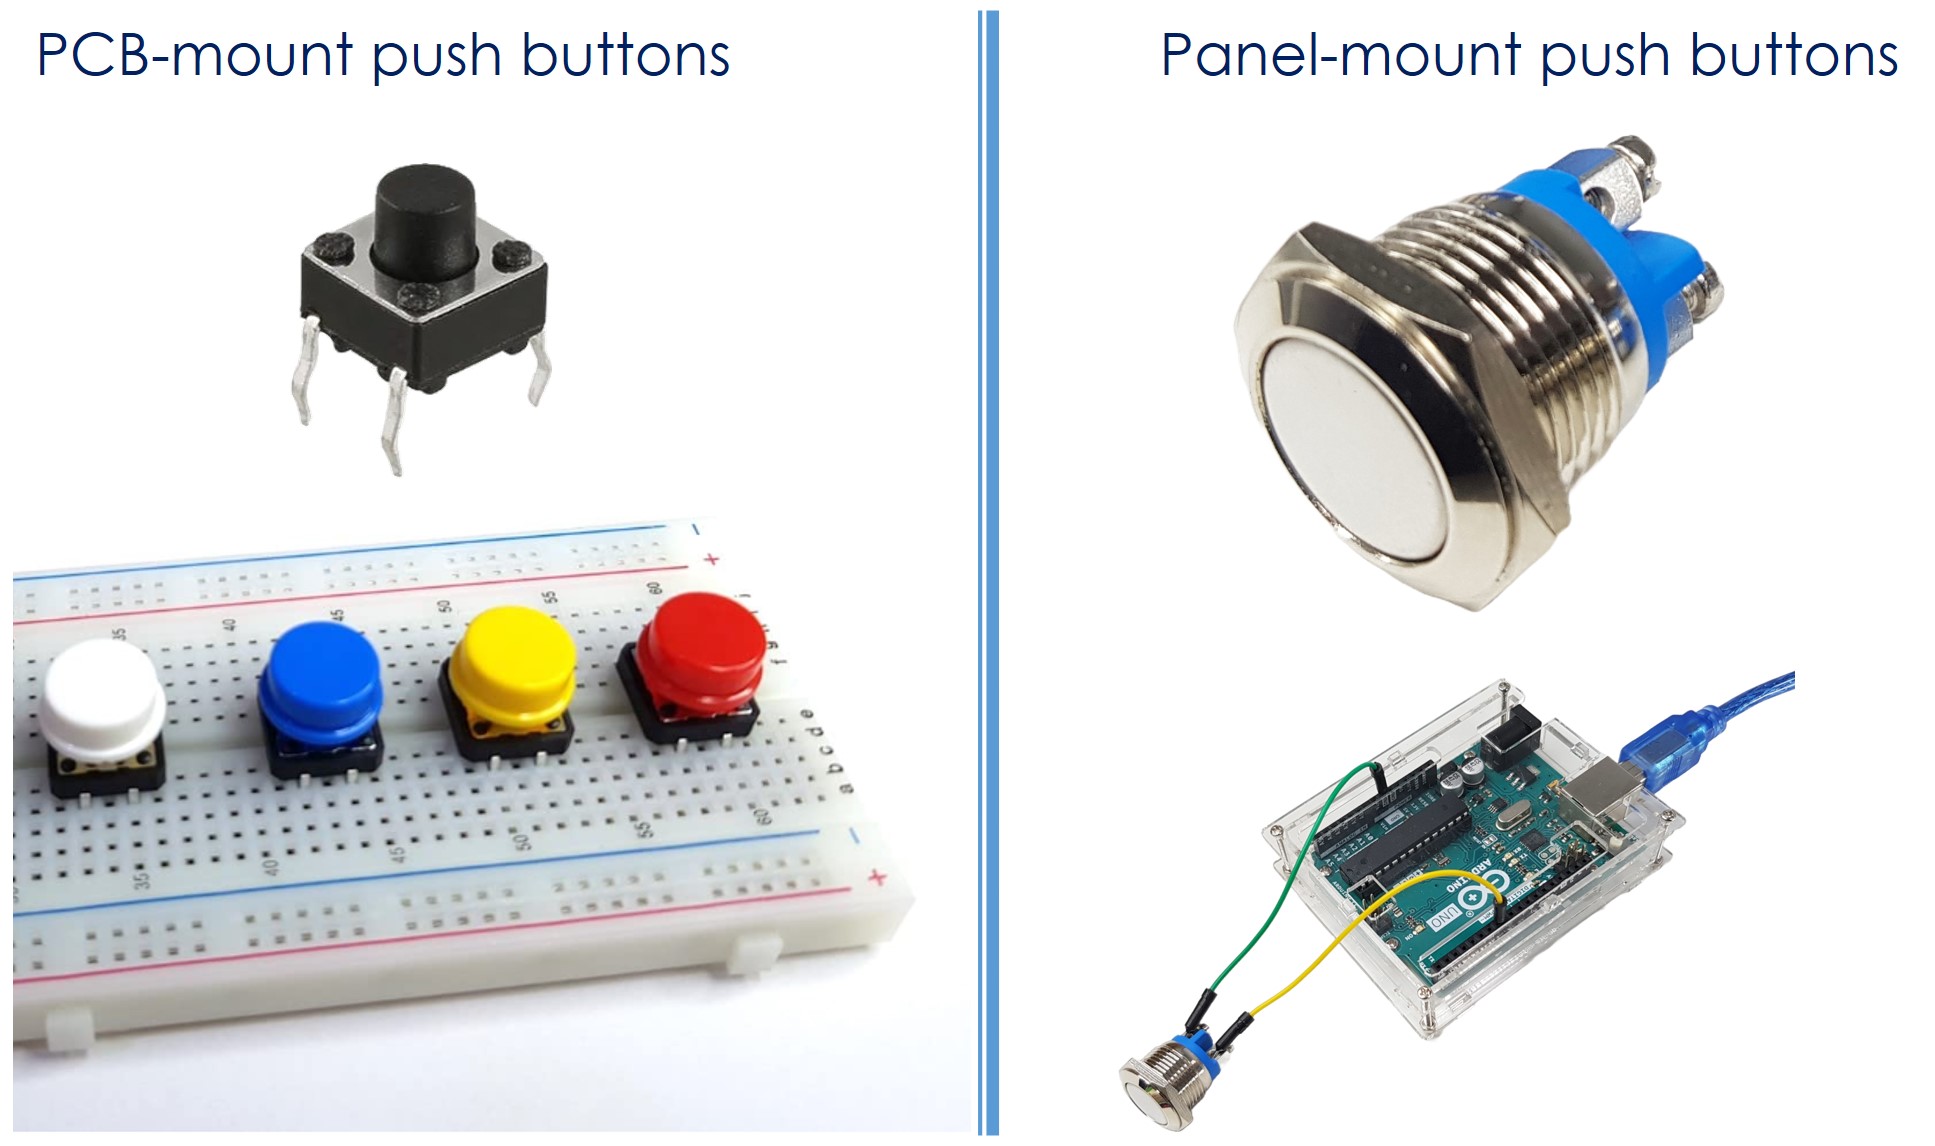
The push button, sometimes called a tactile button or a momentary switch, is a type of switch that connects when you press and keep it down, and disconnects when you let it go. There are various kinds of push buttons, mainly categorized into two groups:
- Push buttons suitable for PCB or breadboard installation
- Push buttons designed for panel installation
Pinout
The PCB-mount buttons usually have four pins.
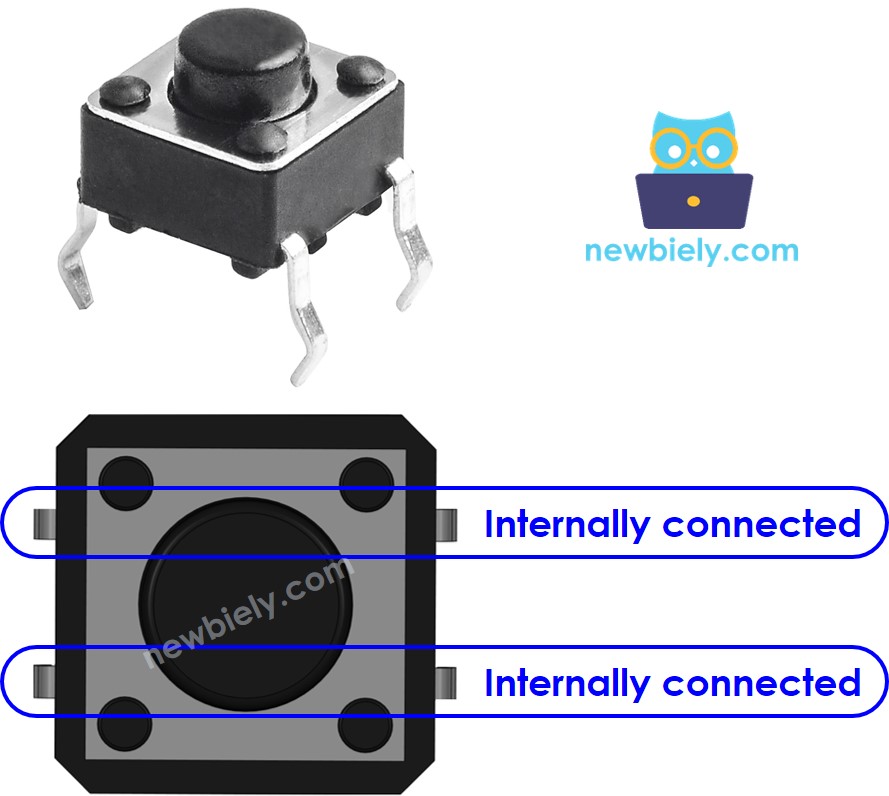
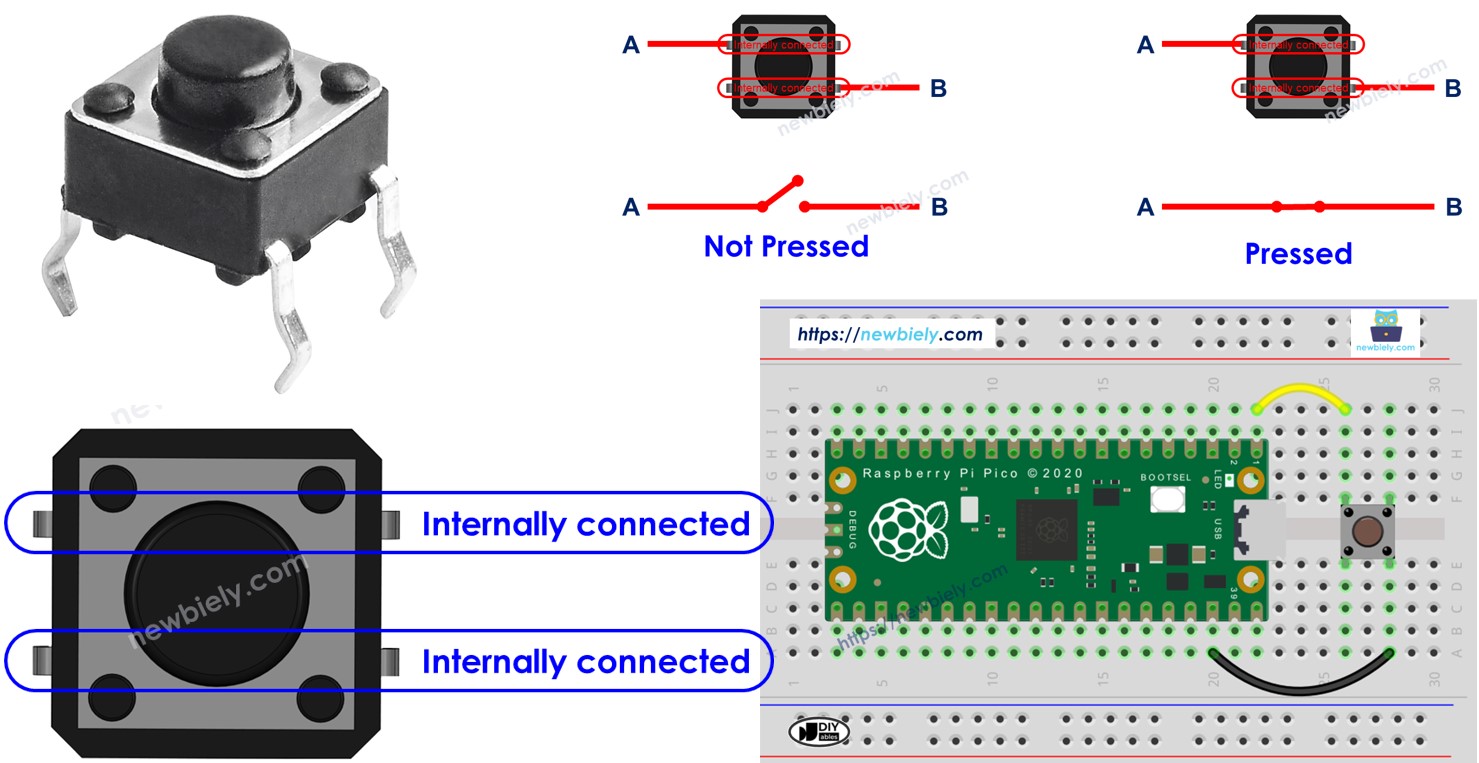
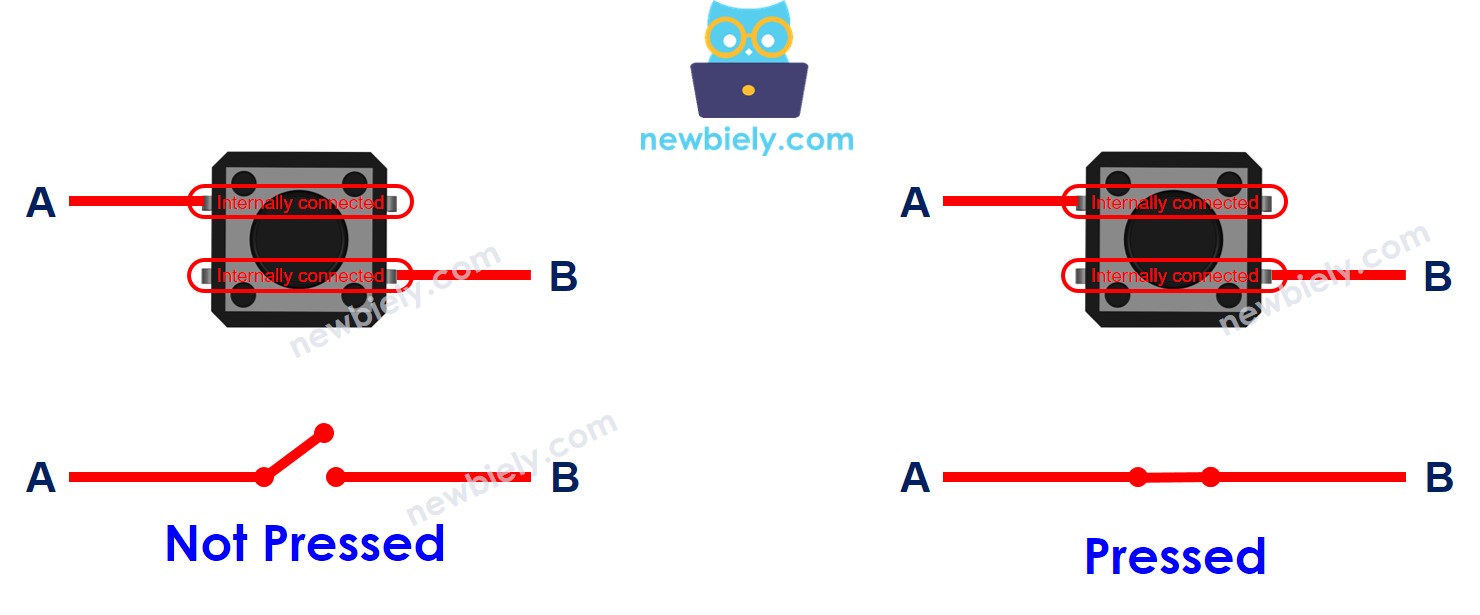
These pins are paired internally, so we just need to use two of the four pins that are not joined inside.
There are four methods to connect the button, as shown in the image, but effectively only two since they are similar.

A button has four pins, but we usually use only two. This helps it stay stable on the board and handle pressure well.
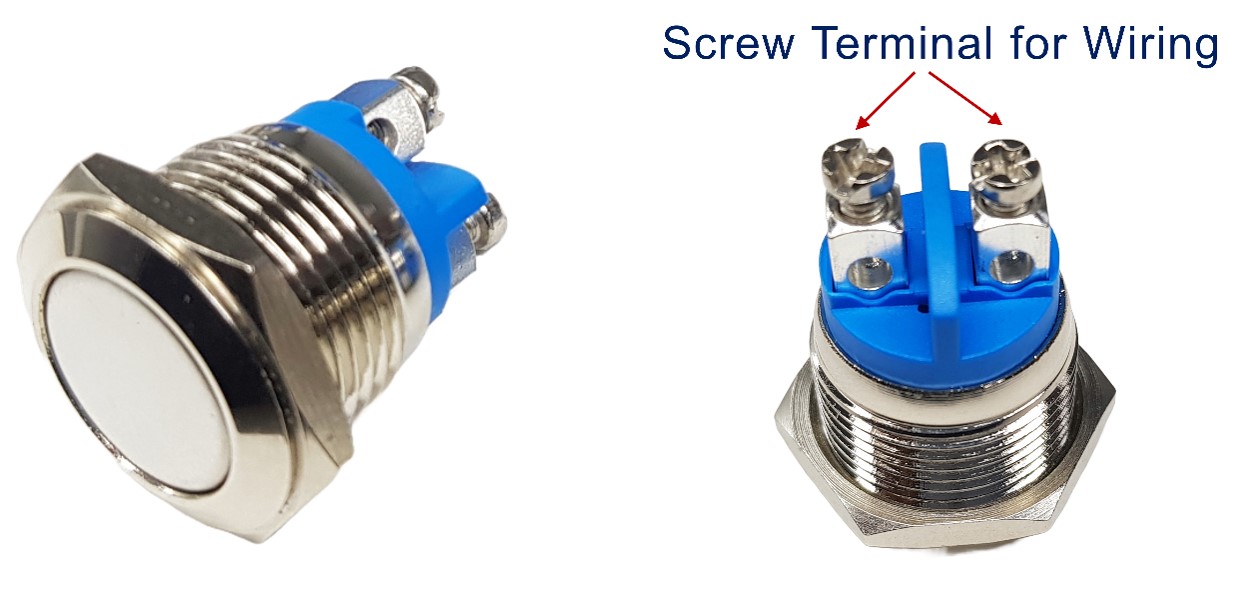
The panel-mount buttons usually have two pins.
The push button module includes an built-in pull-down resistor, which ensures that the output remains LOW when the button is not pressed. It has three pins:
- GND: Connect this pin to ground.
- VCC: Connect this pin to a 3.3V power supply.
- OUT: Connect this pin to a digital input on your Raspberry Pi Pico Push.
With this configuration, the module outputs LOW when the button is not pressed and outputs HIGH when the button is pressed.
How It Works
- When the button is not pressed, pin A and pin B are disconnected.
- When the button is pressed, pin A and pin B are connected.
Raspberry Pi Pico - Button
One button pin connects to VCC or GND, while the other pin connects to a pin on the Raspberry Pi Pico.
We can find out if the button is pressed by checking the input pin state on the Raspberry Pi Pico.
Button State and Pressing State
The connection between the button's status and when it is pressed is determined by how we link the button to the Raspberry Pi Pico and the configuration of the Raspberry Pi Pico's pin.
You can use a button with Raspberry Pi Pico in two ways:
- Connect one pin of the button to VCC and the other pin to a Raspberry Pi Pico pin. Include a pull-down resistor in this connection.
- When the button is pressed, the Raspberry Pi Pico pin becomes HIGH. When not pressed, it is LOW.
- You must use an extra resistor that you add yourself.
- When the button is pressed, the Raspberry Pi Pico pin becomes LOW. When not pressed, it is HIGH.
- You may use a built-in resistor (internal) or add one yourself (external). To use the built-in resistor, set it up using Raspberry Pi Pico's code.
※ NOTE THAT:
Without a pull-down or pull-up resistor, the input pin is "floating" when the button is not pressed, causing the pin's state to unpredictably switch to HIGH or LOW, leading to inaccurate readings.
- Poor practice: Configure the Raspberry Pi Pico pin as an input with button = Pin(BUTTON_PIN, Pin.IN) and no pull-down or pull-up resistor.
- Good practice: Configure the Raspberry Pi Pico pin with an internal pull-up resistor using button = Pin(BUTTON_PIN, Pin.IN, Pin.PULL_UP). This eliminates the need for an external resistor.
This guide shows you the easiest way to start: we use a simple method where you set up a Raspberry Pi Pico pin with an internal pull-up input. This way, you don't need an external resistor. Beginners should just use the Raspberry Pi Pico code we provide.
Wiring Diagram
- Wiring guide for Raspberry Pi Pico and a PCB-mounted button

This image is created using Fritzing. Click to enlarge image
- Connect the Raspberry Pi Pico to a panel-mount button following this guide:
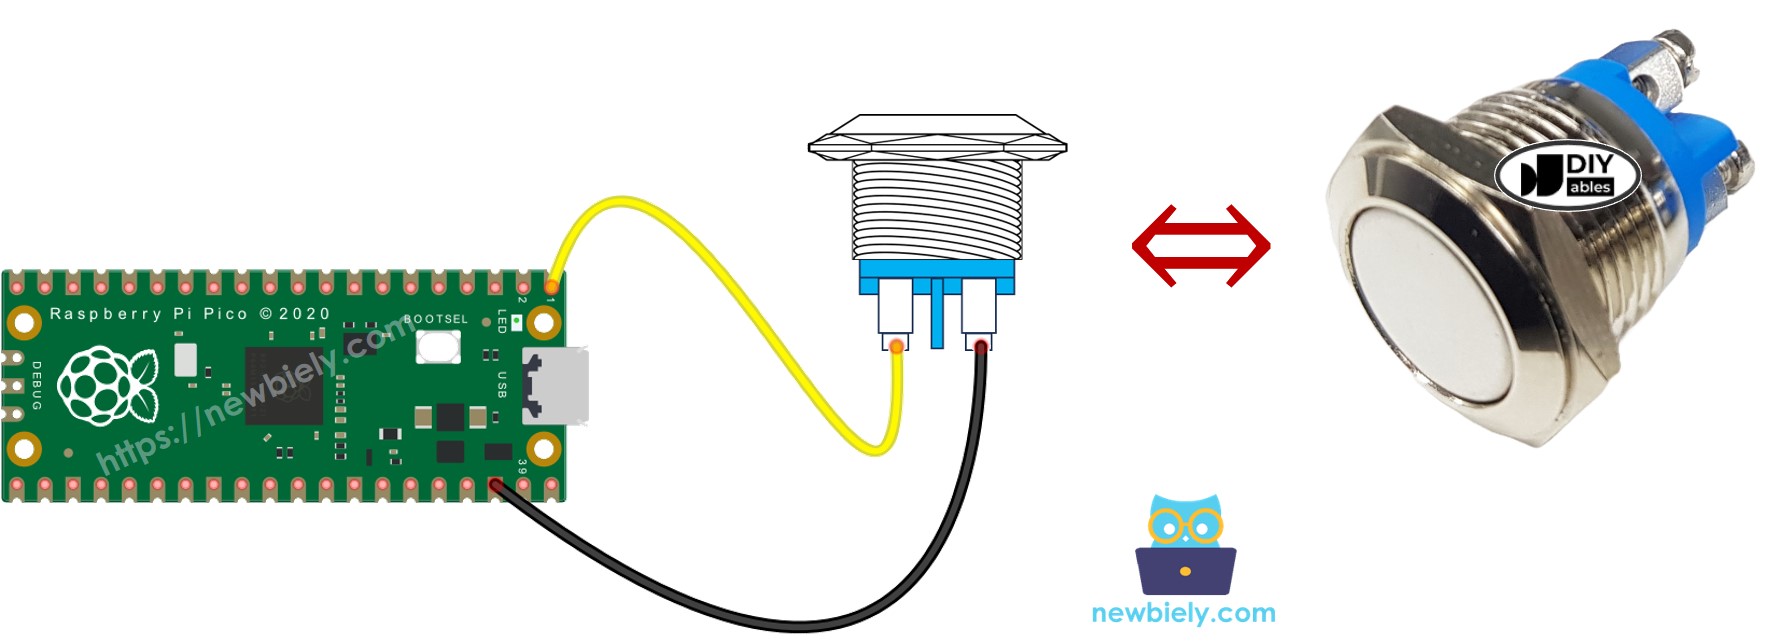
This image is created using Fritzing. Click to enlarge image