Raspberry Pi Pico - MP3 Player
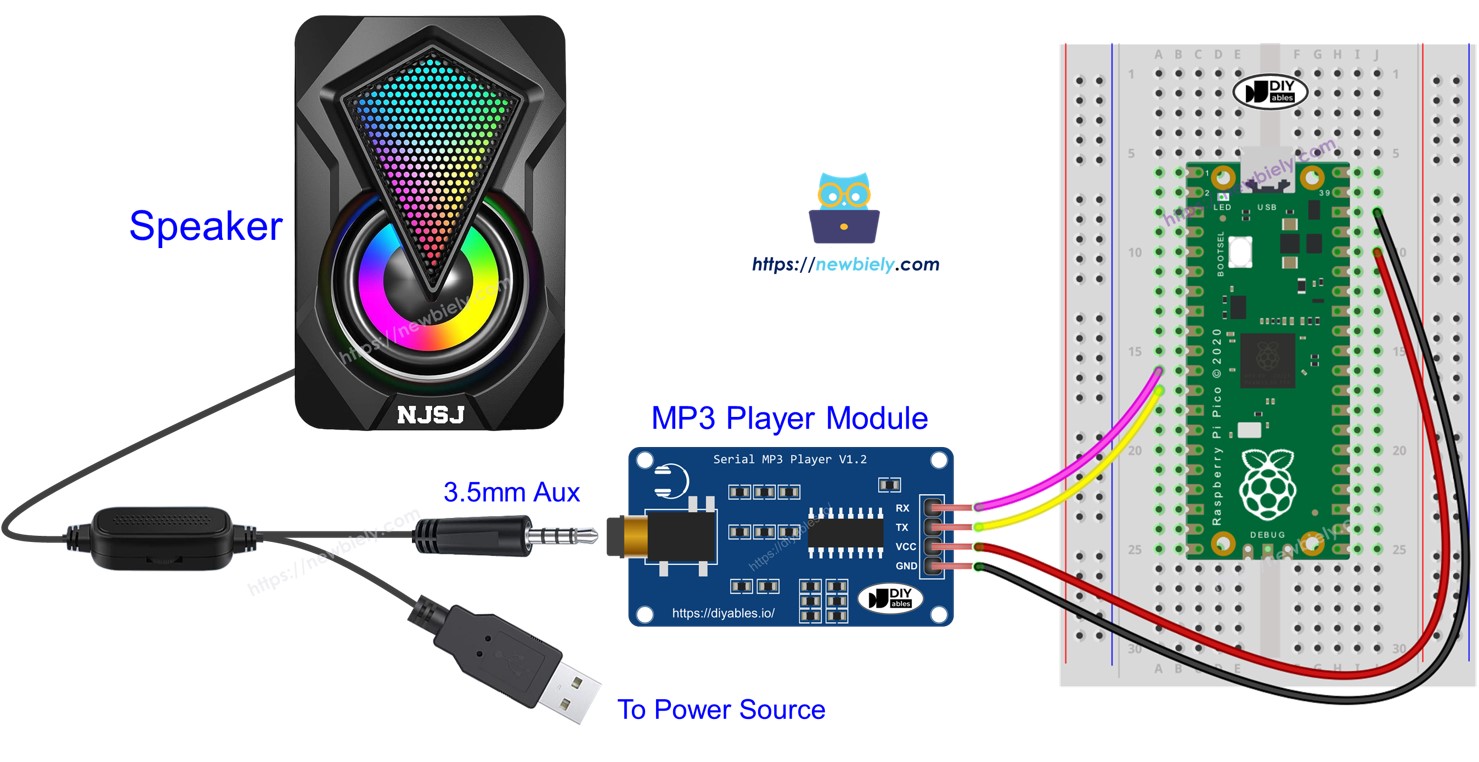
This guide shows you how to make an MP3 player with a Raspberry Pi Pico, an MP3 player module, a Micro SD Card, and a speaker. The MP3 player plays music or audio files from the Micro SD Card. The Raspberry Pi Pico controls the MP3 player module to select and play music from the SD card, convert it to sound, and transmit it to the speaker. We will explain these steps thoroughly.
- How to connect a MP3 player and speaker to Raspberry Pi Pico
- How to write the MicroPython script for Raspberry Pi Pico to play music from a micro SD Card
- How to include buttons for play, pause, next, and previous functions
Then, you can modify the code to add a potentiometer or rotary encoder to control the volume.
Hardware Preparation
Or you can buy the following kits:
| 1 | × | DIYables Sensor Kit (18 sensors/displays) |
Additionally, some of these links are for products from our own brand, DIYables .
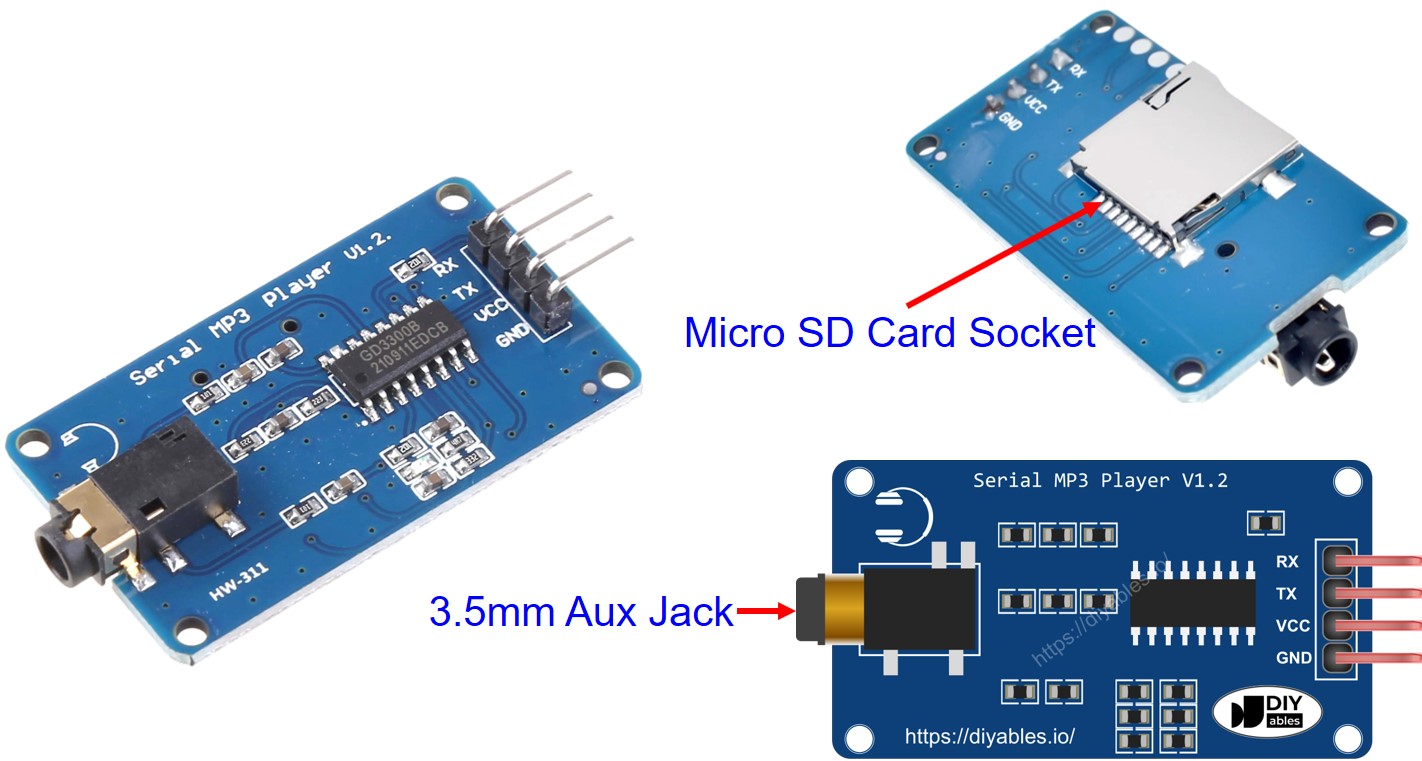
Overview of Serial MP3 Player Module and Speaker
Serial MP3 Player Module Pinout
A serial MP3 player module has three interfaces:
- Raspberry Pi Pico Interface:
- RX pin: This pin is for receiving data. Connect it to the TX pin on your Raspberry Pi Pico using a Serial connection.
- TX pin: This pin is for sending data. Connect it to the RX pin on your Raspberry Pi Pico using a Serial connection.
- VCC pin: This pin provides power. Connect it to a 3.3V pin of Raspberry Pi Pico.
- GND pin: This is the ground pin. Connect it to a 0V source.
- Speaker Interface:
- A 3.5mm Aux output female jack.
- Micro SD Card Interface:
- The socket for the Micro SD Card is located at the back of the module.
- Audio connection: It has a 3.5mm Aux male connector for connecting to an MP3 player.
- Power connection: It can connect to a USB, a 5V power adapter, or other power sources.
Speaker Pinout
A speaker usually has two connection points:
How It Works
What we should prepare:
- Put a list of songs or recordings on a micro SD card.
- Insert the micro SD card into the MP3 player module.
- Attach the MP3 player module to the Raspberry Pi Pico.
- Connect the MP3 player module to a speaker.
- Connect the speaker to a power source.
Each MP3 file on the Micro SD Card is numbered starting from 0, indicating the sequence of the songs.
We can configure the Raspberry Pi Pico to send commands to the MP3 player module. It supports these commands:
- Begin Playing
- Stop
- Play Next
- Play Previous
- Change Volume
The MP3 player module plays the MP3 file stored on the micro SD card and converts it into an audio signal. It then sends this signal to the speaker using the 3.5mm Aux interface.
Wiring Diagram
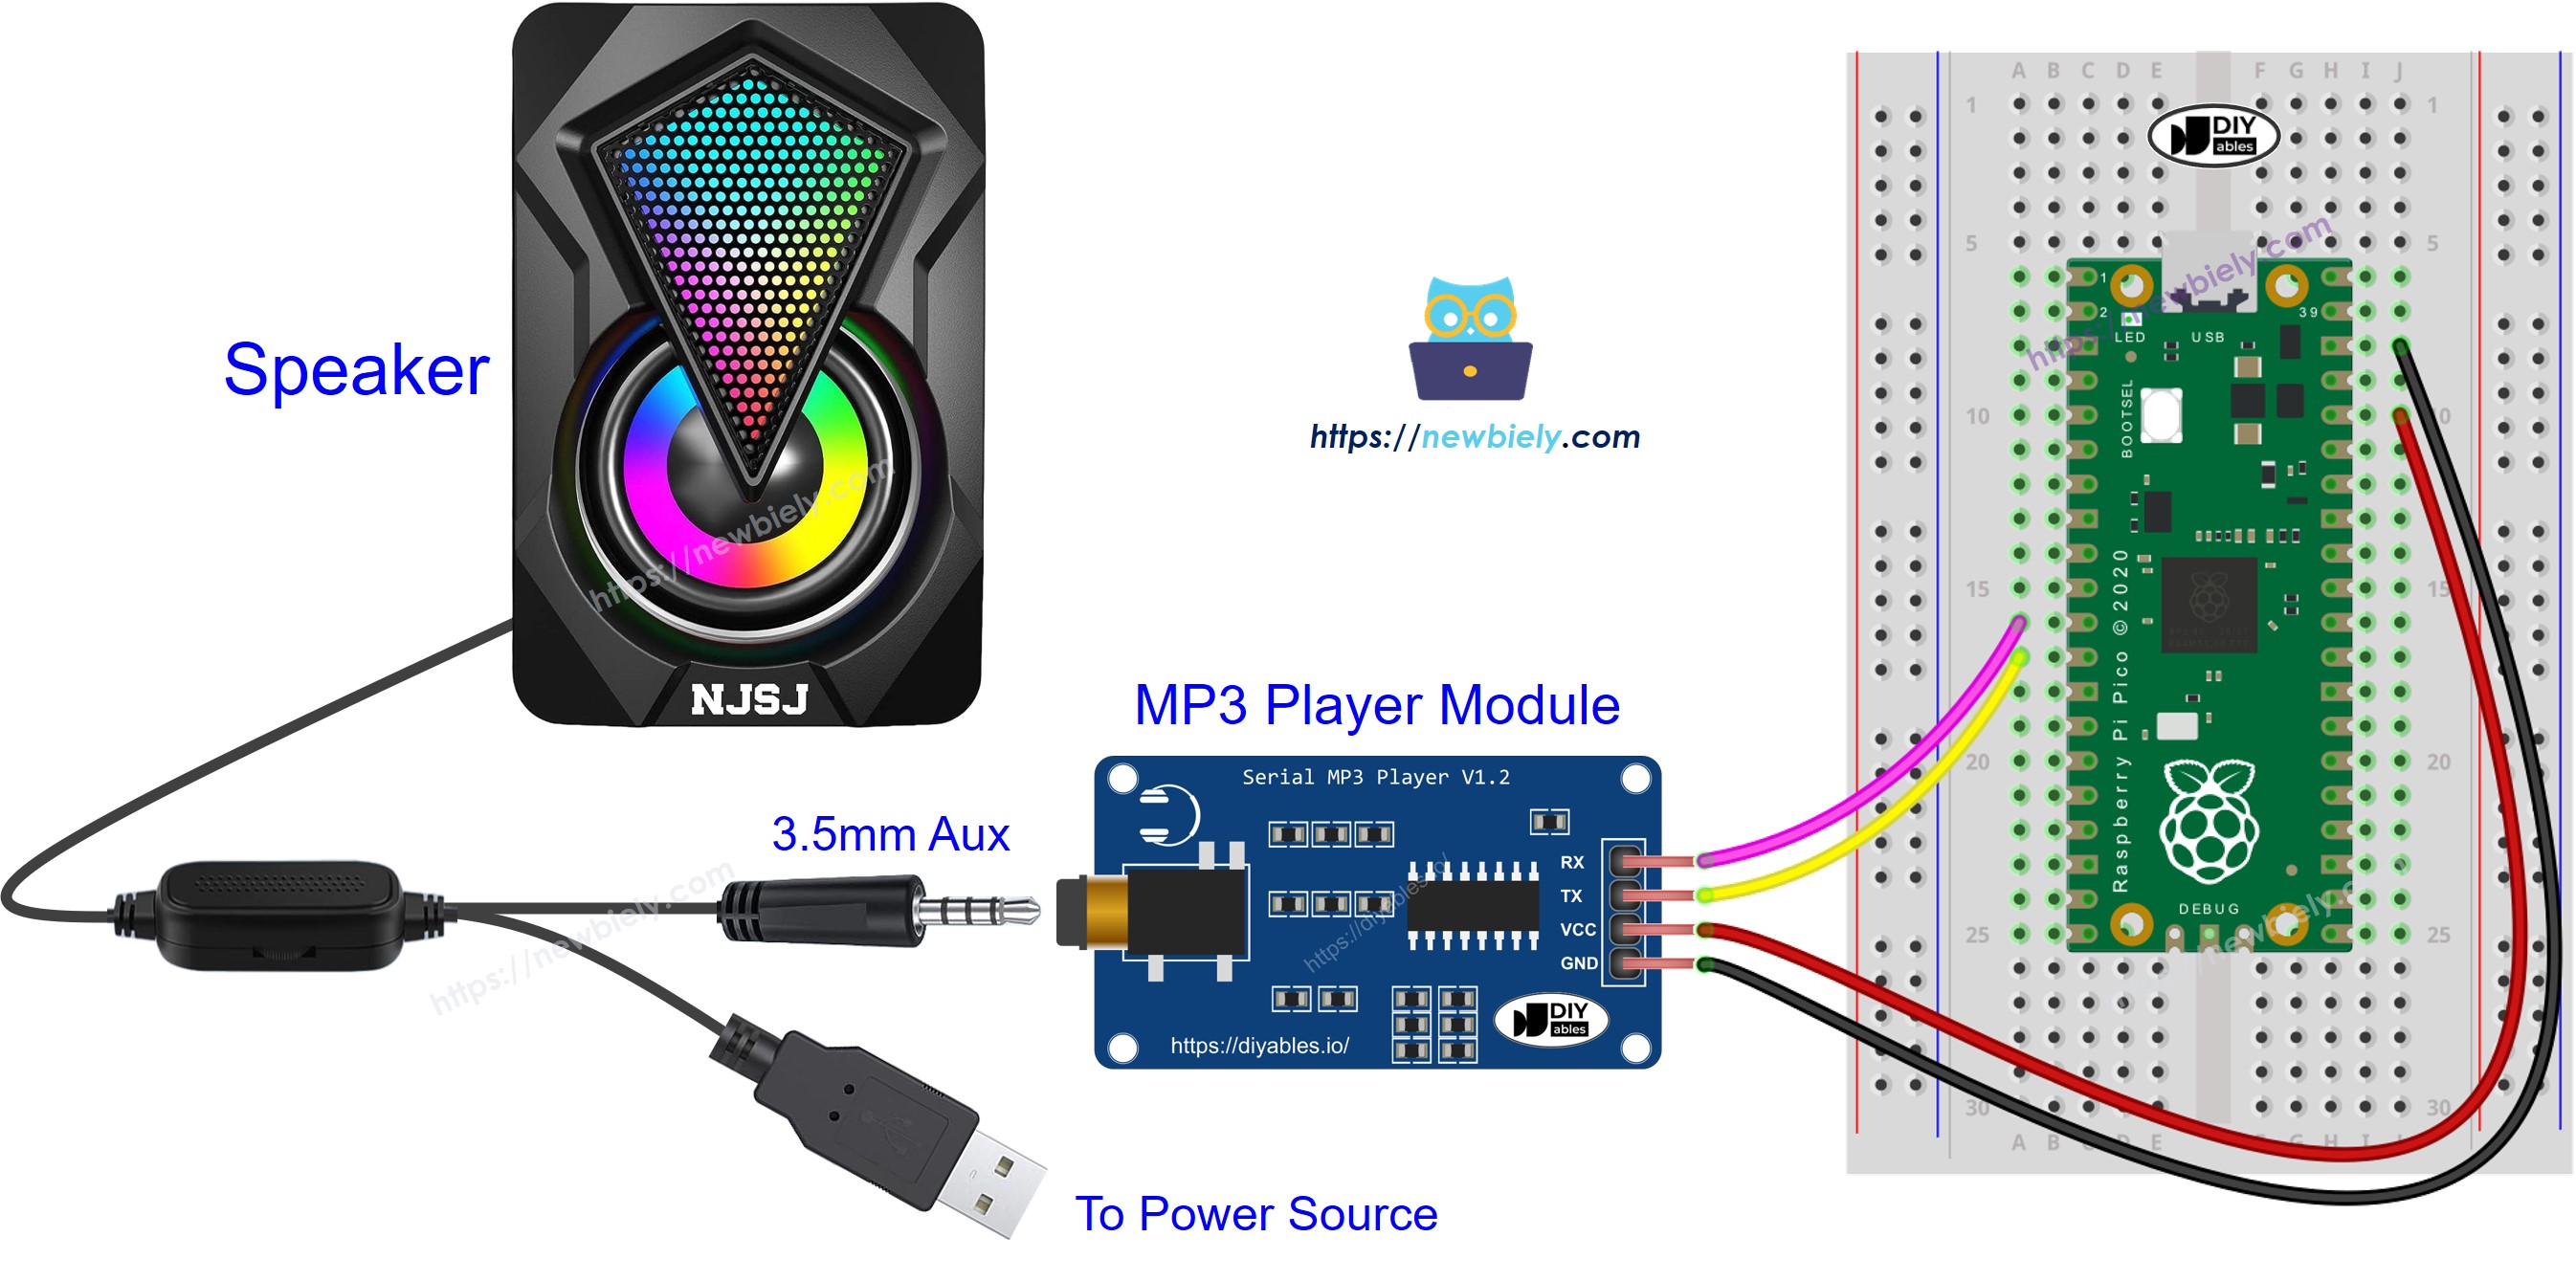
This image is created using Fritzing. Click to enlarge image
Raspberry Pi Pico Code - Play Music
The code below begins to play the first song stored on the Micro SD Card.
Detailed Instructions
Please follow these instructions step by step:
- Ensure that Thonny IDE is installed on your computer.
- Ensure that MicroPython firmware is installed on your Raspberry Pi Pico.
- If this is your first time using a Raspberry Pico, refer to the Raspberry Pi Pico - Getting Started tutorial for detailed instructions.
- Connect the Raspberry Pi Pico to the MP3 player module according to the provided diagram.
- Connect the Raspberry Pi Pico to your computer using a USB cable.
- Launch the Thonny IDE on your computer.
- On Thonny IDE, select MicroPython (Raspberry Pi Pico) Interpreter by navigating to Tools Options.
- In the Interpreter tab, select MicroPython (Raspberry Pi Pico) from the drop-down menu.
- Ensure the correct port is selected. Thonny IDE should automatically detect the port, but you may need to select it manually (e.g., COM3 on Windows or /dev/ttyACM0 on Linux).
- Copy the above code and paste it to the Thonny IDE's editor.
- Save the script to your Raspberry Pi Pico by:
- Click the Save button, or use Ctrl+S keys.
- In the save dialog, you will see two sections: This computer and Raspberry Pi Pico. Select Raspberry Pi Pico
- Save the file as main.py
- Click the green Run button (or press F5) to run the script. The script will execute.
- Enjoy the music
Raspberry Pi Pico Code - Play Music with control buttons
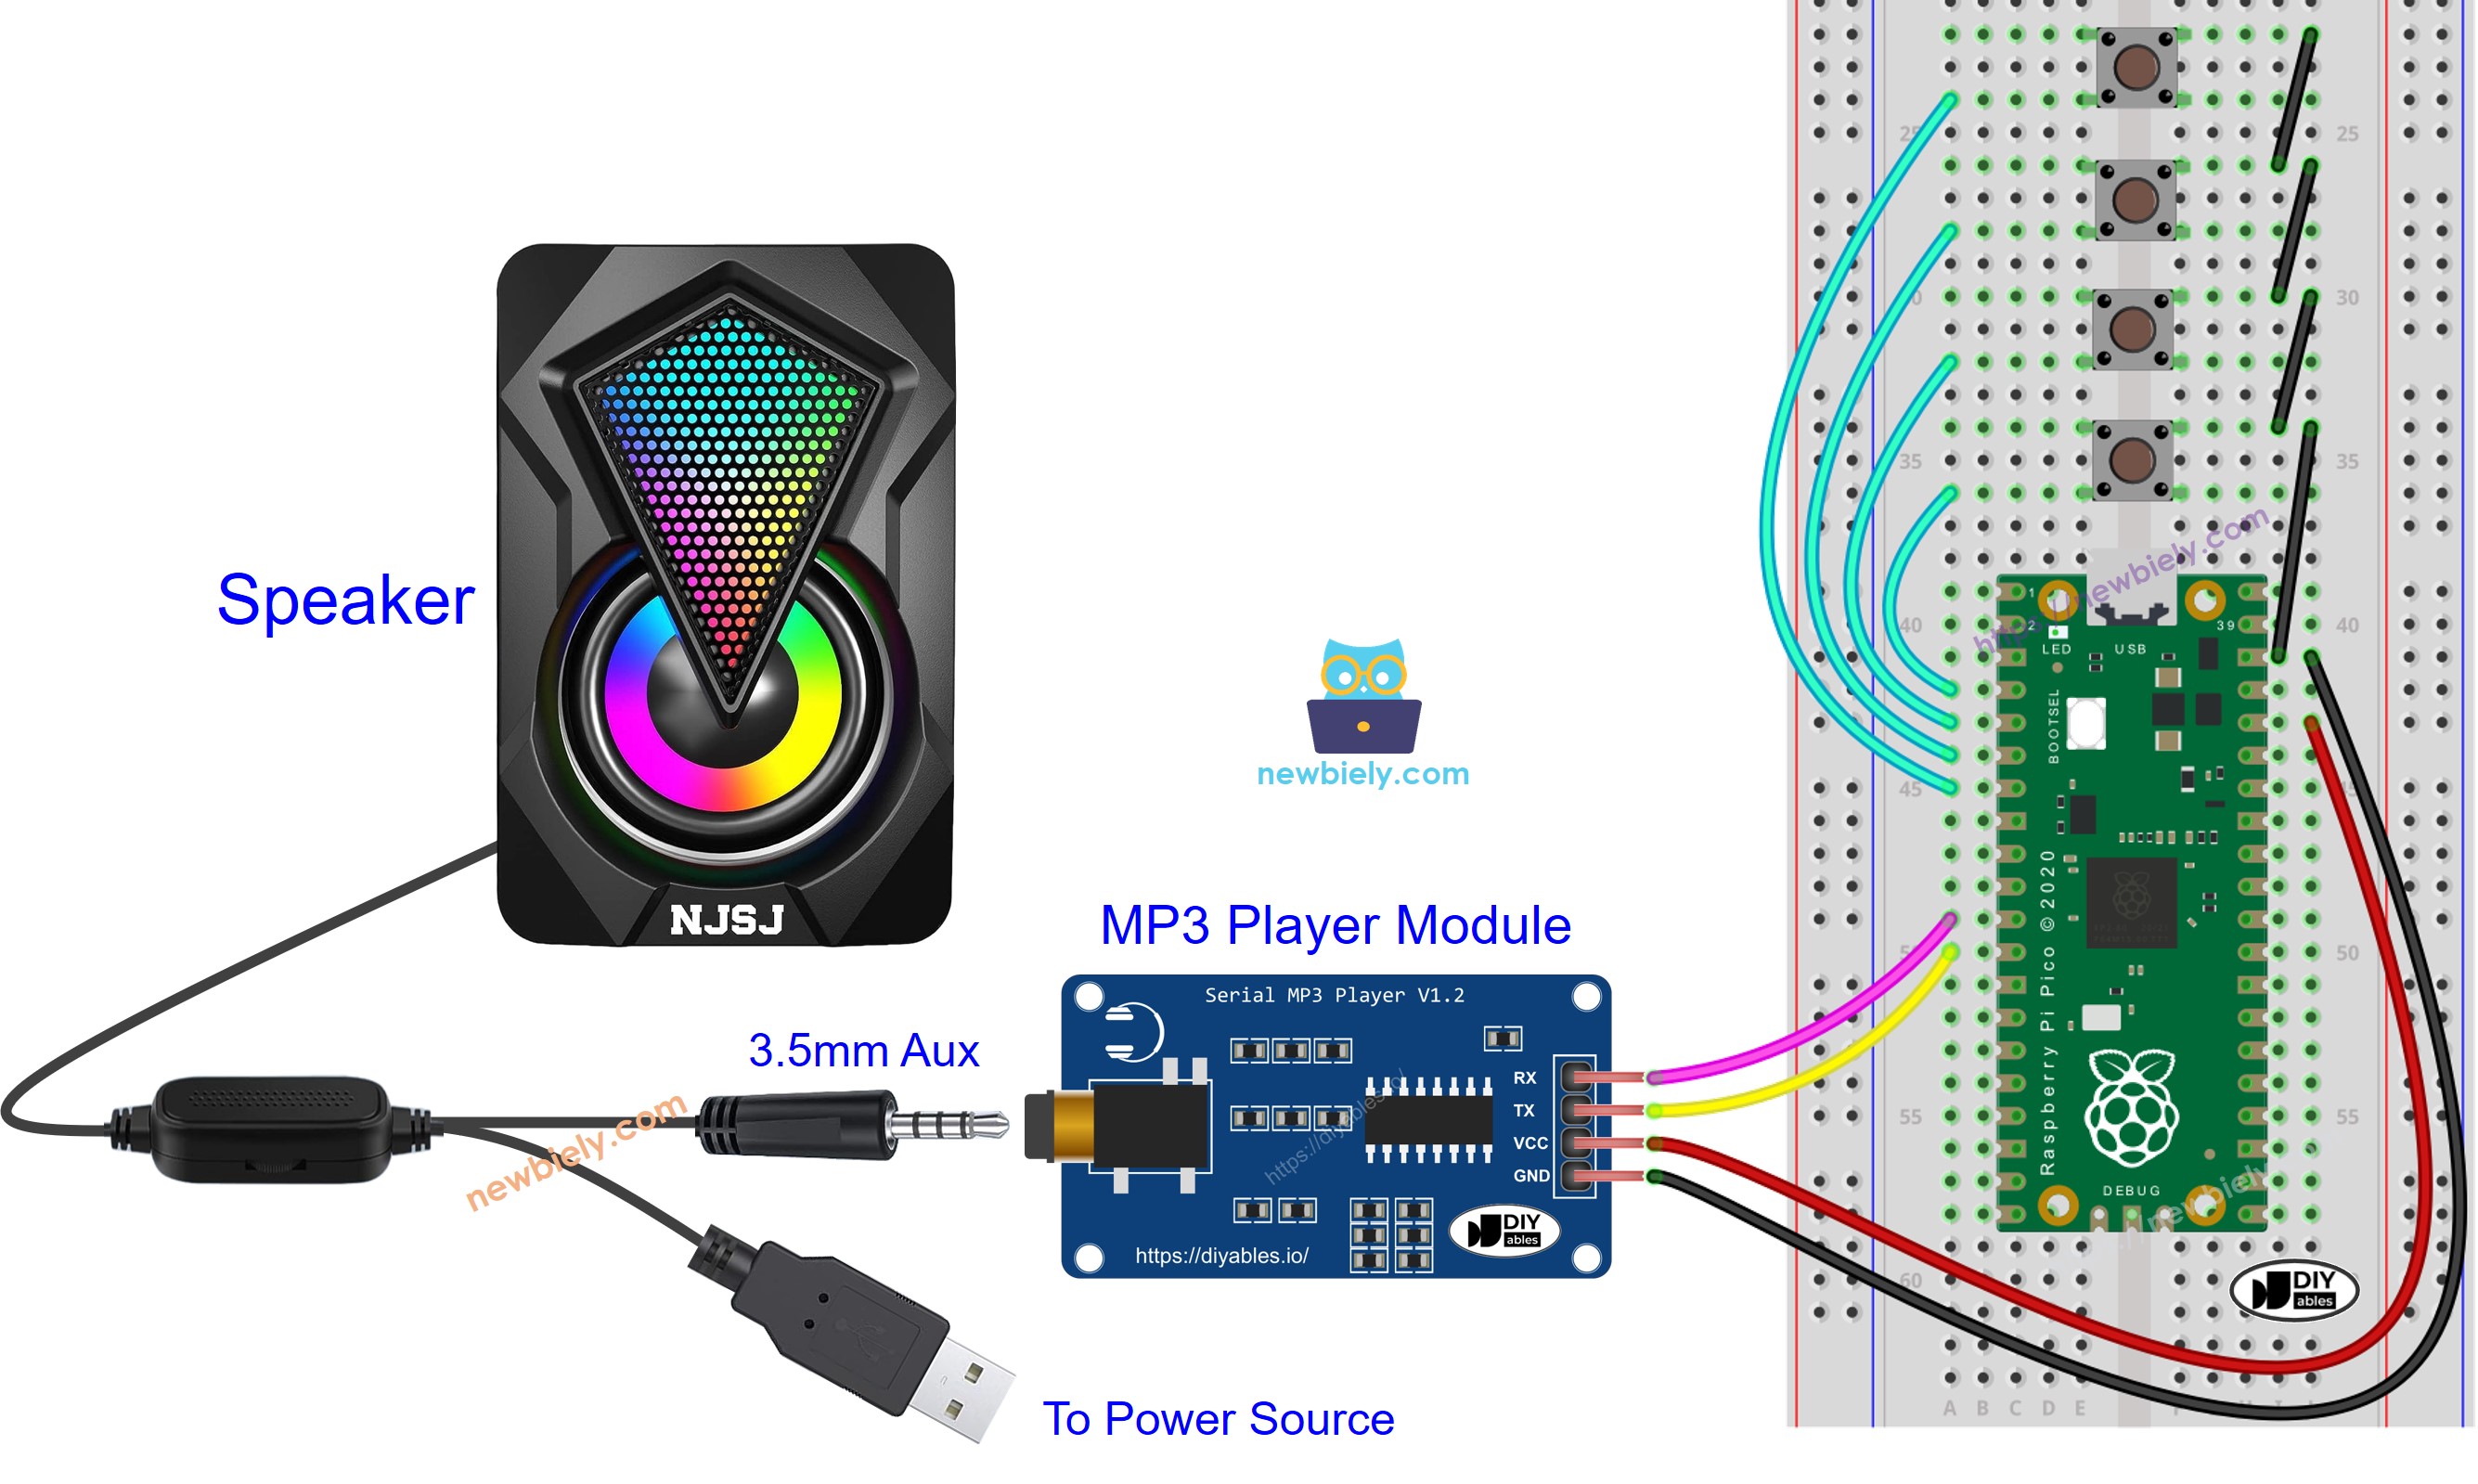
This image is created using Fritzing. Click to enlarge image
The following code is an updated version of the previous one. It features four buttons that help you manage the MP3 player.
Detailed Instructions
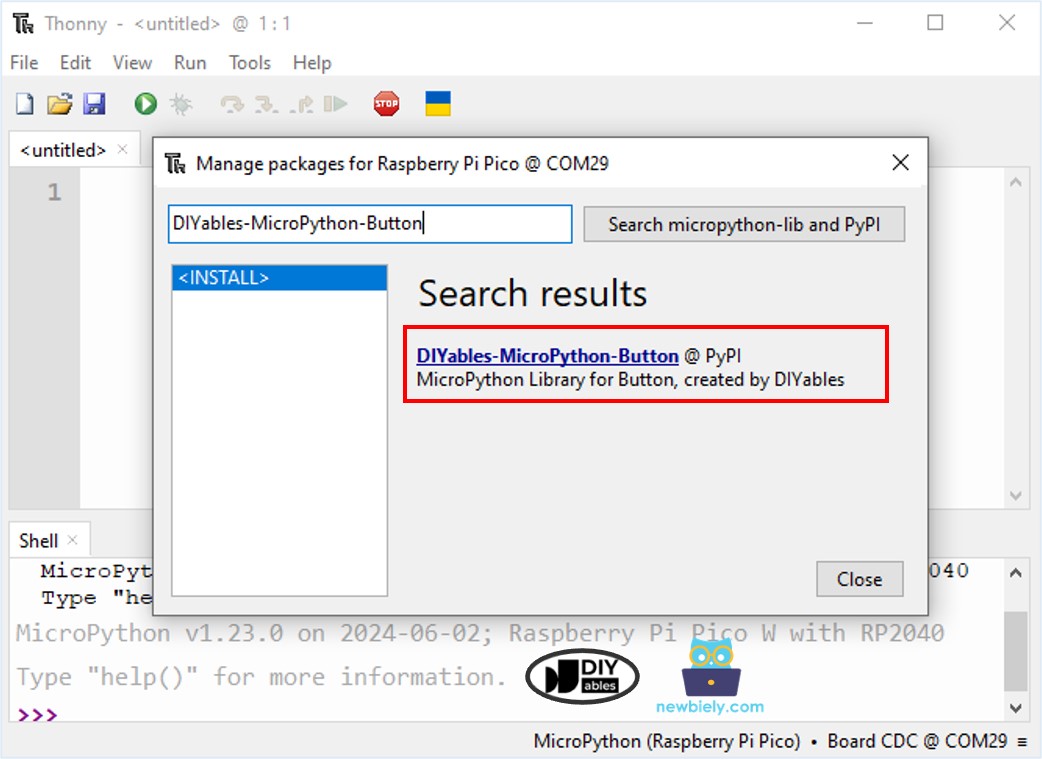
- On Thonny IDE, navigate to the Tools Manage packages on the Thonny IDE.
- Search “DIYables-MicroPython-Button”, then find the Button library created by DIYables.
- Click on DIYables-MicroPython-Button, then click Install button to install Button library.
- Copy the above code and paste it to the Thonny IDE's editor.
- Save the script to your Raspberry Pi Pico.
- Click the green Run button (or press F5) to run the script. The script will execute.
- Press the buttons one by one.
- Enjoy the music