Raspberry Pi Pico - Ultrasonic Sensor - LCD
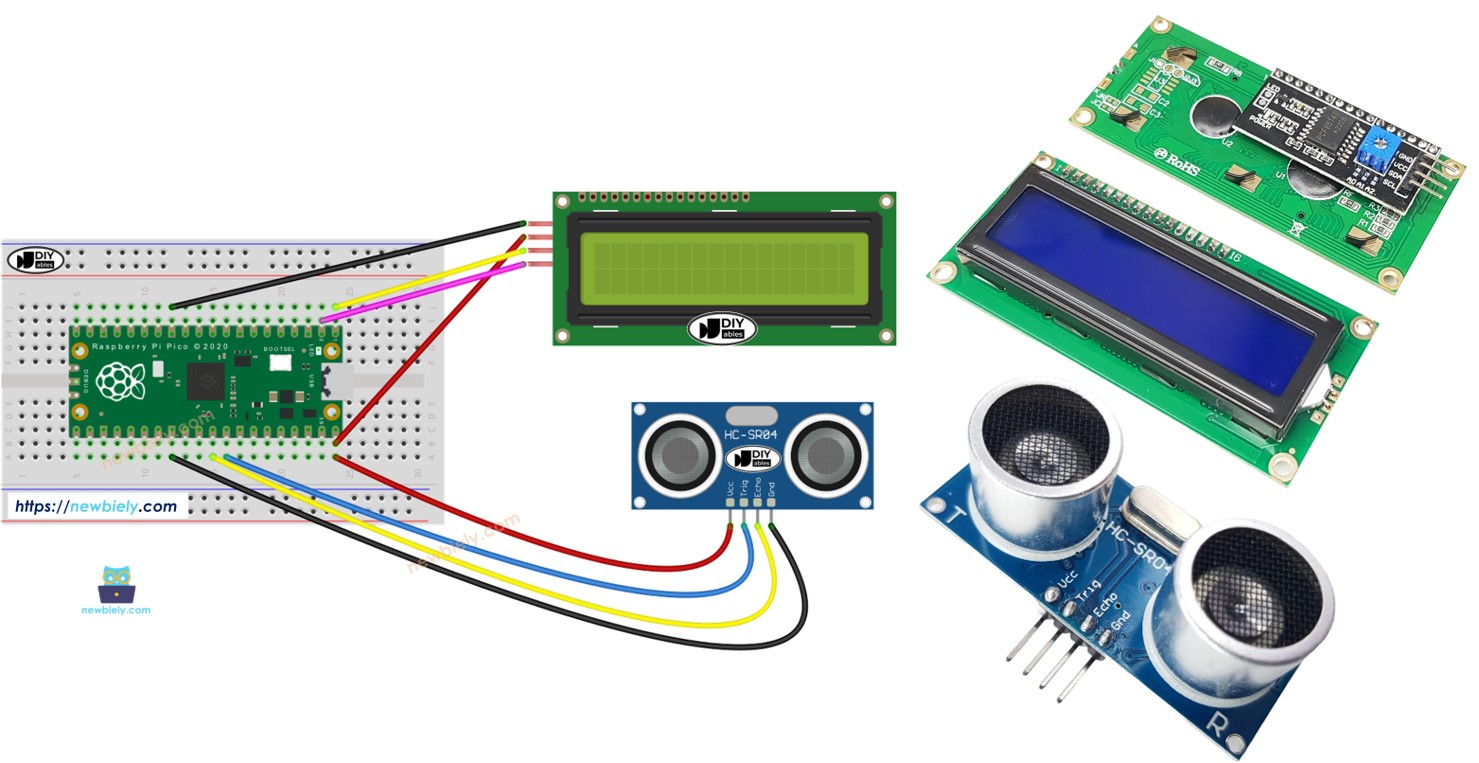
This guide shows you how to measure distance with an ultrasonic sensor and display it on an LCD I2C using a Raspberry Pi Pico.

Hardware Preparation
Or you can buy the following kits:
| 1 | × | DIYables Sensor Kit (30 sensors/displays) | |
| 1 | × | DIYables Sensor Kit (18 sensors/displays) |
Additionally, some of these links are for products from our own brand, DIYables .
Overview of Ultrasonic Sensor and LCD
Discover how to use the Ultrasonic sensor and LCD, exploring their pin connections, how they work, and how to program them in these guides.
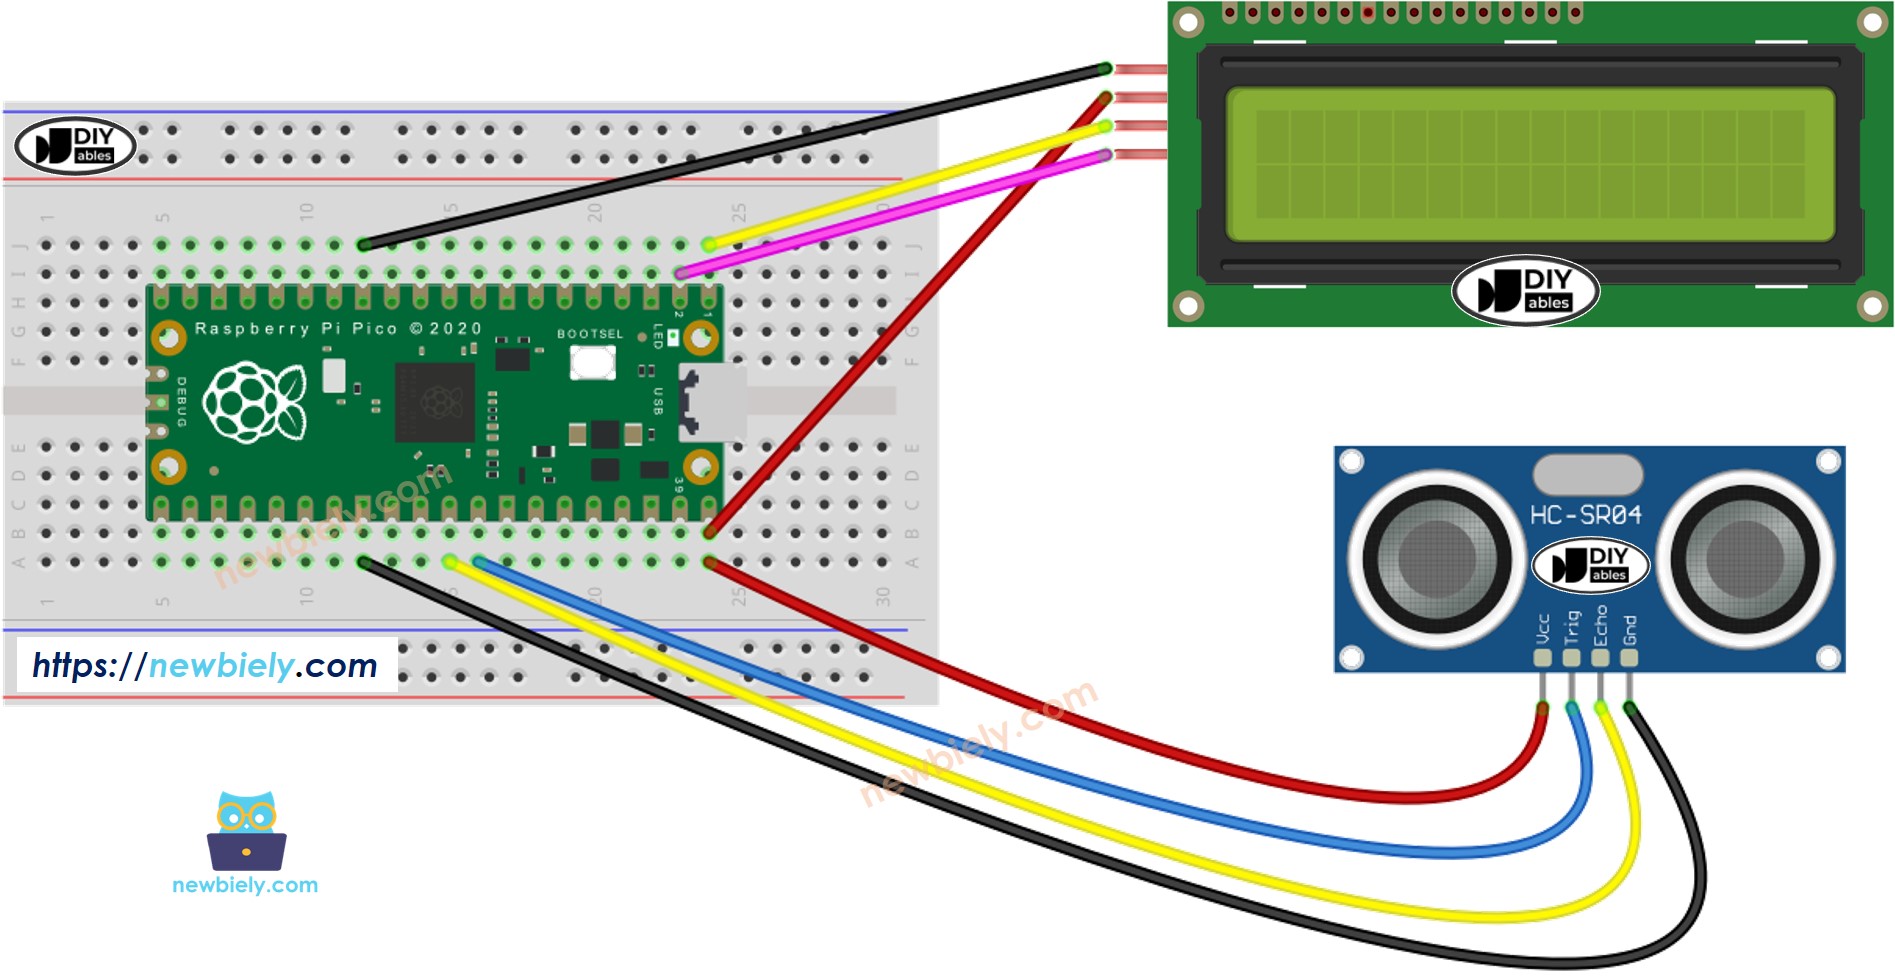
Wiring Diagram

This image is created using Fritzing. Click to enlarge image
Raspberry Pi Pico Code
※ NOTE THAT:
Different manufacturers may use different I2C addresses for the LCD. In our example, we used the address 0x27, following the recommendation from the manufacturer DIYables.
Detailed Instructions
Please follow these instructions step by step:
- Ensure that Thonny IDE is installed on your computer.
- Ensure that MicroPython firmware is installed on your Raspberry Pi Pico.
- If this is your first time using a Raspberry Pico, refer to the Raspberry Pi Pico - Getting Started tutorial for detailed instructions.
- Connect the Raspberry Pi Pico to the ultrasonic sensor and LCD display according to the provided diagram.
- Connect the Raspberry Pi Pico to your computer using a USB cable.
- Launch the Thonny IDE on your computer.
- On Thonny IDE, select MicroPython (Raspberry Pi Pico) Interpreter by navigating to Tools Options.
- In the Interpreter tab, select MicroPython (Raspberry Pi Pico) from the drop-down menu.
- Ensure the correct port is selected. Thonny IDE should automatically detect the port, but you may need to select it manually (e.g., COM3 on Windows or /dev/ttyACM0 on Linux).
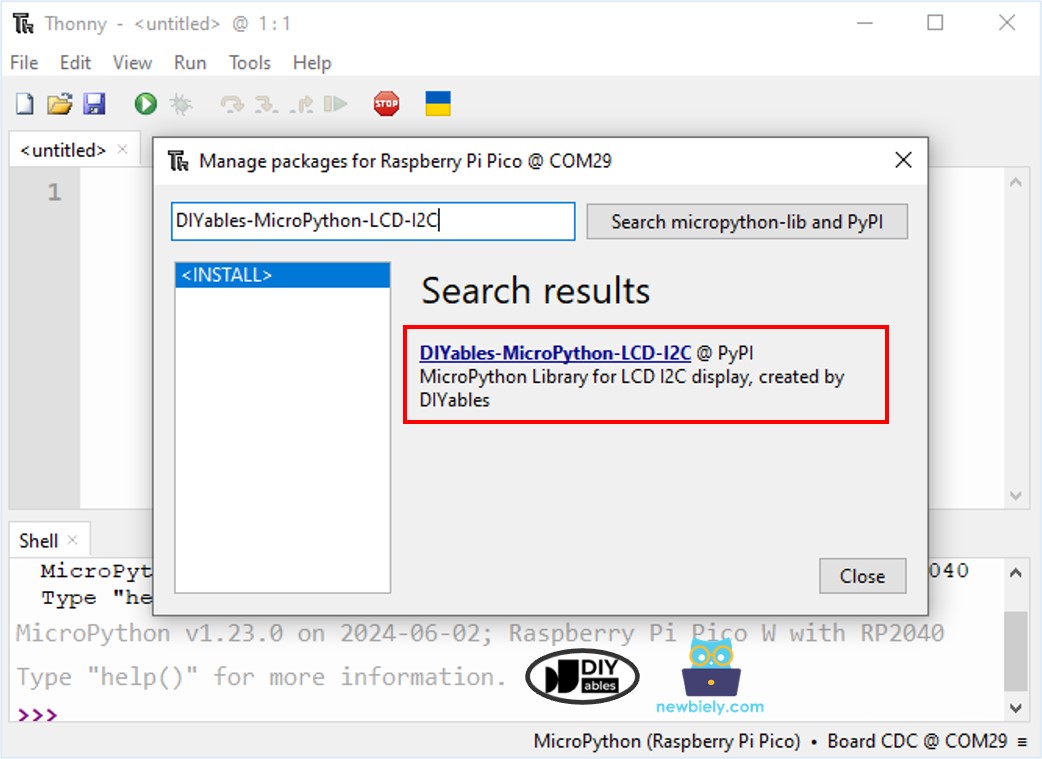
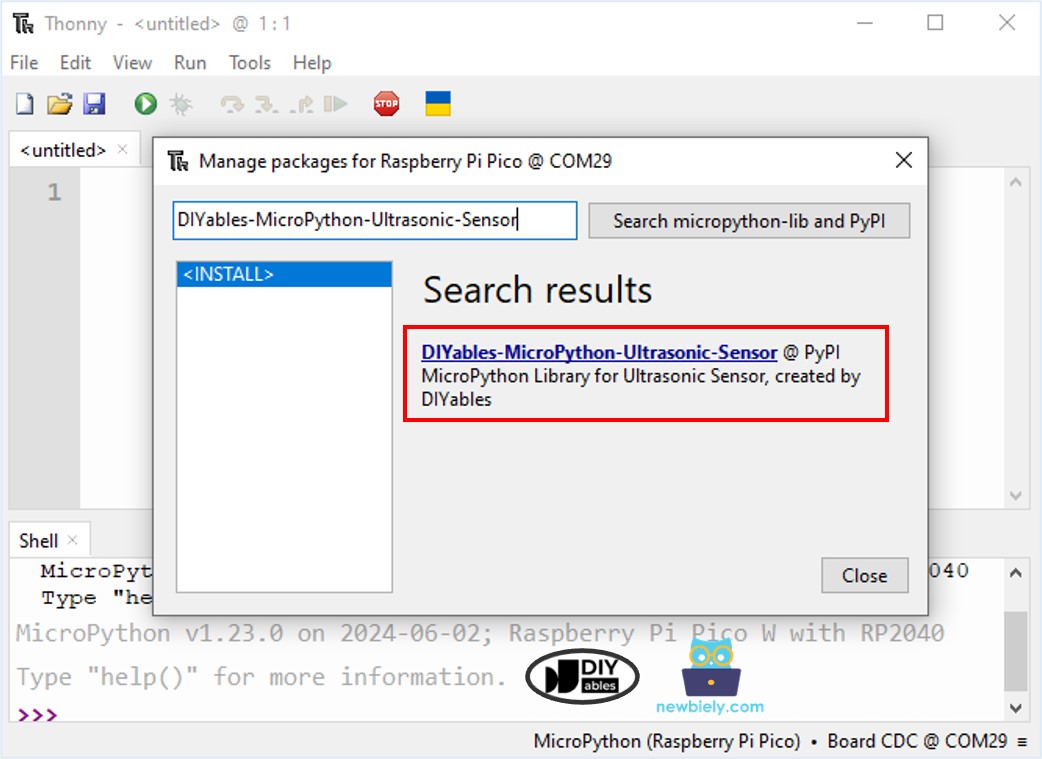
- Navigate to the Tools Manage packages on the Thonny IDE.
- Search “DIYables-MicroPython-LCD-I2C”, then find the LCD I2C library created by DIYables.
- Click on DIYables-MicroPython-LCD-I2C, then click Install button to install LCD I2C library.

- Search “DIYables-MicroPython-Ultrasonic-Sensor”, then find the Ultrasonic Sensor library created by DIYables.
- Click on DIYables-MicroPython-Ultrasonic-Sensor, then click Install button to install Ultrasonic Sensor library.

- Copy the above code and paste it to the Thonny IDE's editor.
- Save the script to your Raspberry Pi Pico by:
- Click the Save button, or use Ctrl+S keys.
- In the save dialog, you will see two sections: This computer and Raspberry Pi Pico. Select Raspberry Pi Pico
- Save the file as main.py
- Click the green Run button (or press F5) to run the script. The script will execute.
- Check out the message in the Shell at the bottom of Thonny.
- Place an object in front of the ultrasonic sensor
- Check out the LCD display.
Code Explanation
Look at the comments in the code to understand each line.
※ NOTE THAT:
If the LCD displays nothing, check this guide: Troubleshooting LCD I2C
