Raspberry Pi Pico - Blink LED Without Sleep
In this tutorial, we will learn how to make the Raspberry Pi Pico blink an LED in non-blocking method without using time.sleep() function. In detail, we will learn:
- Raspberry Pi Pico blinks LED using the non-blocking method
- Raspberry Pi Pico blinks LED in a period of time
- Raspberry Pi Pico blinks LED with number of times.
Hardware Preparation
Or you can buy the following kits:
| 1 | × | DIYables Sensor Kit (18 sensors/displays) |
Additionally, some of these links are for products from our own brand, DIYables .
Buy Note: Use the LED Module for easier wiring. It includes an integrated resistor.
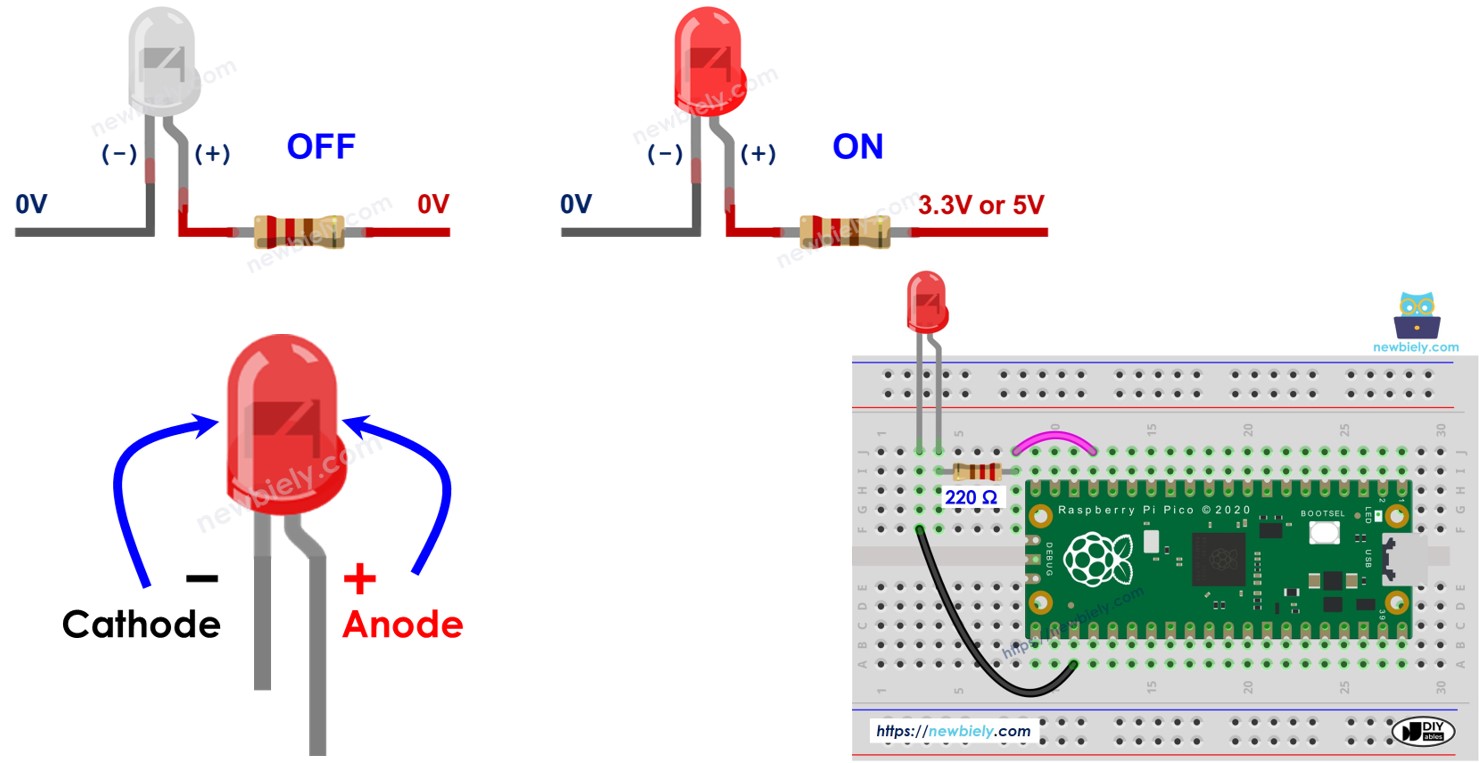
Overview of LED
Explore how LEDs works, their pinout, and programming methods in these tutorials.
Wiring Diagram
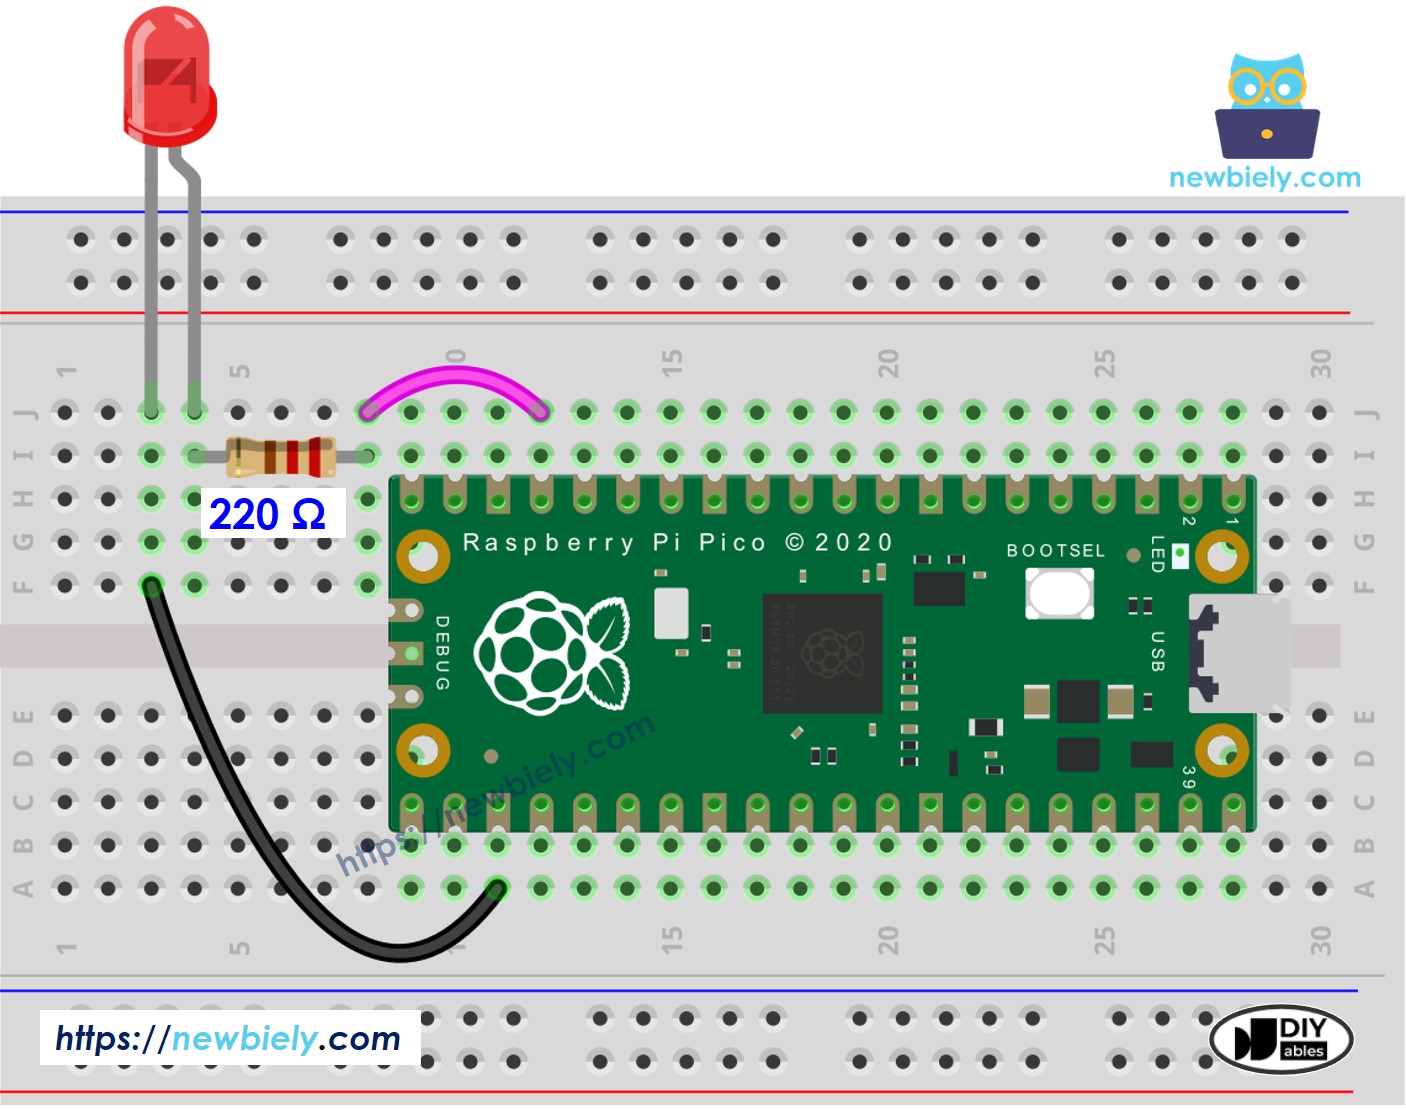
This image is created using Fritzing. Click to enlarge image
Raspberry Pi Pico Code - Blinking LED without sleep
The below MicroPython script blinks a LED with frequency: 250ms ON, 750ms OFF, repectedly forever, without blocking other code.
Detailed Instructions
Please follow these instructions step by step:
- Ensure that Thonny IDE is installed on your computer.
- Ensure that MicroPython firmware is installed on your Raspberry Pi Pico.
- If this is your first time using a Raspberry Pico, refer to the Raspberry Pi Pico - Getting Started tutorial for detailed instructions.
- Connect the Raspberry Pi Pico to the LED according to the provided diagram.
- Connect the Raspberry Pi Pico to your computer using a USB cable.
- Launch the Thonny IDE on your computer.
- On Thonny IDE, select MicroPython (Raspberry Pi Pico) Interpreter by navigating to Tools Options.
- In the Interpreter tab, select MicroPython (Raspberry Pi Pico) from the drop-down menu.
- Ensure the correct port is selected. Thonny IDE should automatically detect the port, but you may need to select it manually (e.g., COM3 on Windows or /dev/ttyACM0 on Linux).
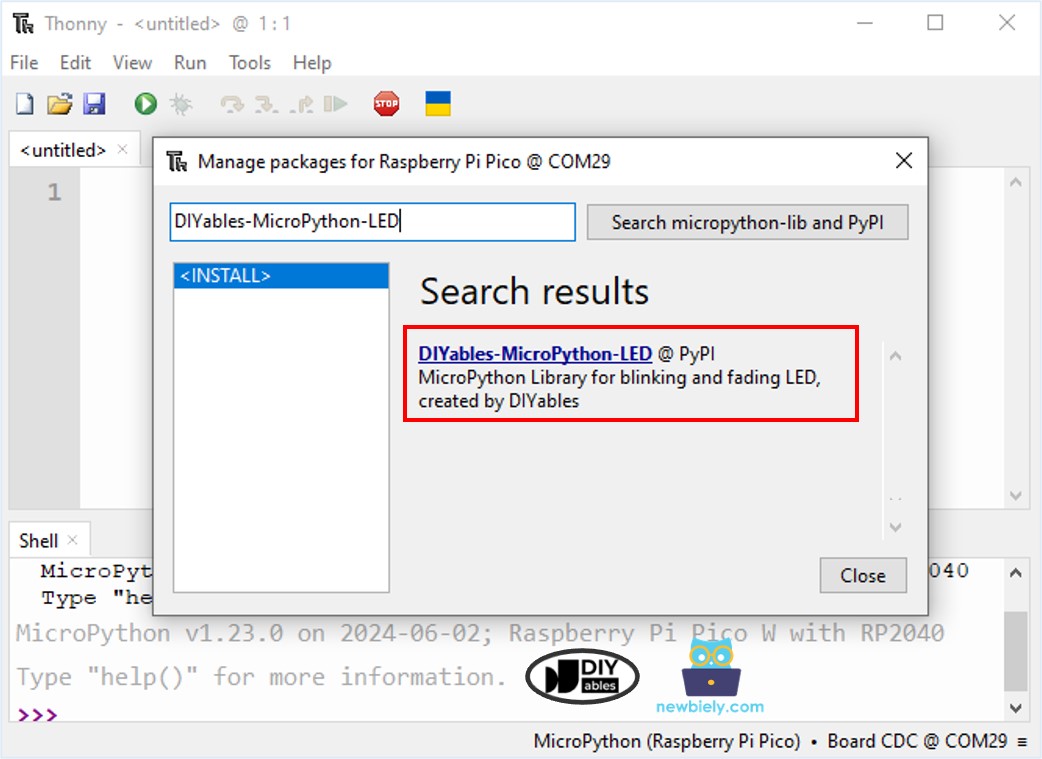
- On Thonny IDE, Navigate to the Tools Manage packages on the Thonny IDE.
- Search “DIYables-MicroPython-LED”, then find the LED library created by DIYables.
- Click on DIYables-MicroPython-LED, then click Install button to install LED library.
- Copy the above code and paste it to the Thonny IDE's editor.
- Save the script to your Raspberry Pi Pico by:
- Click the Save button, or use Ctrl+S keys.
- In the save dialog, you will see two sections: This computer and Raspberry Pi Pico. Select Raspberry Pi Pico
- Save the file as main.py
- Click the green Run button (or press F5) to run the script. The script will execute.
- Watch the LED: LED will blink forever.
Raspberry Pi Pico Code - Blink LED in a Period of Time
The below code blinks a LED in 10 seconds, then stop, without blocking other code.
Detailed Instructions
- Copy the above code and paste it to the Thonny IDE's editor.
- Save the script to your Raspberry Pi Pico.
- Click the green Run button (or press F5) to run the script. The script will execute.
- Watch the LED: LED will blink 10 seconds, then stop.
Raspberry Pi Pico Code - Blink LED with a Number of Time
The below code blinks a LED with frequency: 250ms ON, 750ms OFF, repected 10 times, without blocking other code.
Detailed Instructions
- Copy the above code and paste it to the Thonny IDE's editor.
- Save the script to your Raspberry Pi Pico.
- Click the green Run button (or press F5) to run the script. The script will execute.
- Watch the LED: LED will blink 10 times, then stop.