Raspberry Pi Pico - Joystick - Servo Motor
This guide will show you how to control two servo motors or a pan-tilt kit using a Raspberry Pi Pico and a joystick.
A joystick has two control parts named potentiometers, set in a cross pattern, called the X-axis and Y-axis. These potentiometers create signals, known as X-value and Y-value, which emerge from the VRX and VRY pins of the joystick. We use these signals to operate two servo motors: the X-value controls servo motor #1 and the Y-value controls servo motor #2. When used with a pan-tilt kit, the two servo motors collaborate to move in three dimensions.
The application can be used in two ways:
- Use case 1: Moving the joystick controls the servo motors:
- The servo motors' movement angles correspond to the joystick's left-right (X) and up-down (Y) movements.
- When you release the joystick, it and the servo motors go back to their initial position.
- Use case 2: Use the joystick to direct the servo motors:
- Moving the joystick to the left makes servo motor #1 rotate clockwise.
- Moving the joystick to the right makes servo motor #1 rotate counterclockwise.
- Moving the joystick upward makes servo motor #2 rotate clockwise.
- Moving the joystick downward makes servo motor #2 rotate counterclockwise.
- Releasing the joystick does not change the positions of the servo motors.
- Pushing the joystick's button resets the servo motors to the middle.
- Ensure that Thonny IDE is installed on your computer.
- Ensure that MicroPython firmware is installed on your Raspberry Pi Pico.
- If this is your first time using a Raspberry Pico, refer to the Raspberry Pi Pico - Getting Started tutorial for detailed instructions.
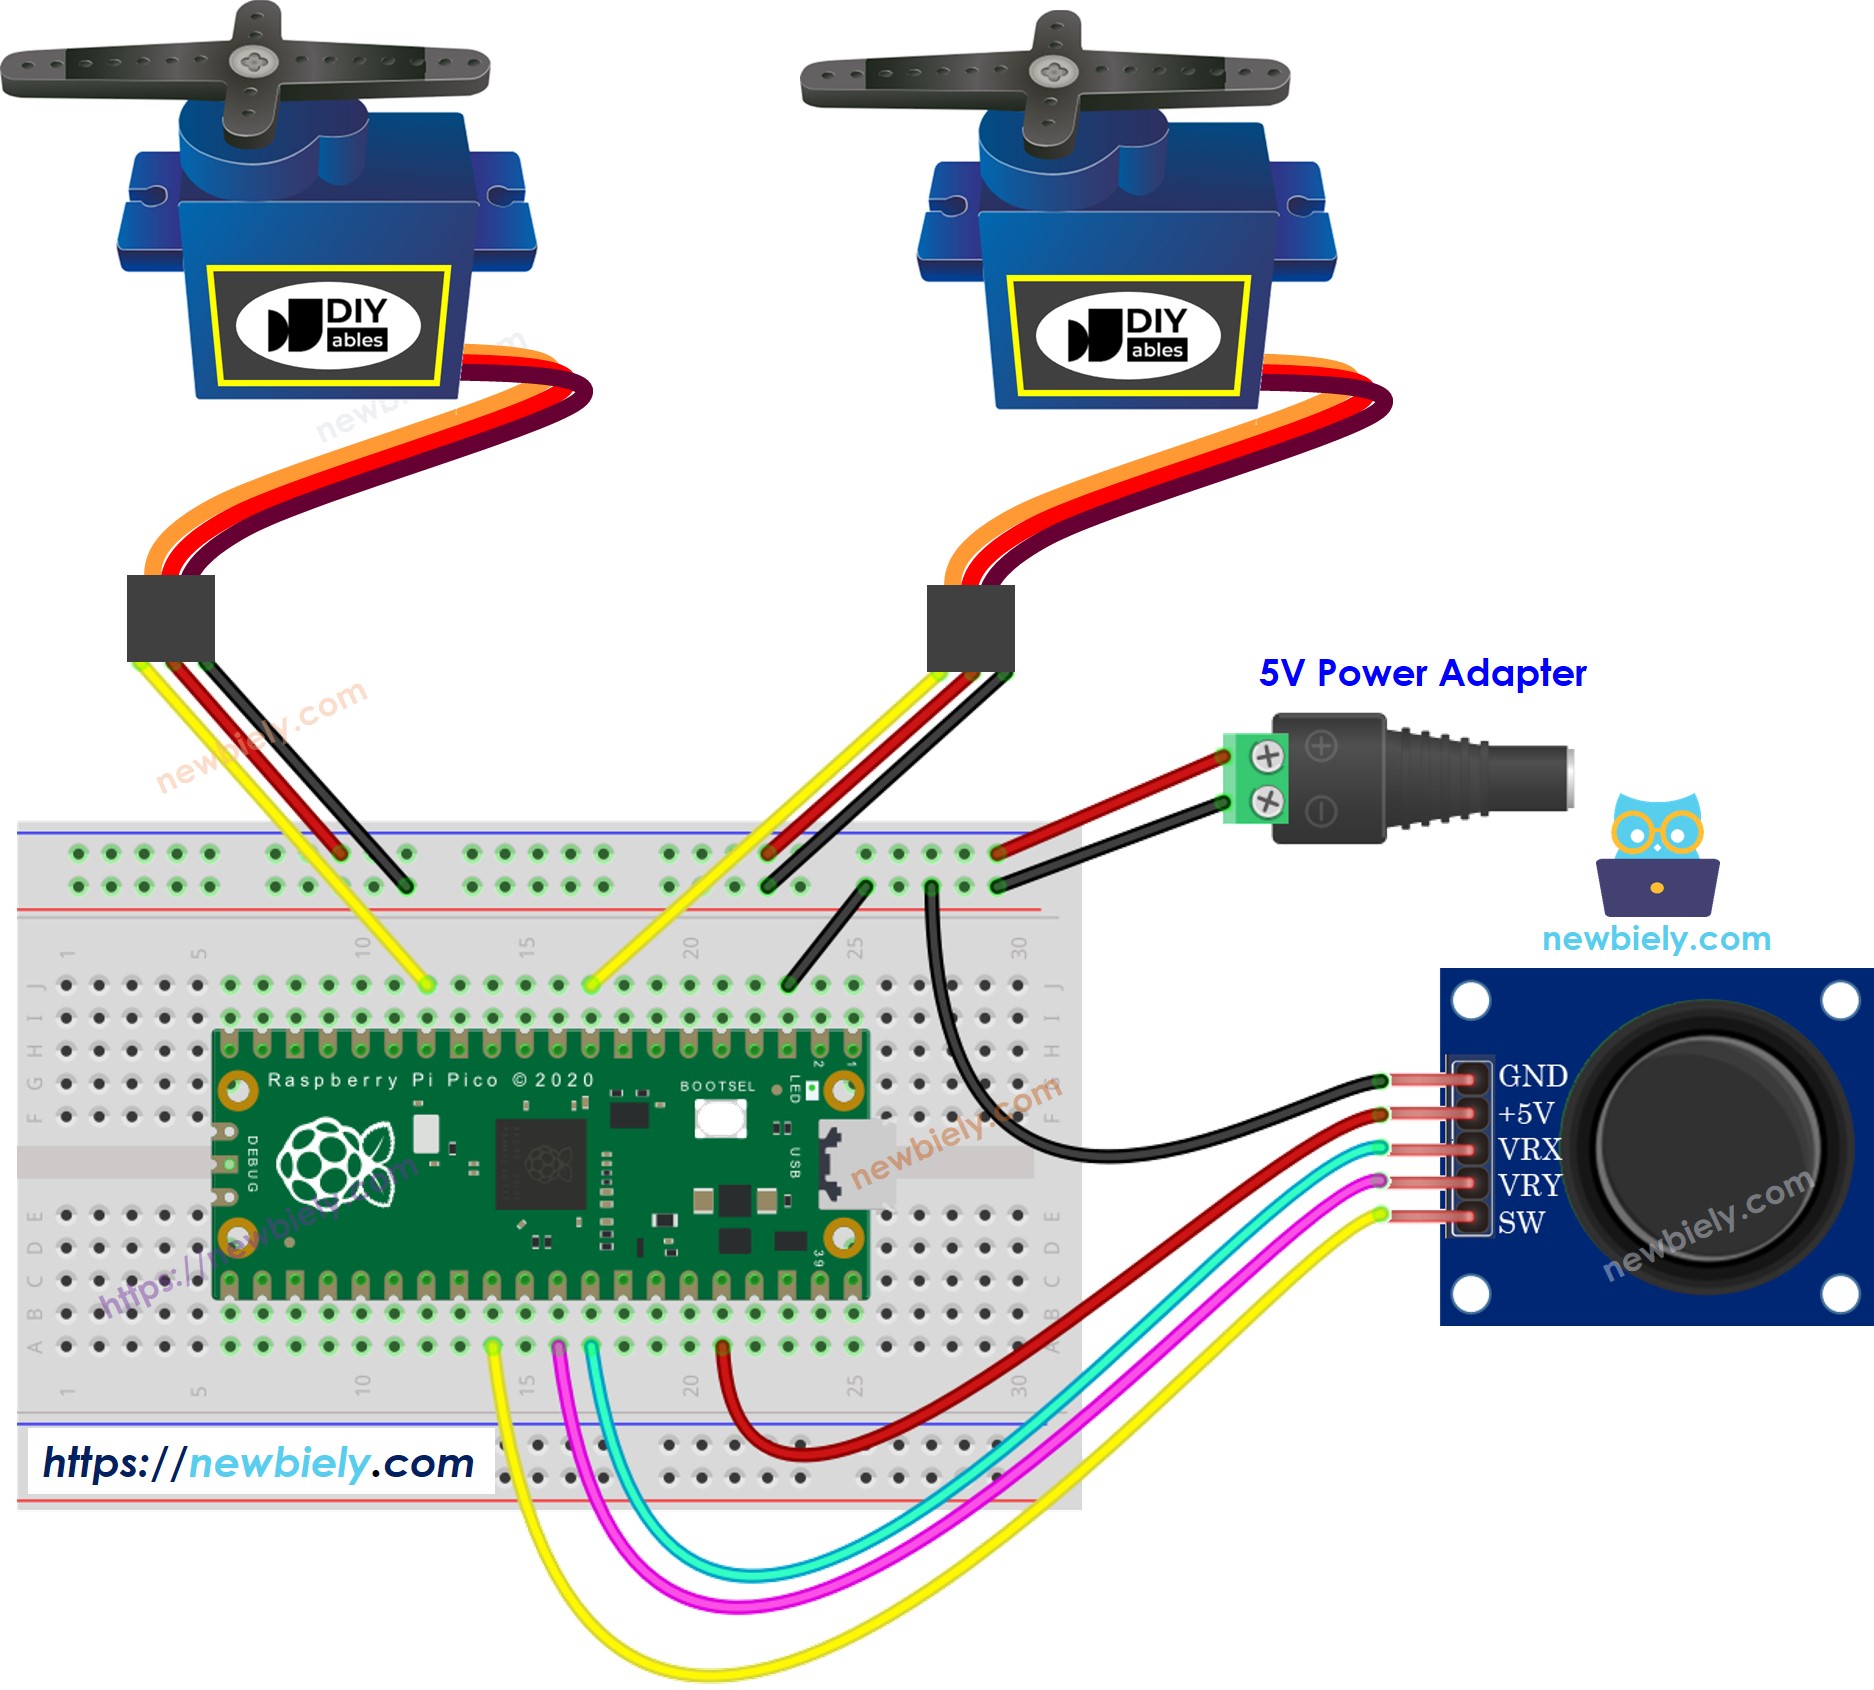
- Connect the Raspberry Pi Pico to the joystick and servo motor according to the provided diagram.
- Connect the Raspberry Pi Pico to your computer using a USB cable.
- Launch the Thonny IDE on your computer.
- On Thonny IDE, select MicroPython (Raspberry Pi Pico) Interpreter by navigating to Tools Options.
- In the Interpreter tab, select MicroPython (Raspberry Pi Pico) from the drop-down menu.
- Ensure the correct port is selected. Thonny IDE should automatically detect the port, but you may need to select it manually (e.g., COM3 on Windows or /dev/ttyACM0 on Linux).
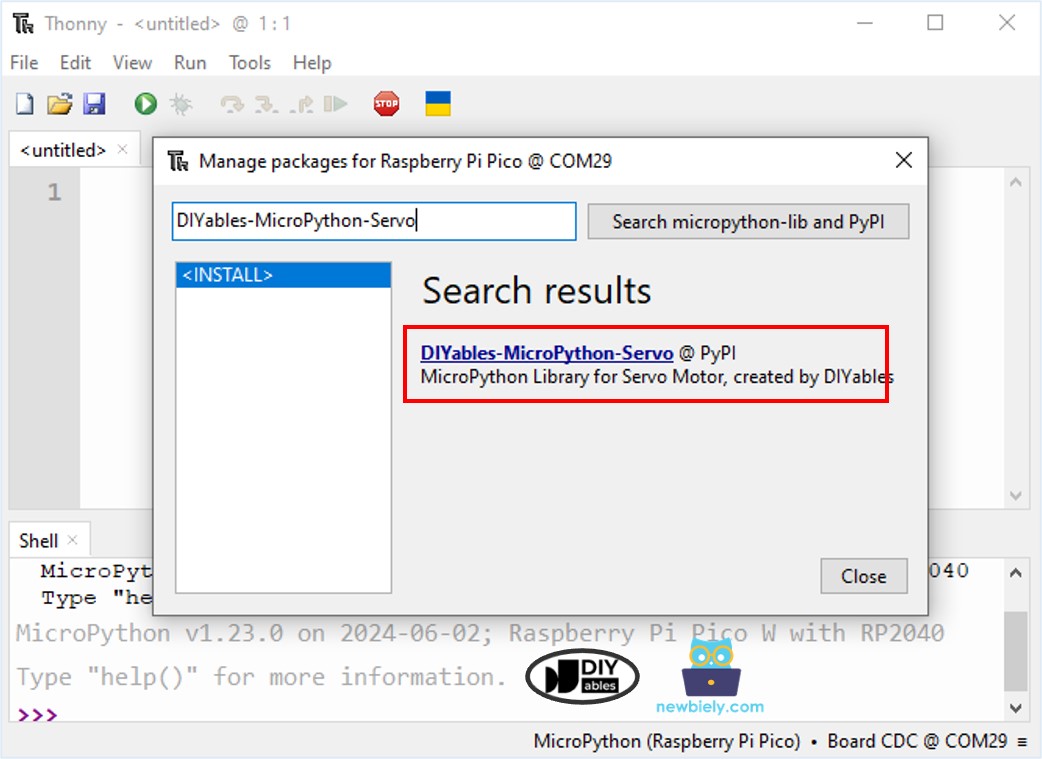
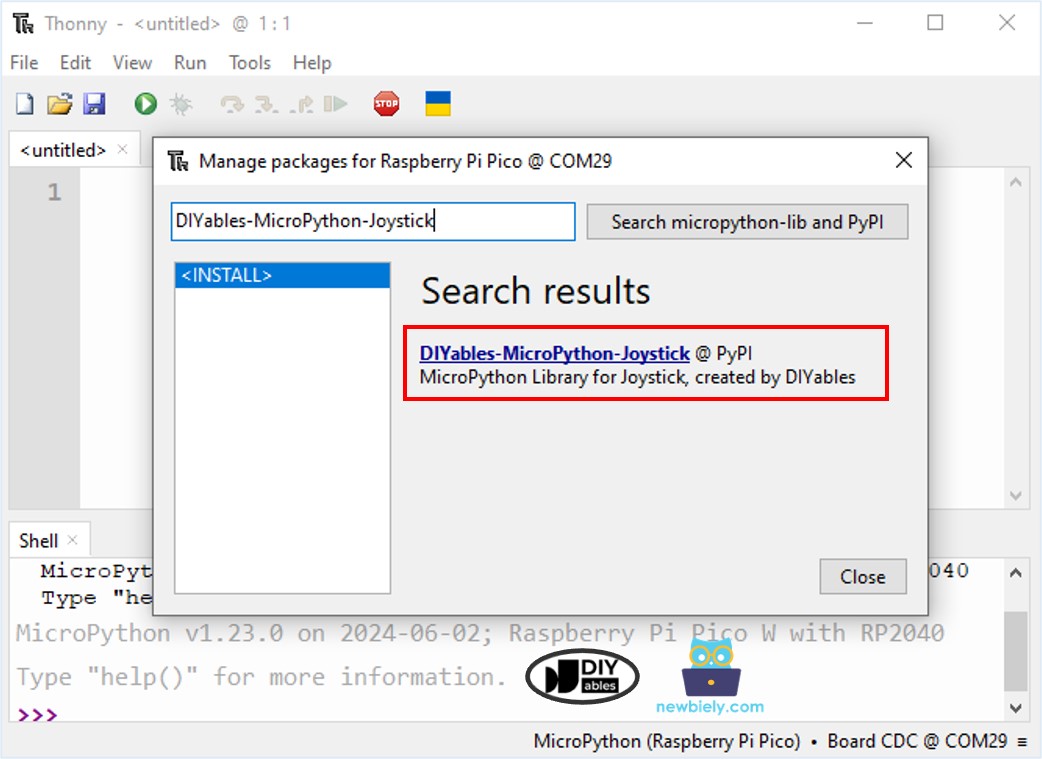
- Navigate to the Tools Manage packages on the Thonny IDE.
- Search “DIYables-MicroPython-Servo”, then find the Servo Motor library created by DIYables.
- Click on DIYables-MicroPython-Servo, then click Install button to install Servo Motor library.
- Search “DIYables-MicroPython-Joystick”, then find the Joystick library created by DIYables.
- Click on DIYables-MicroPython-Joystick, then click Install button to install Joystick library.
- Copy the above code and paste it to the Thonny IDE's editor.
- Save the script to your Raspberry Pi Pico by:
- Click the Save button, or use Ctrl+S keys.
- In the save dialog, you will see two sections: This computer and Raspberry Pi Pico. Select Raspberry Pi Pico
- Save the file as main.py
- Click the green Run button (or press F5) to run the script. The script will execute.
- Push the joystick in any direction.
- Watch the servo motor spin.
- Check out the message in the Shell at the bottom of Thonny.
- Copy the provided MicroPython code and paste it into Thonny's editor.
- Save the code to your Raspberry Pi Pico.
- Click the green Run button (or press F5) to execute the script.
- Move the joystick in any direction.
- Observe the servo motor rotating.
- Check out the message in the Shell at the bottom of Thonny.

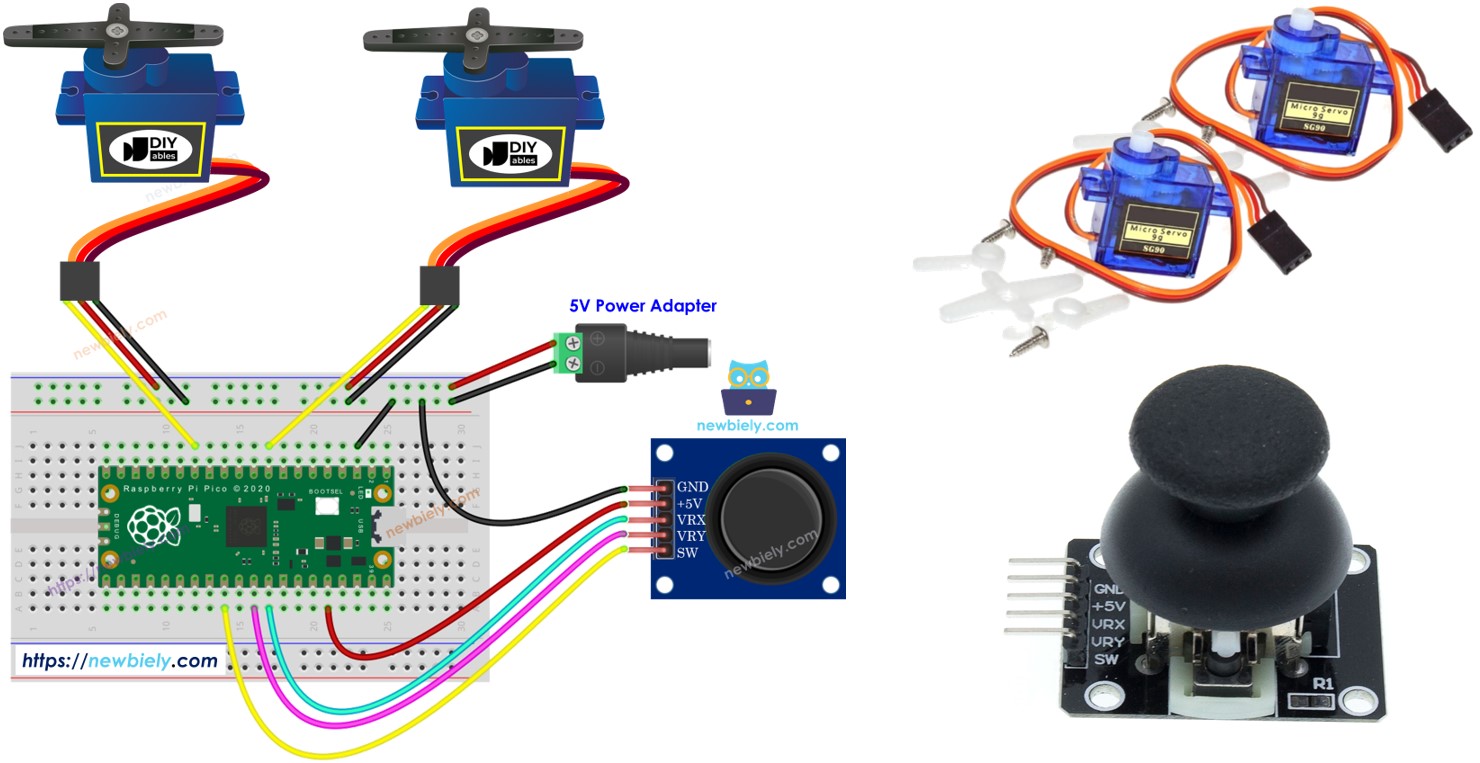
Hardware Preparation
Or you can buy the following kits:
| 1 | × | DIYables Sensor Kit (30 sensors/displays) | |
| 1 | × | DIYables Sensor Kit (18 sensors/displays) |
Additionally, some of these links are for products from our own brand, DIYables .
Overview of Joystick and Servo Motor
If you don't know much about joystick and servo motor details like pinout, functionality, and how to program them, please look at these tutorials to learn more.
Wiring Diagram

This image is created using Fritzing. Click to enlarge image
Raspberry Pi Pico Code
Raspberry Pi Pico Code - The servo motors rotate according to the movement of the joystick's thump
Detailed Instructions
Please follow these instructions step by step:


Raspberry Pi Pico Code - Use the joystick to command servo motors
Detailed Instructions
Code Explanation
Look at the explanations in the comments in the source code.
