Raspberry Pi Pico - Servo Motor
This guide shows you how to operate a servo motor with a Raspberry Pi Pico. We will cover:
- Programming the Raspberry Pi Pico to operate a servo motor
- Using the Raspberry Pi Pico to adjust a servo motor's speed
- Supplying external power to servo motors
Hardware Preparation
| 1 | × | Raspberry Pi Pico W | |
| 1 | × | Raspberry Pi Pico Alternatively, | |
| 1 | × | Micro USB Cable | |
| 1 | × | Servo Motor | |
| 1 | × | Jumper Wires | |
| 1 | × | Breadboard | |
| 1 | × | Recommended: Screw Terminal Expansion Board for Raspberry Pi Pico |
Or you can buy the following kits:
| 1 | × | DIYables Sensor Kit (18 sensors/displays) |
Additionally, some of these links are for products from our own brand, DIYables .
Buy Note: For controlling multiple servo motors, use the PCA9685 16 Channel PWM Servo Driver Module to save MCU pins and simplify wiring.
Overview of Servo Motor
A servo motor is a part that can rotate its handle, typically from 0 to 180 degrees. It is used to adjust the position of an object.
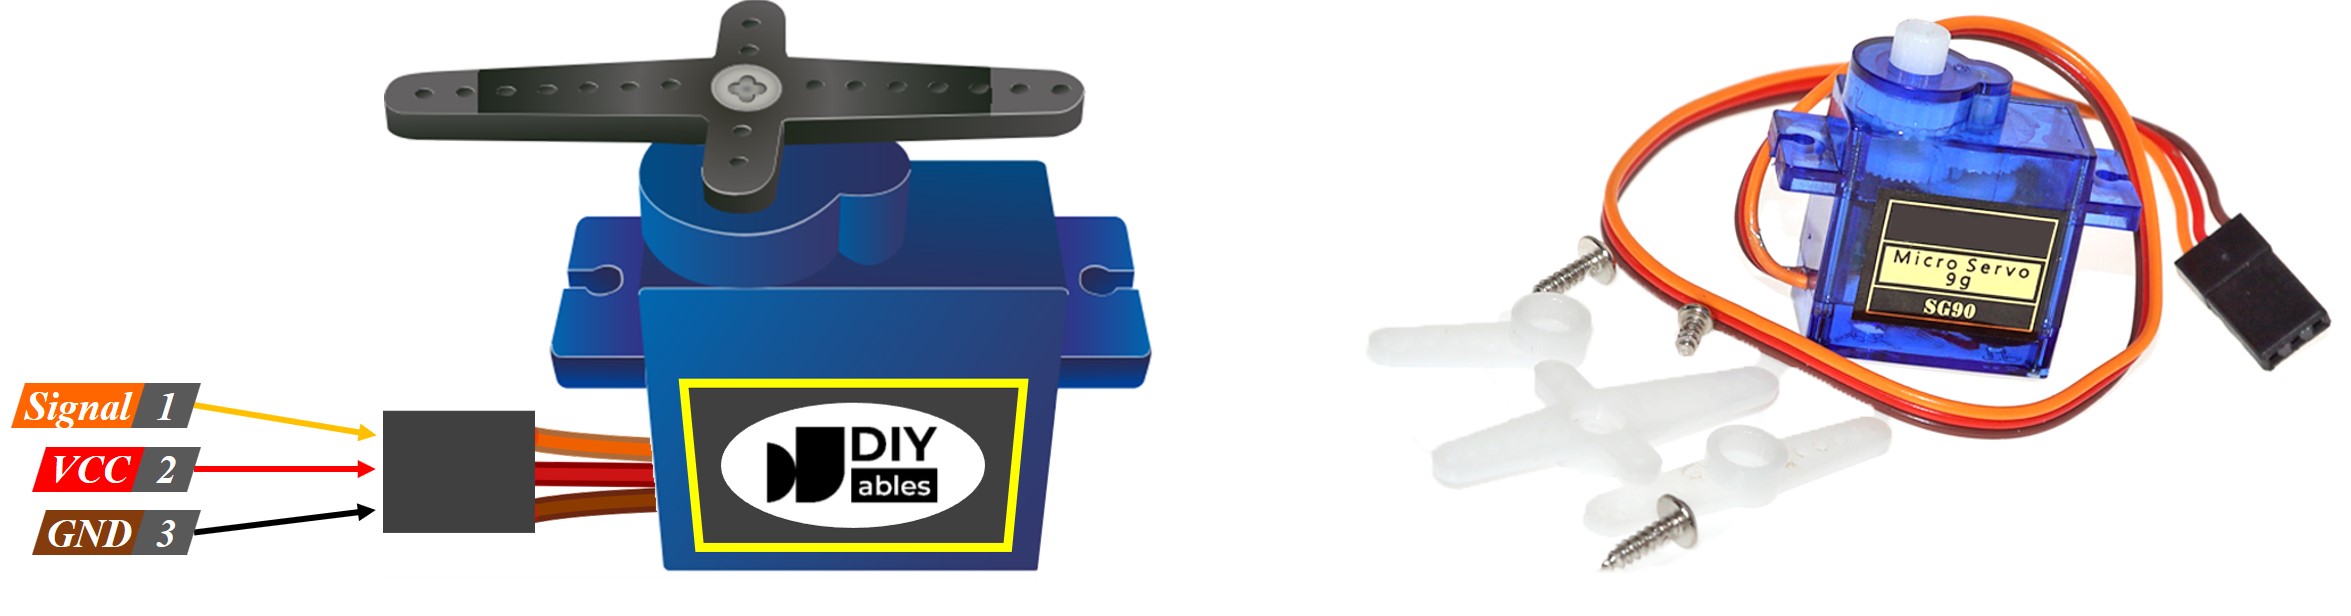
Pinout
This example shows how to use a servo motor that has three pins:
- VCC pin: Attach the red wire to VCC (5 volts).
- GND pin: Connect the black or brown wire to GND (0 volts).
- Signal pin: Connect the yellow or orange wire to get the PWM control signal from a Raspberry Pi Pico pin.
Wiring Diagram
Online diagrams might show a connection between the VCC pin of a servo motor and the VBUS pin of the Raspberry Pi Pico board. Avoid doing this as it can damage the Raspberry Pi Pico board.
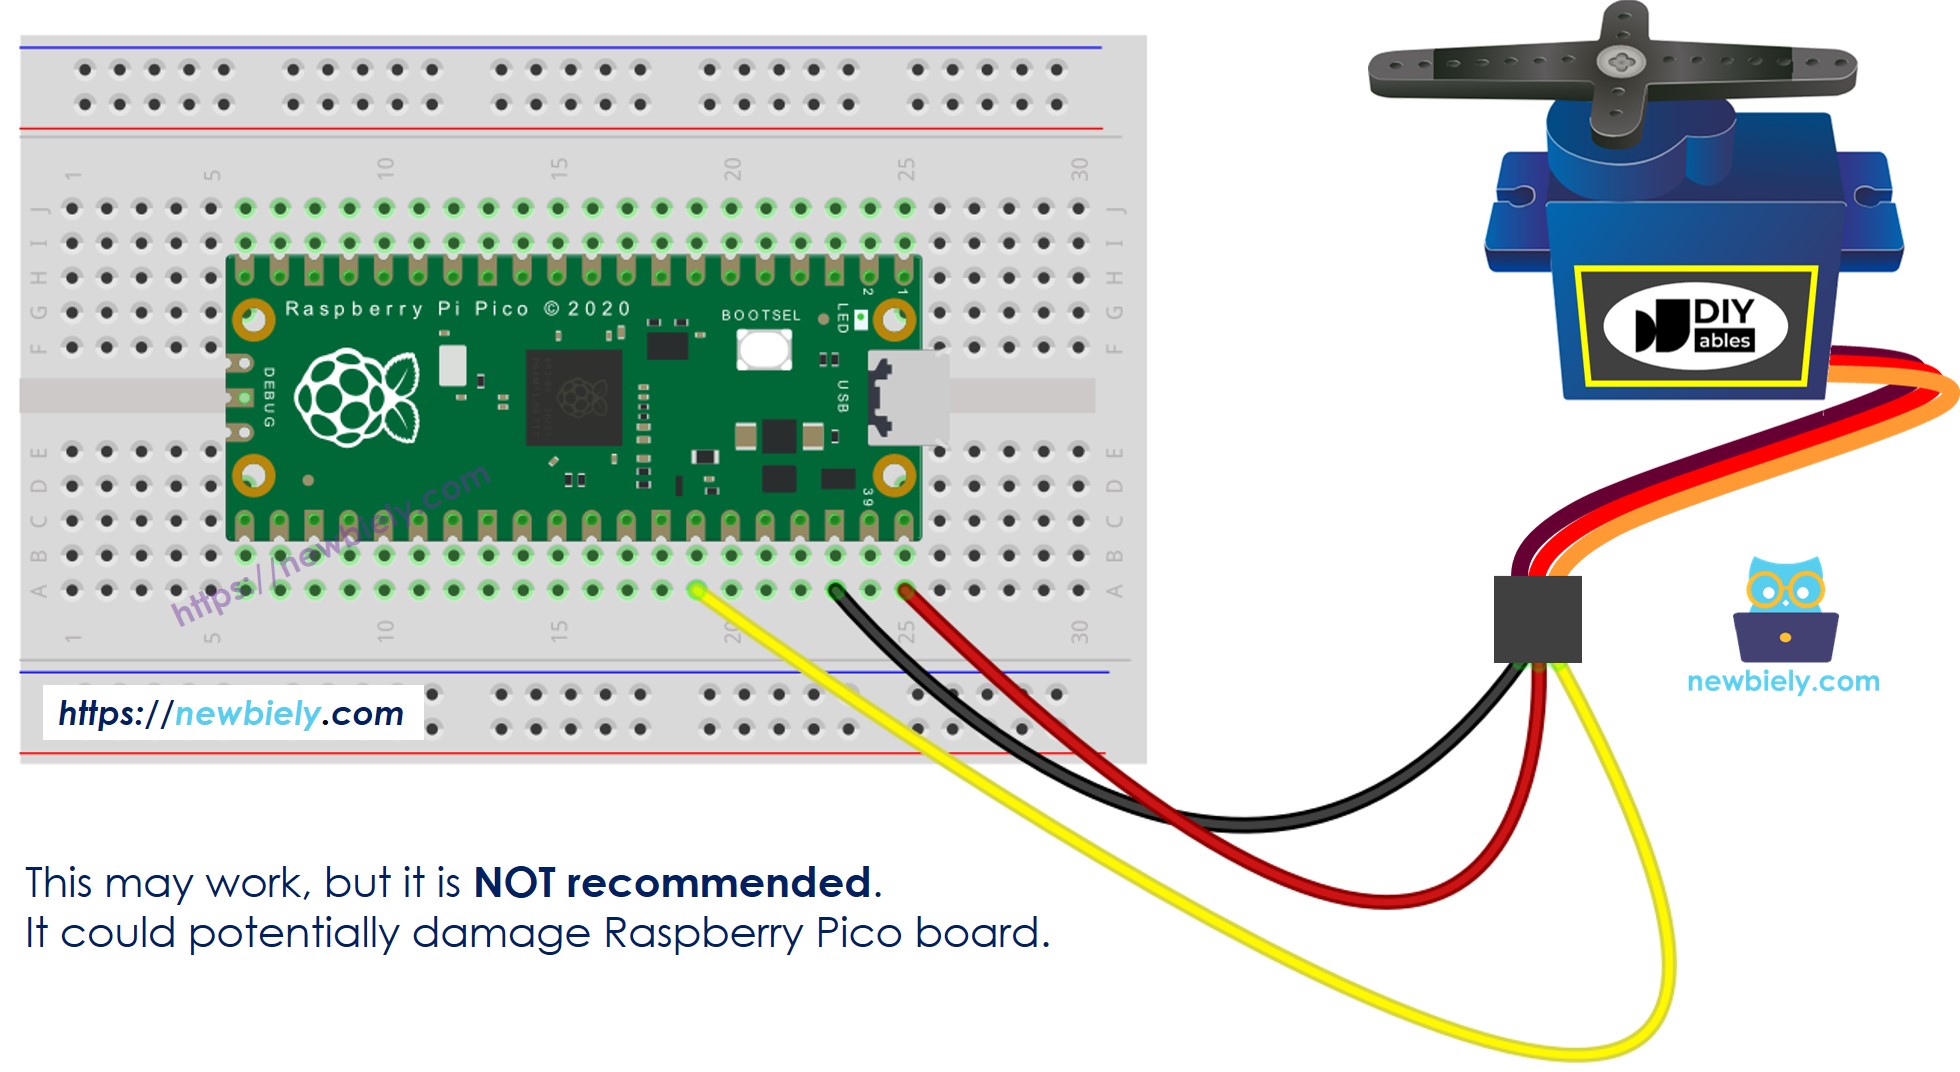
This image is created using Fritzing. Click to enlarge image
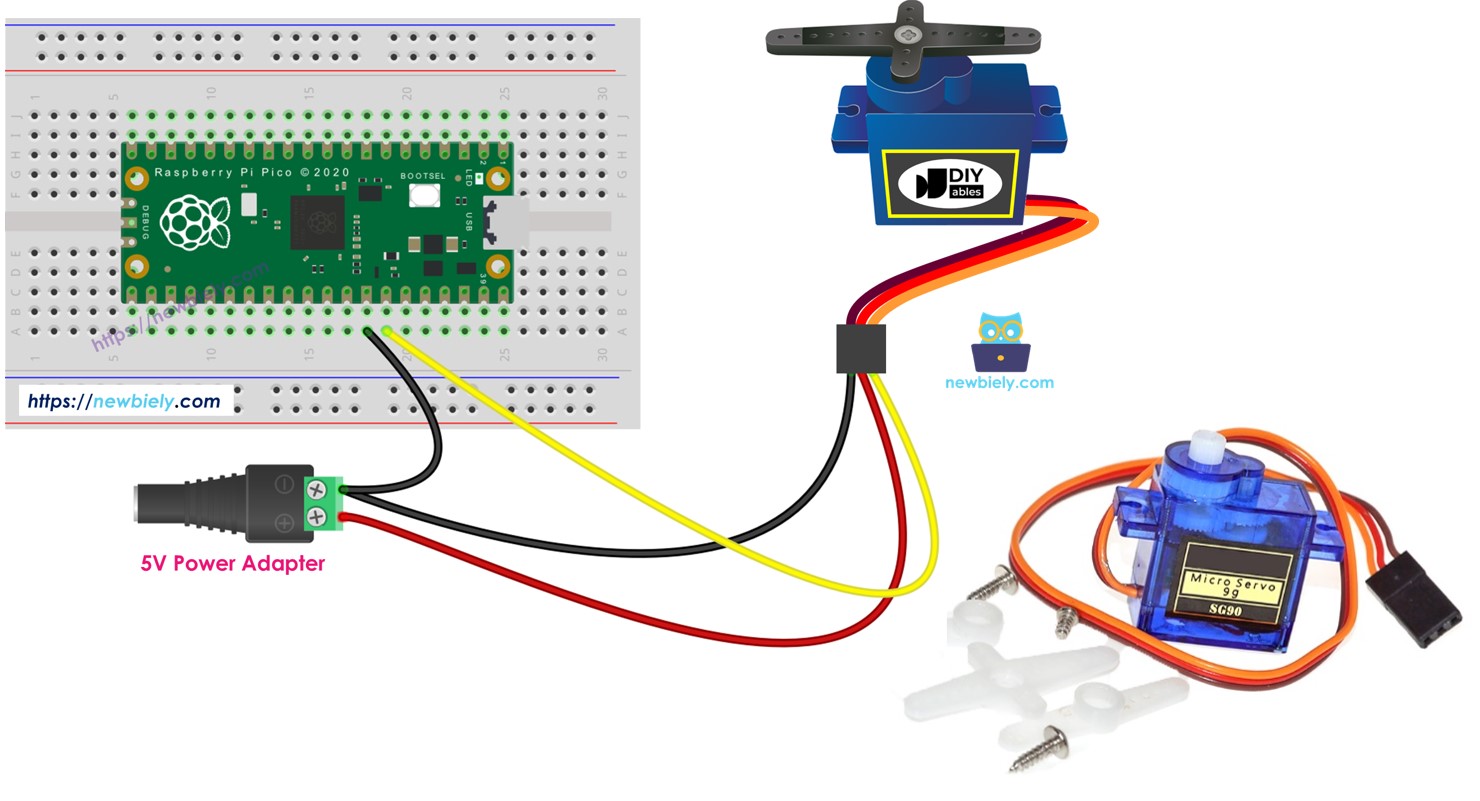
To keep your Raspberry Pi Pico board safe, use a separate power supply for the servo motor. The diagram below explains how to connect the servo motor to this power source.
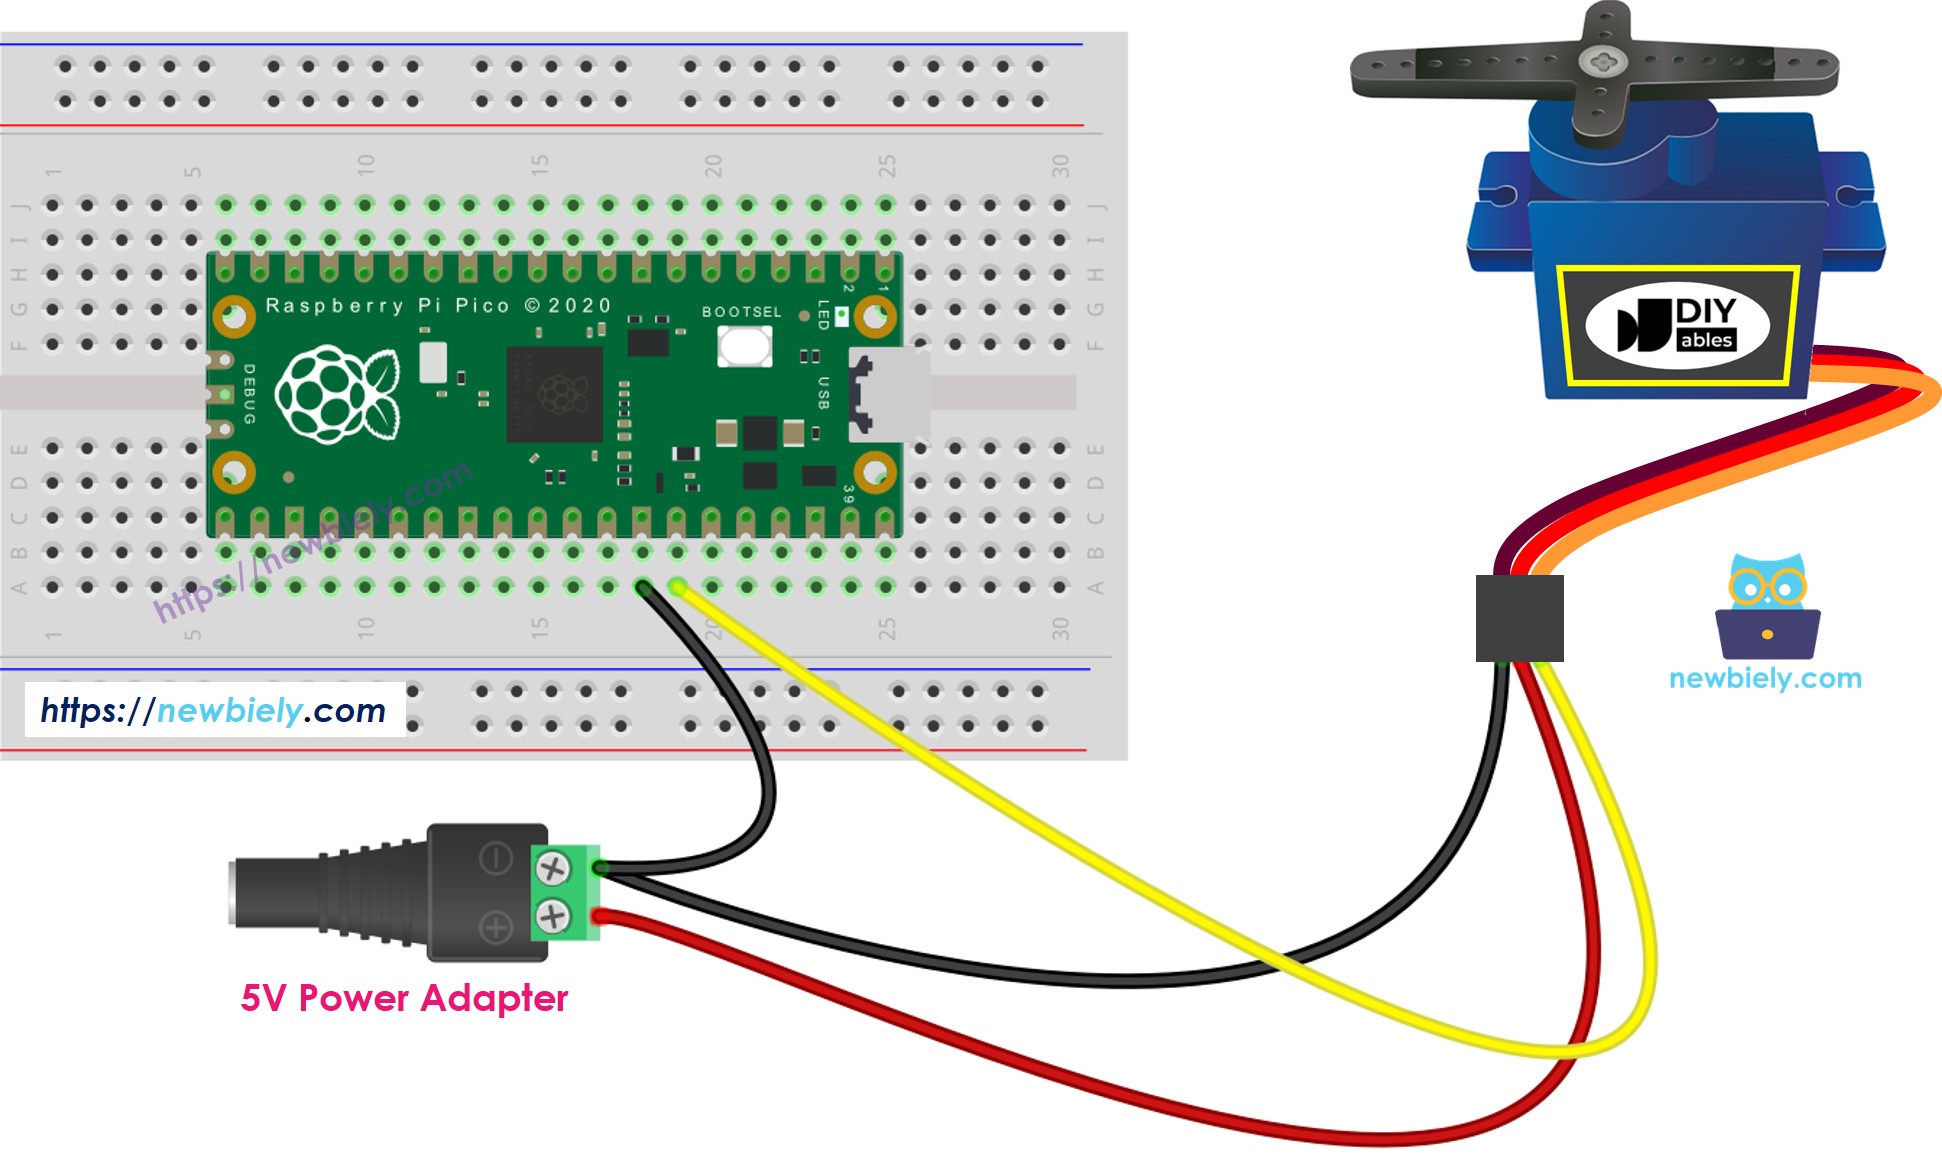
This image is created using Fritzing. Click to enlarge image
Ensure that you connect the GND (ground) from the external power supply to the GND of the Raspberry Pi Pico board. This is crucial for it to function properly.
Raspberry Pi Pico Code
Detailed Instructions
Please follow these instructions step by step:
- Ensure that Thonny IDE is installed on your computer.
- Ensure that MicroPython firmware is installed on your Raspberry Pi Pico.
- If this is your first time using a Raspberry Pico, refer to the Raspberry Pi Pico - Getting Started tutorial for detailed instructions.
- Connect the Raspberry Pi Pico to the servo motor according to the provided diagram.
- Connect the Raspberry Pi Pico to your computer using a USB cable.
- Launch the Thonny IDE on your computer.
- On Thonny IDE, select MicroPython (Raspberry Pi Pico) Interpreter by navigating to Tools Options.
- In the Interpreter tab, select MicroPython (Raspberry Pi Pico) from the drop-down menu.
- Ensure the correct port is selected. Thonny IDE should automatically detect the port, but you may need to select it manually (e.g., COM3 on Windows or /dev/ttyACM0 on Linux).
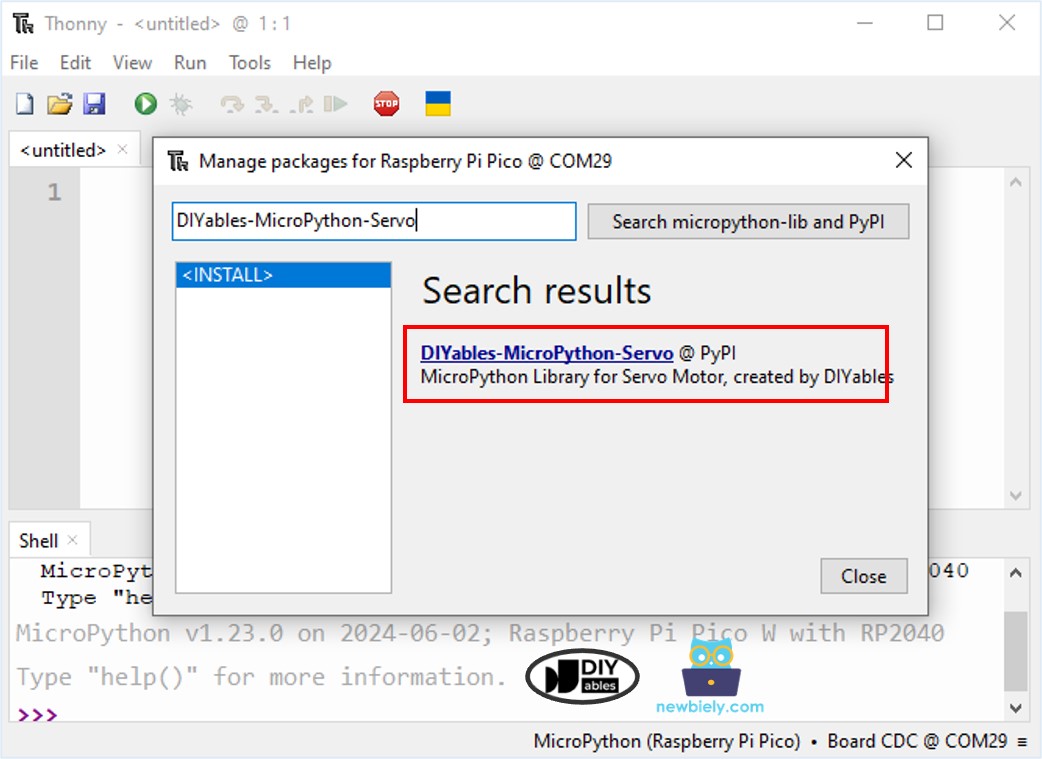
- Navigate to the Tools Manage packages on the Thonny IDE.
- Search “DIYables-MicroPython-Servo”, then find the Servo Motor library created by DIYables.
- Click on DIYables-MicroPython-Servo, then click Install button to install Servo Motor library.
- Copy the above code and paste it to the Thonny IDE's editor.
- Save the script to your Raspberry Pi Pico by:
- Click the Save button, or use Ctrl+S keys.
- In the save dialog, you will see two sections: This computer and Raspberry Pi Pico. Select Raspberry Pi Pico
- Save the file as main.py
- Click the green Run button (or press F5) to run the script. The script will execute.
- Observe the action: The servo motor gradually rotates from 0 to 180 degrees and then gradually rotates back from 180 to 0 degrees.
If you name your script main.py and save it to the root directory of the Raspberry Pi Pico, it will automatically run each time the Pico is powered on or reset. This is useful for standalone applications that need to start running immediately upon power-up. If you name your script another name other than main.py, you will need to manually run it from Thonnys's Shell.
Code Explanation
You can find the explanation in the comments section of the above Raspberry Pi Pico code.
How to Control Speed of Servo Motor
The below MicroPython script controls a servo on the Raspberry Pi Pico to smoothly transition between angles non-blockingly. It uses utime for timing, updating the servo's position periodically without pausing the program. This approach keeps the main loop responsive to other operations.