Raspberry Pi Pico - Motion Sensor
This guide shows you how to use the HC-SR501 motion sensor with the Raspberry Pi Pico to detect a person. We will cover the following details:
- How the HC-SR501 Motion Sensor Operates
- Connecting the HC-SR501 Motion Sensor with Raspberry Pi Pico
- Programming the Raspberry Pi Pico to Gather Data from the HC-SR501 Motion Sensor
- Using the Raspberry Pi Pico and Motion Sensor to Detect Human Presence
Hardware Preparation
Or you can buy the following kits:
| 1 | × | DIYables Sensor Kit (18 sensors/displays) |
Additionally, some of these links are for products from our own brand, DIYables .
Overview of HC-SR501 Motion Sensor
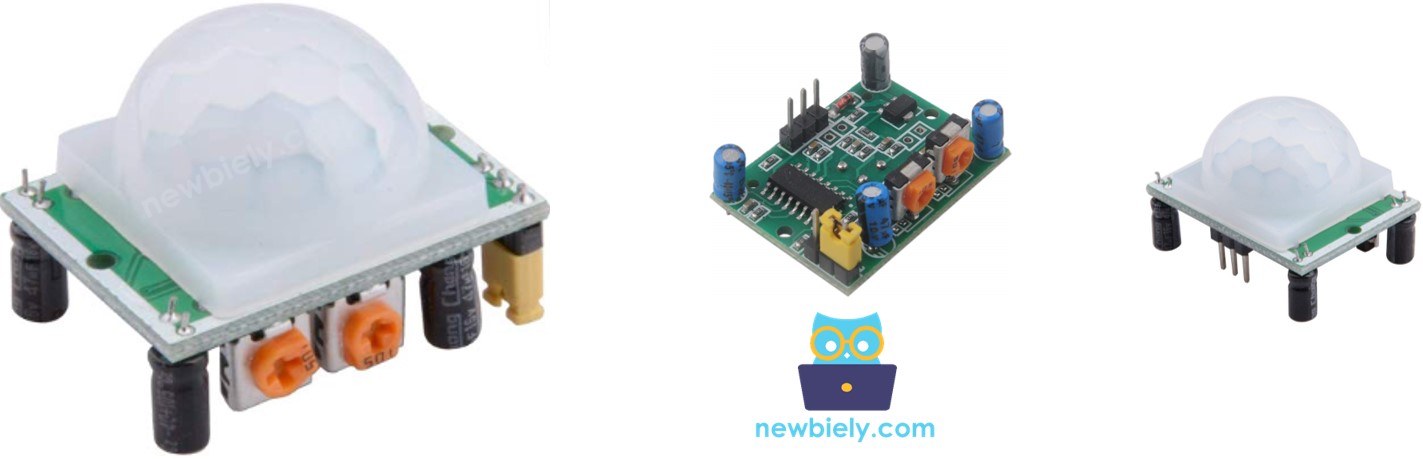
The HC-SR501 PIR sensor is a motion detector that can sense human or animal movement. It's used in many applications, including:
- Automatic lighting: Turning lights on and off based on motion.
- Door control: Opening and closing doors automatically.
- Escalator control: Activating or deactivating escalators.
- Security systems: Detecting intruders.
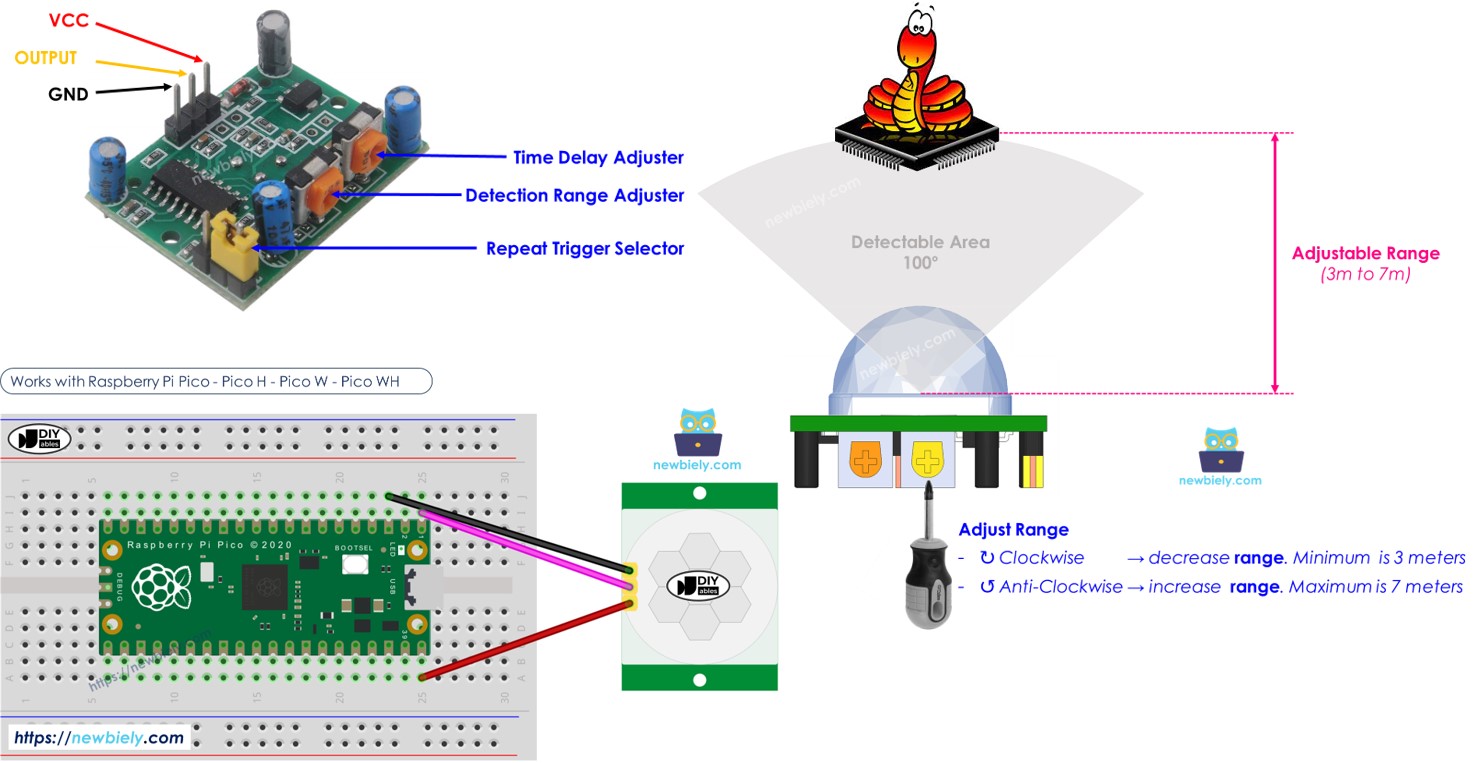
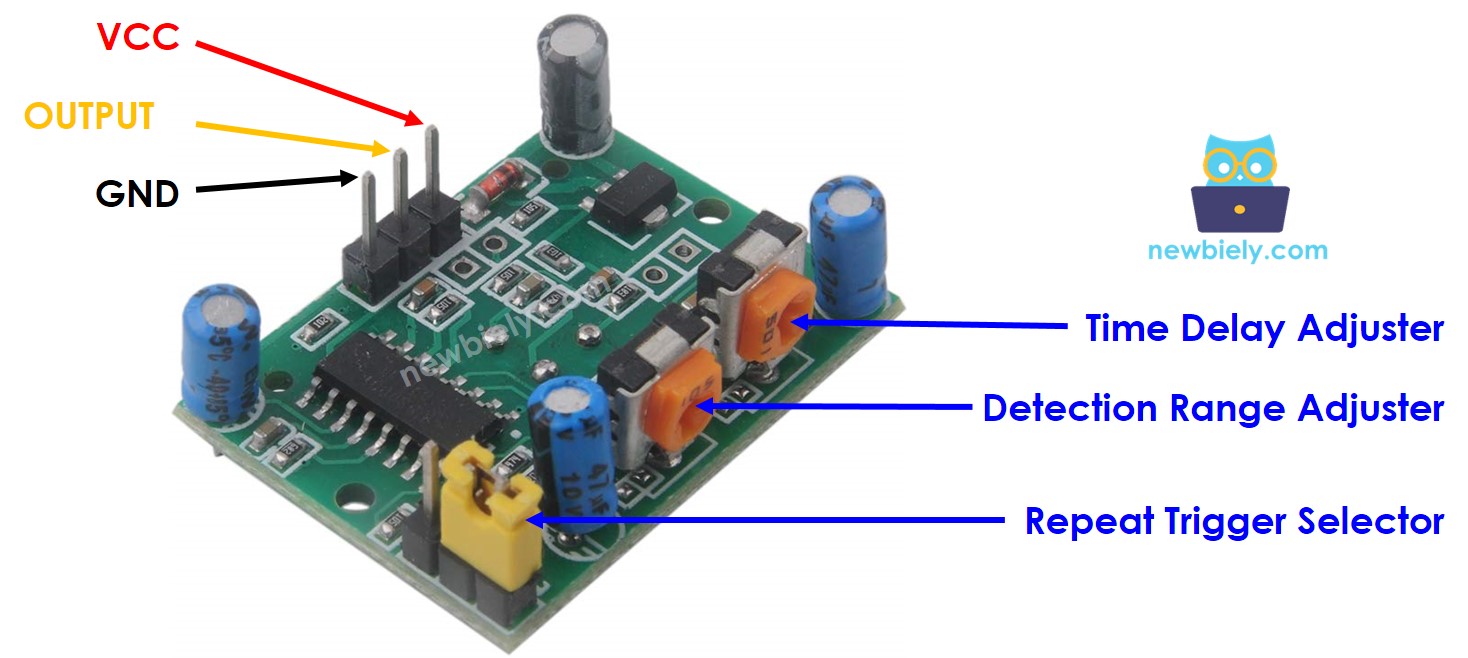
Pinout
The HC-SR501 motion sensor has three pins.
- GND pin: Connect to GND (0V).
- VCC pin: Connect to VCC (5V).
- OUTPUT Pin: Outputs a LOW signal when no movement is detected and a HIGH signal when movement is detected. Connect this pin to an input pin on the ESP32.
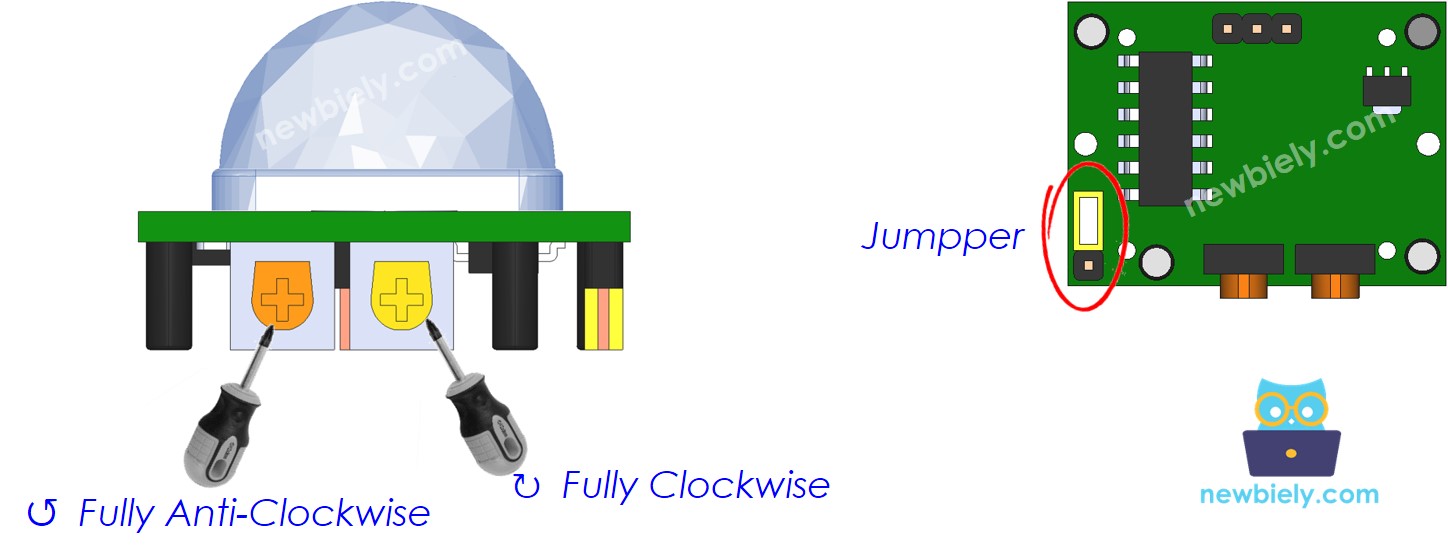
The HC-SR501 features one jumper and two potentiometers that allow you to adjust its settings. For more details, refer to the Advanced Uses of Motion Sensor.
How It Works
The HC-SR501 sensor detects motion by sensing changes in infrared radiation. For the sensor to be triggered, an object must meet two conditions:
- It must be in motion.
- It must emit infrared radiation.
As a result:
- Moving objects that don't emit infrared radiation (such as a robot toy) won't be detected.
- Objects that emit infrared radiation but remain stationary (like a person standing still* won't be detected.
Humans and animals naturally emit infrared radiation, making them detectable by the sensor.
Output Pin Behavior:
- No motion: When no person or animal is in the sensor's detection range, the OUTPUT pin remains LOW.
- Motion detected: When a person or animal enters the detection range, the OUTPUT pin transitions from LOW to HIGH.
- Motion ended: When the person or animal leaves the detection range, the OUTPUT pin transitions from HIGH back to LOW.
The video explains the basic function of the motion sensor. In real-life situations, its operation may differ slightly depending on its settings, as detailed in the Advanced Uses section.
Raspberry Pi Pico - HC-SR501 Motion Sensor
When you configure a pin on the Raspberry Pi Pico to be a digital input, it can tell if the connected object is in a LOW or HIGH state.
Attach the Raspberry Pi Pico's pin to the HC-SR501 sensor's OUTPUT pin. Next, use code on the Raspberry Pi Pico to check the OUTPUT pin’s value and detect motion.
Wiring Diagram
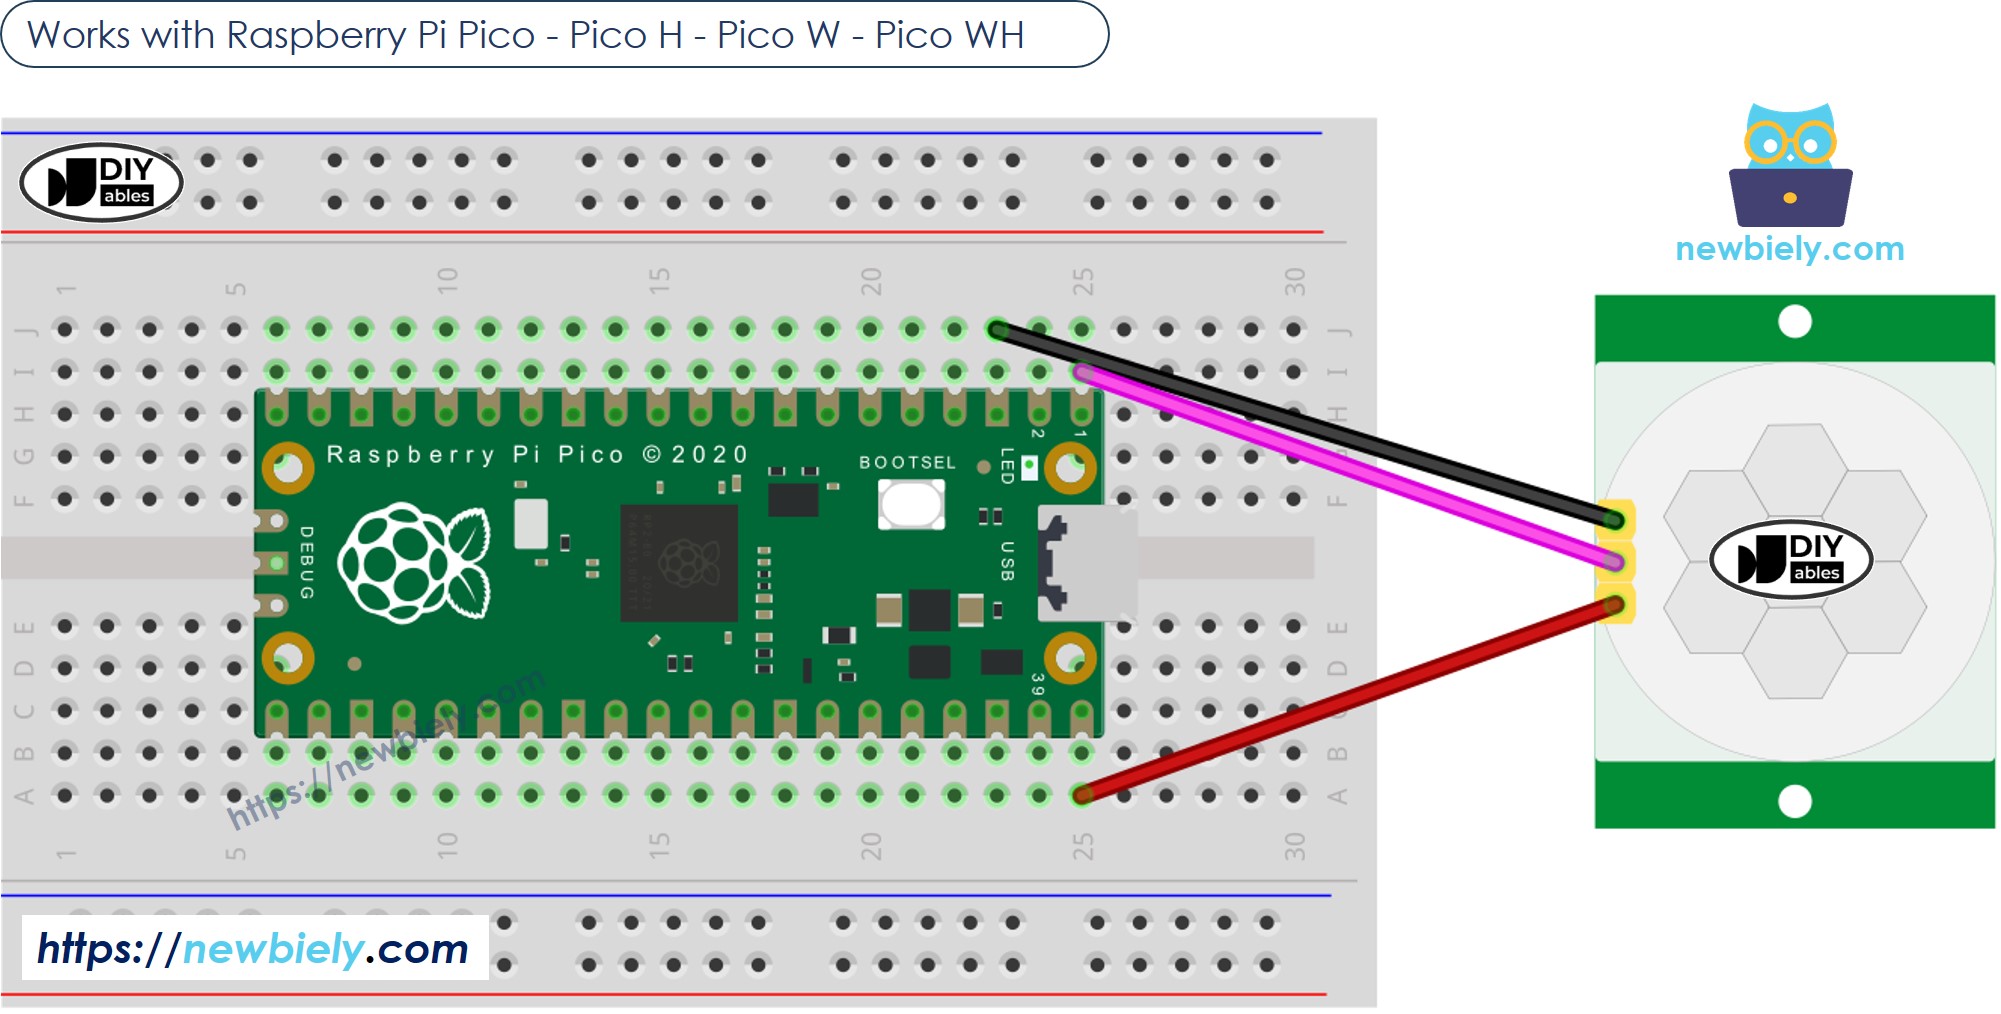
This image is created using Fritzing. Click to enlarge image
Initial Setting
| Time Delay Adjuster | Screw it in anti-clockwise direction fully. |
| Detection Range Adjuster | Screw it in clockwise direction fully. |
| Repeat Trigger Selector | Put jumper as shown on the image. |
How To Program For Motion Sensor
- Config a Raspberry Pi Pico pin to digital input mode.
- Read the sensor's OUTPUT pin status.
Raspberry Pi Pico Code
Detailed Instructions
Please follow these instructions step by step:
- Ensure that Thonny IDE is installed on your computer.
- Ensure that MicroPython firmware is installed on your Raspberry Pi Pico.
- If this is your first time using a Raspberry Pico, refer to the Raspberry Pi Pico - Getting Started tutorial for detailed instructions.
- Connect the Raspberry Pi Pico to the HC-SR501 motion sensor according to the provided diagram.
- Connect the Raspberry Pi Pico to your computer using a USB cable.
- Launch the Thonny IDE on your computer.
- On Thonny IDE, select MicroPython (Raspberry Pi Pico) Interpreter by navigating to Tools Options.
- In the Interpreter tab, select MicroPython (Raspberry Pi Pico) from the drop-down menu.
- Ensure the correct port is selected. Thonny IDE should automatically detect the port, but you may need to select it manually (e.g., COM3 on Windows or /dev/ttyACM0 on Linux).
- Copy the above code and paste it to the Thonny IDE's editor.
- Save the script to your Raspberry Pi Pico by:
- Click the Save button, or use Ctrl+S keys.
- In the save dialog, you will see two sections: This computer and Raspberry Pi Pico. Select Raspberry Pi Pico
- Save the file as main.py
- Click the green Run button (or press F5) to run the script. The script will execute.
- Move your hand in front of the sensor
- Check out the message in the Shell at the bottom of Thonny.
If you name your script main.py and save it to the root directory of the Raspberry Pi Pico, it will automatically run each time the Pico is powered on or reset. This is useful for standalone applications that need to start running immediately upon power-up. If you name your script another name other than main.py, you will need to manually run it from Thonnys's Shell.
Video Tutorial
Advanced Uses
We can change the sensor settings using one jumper and two knobs, as explained earlier.
Detection Range Adjuster
This potentiometer sets the detection range (from about 3 meters to 7 meters).
- When turned completely clockwise, the detection distance is about 3 meters.
- When turned completely anti-clockwise, the detection distance is about 7 meters.
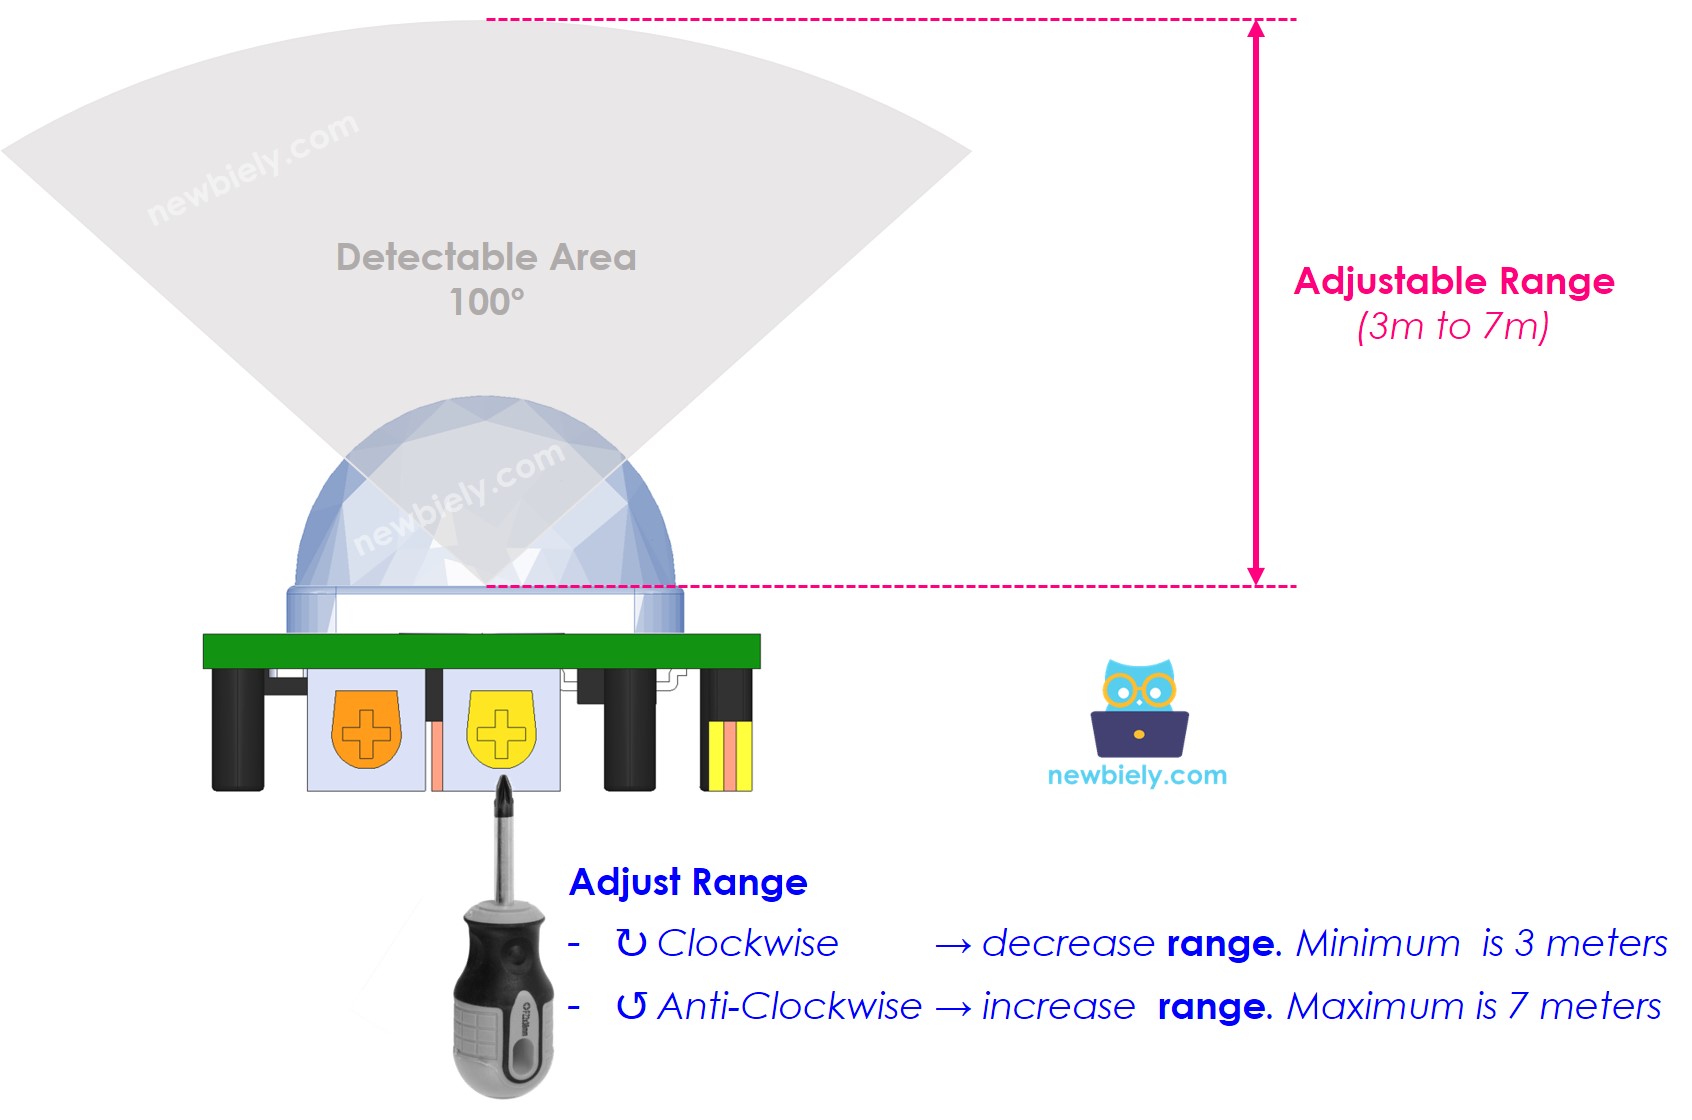
We can adjust the settings of the potentiometer to achieve a distance ranging from 3 meters to 7 meters.
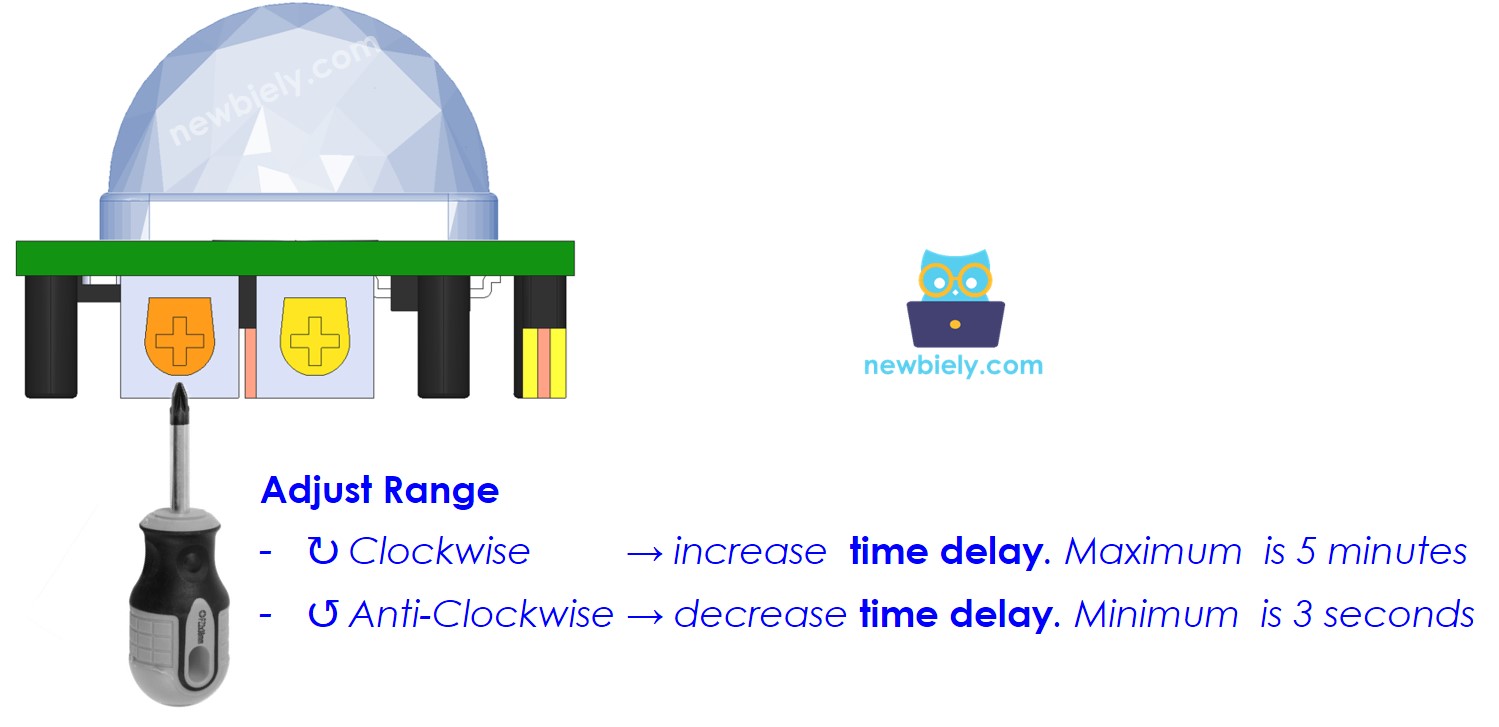
Time Delay Adjuster
This knob changes the delay time.
- If you rotate it fully clockwise, the delay will be approximately 5 minutes.
- If you rotate it fully counter-clockwise, the delay will be approximately 3 seconds.
Next, we will describe what time delay is and its connection to Repeat Trigger.
Repeat Trigger Selector
This jumper allows you to choose a trigger mode: single trigger or repeat trigger.

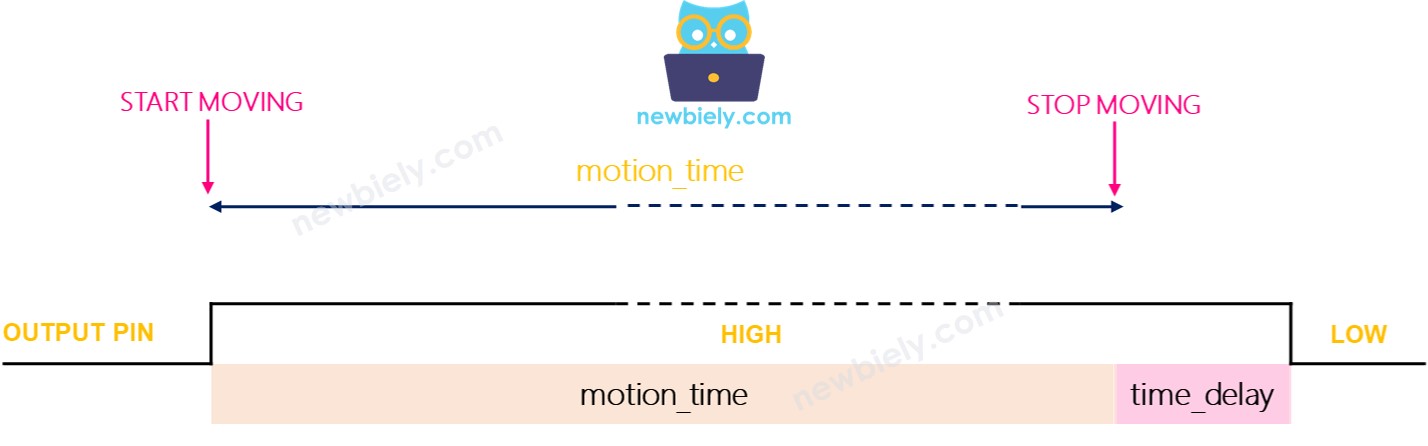
We will call the time delay setting (which you can change using the Time Delay Adjuster) time_delay. Picture yourself moving in the sensor's detection zone for a long time, which we will name motion_time (this is longer than time_delay).
- In single trigger mode, the OUTPUT pin changes from LOW to HIGH several times. It remains HIGH for a duration called "time_delay" and LOW for a constant period of 3 seconds.
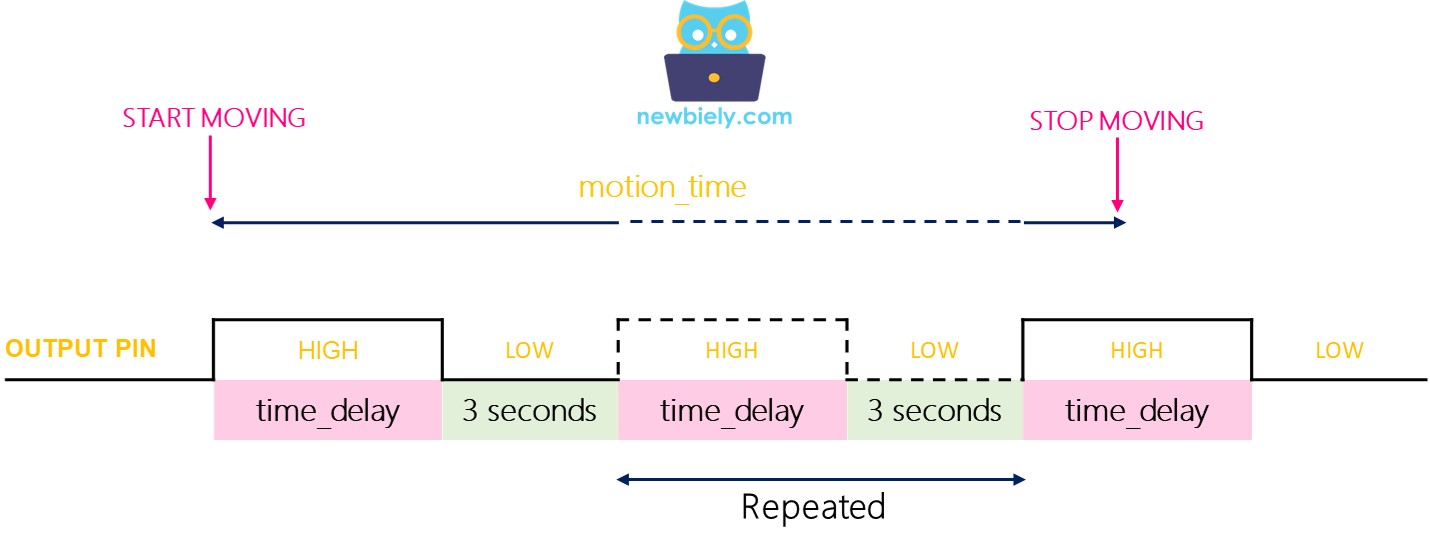
- The OUTPUT pin remains HIGH for the length of the motion time plus the additional delay time.
Testing
Let's try the different trigger settings. First, turn the Time Delay Adjuster all the way to the left to set the delay time for 3 seconds.
- Single Trigger Mode:
- Set the jumper for single trigger mode.
- Move your hand in front of the sensor for 10 seconds.
- Take your hand away from the sensor area.
- Wait for 3 seconds, then look at the serial monitor to see the results.
- Repeatable Trigger Mode:
- Put the jumper on to start the Repeatable Trigger mode.
- Keep moving your hand in front of the sensor for 10 seconds.
- Take your hand away from in front of the sensor.
- Wait for 3 seconds, then look at the serial monitor to view the output.
- Devices or machines usually turn on when they detect a person close by.
- Devices or machines do not turn off immediately when the person leaves. They turn off after a short delay.
In single trigger mode, the sensor turns on two or three times. In repeatable trigger mode, it turns on just once.
※ NOTE THAT:
During the low period of 3 seconds, the sensor cannot detect motion. This means it is not active, but it generally does not cause issues.
It is recommended to use the repeatable trigger mode.
In practical uses: