Raspberry Pi Pico - Getting Started
This tutorial instructs you how to get started with Raspberry Pi Pico using MicroPython, The tutorial show you how to install Thonny IDE, install MicroPython firmware on Raspberry Pi Pico and run the simple Python program on Raspberry Pi Pico.
Hardware Preparation
| 1 | × | Raspberry Pi Pico W | |
| 1 | × | Raspberry Pi Pico Alternatively, | |
| 1 | × | Micro USB Cable | |
| 1 | × | Recommended: Screw Terminal Expansion Board for Raspberry Pi Pico |
Or you can buy the following kits:
| 1 | × | DIYables Sensor Kit (18 sensors/displays) |
Disclosure: Some of the links provided in this section are Amazon affiliate links. We may receive a commission for any purchases made through these links at no additional cost to you.
Additionally, some of these links are for products from our own brand, DIYables .
Additionally, some of these links are for products from our own brand, DIYables .
Install Thonny IDE on your PC and MicroPython firmware on Raspberry Pi Pico
Detailed Instructions
Please follow these instructions step by step:
- Download and install Thonny IDE on your computer
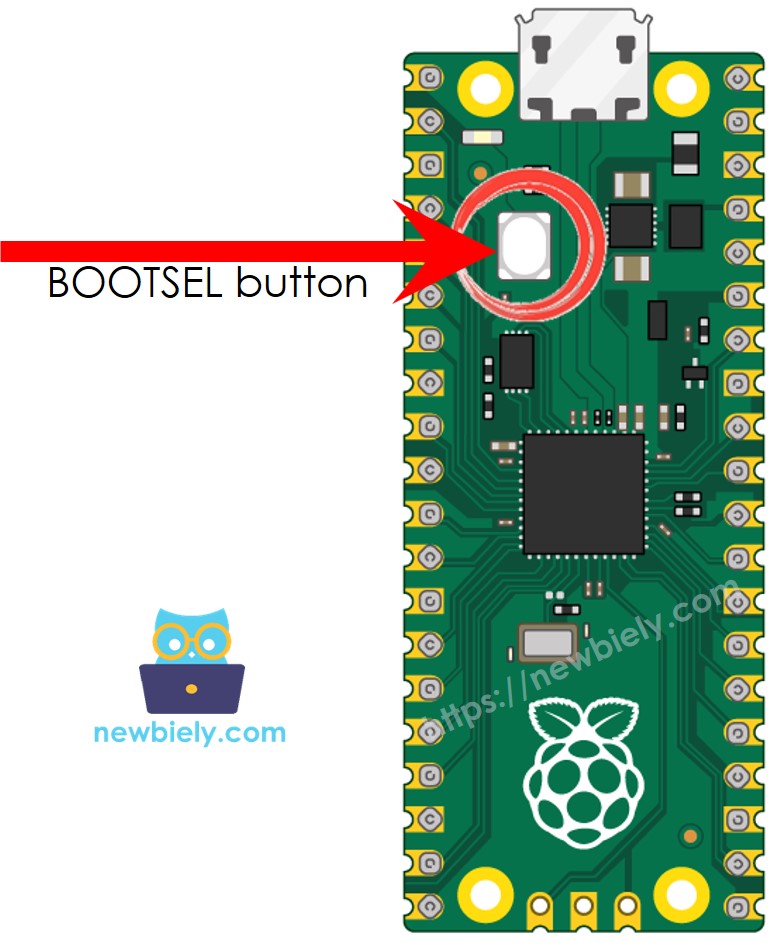
- Find the BOOTSEL button on your Raspberry Pi Pico
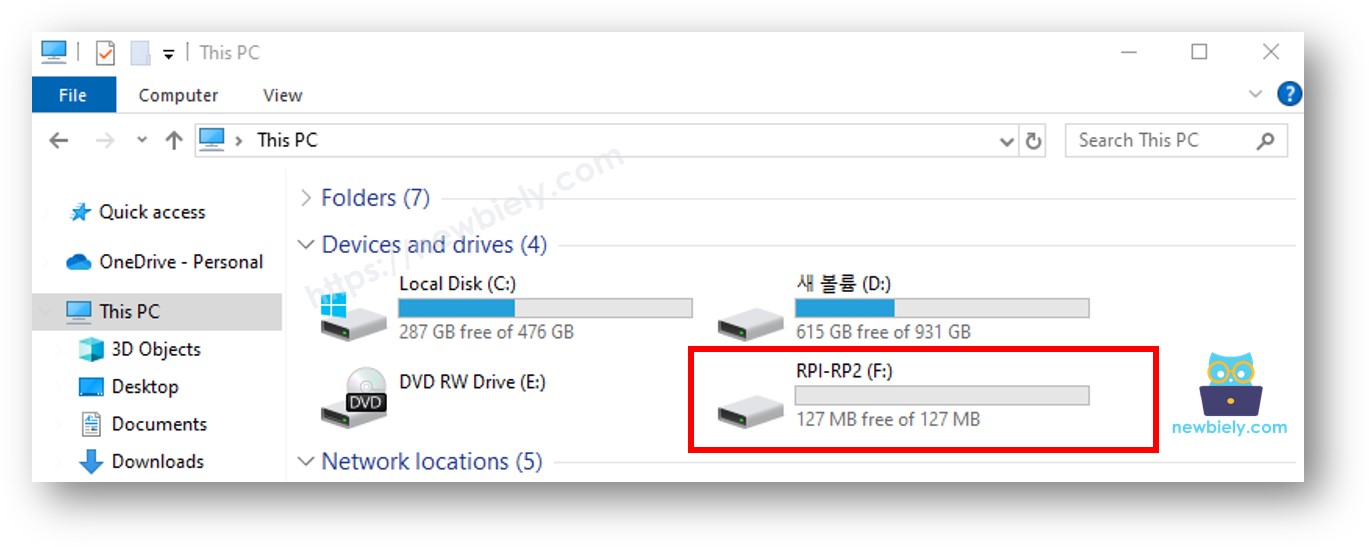
- Press and hold the BOOTSEL button while connecting your Raspberry Pi Pico to your computer via a USB cable.
- If successful, you will see the RPI-RP2 drive appear on your PC, as shown below:
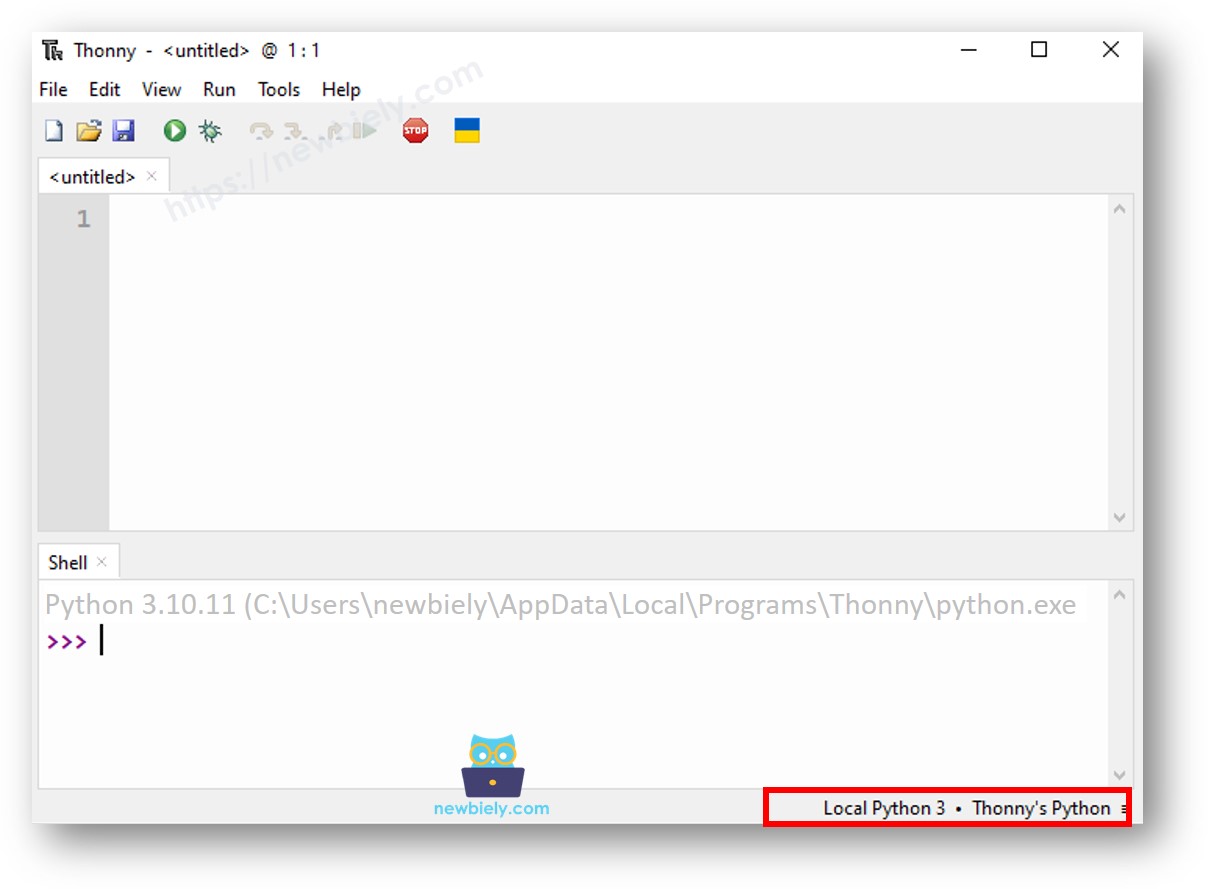
- Launch the Thonny IDE on your computer.
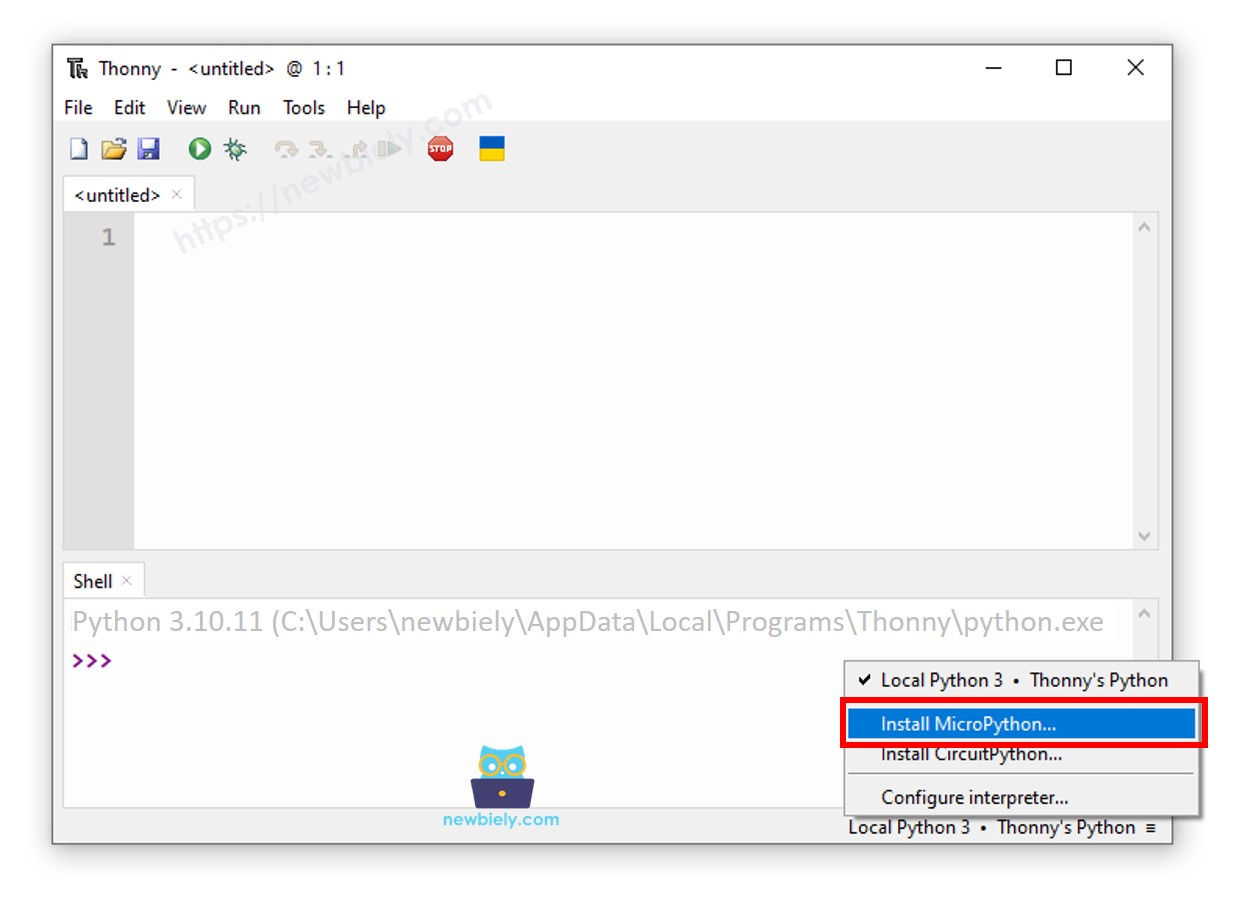
- Click on the bottom right-hand corner of the Thonny window:
- Select the "Install MicroPython" option:
- An installation window will appear. Select the Raspberry Pi Pico board you have, then click the "Install" button as shown below:
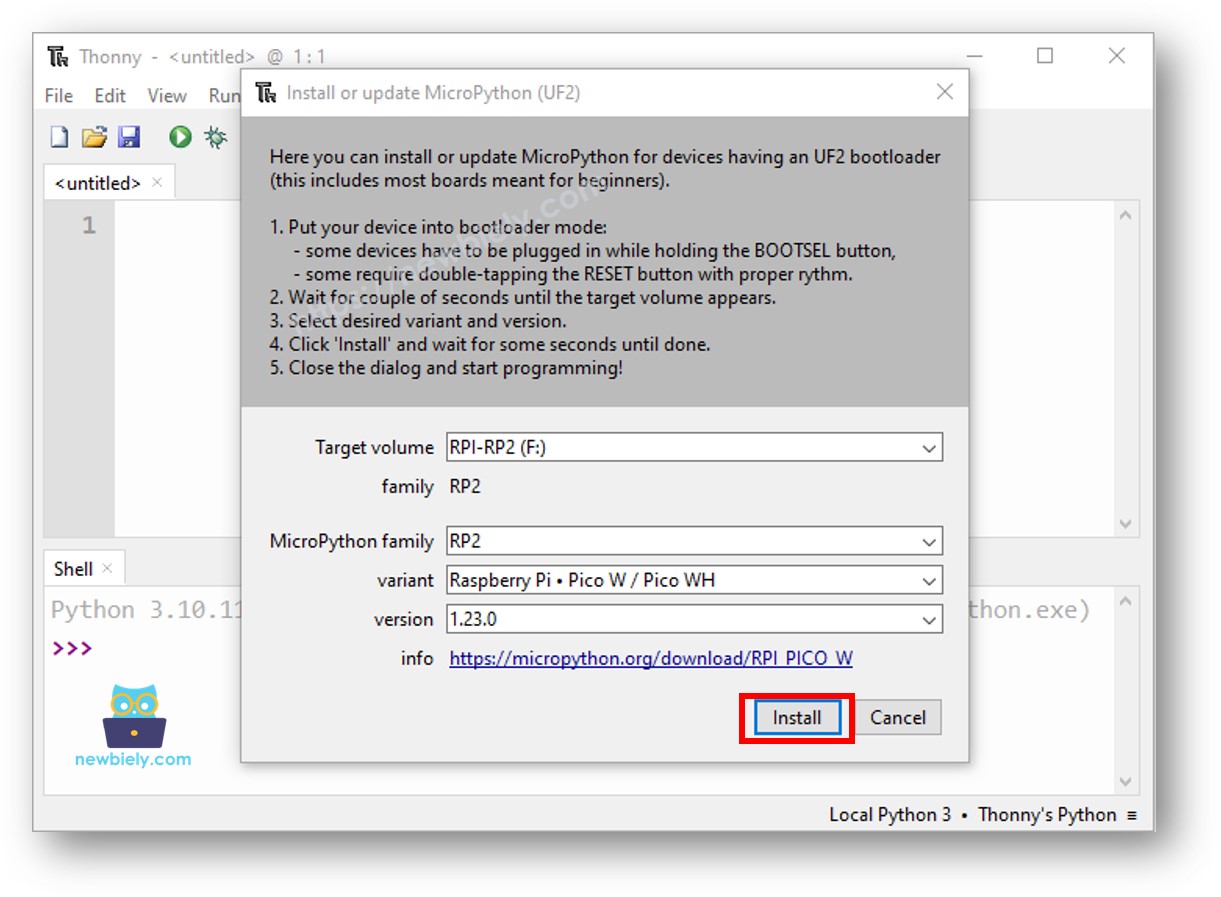
After these process are done, your Raspberry Pi Pico will be rebooted automatically. And it is ready for running MicroPython code. Let's run the first Raspberry Pi Pico program.
Updating the firmware on your Raspberry Pi Pico isn't necessary every time you use it. Next time, just connect it to your computer without pressing the BOOTSEL button.
Running the first program on Raspberry Pi Pico
- On Thonny IDE, select MicroPython (Raspberry Pi Pico) Interpreter by navigating to Tools Options.
- In the Interpreter tab, select MicroPython (Raspberry Pi Pico) from the drop-down menu.
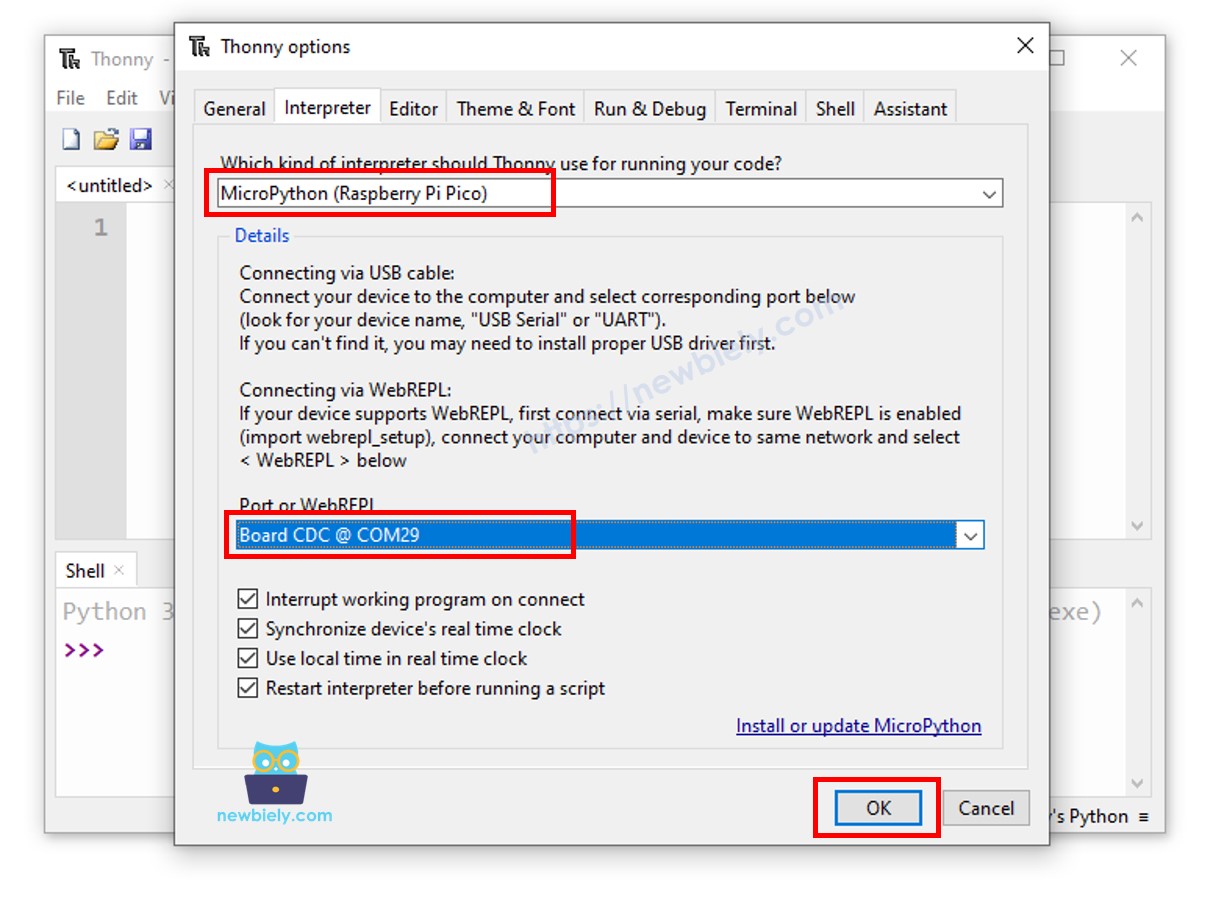
- Ensure the correct port is selected. Thonny IDE should automatically detect the port, but you may need to select it manually (e.g., COM3 on Windows or /dev/ttyACM0 on Linux).
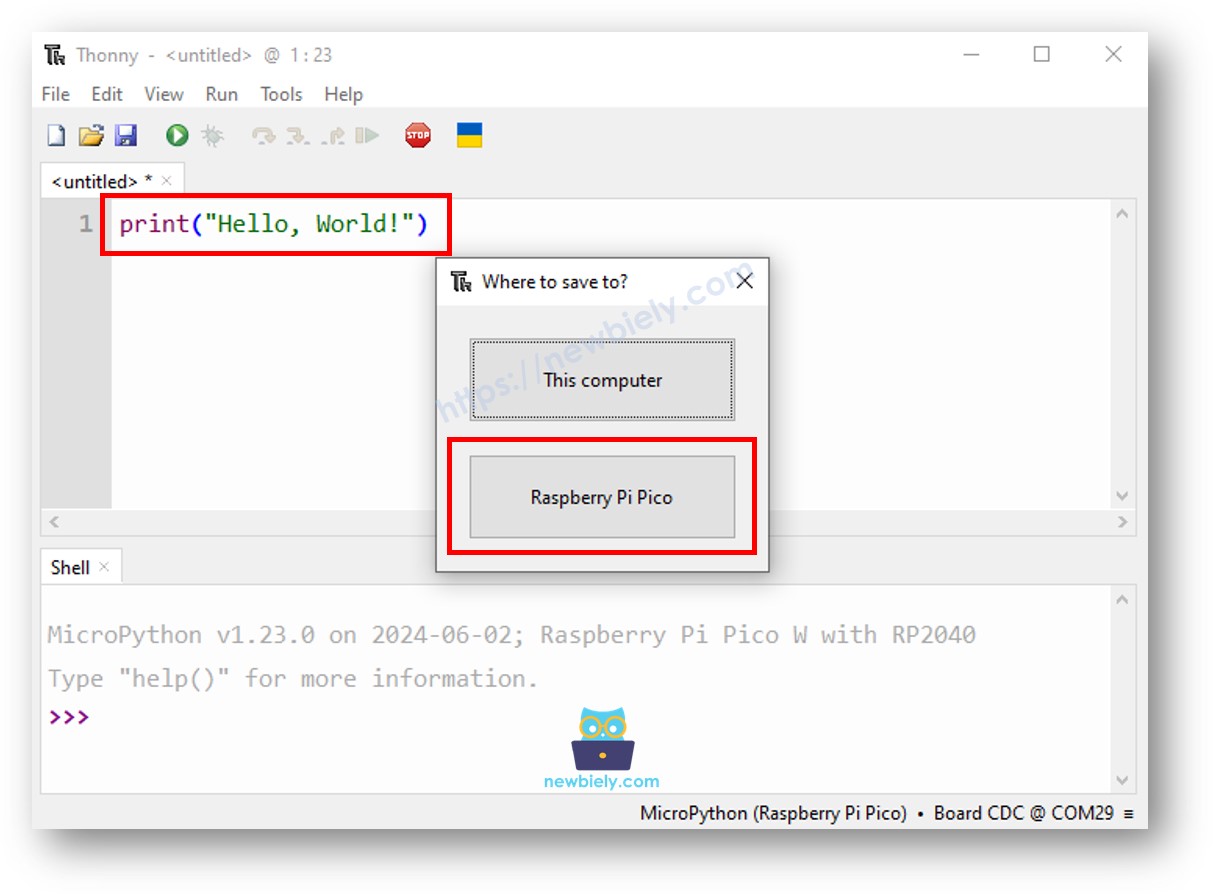
print("Hello, World!")
- Copy the above code and paste it to the Thonny IDE's editor.
- Save the script to your Raspberry Pi Pico by:
- Click the Save button, or use Ctrl+S keys.
- In the save dialog, you will see two sections: This computer and Raspberry Pi Pico. Select Raspberry Pi Pico
- Save the file as main.py
- Click the green Run button (or press F5) to run the script. The script will execute.
- Check out the message in the Shell at the bottom of Thonny.
Shell x
>>> %Run -c $EDITOR_CONTENT
MPY: soft reboot
Hello, World!
MicroPython (Raspberry Pi Pico) • Board CDC @ COM29 ≡