Raspberry Pi Pico - Potentiometer
This guide shows you how to use a Raspberry Pi Pico with a potentiometer. We will learn:
- Understanding how a potentiometer works.
- Connecting a potentiometer to a Raspberry Pi Pico.
- Programming the Raspberry Pi Pico to interpret readings from the potentiometer and convert them into practical values.

Hardware Preparation
Or you can buy the following kits:
| 1 | × | DIYables Sensor Kit (30 sensors/displays) | |
| 1 | × | DIYables Sensor Kit (18 sensors/displays) |
Additionally, some of these links are for products from our own brand, DIYables .
Overview of Potentiometer
A rotary potentiometer, which is also called a rotary angle sensor, is used to adjust settings manually like stereo volume, lamp brightness, or how much you zoom in on an oscilloscope.

Pinout
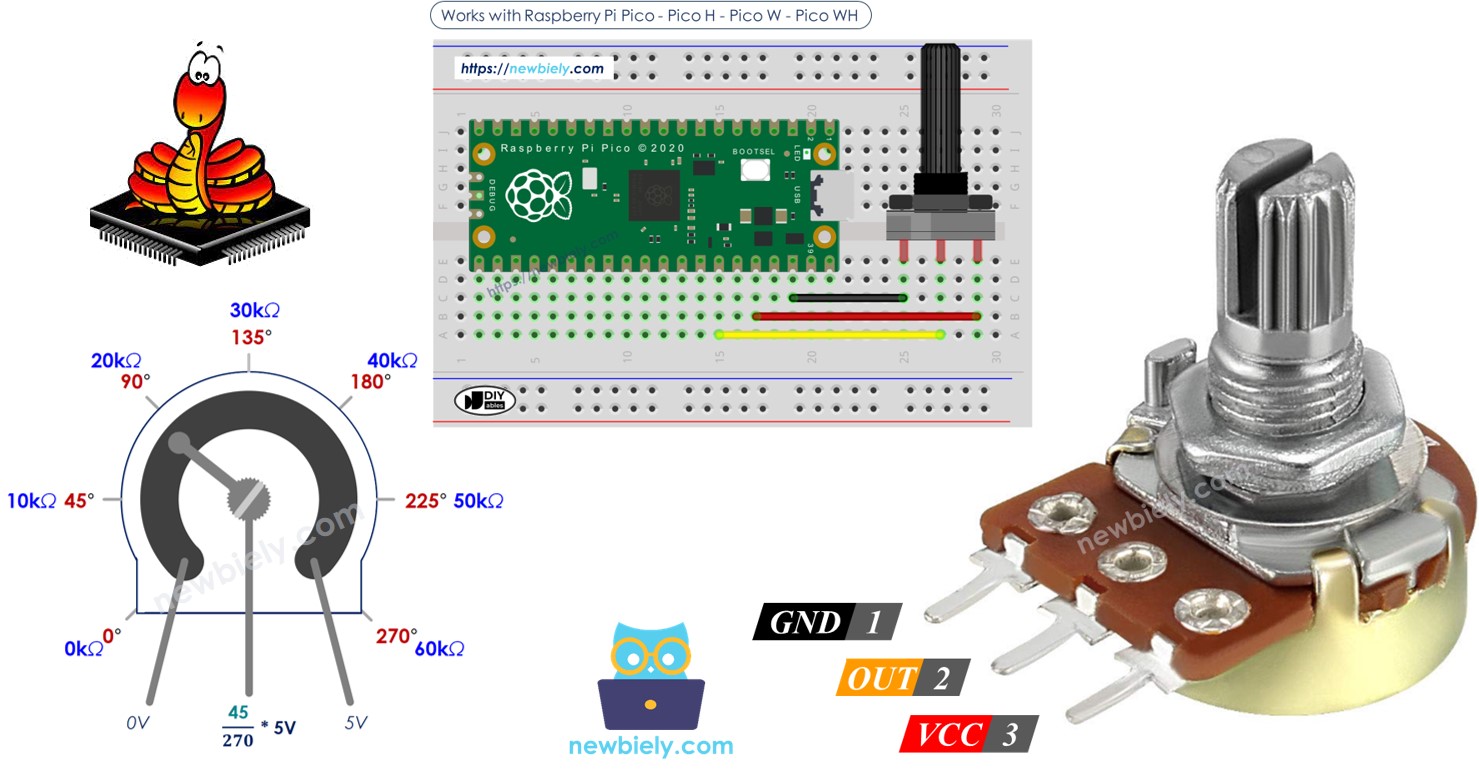
A potentiometer usually has three pins.
- GND pin: connect to GND (0 volts)
- VCC pin: connect to VCC (5 volts or 3.3 volts)
- Output pin: sends voltage to Raspberry Pi Pico's input pin.

※ NOTE THAT:
You can switch the positions of the GND pin and the VCC pin.
How It Works
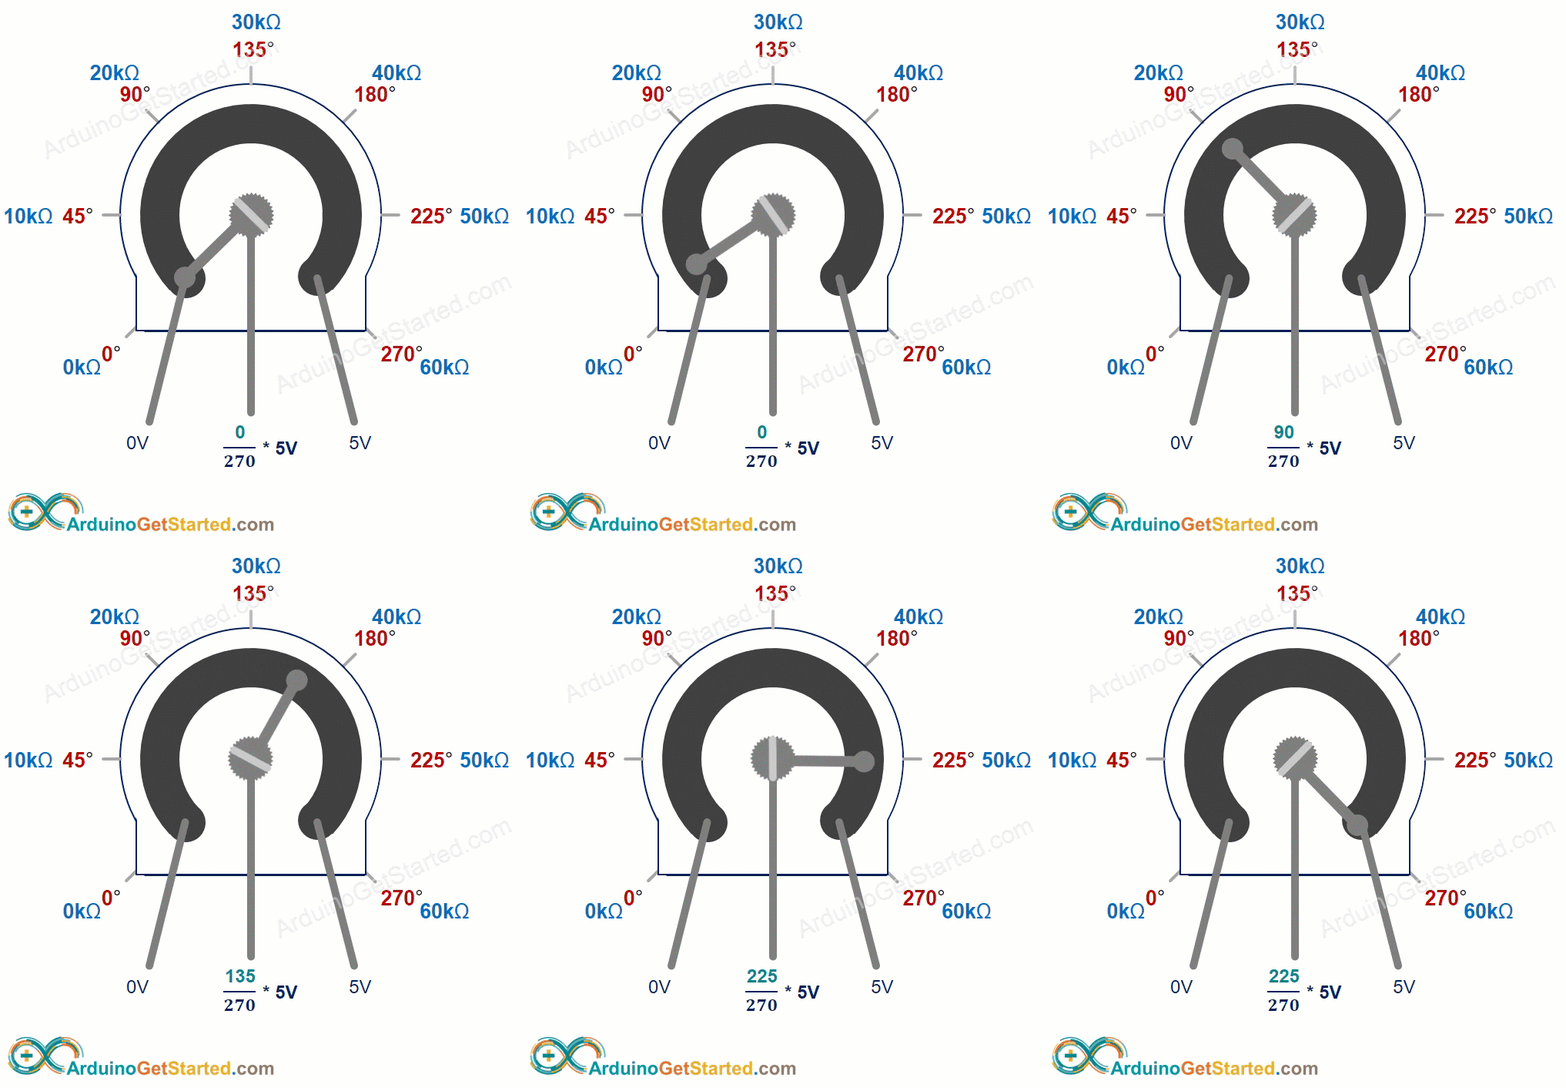
The potentiometer's shaft turns from 0 degrees, near the GND, to a maximum position near the VCC pin, called ANGLE_MAX.
The voltage at the output pin ranges from the ground (GND) voltage to the supply voltage (VCC). As you rotate the shaft, the output voltage changes accordingly.
- If the angle is 0 degrees, there is no voltage (0 volts) at the output pin.
- If the angle is ANGLE_MAX, the output pin's voltage is the same as VCC’s voltage.
- For angles between 0 degrees and ANGLE_MAX, the output voltage is calculated as: angle × VCC / ANGLE_MAX.
※ NOTE THAT:
The value of ANGLE_MAX changes depending on the manufacturer. Normally, we do not focus on the value of ANGLE_MAX unless we need to calculate the rotation angle (see the use cases section).

Raspberry Pi Pico - Rotary Potentiometer
The ADC pins on the Raspberry Pi Pico can be used as analog inputs. These pins convert the voltage, which varies from 0 volts to VCC, into whole numbers from 0 to 4095. These numbers are known as ADC values or analog values.
You can connect the output pin of a potentiometer to an analog input pin on the Raspberry Pi Pico. This allows the Raspberry Pi Pico to read the ADC value and turn it into a number that you can use.
The number that the Raspberry Pi Pico gets is not an angle or voltage; it is a whole number between 0 and 4095.
We change the number from the analog input pin to a different number. Now, let's see its use.
Use Cases
- Changing the ADC value into an angle.
- Changing the ADC value into voltage.
- Changing the ADC value to a value you can control (like the loudness of a stereo, how bright something is, or the speed of a motor). This is often the most common use.
Rescale Range
| FROM | TO | |||
|---|---|---|---|---|
| Angle | rotated by user | 0° | → | ANGLE_MAX |
| Voltage | from potentiometer's pin | 0V | → | 3.3V |
| ADC value | read by Raspberry Pi Pico | 0 | → | 4095 |
| Other value | converted by Raspberry Pi Pico | VALUE_MIN | → | VALUE_MAX |
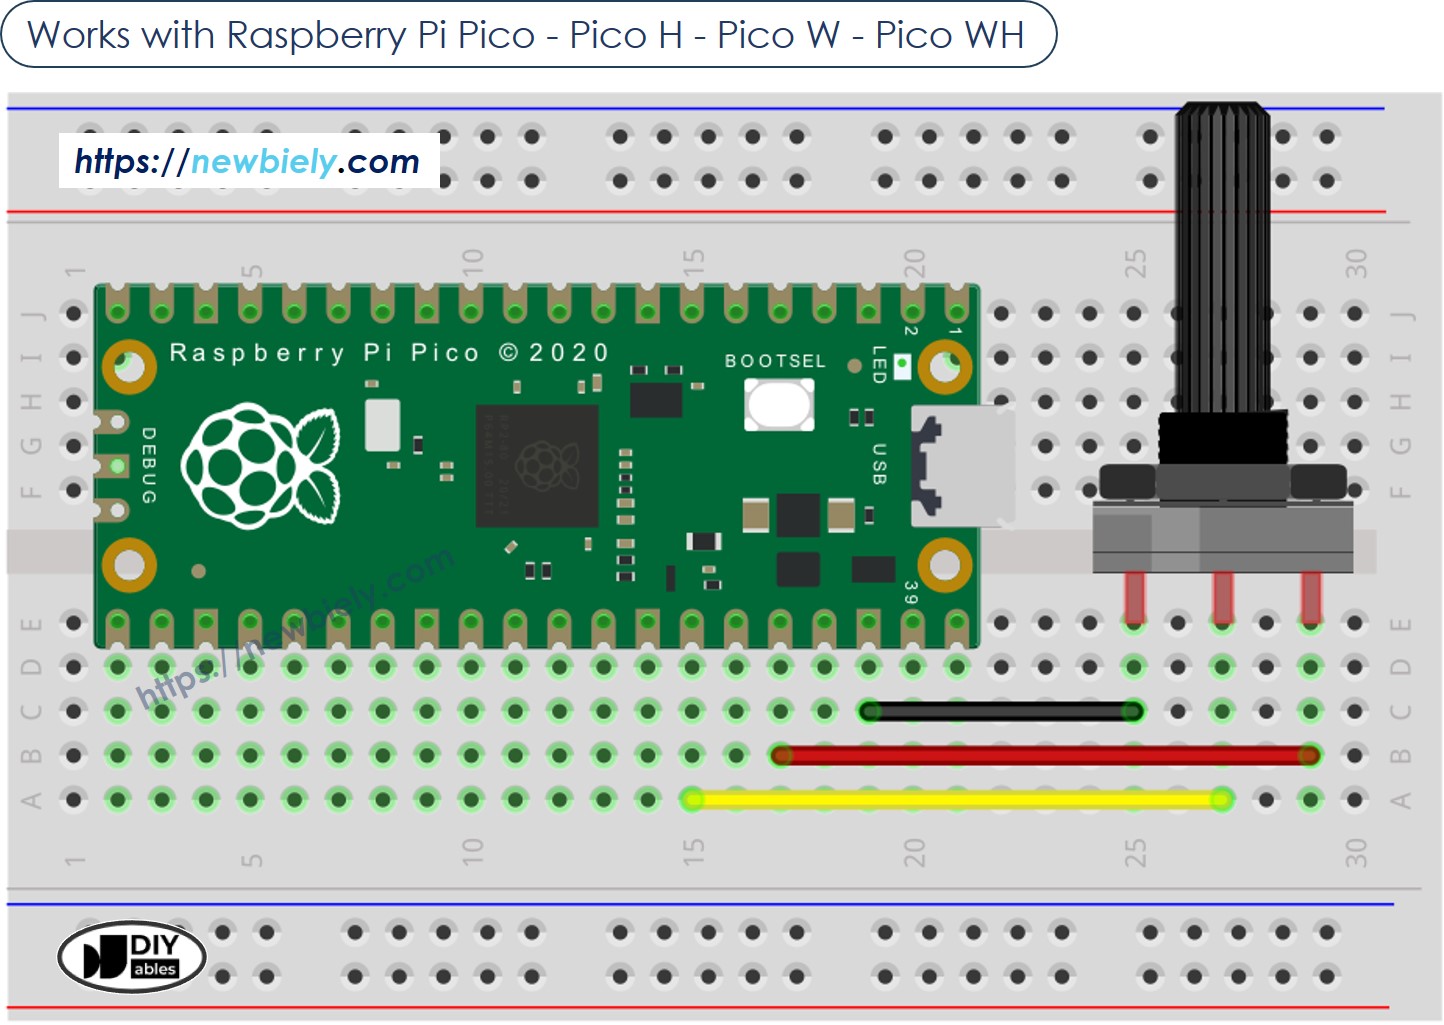
Wiring Diagram

This image is created using Fritzing. Click to enlarge image
Raspberry Pi Pico Code
Detailed Instructions
Please follow these instructions step by step:
- Ensure that Thonny IDE is installed on your computer.
- Ensure that MicroPython firmware is installed on your Raspberry Pi Pico.
- If this is your first time using a Raspberry Pico, refer to the Raspberry Pi Pico - Getting Started tutorial for detailed instructions.
- Wire the Raspberry Pi Pico to the potentiometer according to the provided diagram.
- Connect the Raspberry Pi Pico to your computer using a USB cable.
- Launch the Thonny IDE on your computer.
- On Thonny IDE, select MicroPython (Raspberry Pi Pico) Interpreter by navigating to Tools Options.
- In the Interpreter tab, select MicroPython (Raspberry Pi Pico) from the drop-down menu.
- Ensure the correct port is selected. Thonny IDE should automatically detect the port, but you may need to select it manually (e.g., COM3 on Windows or /dev/ttyACM0 on Linux).
- Copy the above code and paste it to the Thonny IDE's editor.
- Save the script to your Raspberry Pi Pico by:
- Click the Save button, or use Ctrl+S keys.
- In the save dialog, you will see two sections: This computer and Raspberry Pi Pico. Select Raspberry Pi Pico
- Save the file as main.py
- Click the green Run button (or press F5) to run the script. The script will execute.
- Adjust the potentiometer
- Check out the message in the Shell at the bottom of Thonny.
If you name your script main.py and save it to the root directory of the Raspberry Pi Pico, it will automatically run each time the Pico is powered on or reset. This is useful for standalone applications that need to start running immediately upon power-up. If you name your script another name other than main.py, you will need to manually run it from Thonnys's Shell.
