Raspberry Pi Pico - Touch Sensor
This tutorial instructs you how to utilize a Raspberry Pi Pico with a touch sensor, commonly referred to as a touch button or touch switch. Touch sensors are frequently employed to control devices like lamps through simple touch interaction, functioning similarly to conventional buttons. The preference for touch sensors in many modern devices stems from their ability to give products a sleeker, more integrated appearance compared to traditional mechanical buttons.
Hardware Preparation
| 1 | × | Raspberry Pi Pico W | |
| 1 | × | Raspberry Pi Pico Alternatively, | |
| 1 | × | Micro USB Cable | |
| 1 | × | Touch Sensor | |
| 1 | × | Jumper Wires | |
| 1 | × | Breadboard | |
| 1 | × | Recommended: Screw Terminal Expansion Board for Raspberry Pi Pico |
Or you can buy the following kits:
| 1 | × | DIYables Sensor Kit (18 sensors/displays) |
Additionally, some of these links are for products from our own brand, DIYables .
Overview of Touch Sensor
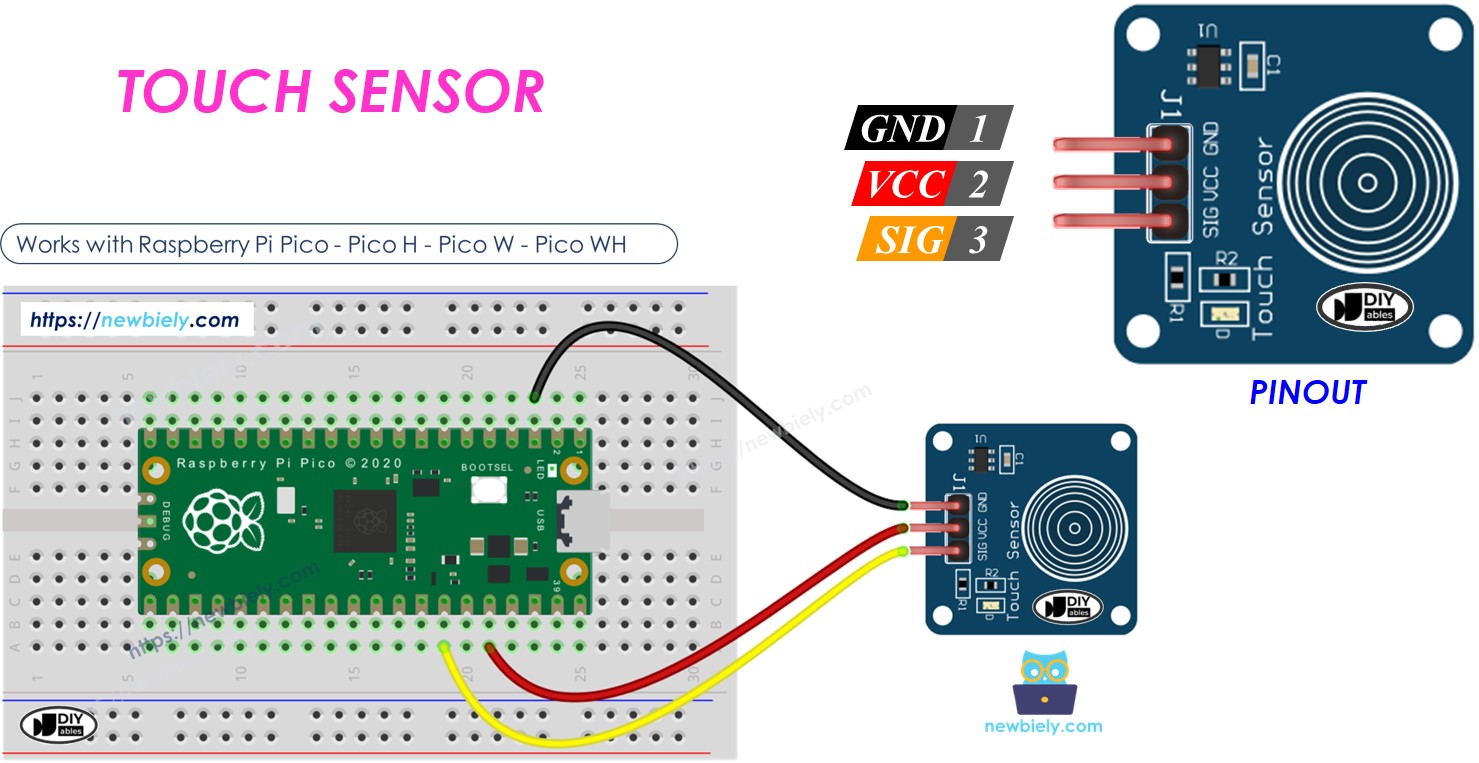
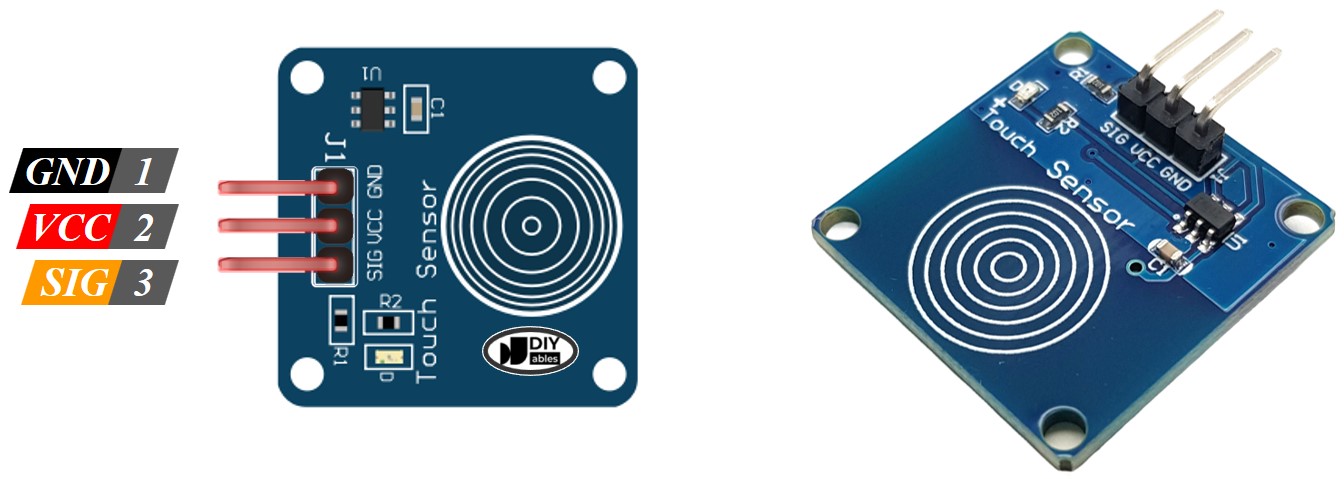
Pinout
The touch sensor has three connectors.
- GND pin: connect to GND (0 volts)
- VCC pin: connect to VCC (5 volts or 3.3 volts)
- SIGNAL pin: if not touched, it shows LOW; if touched, it shows HIGH. Connect this pin to the Raspberry Pi Pico's input pin.
How It Works
- When no one is touching the sensor, the signal pin is LOW.
- When someone touches the sensor, the signal pin is HIGH.
Raspberry Pi Pico - Touch Sensor
The touch sensor's SIGNAL pin is connected to an input pin on the Raspberry Pi Pico.
To know if the touch sensor is touched, check if the input pin on the Raspberry Pico is active.
Wiring Diagram
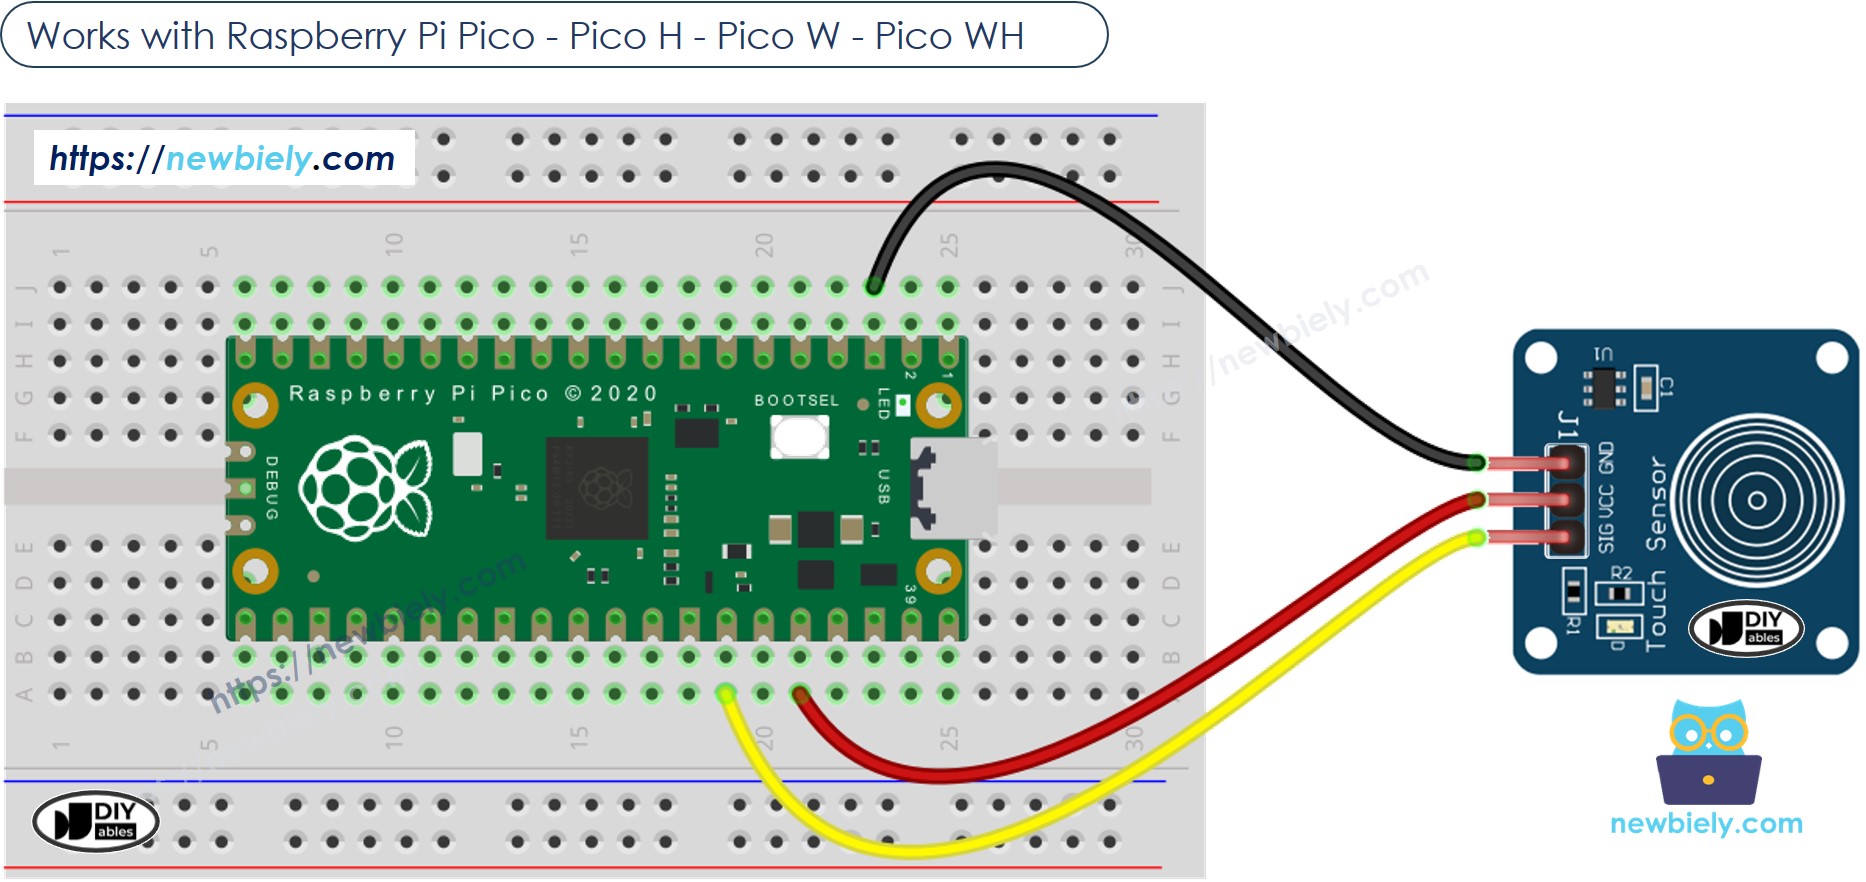
This image is created using Fritzing. Click to enlarge image
Touch Sensor - Raspberry Pi Pico Code
Reads the value from the touch sensor and print it out
Detailed Instructions
Please follow these instructions step by step:
- Ensure that Thonny IDE is installed on your computer.
- Ensure that MicroPython firmware is installed on your Raspberry Pi Pico.
- If this is your first time using a Raspberry Pico, refer to the Raspberry Pi Pico - Getting Started tutorial for detailed instructions.
- Connect the Raspberry Pi Pico to the touch sensor according to the provided diagram.
- Connect the Raspberry Pi Pico to your computer using a USB cable.
- Launch the Thonny IDE on your computer.
- On Thonny IDE, select MicroPython (Raspberry Pi Pico) Interpreter by navigating to Tools Options.
- In the Interpreter tab, select MicroPython (Raspberry Pi Pico) from the drop-down menu.
- Ensure the correct port is selected. Thonny IDE should automatically detect the port, but you may need to select it manually (e.g., COM3 on Windows or /dev/ttyACM0 on Linux).
- Copy the above code and paste it to the Thonny IDE's editor.
- Save the script to your Raspberry Pi Pico by:
- Click the Save button, or use Ctrl+S keys.
- In the save dialog, you will see two sections: This computer and Raspberry Pi Pico. Select Raspberry Pi Pico
- Save the file as main.py
- Click the green Run button (or press F5) to run the script. The script will execute.
- Touch the sensor with your finger and then take your finger off.
- Check out the message in the Shell at the bottom of Thonny.
If you name your script main.py and save it to the root directory of the Raspberry Pi Pico, it will automatically run each time the Pico is powered on or reset. This is useful for standalone applications that need to start running immediately upon power-up. If you name your script another name other than main.py, you will need to manually run it from Thonnys's Shell.
Detects the sensor is touched or released
Detailed Instructions
- Copy the provided MicroPython code and paste it into Thonny's editor.
- Save the code to your Raspberry Pi Pico.
- Click the green Run button (or press F5) to execute the script.
- Put your finger on the sensor and keep it there.
- Check out the message in the Shell at the bottom of Thonny.
- Remove your finger from the sensor.
- Check out the message in the Shell at the bottom of Thonny.