Raspberry Pi Pico - Electromagnetic Lock
In this guide, we will learn how to use the Raspberry Pi Pico to control an electromagnetic lock to lock and unlock your door automatically.
Hardware Preparation
Or you can buy the following kits:
| 1 | × | DIYables Sensor Kit (18 sensors/displays) |
Additionally, some of these links are for products from our own brand, DIYables .
Overview of Electromagnetic Lock
The electromagnetic lock, also known as a maglock, is widely used to lock doors. It usually works with different devices such as switches, fingerprint scanners, RFID/NFC scanners, keypads, or software on computers and mobile devices to control who can enter doors and buildings.
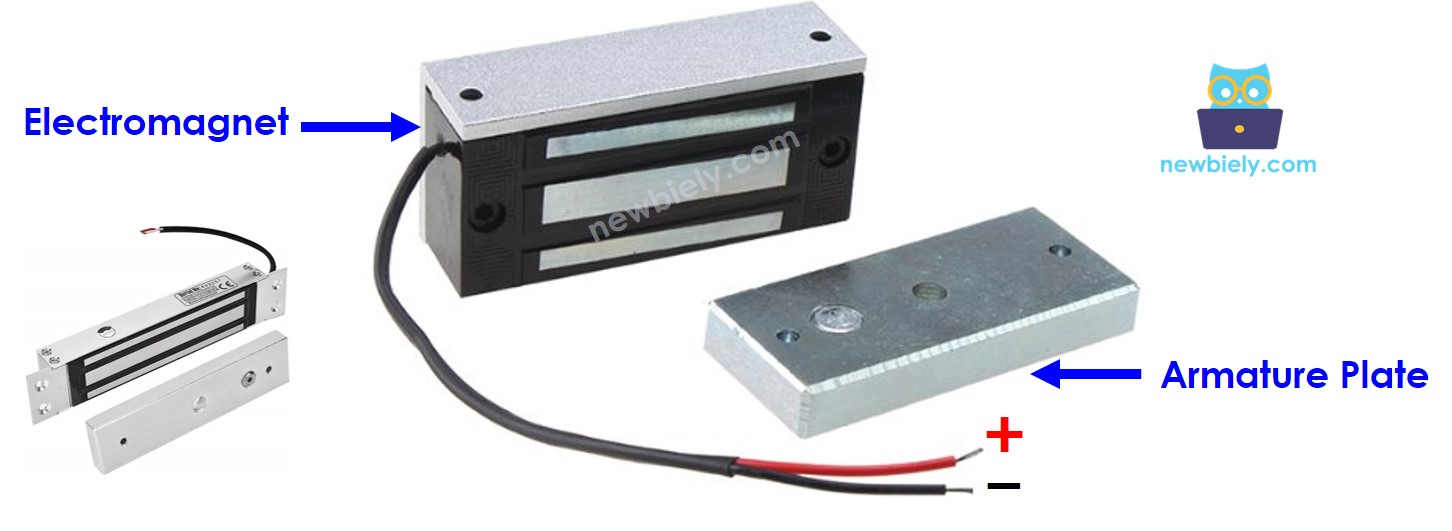
Pinout
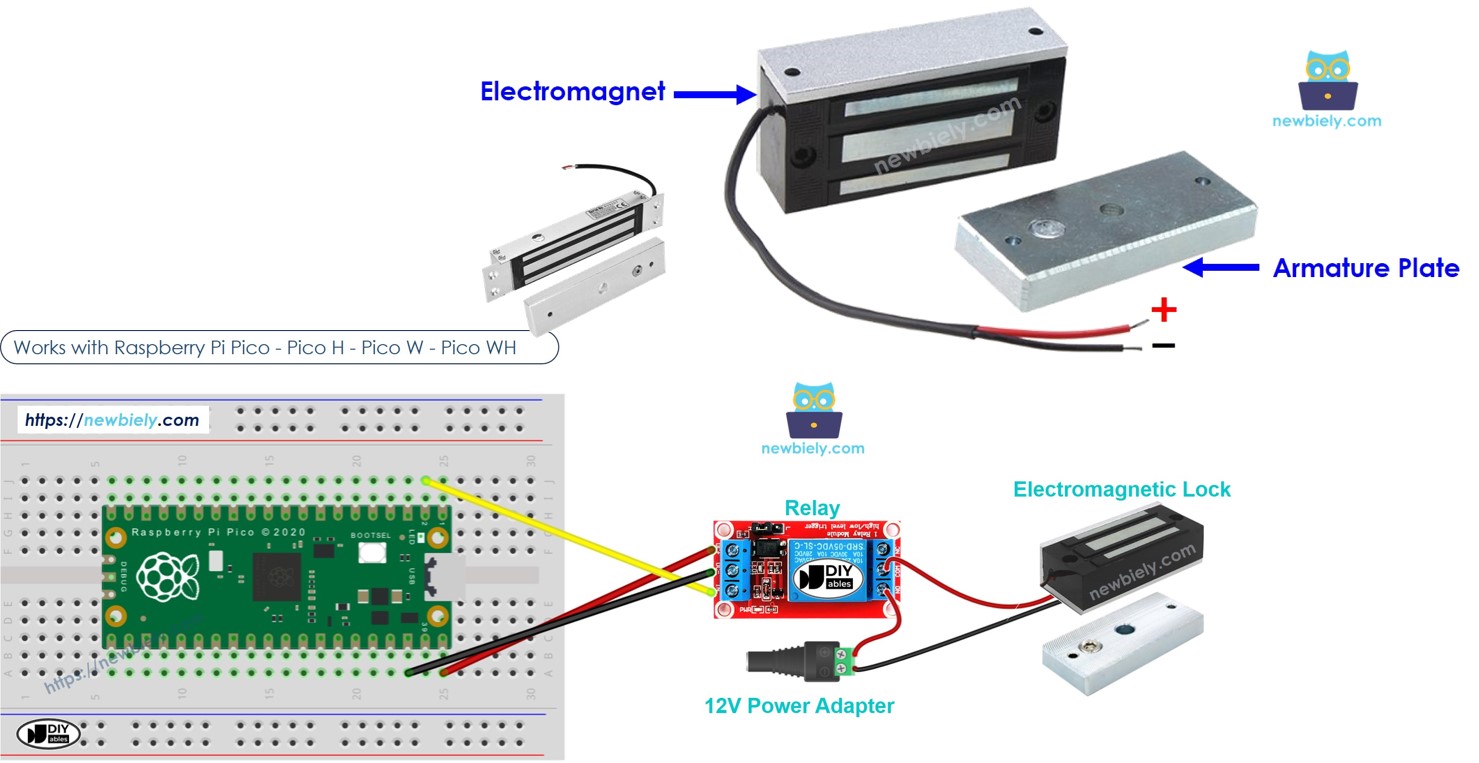
An electromagnetic lock consists of two components.
- One electromagnet with two pins
- One armature plate
How It Works
- When the electromagnet is activated, electric current runs through it, creating a magnetic field that attracts the armature plate to the electromagnet, thus locking it. When the electromagnet is deactivated, it stops generating a magnetic field, so the armure plate is not attracted and the lock opens.
※ NOTE THAT:
The electromagnetic lock usually requires a 12V, 24V, or 48V power supply. Therefore, we cannot connect the electromagnetic lock directly to a Raspberry Pi Pico pin. We need to connect it using a relay to the Raspberry Pi Pico pin.
If we connect the electromagnetic lock to a relay that is set to 'normally open':
- When the relay is open, the door can be opened.
- When the relay is closed, the door cannot be opened.
You can link a Raspberry Pi Pico with a relay to control an electromagnetic lock. To understand more about connecting a relay to a Raspberry Pi Pico, visit Raspberry Pi Pico - Relay tutorial.
To install it, attach the armature plate to the door or window (the part that moves) and mount the electromagnet to the door frame (the part that does not move). Ensure that these two parts touch each other when the door is closed.
Wiring Diagram
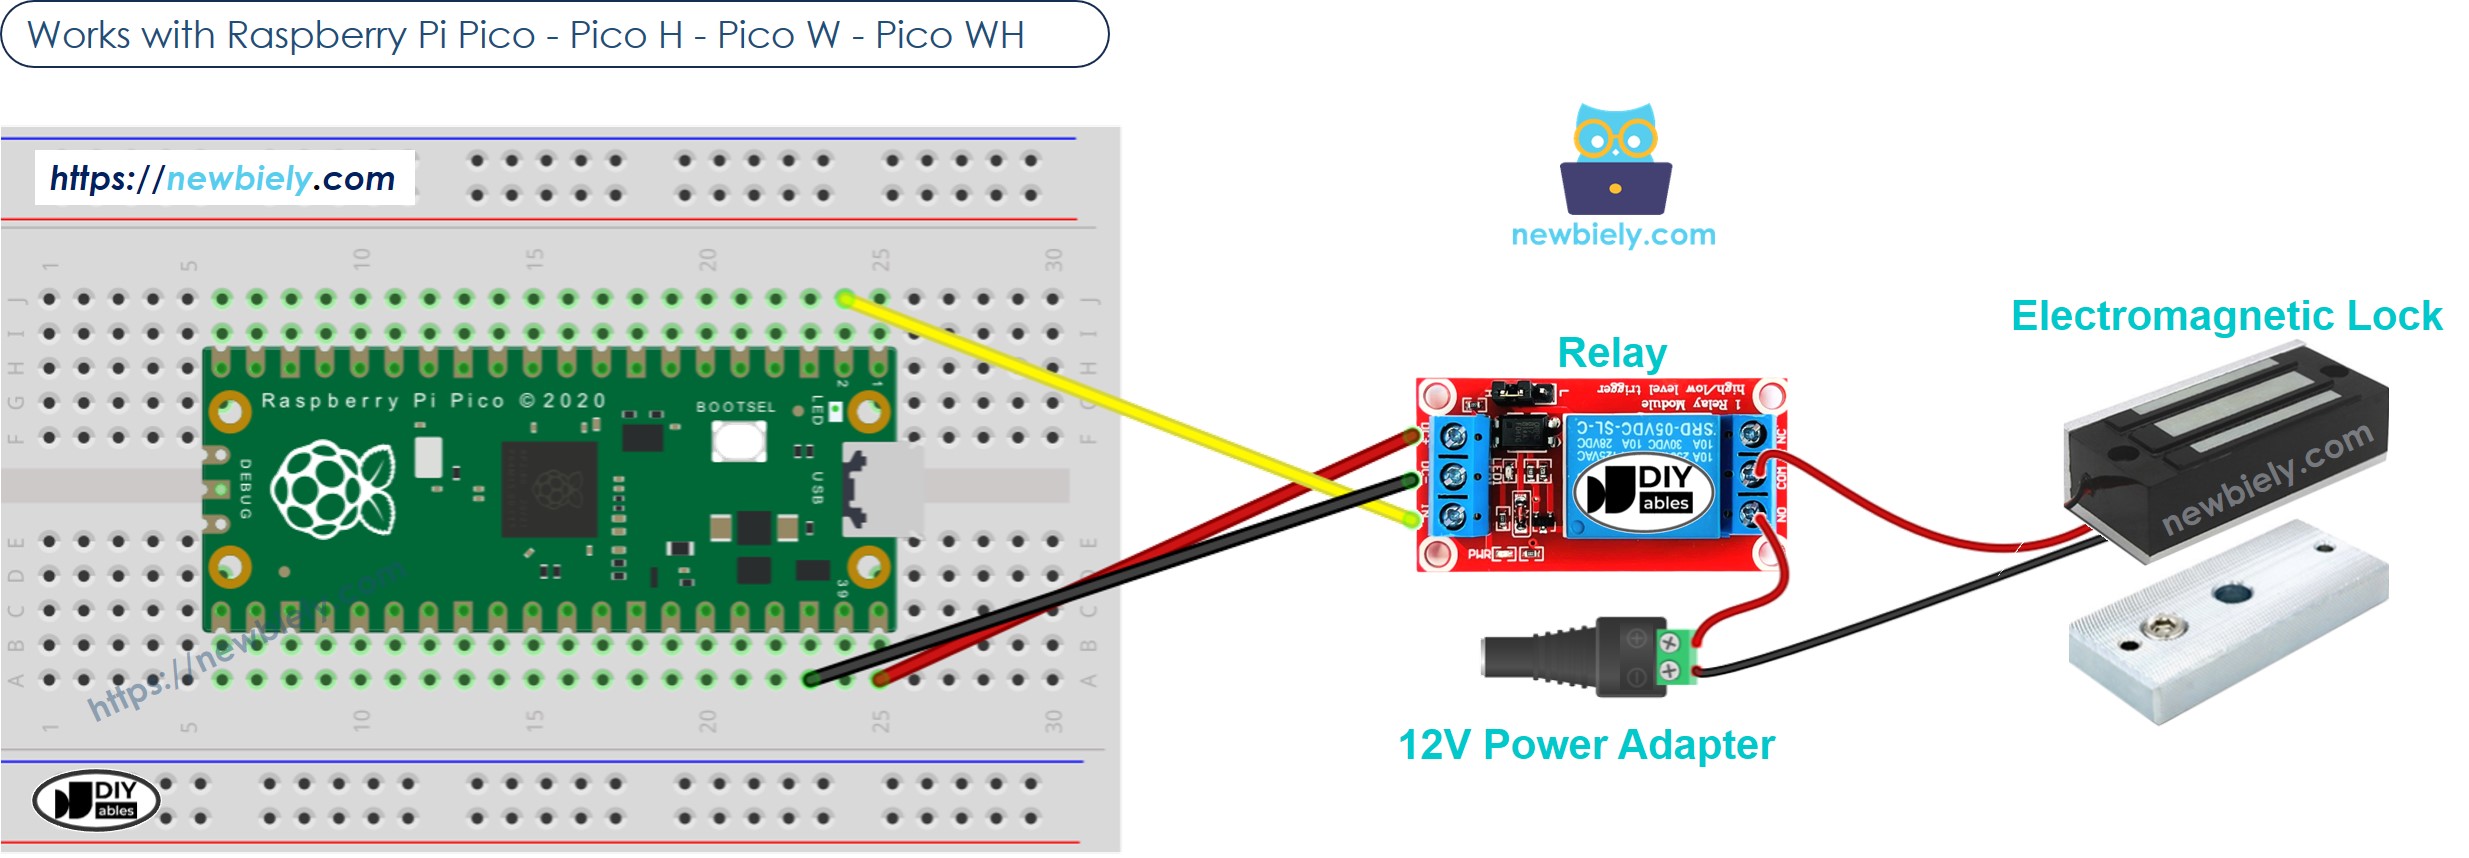
This image is created using Fritzing. Click to enlarge image
Raspberry Pi Pico Code
This code makes the door lock and unlock every 5 seconds.
Detailed Instructions
Please follow these instructions step by step:
- Ensure that Thonny IDE is installed on your computer.
- Ensure that MicroPython firmware is installed on your Raspberry Pi Pico.
- If this is your first time using a Raspberry Pico, refer to the Raspberry Pi Pico - Getting Started tutorial for detailed instructions.
- Connect the Raspberry Pi Pico to the electromagnetic lock according to the provided diagram.
- Connect the Raspberry Pi Pico to your computer using a USB cable.
- Launch the Thonny IDE on your computer.
- On Thonny IDE, select MicroPython (Raspberry Pi Pico) Interpreter by navigating to Tools Options.
- In the Interpreter tab, select MicroPython (Raspberry Pi Pico) from the drop-down menu.
- Ensure the correct port is selected. Thonny IDE should automatically detect the port, but you may need to select it manually (e.g., COM3 on Windows or /dev/ttyACM0 on Linux).
- Copy the above code and paste it to the Thonny IDE's editor.
- Save the script to your Raspberry Pi Pico by:
- Click the Save button, or use Ctrl+S keys.
- In the save dialog, you will see two sections: This computer and Raspberry Pi Pico. Select Raspberry Pi Pico
- Save the file as main.py
- Click the green Run button (or press F5) to run the script. The script will execute.
- Place the armature plate close to the electromagnet.
- Check out how the armature plate is attracted to the electromagnet.
If you name your script main.py and save it to the root directory of the Raspberry Pi Pico, it will automatically run each time the Pico is powered on or reset. This is useful for standalone applications that need to start running immediately upon power-up. If you name your script another name other than main.py, you will need to manually run it from Thonnys's Shell.