Arduino MicroPython Button
This guide shows you how to use a button with an Arduino and MicroPython. You will learn:
- How a button works
- How to connect the button to Arduino
- How to write MicroPython code for Arduino to read the button's state
- How to write MicroPython code for Arduino to detect the button's press/release events
Hardware Preparation
Or you can buy the following kits:
| 1 | × | DIYables Sensor Kit (18 sensors/displays) |
Additionally, some of these links are for products from our own brand, DIYables .
Overview of Button
Buttons can be challenging when working with Arduino, especially for beginners in electronics. Let's go over the basics and avoid some common mistakes.
Two Main Issues to Consider:
- Floating Inputs: When a button is connected to an Arduino without a resistor, the Arduino might not correctly detect whether the button is pressed. This happens because the input pin can be in an undefined state. To solve this, you'll need to use a pull-down or pull-up resistor. We'll explain how to set this up later.
- Chattering: Buttons can "bounce," which means they quickly switch between pressed and unpressed states, even if only pressed once. This can lead to the Arduino registering multiple presses. While this might not always be a problem, it can be an issue in applications where accurate button press counting is critical. We'll discuss debouncing techniques to handle this.
By understanding these issues and applying the right solutions, you'll be prepared to use buttons effectively in your Arduino projects.
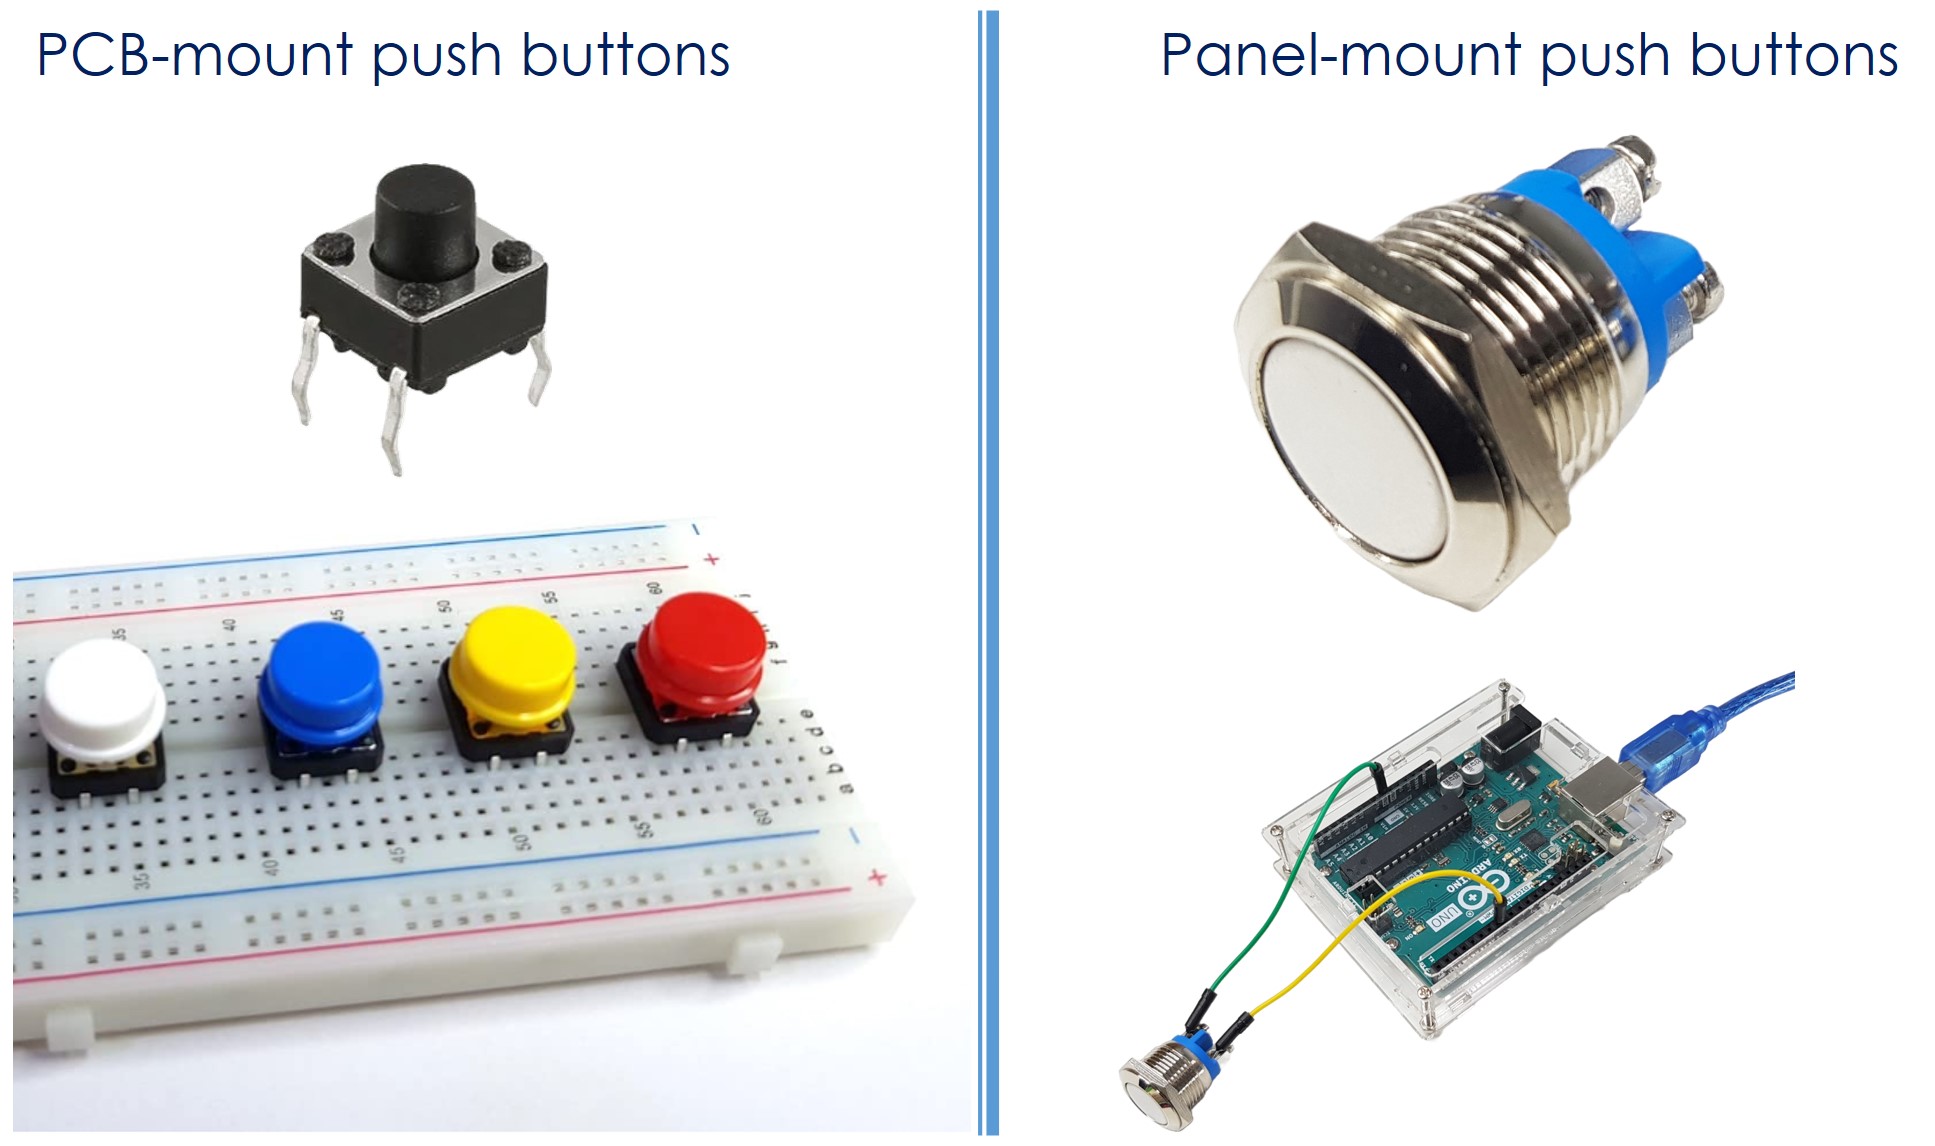
Push buttons are switches that close when pressed and open when released. They're also known as tactile buttons or momentary switches. There are two main types of push buttons:
- PCB-mount push buttons: Designed for mounting on breadboards or printed circuit boards.
- Panel-mount push buttons: Intended for mounting on panels or enclosures.
Pinout
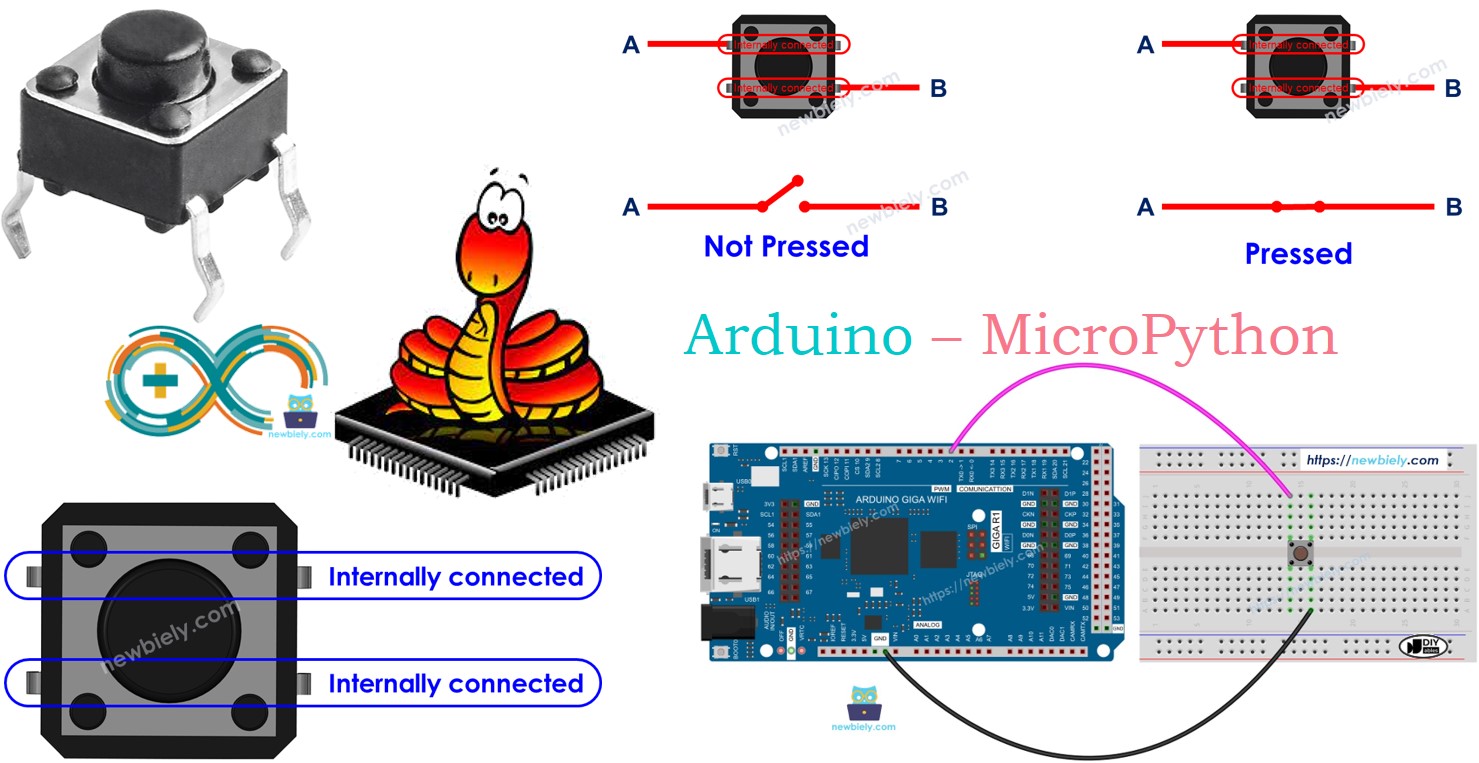
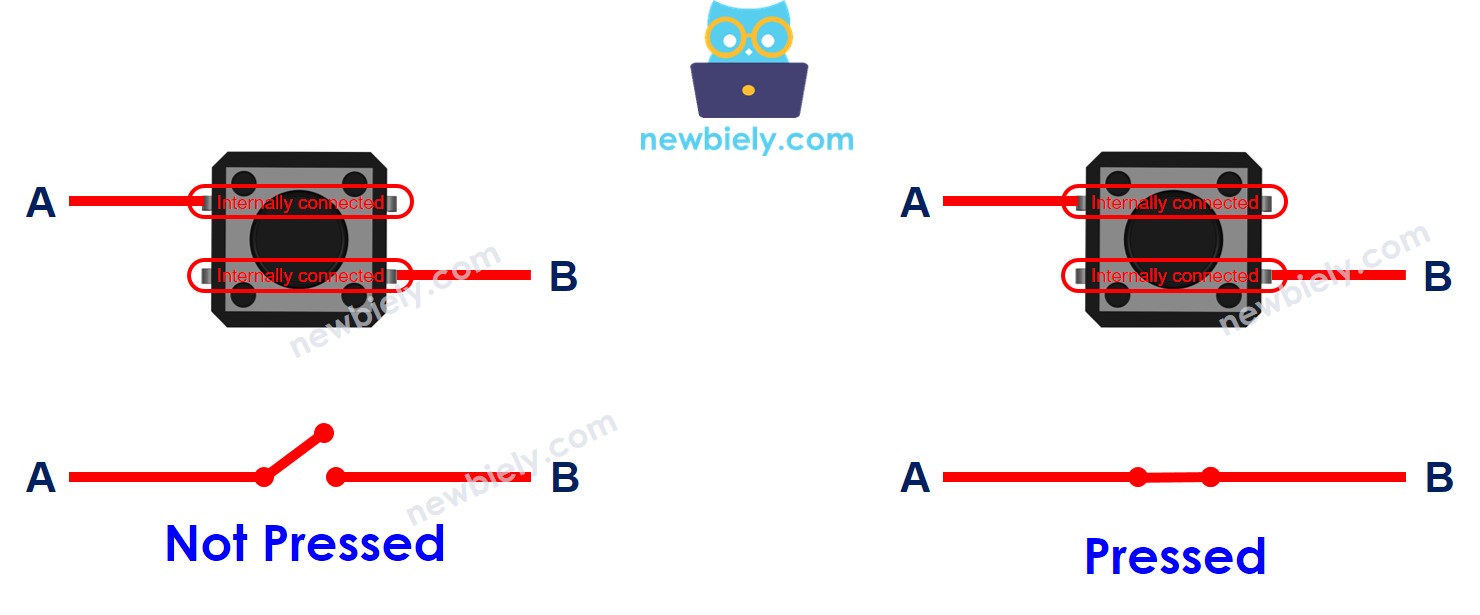
The PCB-mount buttons usually have four pins.
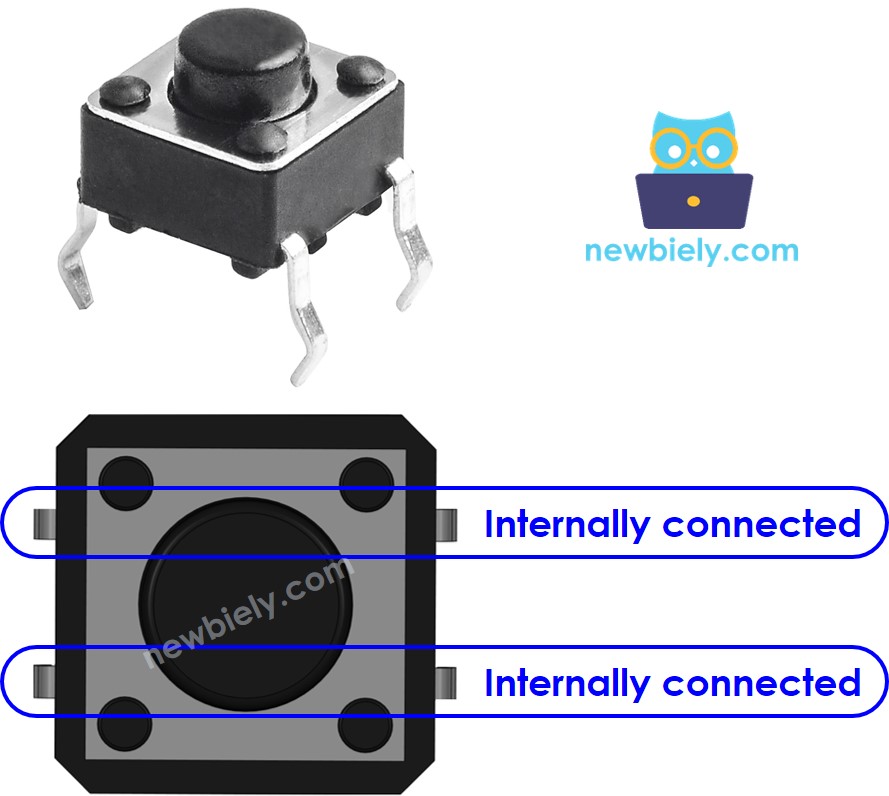
Even though a button has four pins, only two of them are actually used. This is because the pins are internally connected in pairs. While there are four possible ways to connect a button to a PCB, two of these configurations are symmetrical.

Why are only two pins used on a button that has four?
⇒ To provide stable mounting on the PCB (printed circuit board) and to endure the force applied when the button is pressed.
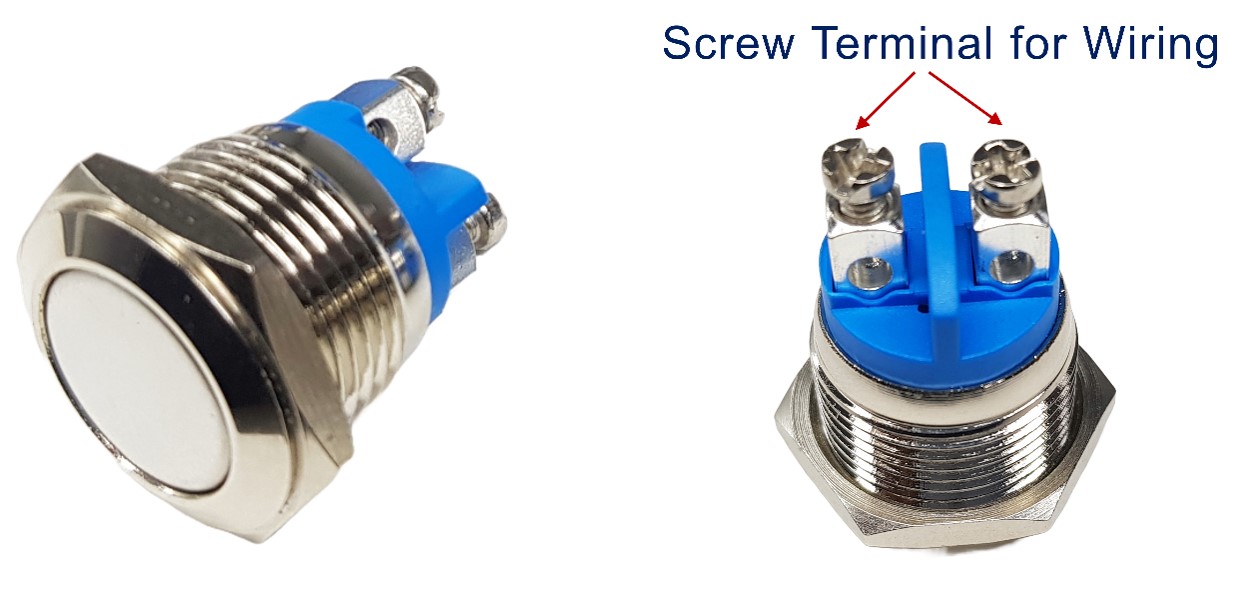
The panel-mount buttons usually have two pins.
The push button module includes an built-in pull-down resistor, which ensures that the output remains LOW when the button is not pressed. It has three pins:
- GND: Connect this pin to ground.
- VCC: Connect this pin to a 3.3V power supply.
- OUT: Connect this pin to a digital input on your Arduino.
With this configuration, the module outputs LOW when the button is not pressed and outputs HIGH when the button is pressed.
How It Works
- When the button is not pressed, pin A and pin B are not connected.
- When the button is pressed, pin A and pin B are connected.
Arduino - Button
One button pin attaches to VCC or GND, while the other pin connects to a pin on the Arduino. We can determine if the button is pressed by checking the input pin status on the Arduino.
Button State and Pressing State
The behavior of an Arduino pin when a button is pressed or released depends on the button's connection and the pin's configuration.
Two Common Connection Methods:
- Pull-Down Resistor:
- Connect one side of the button to VCC (power) and the other side to an Arduino pin.
- Use either an internal or external pull-down resistor on the Arduino pin.
- The Arduino pin reads HIGH when the button is pressed and LOW when the button is not pressed.
- Pull-Up Resistor:
- Connect one side of the button to GND (ground) and the other side to an Arduino pin.
- Use either a built-in pull-up resistor or an external pull-up resistor on the Arduino pin.
- The Arduino pin reads LOW when the button is pressed and HIGH when the button is not pressed.
Why Use a Pull-Up or Pull-Down Resistor?
Without a resistor, the Arduino pin may be in an unstable state when the button is not pressed, causing inaccurate readings. Using a pull-up or pull-down resistor guarantees a stable state.
Recommended Configuration:
For beginners, we recommend using a built-in pull-up resistor on the Arduino pin. This simplifies the wiring and eliminates the need for an external resistor. You can configure this in your MicroPython code using button = Pin(BUTTON_PIN, Pin.IN, Pin.PULL_UP).
Remember: Using a pull-up or pull-down resistor is essential for reliable button readings on an Arduino.
Wiring Diagram
- How to connect Arduino to breadboard-mount button
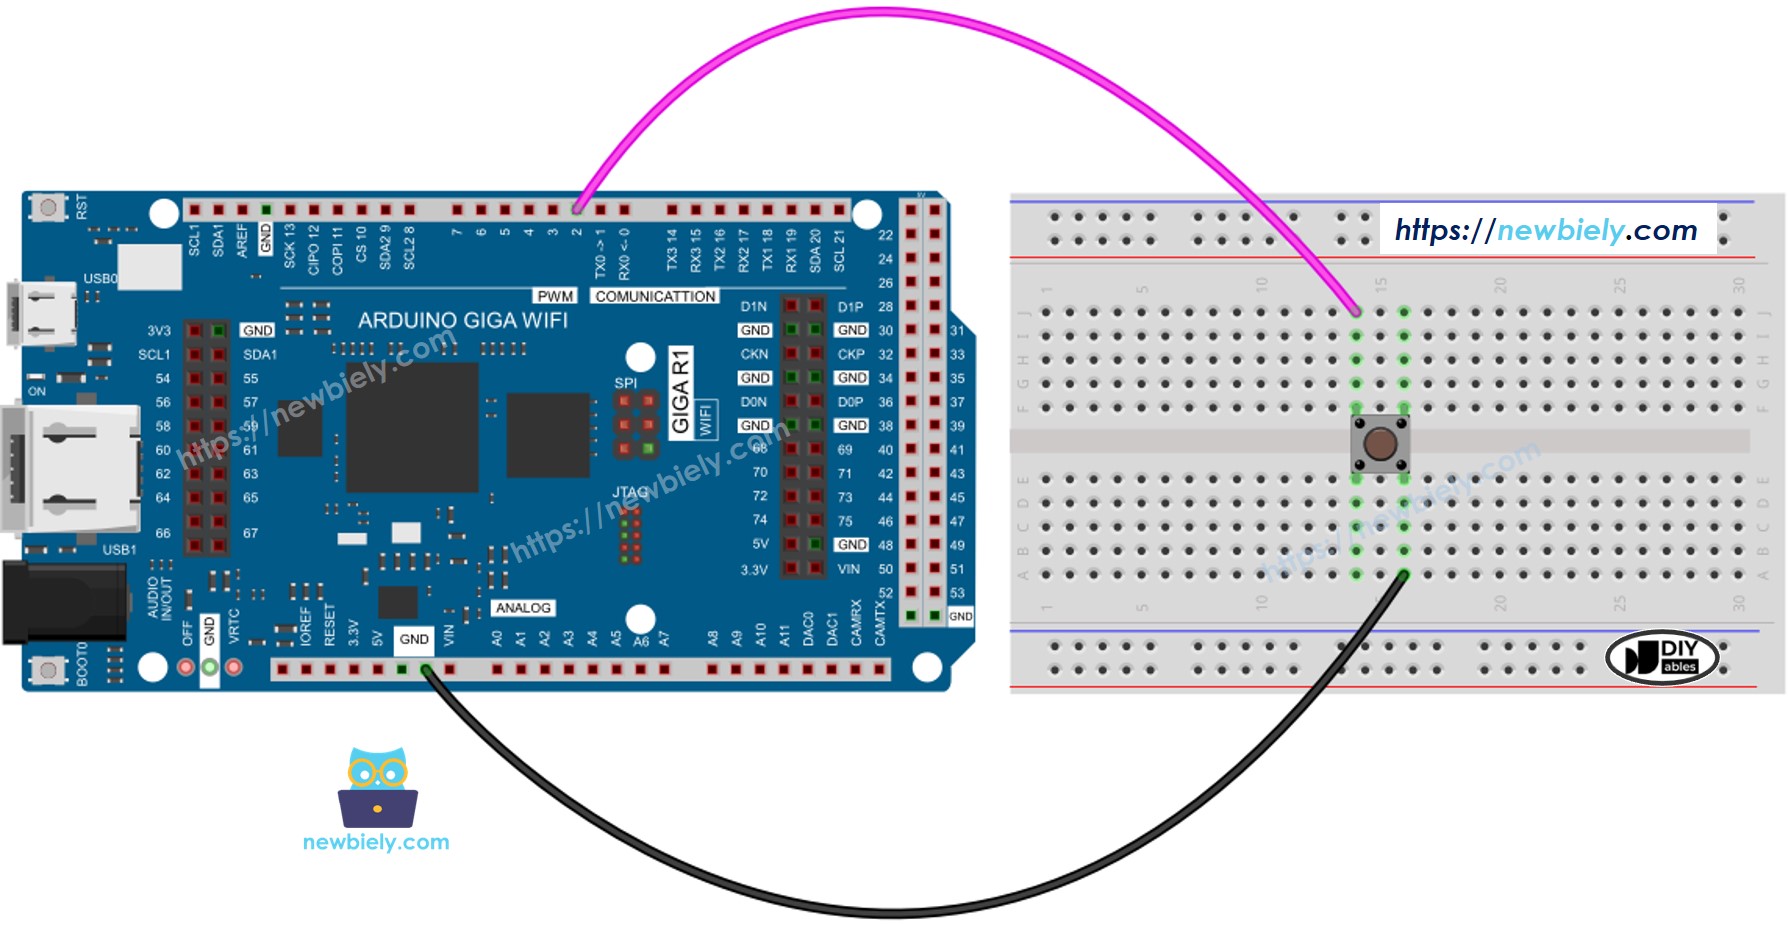
This image is created using Fritzing. Click to enlarge image
- How to connect Arduino to a panel-mounted button
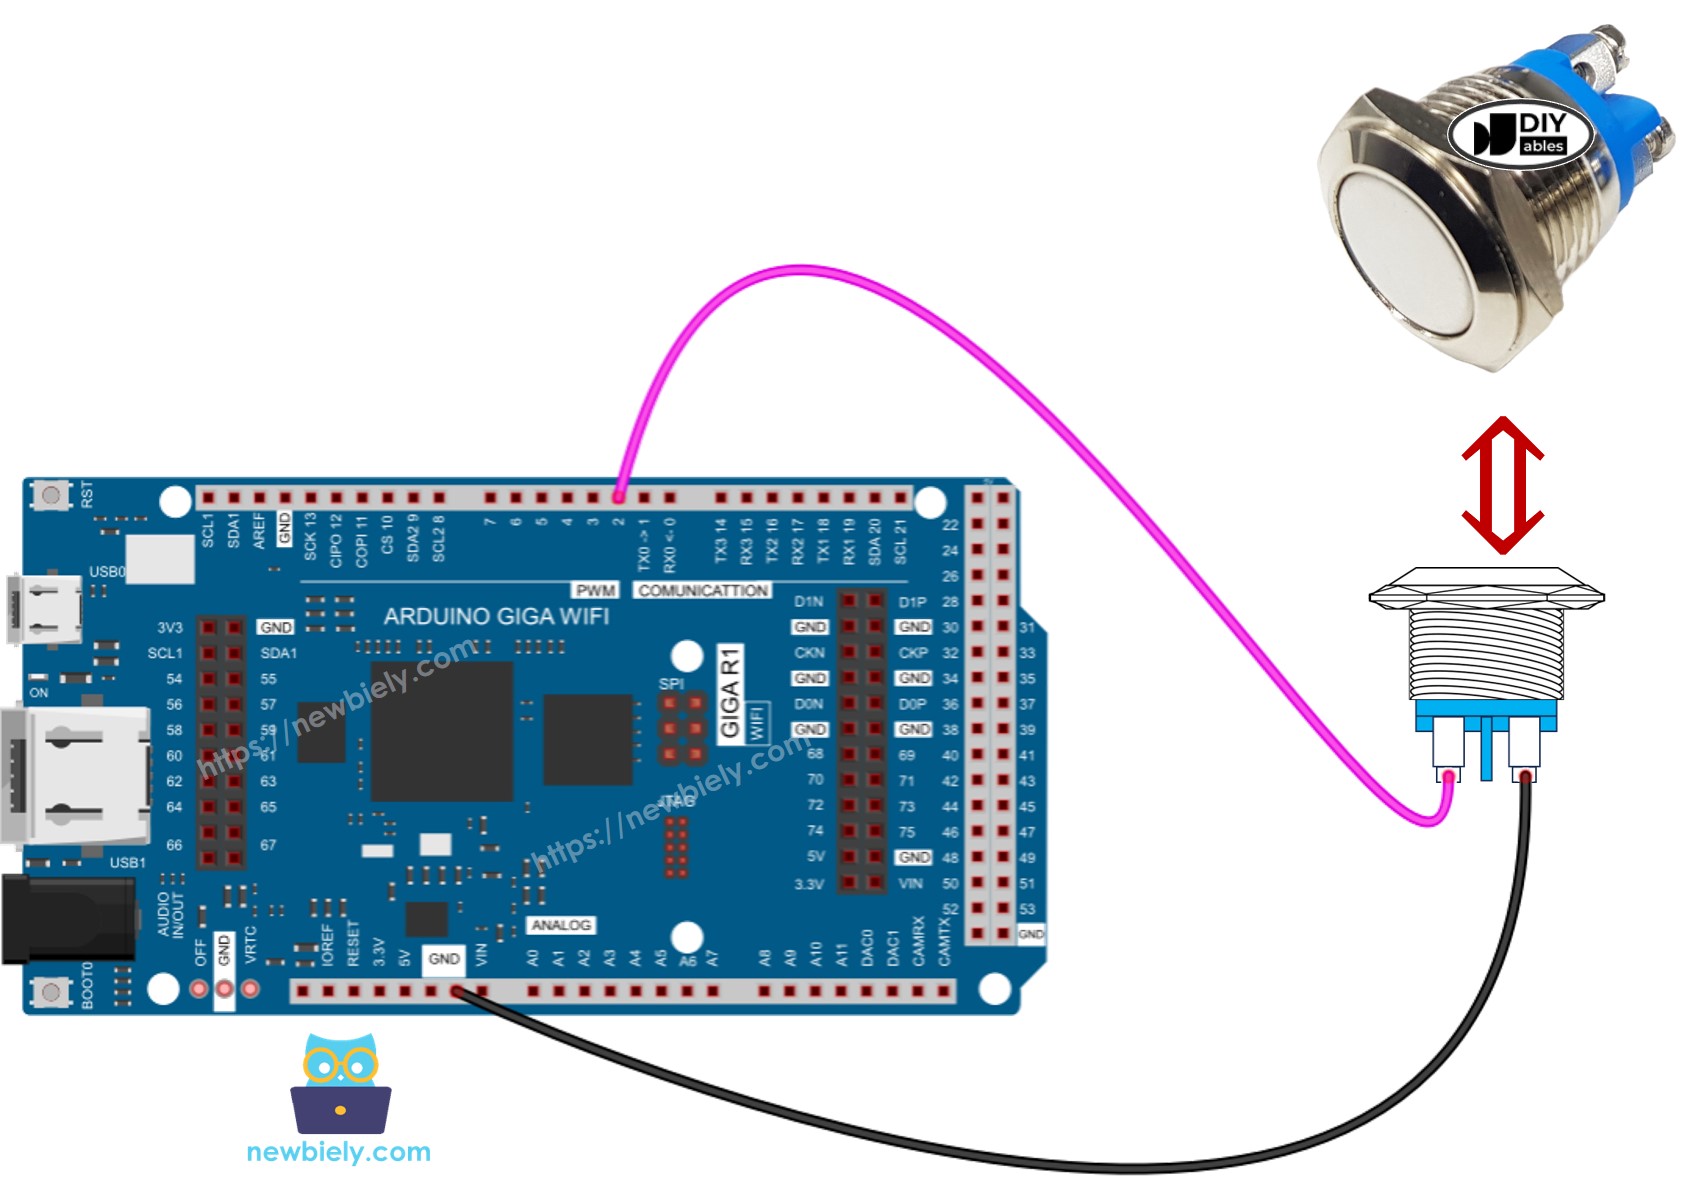
This image is created using Fritzing. Click to enlarge image