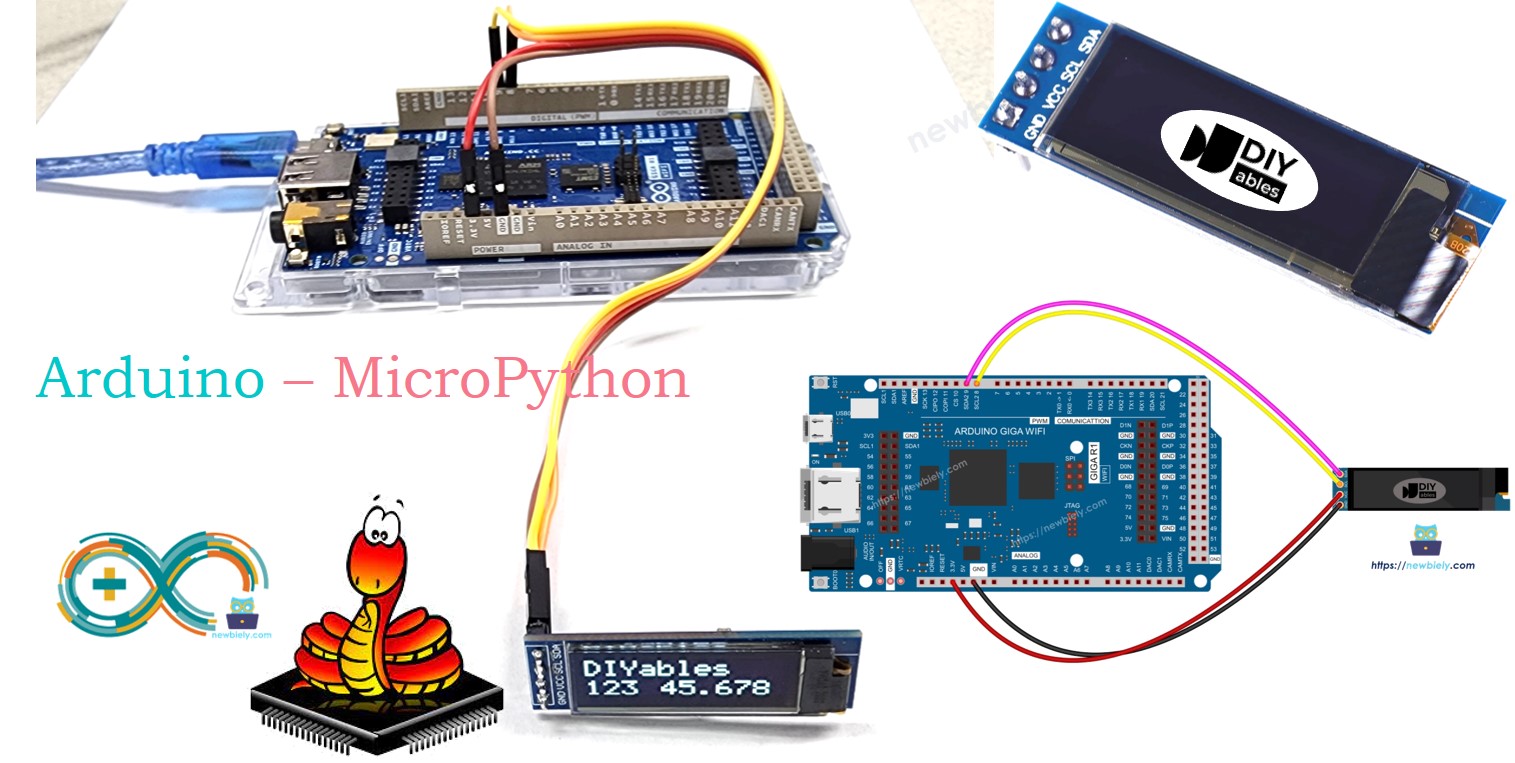
Arduino MicroPython OLED 128x32

This tutorial guides you on how to use a 128x32 OLED I2C display with Arduino and MicroPython. You will learn the following:

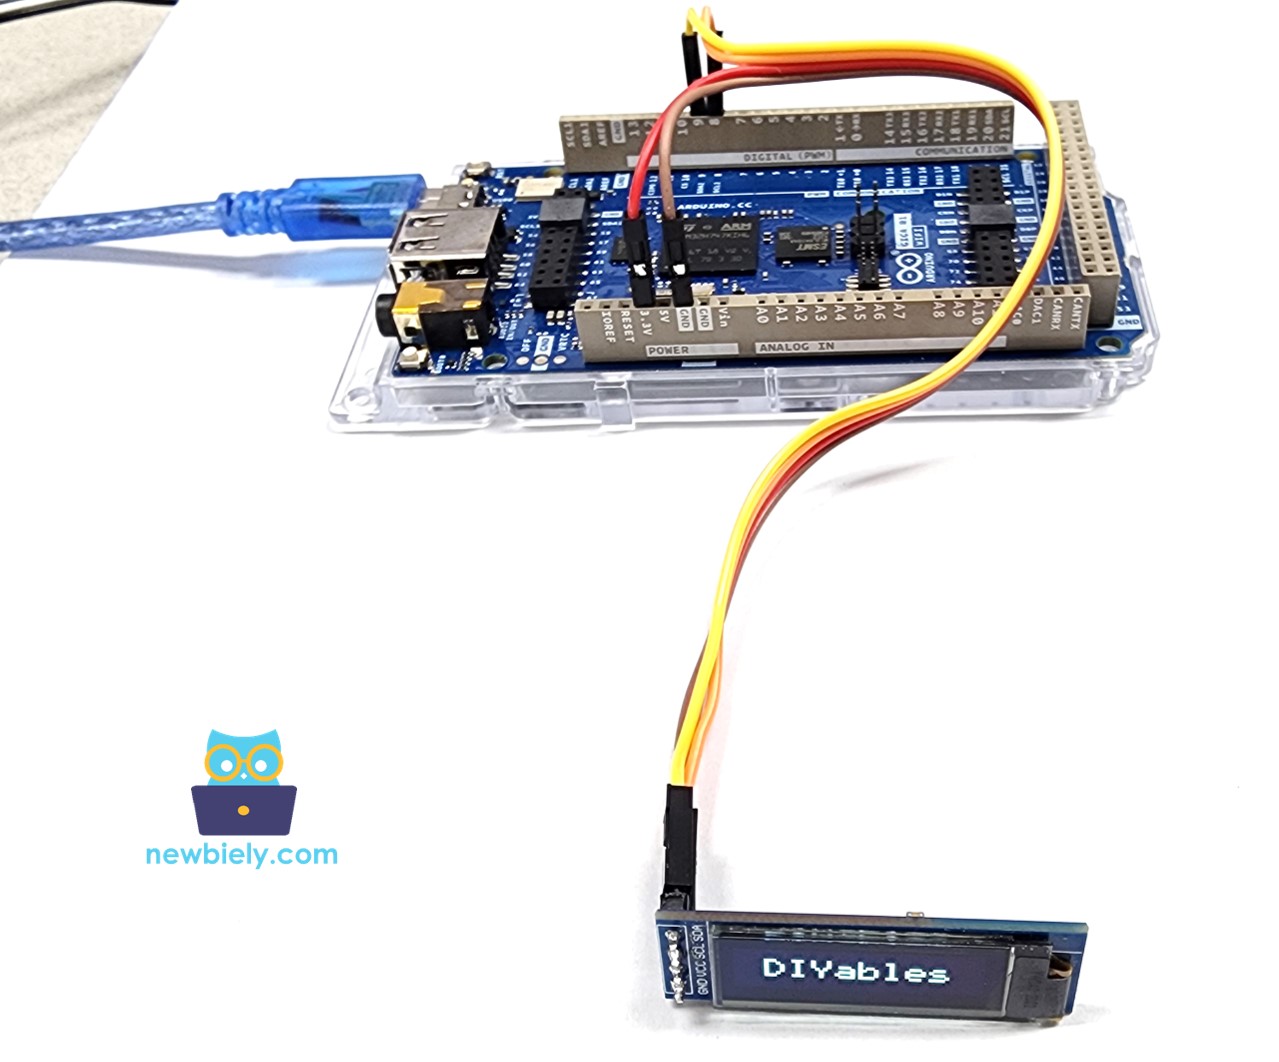
Arduino MicroPython OLED I2C display

Hardware Preparation

1×Arduino Giga R1 WiFi
1×USB Cable Type-C
1×SSD1306 I2C OLED Display 128x32
1×Jumper Wires
1×(Recommended) Screw Terminal Block Shield for Arduino Uno/Mega/Giga
1×(Recommended) Breadboard Shield For Arduino Mega/Giga
1×(Recommended) Enclosure For Arduino Giga
1×(Recommended) Power Splitter For Arduino Giga

Or you can buy the following sensor kits:

1×DIYables Sensor Kit (30 sensors/displays)
1×DIYables Sensor Kit (18 sensors/displays)
Disclosure: Some of the links provided in this section are Amazon affiliate links. We may receive a commission for any purchases made through these links at no additional cost to you.
Additionally, some of these links are for products from our own brand, DIYables .

Overview of 128x32 I2C OLED Display

128x32 I2C OLED Display Pinout

  • GND pin: Connect to Arduino's ground.
  • VCC pin: Connect to the 5 volts pin on Arduino for power.
  • SCL pin: This is the clock pin for I2C communication.
  • SDA pin: This is the data pin for I2C communication.
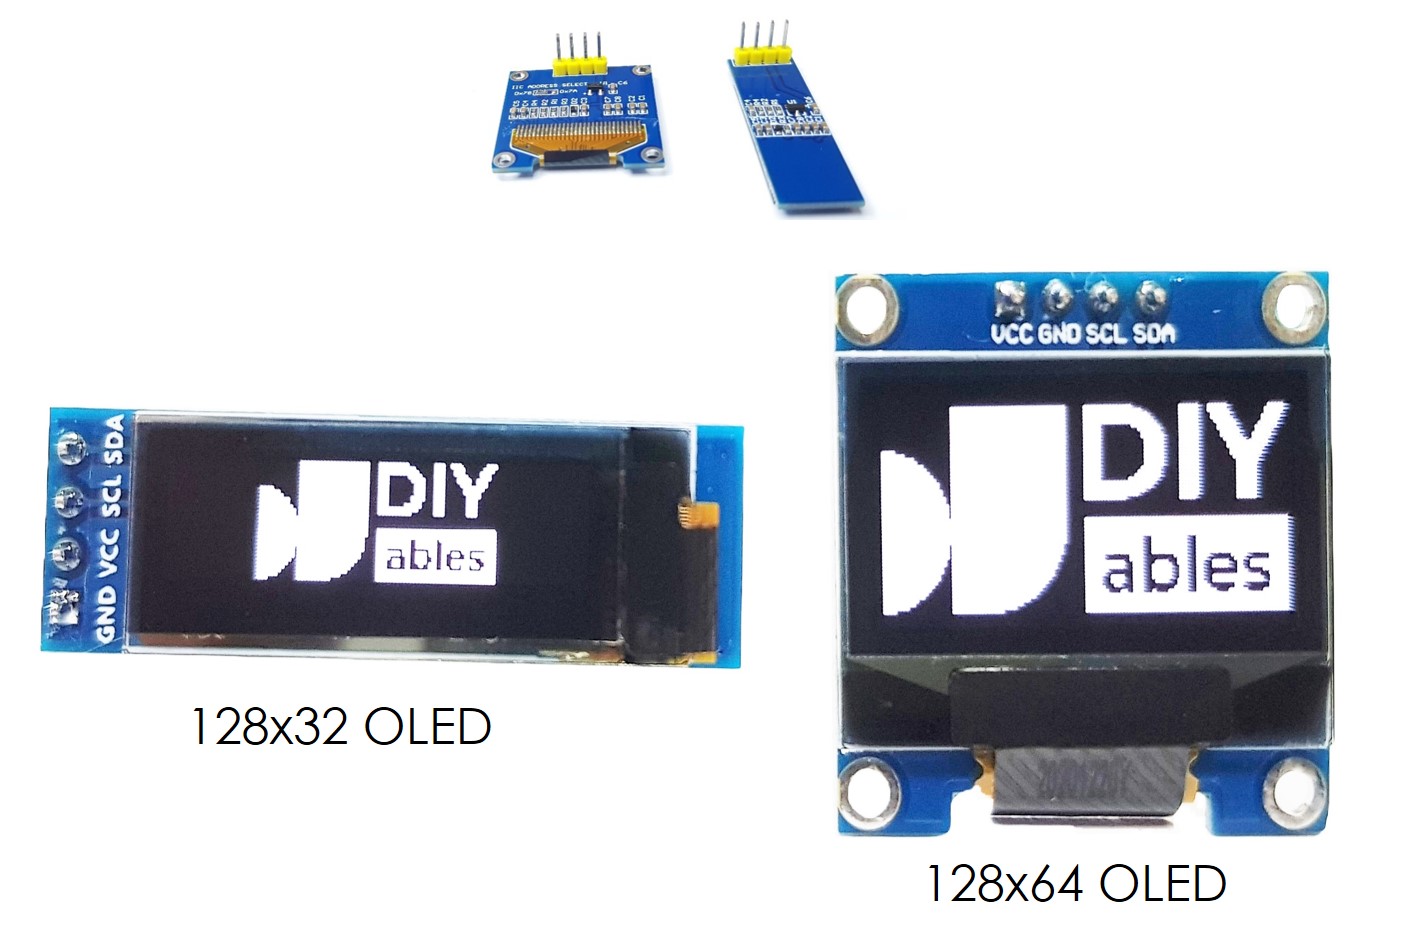
OLED Pinout

Wiring Diagram

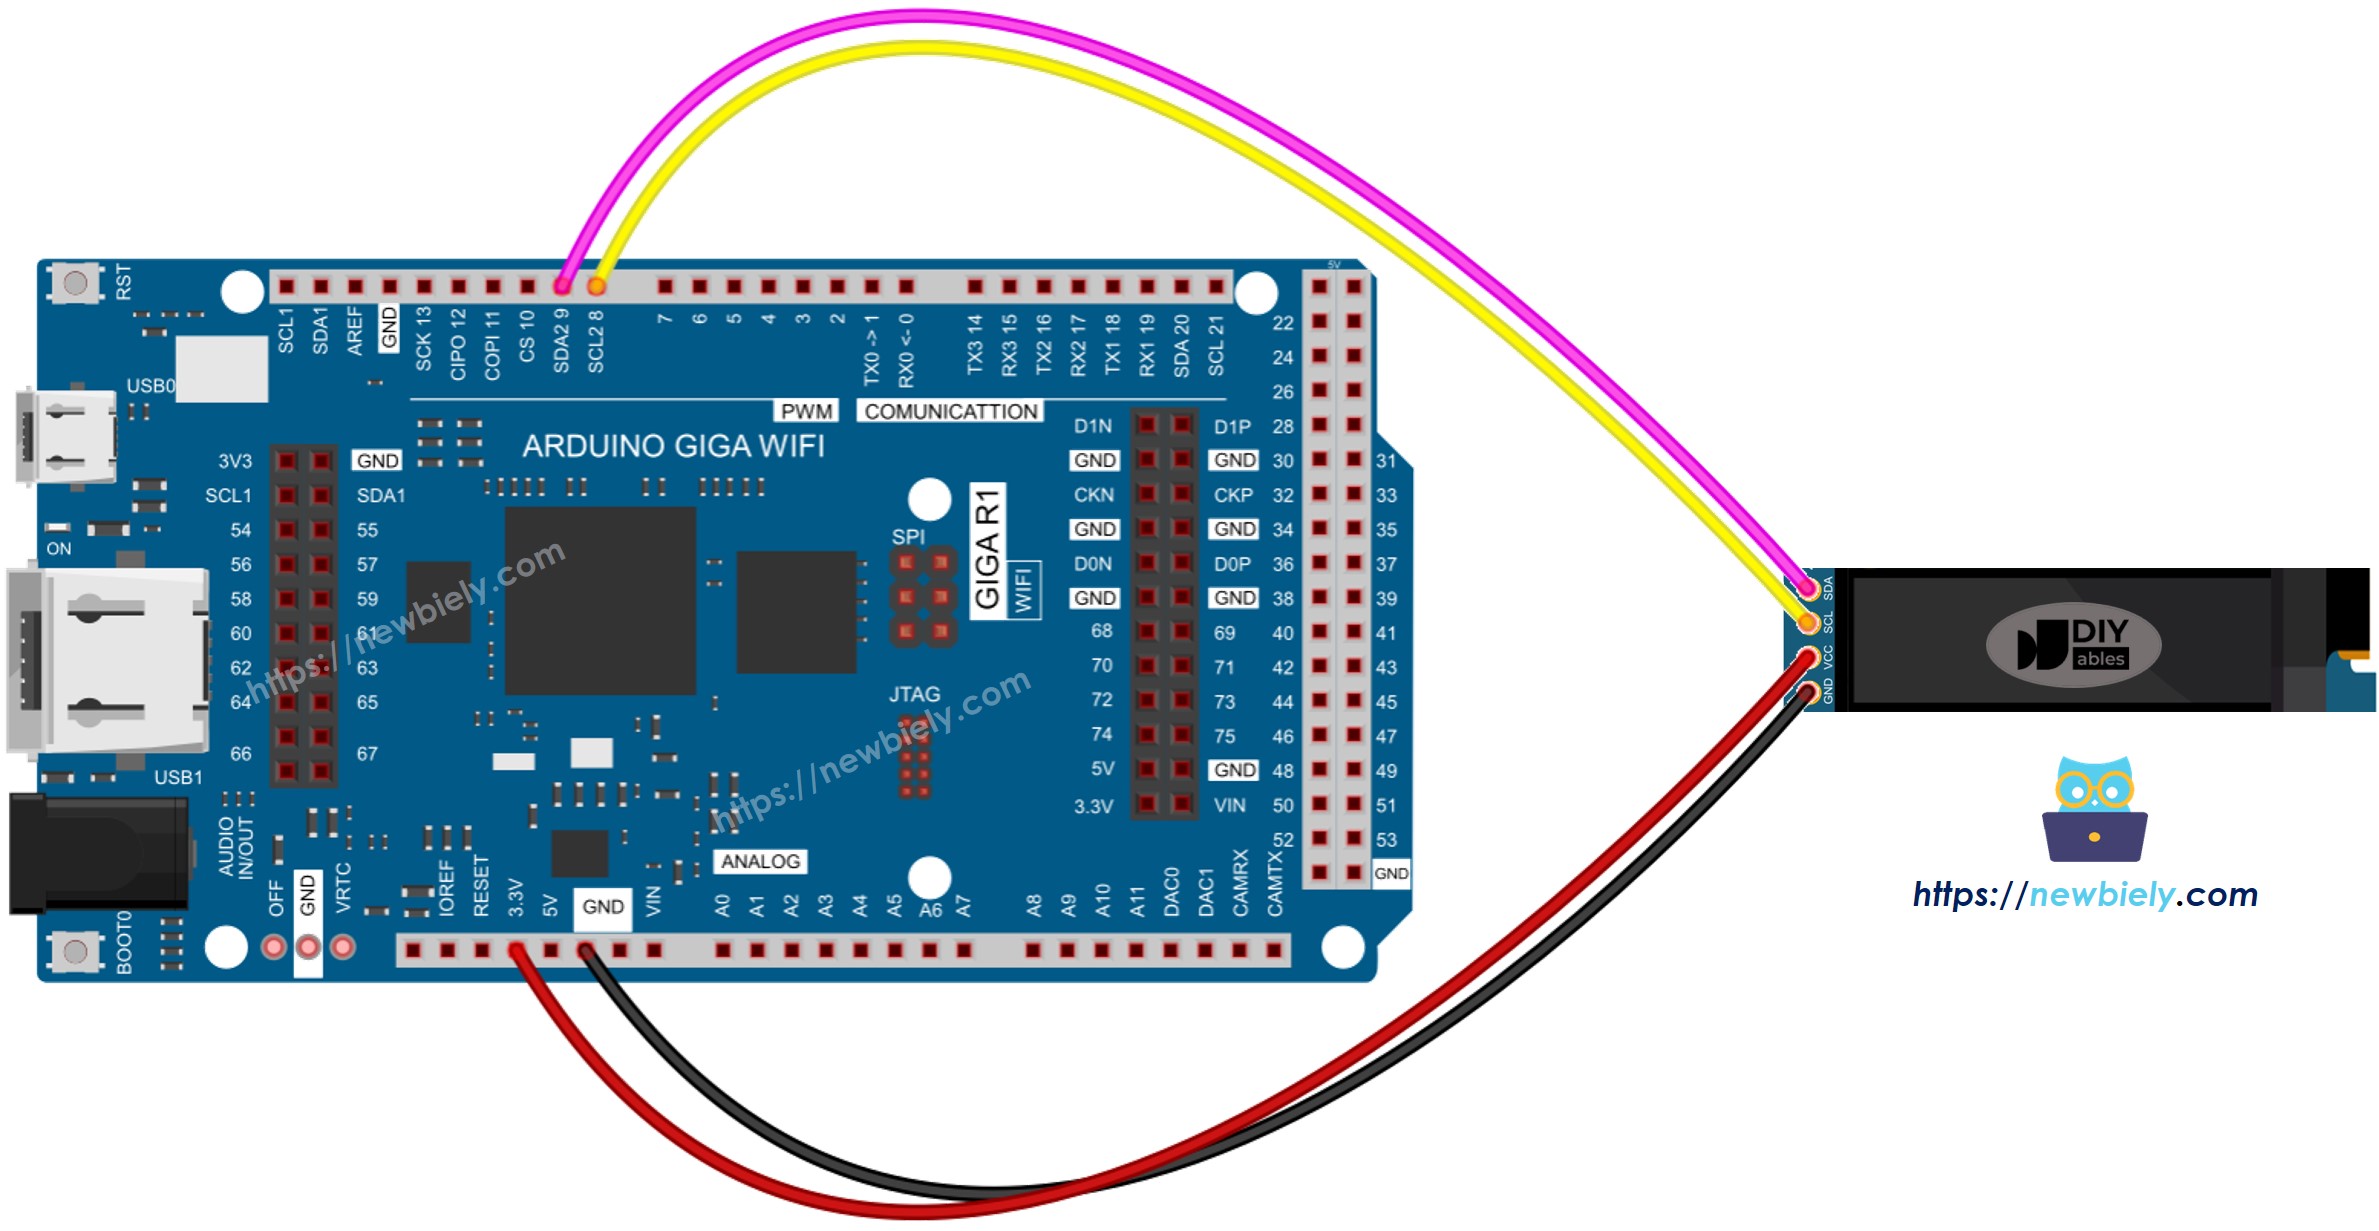
The wiring diagram between Arduino MicroPython OLED 128x32

This image is created using Fritzing. Click to enlarge image

The below is the wiring table between 128x32 OLED Module and Arduino

128x32 OLED Module Arduino
VCC 3.3V
GND GND
SDA D9
SCL D8

Arduino MicroPython Code - Display Text, Integer and Float Number on OLED

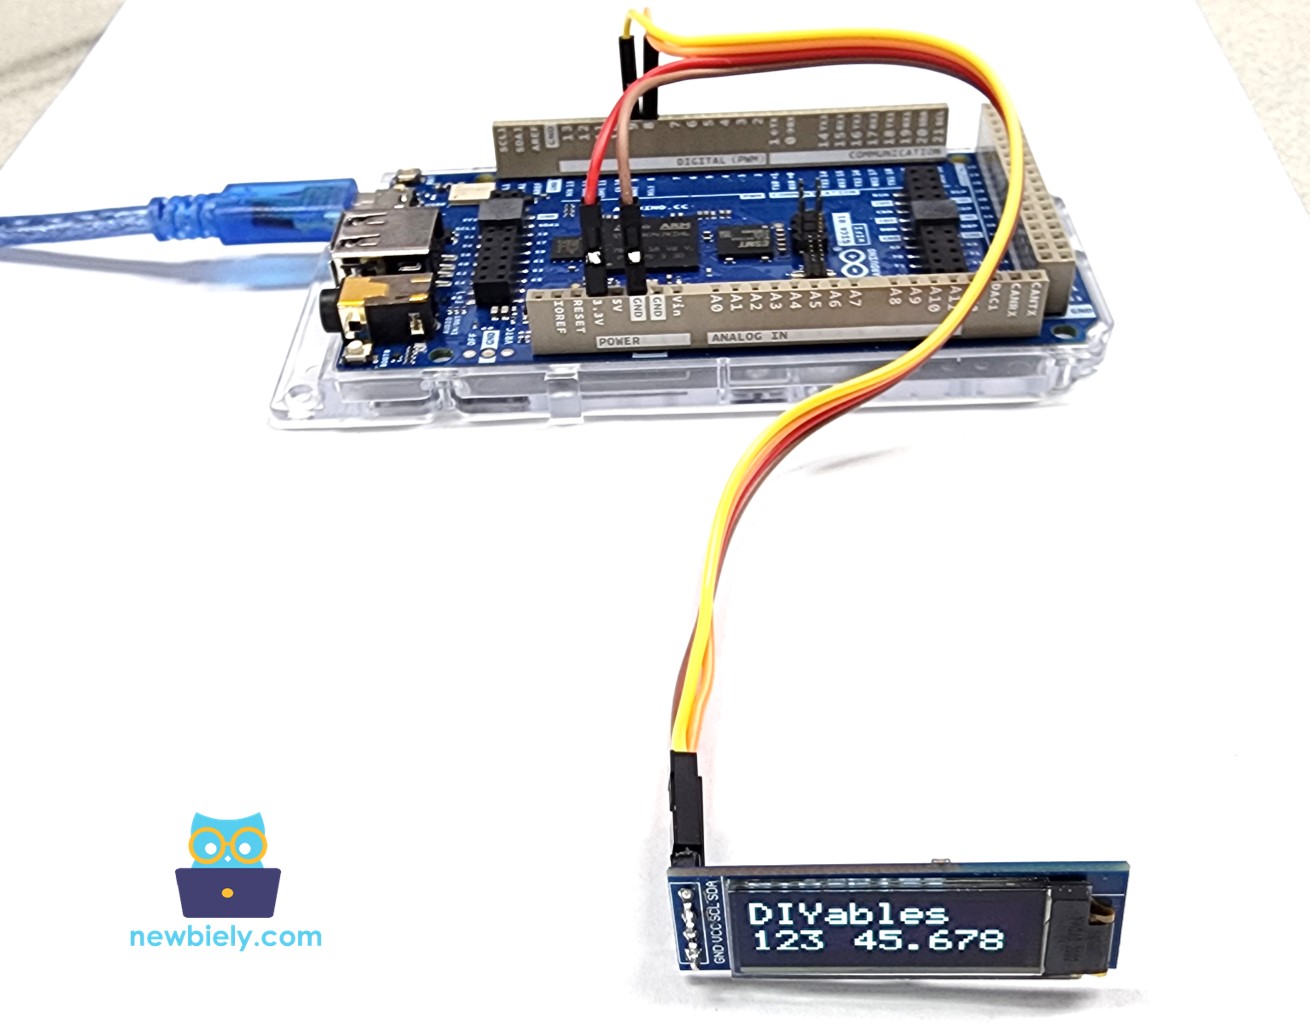
""" This Arduino MicroPython script was developed by newbiely.com This Arduino MicroPython script is made available for public use without any restriction For comprehensive instructions and wiring diagrams, please visit: https://newbiely.com/tutorials/arduino-micropython/arduino-micropython-oled-128x32 """ from machine import I2C, Pin from DIYables_MicroPython_OLED import OLED_SSD1306_I2C # Initialize I2C i2c = I2C(1) # Arduino Giga R1 WiFi I2C1 pins: SCL-D8, SDA-D9 # Initialize the OLED display oled = OLED_SSD1306_I2C(128, 32, i2c) # Clear the display oled.clear_display() oled.display() oled.set_text_size(2) # Print a message to the display text = "DIYables" integer_value = 123 float_value = 45.678 oled.set_cursor(0, 0) oled.println(text) oled.set_cursor(0, 19) oled.println(str(integer_value)) # Print integer and move to the next line oled.set_cursor(50, 19) oled.println("{:.3f}".format(float_value)) # Print formatted float and move to the next line oled.display() # Ensure you update the display after writing to it

Detailed Instructions

Please follow these instructions step by step:

  • Ensure that Thonny IDE is installed on your computer.
  • Ensure that MicroPython firmware is installed on your Arduino board by.
  • If this is your first time using a Arduino with MicroPython, refer to the Arduino MicroPython Getting Started tutorial for detailed instructions.
  • Connect the OLED display to the Arduino according to the provided diagram.
  • Connect the Arduino board to your computer with a USB cable.
  • Open Thonny IDE and go to Tools Options.
  • Under the Interpreter tab, select MicroPython (generic) from the dropdown menu.
  • Select the COM port corresponding to your Arduino board (e.g., COM33 on Windows or /dev/ttyACM0 on Linux).
  • Navigate to the Tools Manage packages on the Thonny IDE.
  • Search “DIYables-MicroPython-OLED”, then find the OLED library created by DIYables.
  • Click on DIYables-MicroPython-OLED, then click Install button to install OLED library.
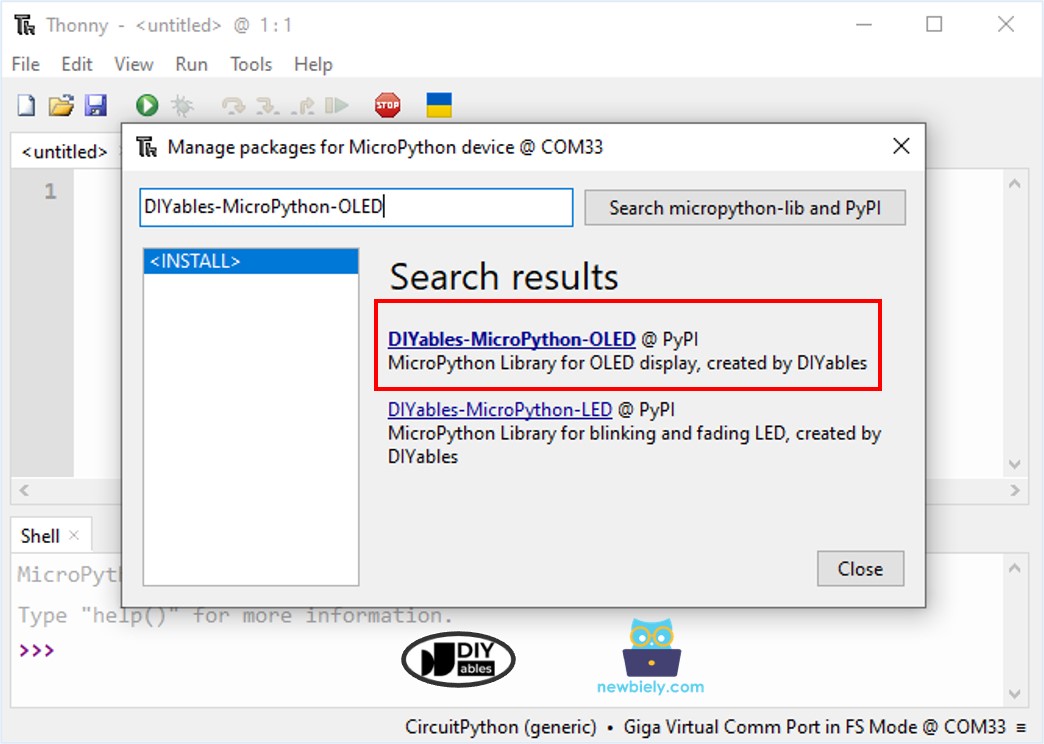
Arduino MicroPython OLED library
  • Copy the above code and paste it to the Thonny IDE's editor.
  • Save the script to your Arduino board by:
    • Click the Save button, or use Ctrl+S keys.
    • In the save dialog, you will see two sections: This computer and MicroPython device. Select MicroPython device
    • Save the file as main.py
  • Click the green Run button (or press F5) to run the script. The script will execute.
  • Check out on the OLED display. It looks like the below:
Arduino MicroPython OLED display text, integer and float number

Arduino MicroPython Code - Drawing on OLED

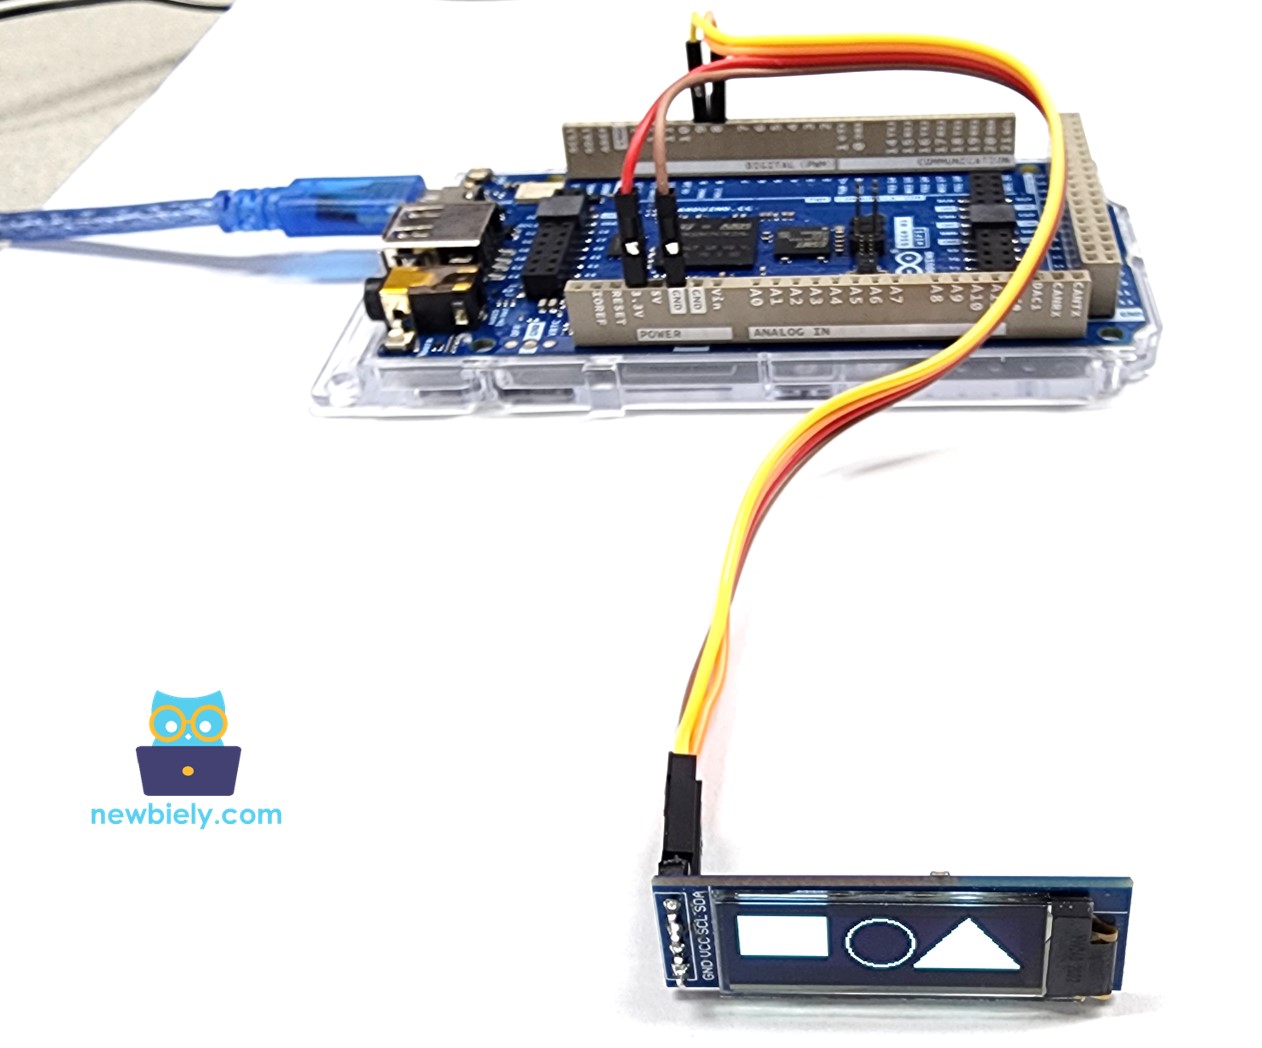
""" This Arduino MicroPython script was developed by newbiely.com This Arduino MicroPython script is made available for public use without any restriction For comprehensive instructions and wiring diagrams, please visit: https://newbiely.com/tutorials/arduino-micropython/arduino-micropython-oled-128x32 """ from machine import I2C, Pin from DIYables_MicroPython_OLED import OLED_SSD1306_I2C # Initialize I2C i2c = I2C(1) # Arduino Giga R1 WiFi I2C1 pins: SCL-D8, SDA-D9 # Initialize the OLED display oled = OLED_SSD1306_I2C(128, 32, i2c) # Clear the display oled.clear_display() oled.display() # Draw a rectangle #oled.draw_rect(0, 0, 40, 25, 1) oled.fill_rect(0, 0, 40, 25, 1) # Draw a circle oled.draw_circle(64, 16, 15, 1) #oled.fill_circle(64, 16, 15, 1) # Draw a triangle #oled.draw_triangle(80, 31, 128, 31, 104, 0, 1) oled.fill_triangle(80, 31, 128, 31, 104, 0, 1) oled.display()

When you execute the code, a rectangle, circle, and triangle will be displayed on the OLED screen, as shown below.
Arduino MicroPython draw rectangle, circle, an triagle on OLED

Arduino MicroPython Code – Display Image on OLED

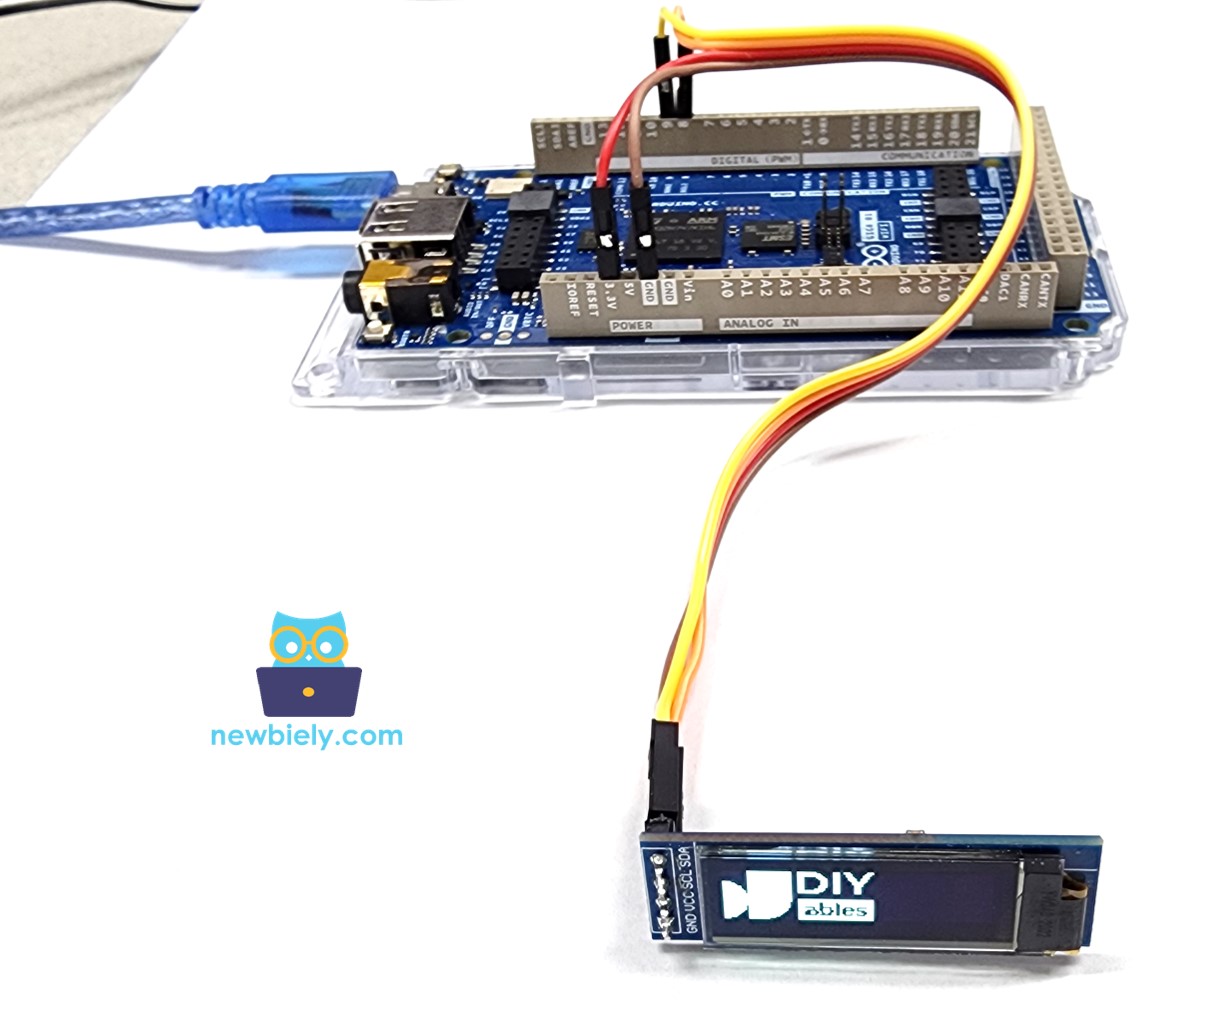
The below code draws an image to LCD display. The image is DIYables icon.

""" This Arduino MicroPython script was developed by newbiely.com This Arduino MicroPython script is made available for public use without any restriction For comprehensive instructions and wiring diagrams, please visit: https://newbiely.com/tutorials/arduino-micropython/arduino-micropython-oled-128x32 """ from machine import I2C, Pin from DIYables_MicroPython_OLED import OLED_SSD1306_I2C import utime # Initialize I2C i2c = I2C(1) # Arduino Giga R1 WiFi I2C1 pins: SCL-D8, SDA-D9 # Create the SSD1306 display object oled = OLED_SSD1306_I2C(128, 32, i2c) # Clear the display buffer oled.clear_display() utime.sleep(2) # 16x16 heart bitmap in RGB565 format heart_bitmap = [ # 'DIYables Icon', 72x32 0x00, 0x0f, 0xff, 0xff, 0x8f, 0xf8, 0x07, 0x38, 0x07, 0x00, 0x0f, 0xff, 0xff, 0x8f, 0xfe, 0x07, 0x1c, 0x0e, 0x00, 0x0f, 0xff, 0xff, 0x8f, 0xff, 0x07, 0x1c, 0x1c, 0x00, 0x0f, 0xff, 0xff, 0x8e, 0x07, 0x87, 0x0e, 0x1c, 0x00, 0x0f, 0xff, 0xff, 0x8e, 0x03, 0xc7, 0x0f, 0x38, 0x00, 0x0f, 0xff, 0xff, 0x8e, 0x01, 0xc7, 0x07, 0x38, 0x00, 0x0f, 0xff, 0xff, 0x8e, 0x01, 0xc7, 0x03, 0xf0, 0xf0, 0x0f, 0xff, 0xff, 0x8e, 0x01, 0xc7, 0x03, 0xe0, 0xfc, 0x0f, 0xff, 0xff, 0x8e, 0x01, 0xc7, 0x01, 0xe0, 0xfe, 0x0f, 0xff, 0xff, 0x8e, 0x03, 0xc7, 0x01, 0xc0, 0xff, 0x8f, 0xff, 0xff, 0x8e, 0x03, 0x87, 0x01, 0xc0, 0xff, 0x8f, 0xff, 0xff, 0x8e, 0x0f, 0x87, 0x01, 0xc0, 0xff, 0xcf, 0xff, 0xff, 0x8f, 0xff, 0x07, 0x01, 0xc0, 0xff, 0xef, 0xff, 0xff, 0x8f, 0xfc, 0x07, 0x01, 0xc0, 0xff, 0xef, 0xff, 0xff, 0x80, 0x00, 0x00, 0x00, 0x00, 0xff, 0xff, 0xff, 0xff, 0x80, 0x00, 0x00, 0x00, 0x00, 0xff, 0xff, 0xff, 0xff, 0x80, 0x00, 0x00, 0x00, 0x00, 0xff, 0xff, 0xff, 0xff, 0x80, 0x00, 0x00, 0x00, 0x00, 0xff, 0xff, 0xff, 0xff, 0x8f, 0xff, 0xff, 0xff, 0xff, 0xff, 0xff, 0xff, 0xff, 0x8f, 0xff, 0xff, 0xff, 0xff, 0xff, 0xff, 0xff, 0xff, 0x0f, 0xfc, 0xfd, 0xff, 0xff, 0xff, 0xff, 0xff, 0xff, 0x0f, 0xfc, 0xfc, 0xff, 0xff, 0xff, 0xff, 0xff, 0xff, 0x0f, 0xfc, 0xfc, 0xff, 0xff, 0xff, 0xef, 0xff, 0xff, 0x0e, 0x0c, 0x0c, 0xc3, 0x07, 0xff, 0xef, 0xff, 0xfe, 0x0f, 0xec, 0xec, 0x99, 0x7f, 0xff, 0xef, 0xff, 0xfe, 0x0f, 0x04, 0xe4, 0x81, 0x0f, 0xff, 0xcf, 0xff, 0xfc, 0x0e, 0x32, 0xe4, 0x9f, 0xc7, 0xff, 0x8f, 0xff, 0xf8, 0x0e, 0x32, 0x4c, 0x9b, 0x67, 0xff, 0x0f, 0xff, 0xf0, 0x0e, 0x04, 0x0c, 0xc3, 0x0f, 0xfe, 0x0f, 0xff, 0xe0, 0x0f, 0xff, 0xff, 0xff, 0xff, 0xfc, 0x0f, 0xff, 0x80, 0x0f, 0xff, 0xff, 0xff, 0xff, 0xe0, 0x0f, 0xfc, 0x00, 0x0f, 0xff, 0xff, 0xff, 0xff ] # Draw the bitmap on the display oled.draw_bitmap(0, 0, heart_bitmap, 72, 32, 1) # Update the display with the new image oled.display() utime.sleep(3) #oled.invert_display(True)

When you execute the code, the image will be displayed on the OLED screen as shown below.
Arduino MicroPython display image on OLED

To display a different image on the OLED screen, follow these steps:

  • Convert the image (in any format) to a bitmap array. You can use this online tool for conversion. Refer to the image below for guidance on how to convert an image to a bitmap array. In this example, I converted the Arduino icon into a bitmap array.
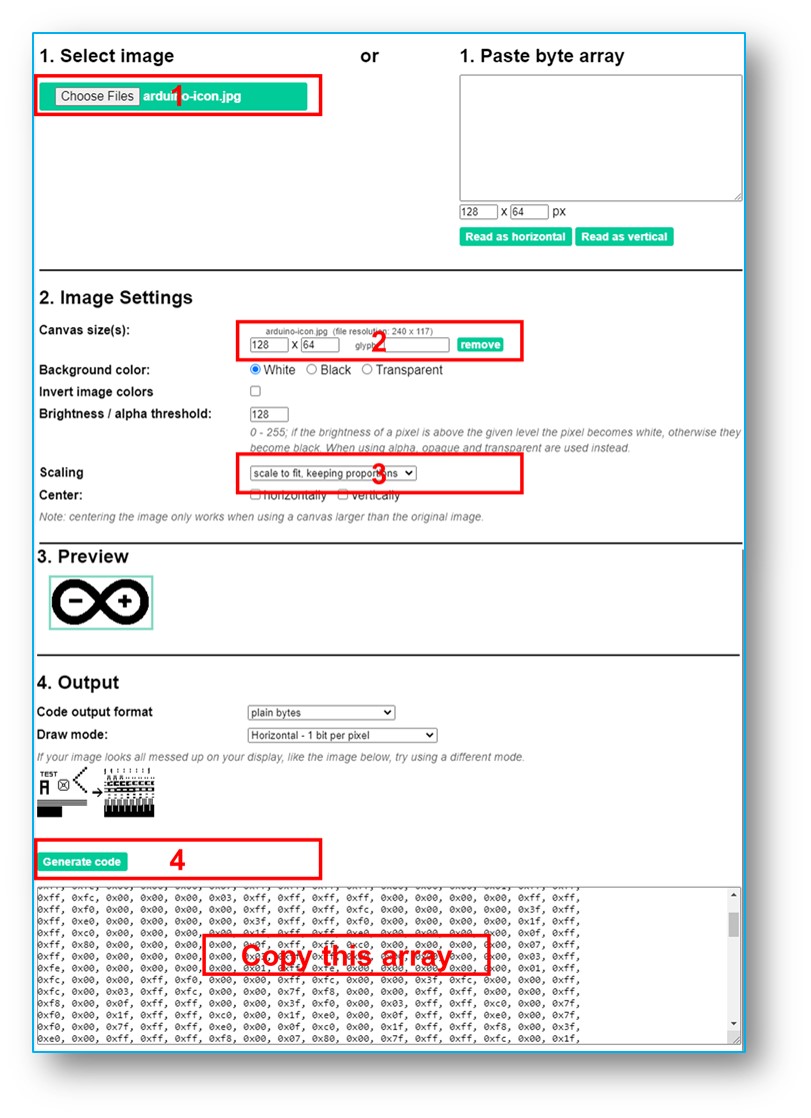
image to bitmap array
  • Replace the current bitmap array in your Arduino MicroPython code with the newly converted one.
  • Modify the image width and height in your Arduino MicroPython code to match the new image dimensions.

Note: Make sure the image size is equal to or smaller than the OLED screen size.

How to automatically vertical and horizontal center align text/number on OLED

The MicroPython code below automatically centers the text both vertically and horizontally on the OLED screen.

""" This Arduino MicroPython script was developed by newbiely.com This Arduino MicroPython script is made available for public use without any restriction For comprehensive instructions and wiring diagrams, please visit: https://newbiely.com/tutorials/arduino-micropython/arduino-micropython-oled-128x32 """ from machine import I2C, Pin from DIYables_MicroPython_OLED import OLED_SSD1306_I2C import utime # Initialize I2C i2c = I2C(1) # Arduino Giga R1 WiFi I2C1 pins: SCL-D8, SDA-D9 # Initialize the OLED display oled = OLED_SSD1306_I2C(128, 32, i2c) # Clear the display oled.clear_display() oled.display() def oled_display_center(oled, text): # Get the text bounds (width and height) of the string x1, y1, width, height = oled.get_text_bounds(text, 0, 0) # Set cursor to the calculated centered position cursor_x = (oled.WIDTH - width) // 2 cursor_y = (oled.HEIGHT - height) // 2 oled.set_cursor(cursor_x, cursor_y) # Print the text on the display oled.println(text) # Refresh the display to show the text oled.display() oled.set_text_size(2) oled_display_center(oled, "DIYables")

Once the code is executed, the text will appear centered both vertically and horizontally on the OLED screen.
Arduino MicroPython OLED vertical and horizontal center align

※ OUR MESSAGES

  • As freelancers, We are AVAILABLE for HIRE. See how to outsource your project to us
  • Please feel free to share the link of this tutorial. However, Please do not use our content on any other websites. We invested a lot of effort and time to create the content, please respect our work!