Arduino MicroPython Door Sensor
This guide teaches you how to use a door sensor with an Arduino and MicroPython to check if a door or window is open or closed. You will learn:
- How to connect the door sensor to the Arduino board and install it on a door.
- How to write MicroPython code for the Arduino to read the door's state.
- How to write MicroPython code for the Arduino to detect opening and closing events.

Hardware Preparation
Or you can buy the following kits:
| 1 | × | DIYables Sensor Kit (18 sensors/displays) |
Additionally, some of these links are for products from our own brand, DIYables .
Overview of Door Sensor
Pinout
The door sensor consists of two components:
- One reed switch with two metal connectors
- One magnet
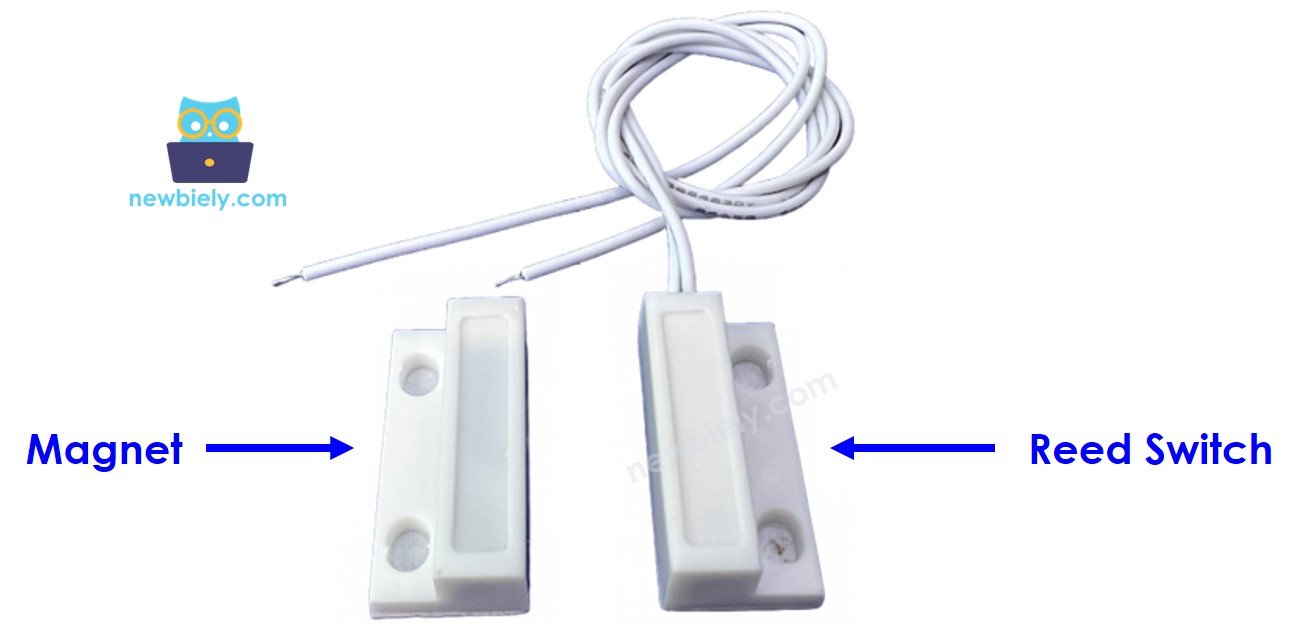
Just like a normal switch or button, we do not need to worry about the two pins of the reed switch.
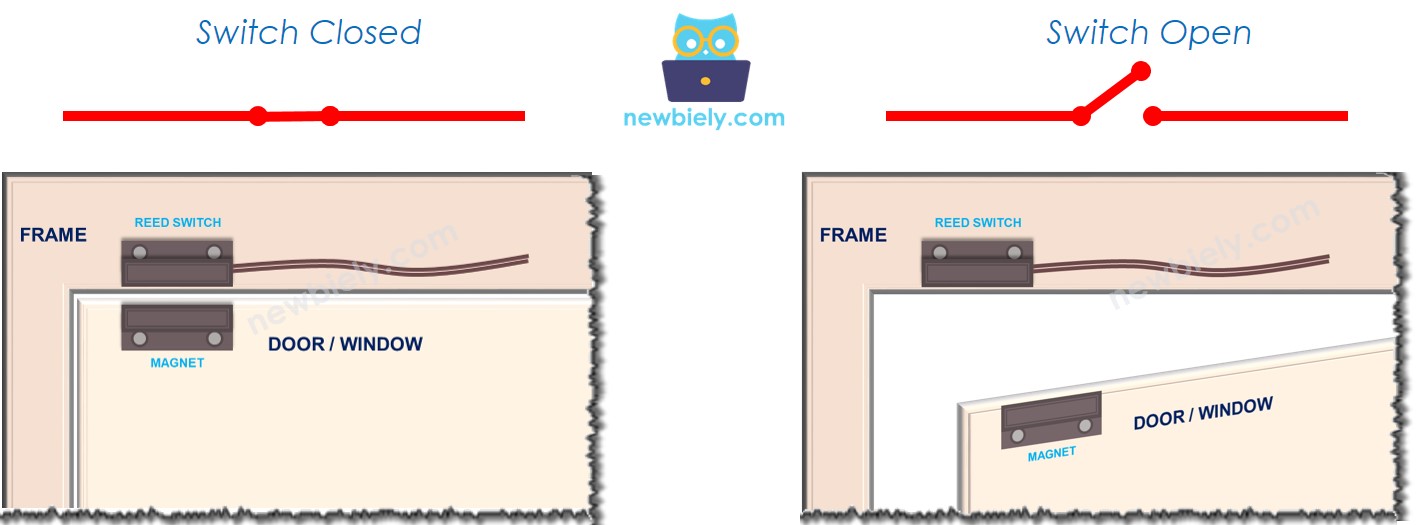
How It Works
The magnet is fixed to the moving part of the door or window, while the reed switch is attached to the door frame. When the door is closed, the magnet and the reed switch are near each other.
- When the magnet is near the reed switch, the reed switch circuit closes.
- When the magnet is away from the reed switch, the reed switch circuit opens.
※ NOTE THAT:
The reed switch doesn't create LOW or HIGH signals on its own. It can only be in an open or closed state. How we connect it to the Arduino determines if the pin reads as LOW, HIGH, or a floating value (which is unstable). To prevent this unstable floating value, we should connect a pull-up or pull-down resistor to the pin on the Arduino.
Connect one pin of the reed switch to GND and the other to an input pin on the Arduino with a pull-up resistor, either built-in or external.
- When the magnet is close to the reed switch, the Arduino input pin reads LOW.
- When the magnet is away from the reed switch, the Arduino input pin reads HIGH.
This setup allows you to:
- Check if the door is open or closed by reading the Arduino input pin:
- If the pin reads LOW, the door is closed.
- If the pin reads HIGH, the door is open.
- Detect when the door is opening or closing by monitoring changes in the input pin state:
- A change from LOW to HIGH indicates the door is opening.
- A change from HIGH to LOW indicates the door is closing.
Wiring Diagram
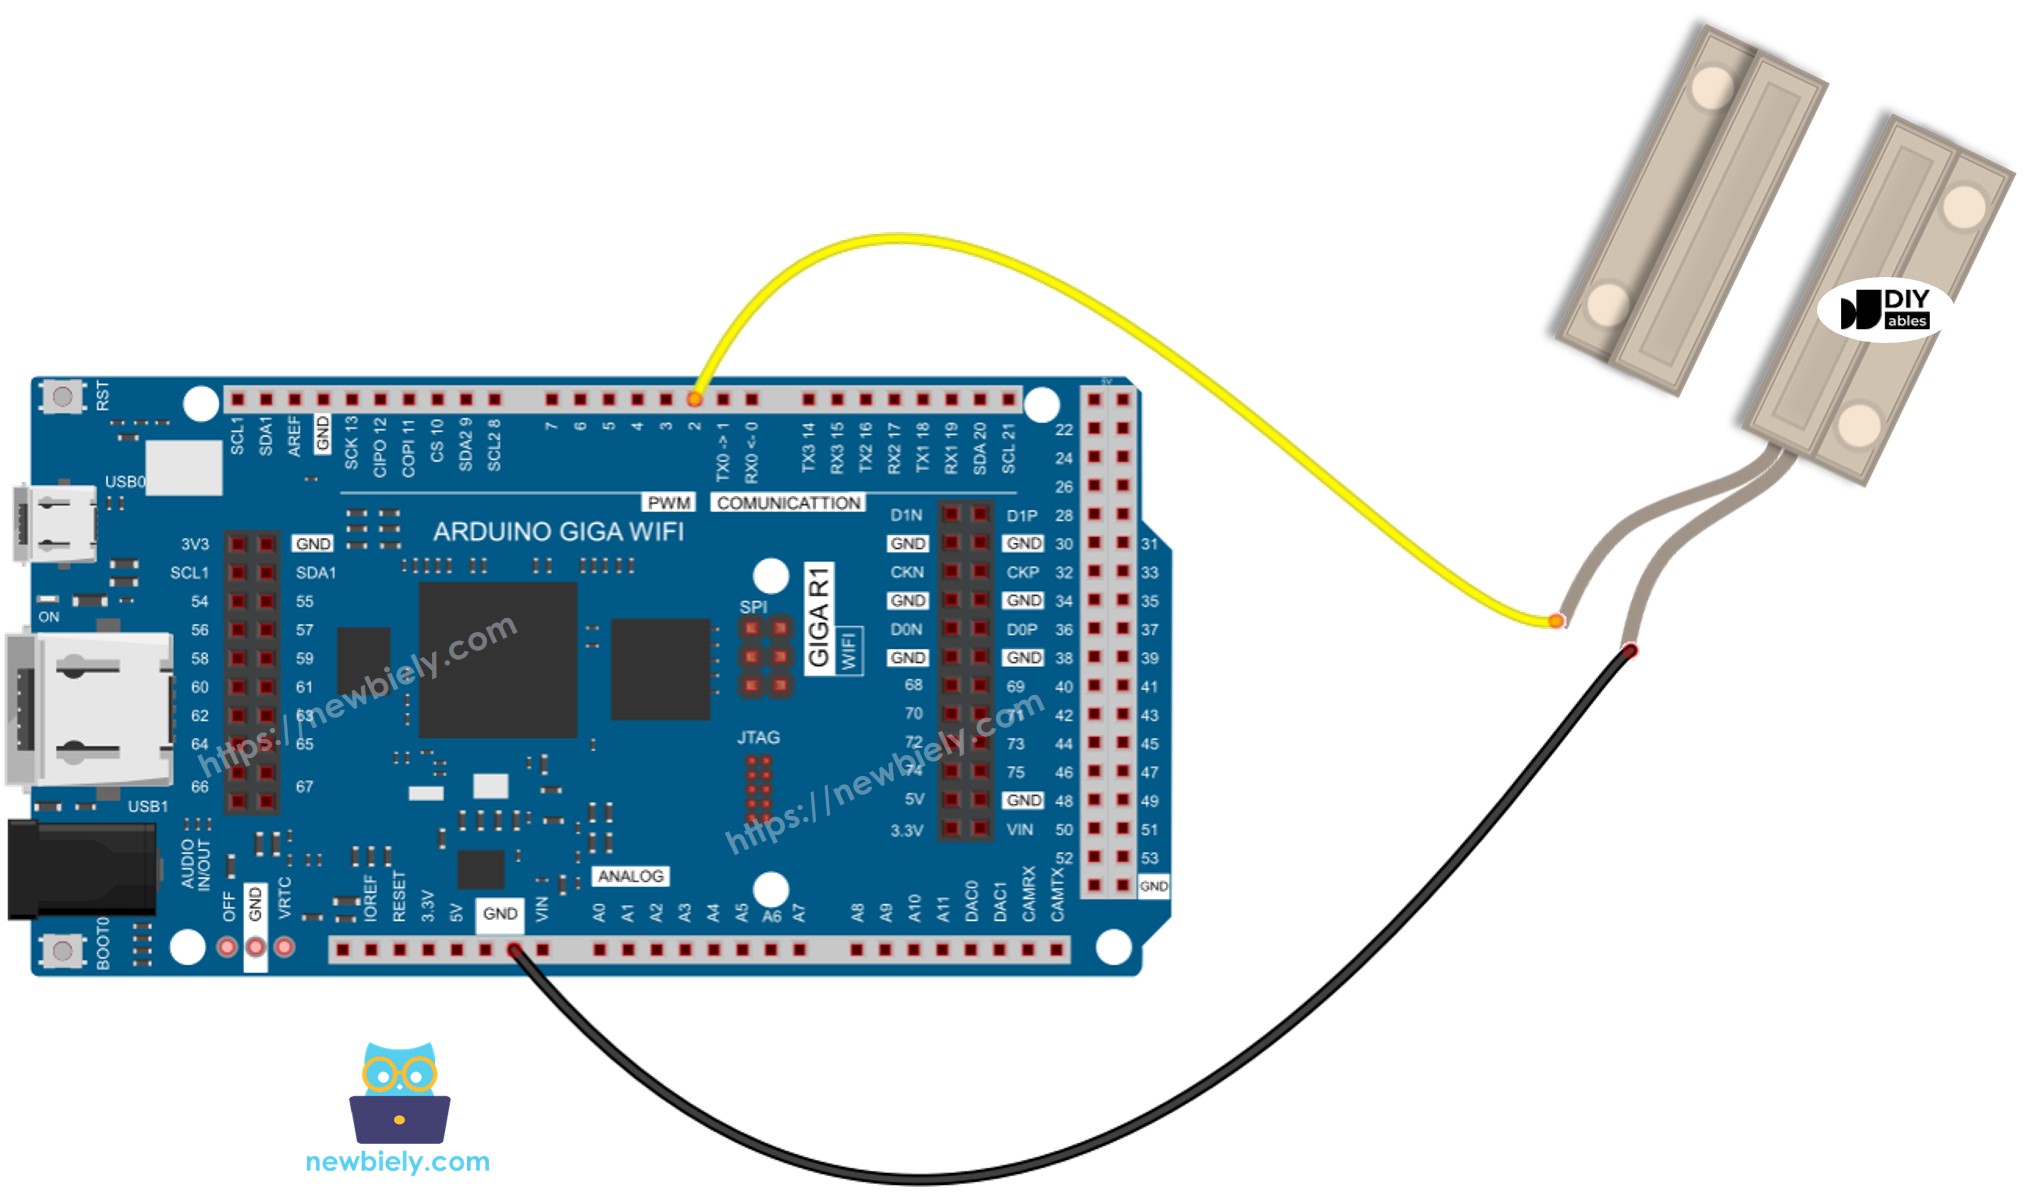
This image is created using Fritzing. Click to enlarge image
Arduino MicroPython Code - Check Door Open and Close State
Detailed Instructions
Here’s instructions on how to run the above MicroPython code on Arduino with Thonny IDE:
- Make sure Thonny IDE is installed on your computer.
- Make sure MicroPython firmware is installed on your Arduino board.
- If you are new to Arduino with MicroPython, see the Getting Started with Arduino and MicroPython.
- Connect the Arduino board to the door sensor according to the provided diagram.
- Connect the Arduino board to your computer with a USB cable.
- Open Thonny IDE and go to Tools Options.
- Under the Interpreter tab, select MicroPython (generic) from the dropdown menu.
- Select the COM port corresponding to your Arduino board (e.g., COM33 on Windows or /dev/ttyACM0 on Linux).
- Copy the provided Arduino MicroPython code and paste it into Thonny's editor.
- Save the MicroPython code to your Arduino by:
- Clicking the Save button or pressing Ctrl+S.
- In the save dialog, choose MicroPython device and name the file main.py.
- Click the green Run button (or press F5) to execute the code.
- Move the magnet close to the reed switch and then pull it away.
- Check out the message in the Shell at the bottom of Thonny.
Arduino MicroPython Code - Detect Door-opening and Door-closing Events
- Copy the provided Arduino MicroPython code and paste it into Thonny's editor.
- Save the code to your Arduino.
- Click the green Run button (or press F5) to execute the code.
- Hold a magnet close to the reed switch and then move it away.
- Check out the message in the Shell at the bottom of Thonny.