Arduino MicroPython Getting Started
This tutorial guides you on how to get started using Arduino with MicroPython. It includes instructions for installing the MicroPython firmware on your Arduino, setting up the Thonny IDE, and running a basic Python script on the Arduino board.
Hardware Preparation
Or you can buy the following kits:
| 1 | × | DIYables Sensor Kit (18 sensors/displays) |
Disclosure: Some of the links provided in this section are Amazon affiliate links. We may receive a commission for any purchases made through these links at no additional cost to you.
Additionally, some of these links are for products from our own brand, DIYables .
Additionally, some of these links are for products from our own brand, DIYables .
To begin using MicroPython on your Arduino board, follow these steps:
- Flash MicroPython firmware: Install the MicroPython firmware onto your Arduino.
- Install Thonny IDE: Set up Thonny as your development environment for working with MicroPython on Arduino.
- Run a "Hello World" program: Verify your setup by running a simple "Hello World" program.
Let's go through each step in more detail.
Flash MicroPython firmware
- Connect the Arduino board to your computer using a USB cable.
- If you have not Arduino IDE installed on your computer, download the Arduino IDE and then install it.
- Open the Arduino IDE.
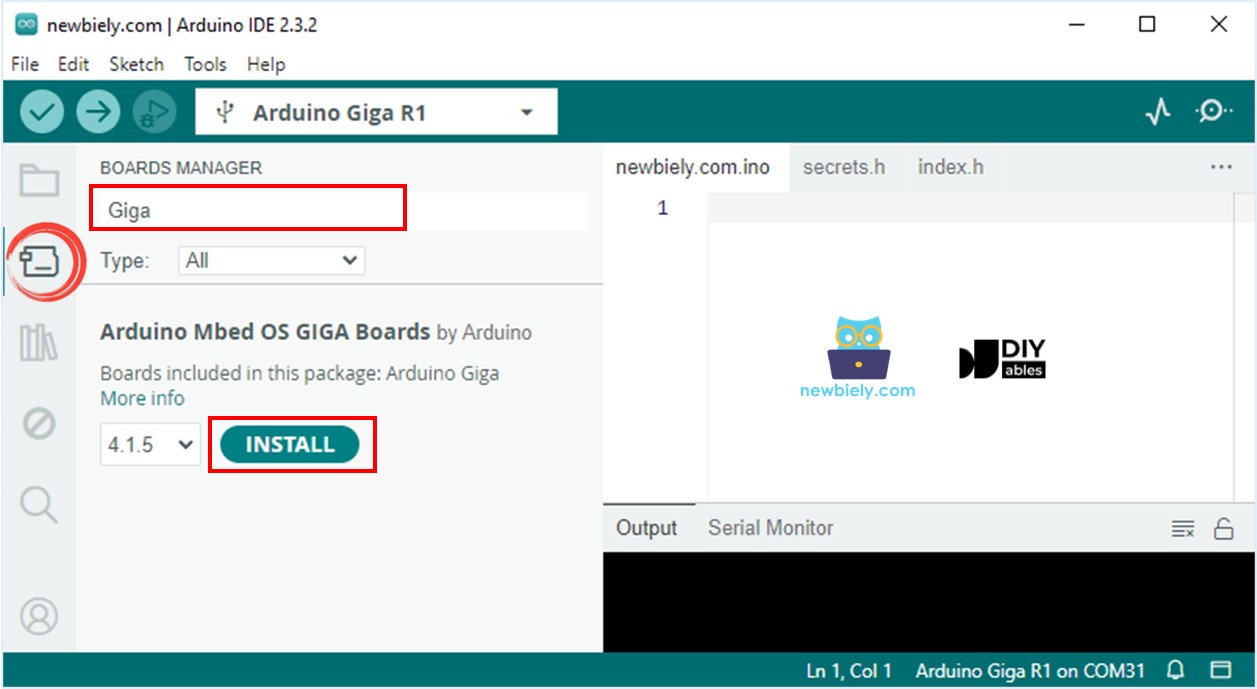
- Install Giga Board Package on Arduino IDE by openning the Boards Manager by clicking on the Boards Manager icon on the left navigation bar of the Arduino IDE.
- Type "Giga", then click the Install button as below image.
Once the software is installed, You can close the Arduino IDE. Arduino IDE is not used for programming MicroPython, but it is used to be a part of MicroPython firmware insalling process. We need to do more:
- Download Arduino MicroPython Installer
- Run the Arduino MicroPython Installer on your PC, it will automatically detect the Arduino board you connected to your PC in previous step, look like below:
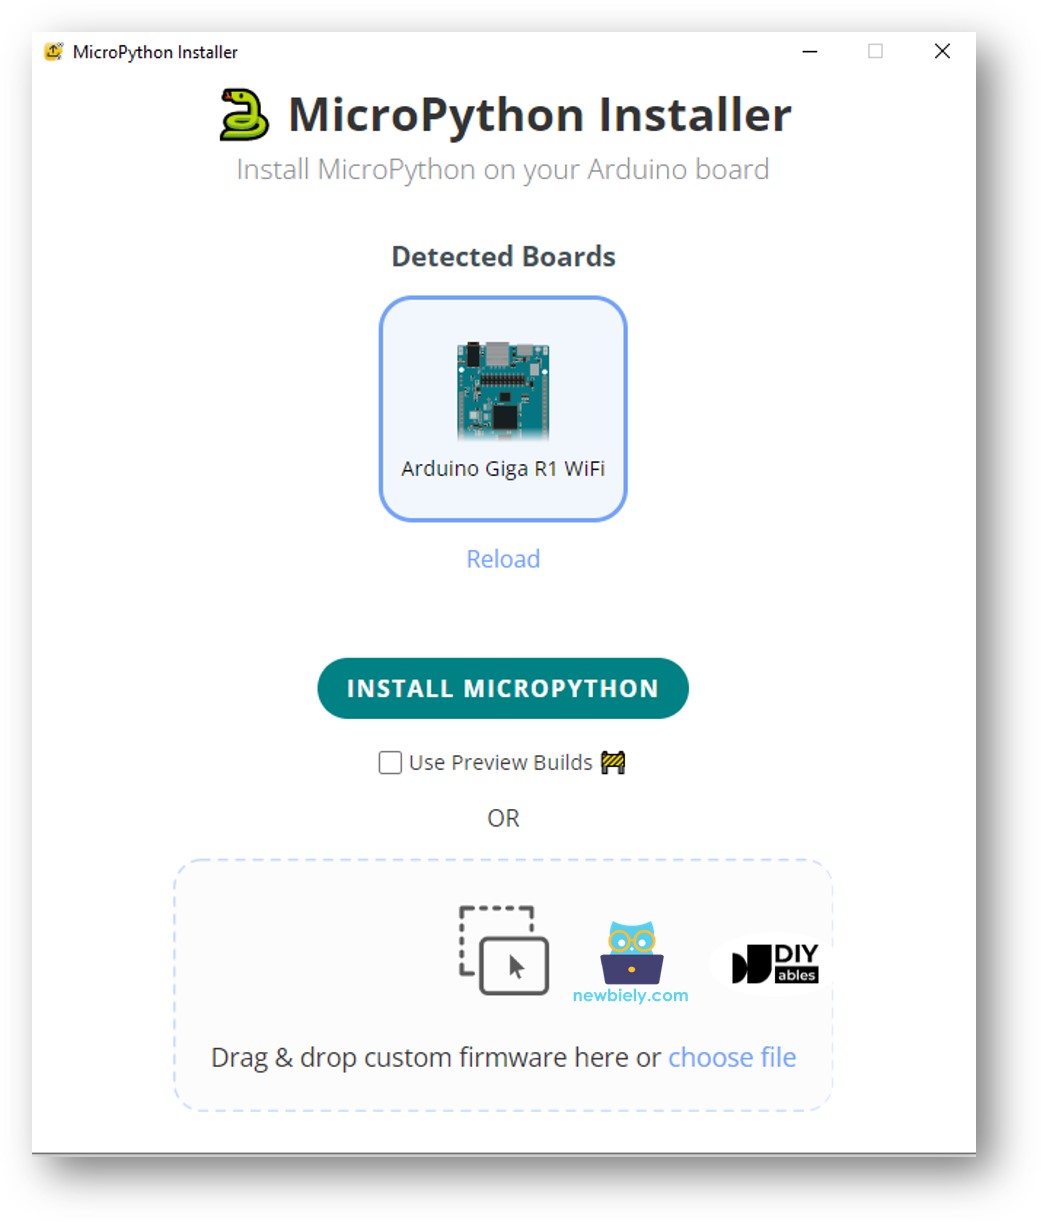
- Click Install button, then wait until it is done
Now, the MicroPython firmware is loaded to your Arduino board.
Install Thonny IDE on your computer
- Download and install Thonny IDE on your computer
Running the first program on Arduino
- Open Thonny IDE and go to Tools Options.
- Under the Interpreter tab, choose MicroPython (generic) from the dropdown menu.
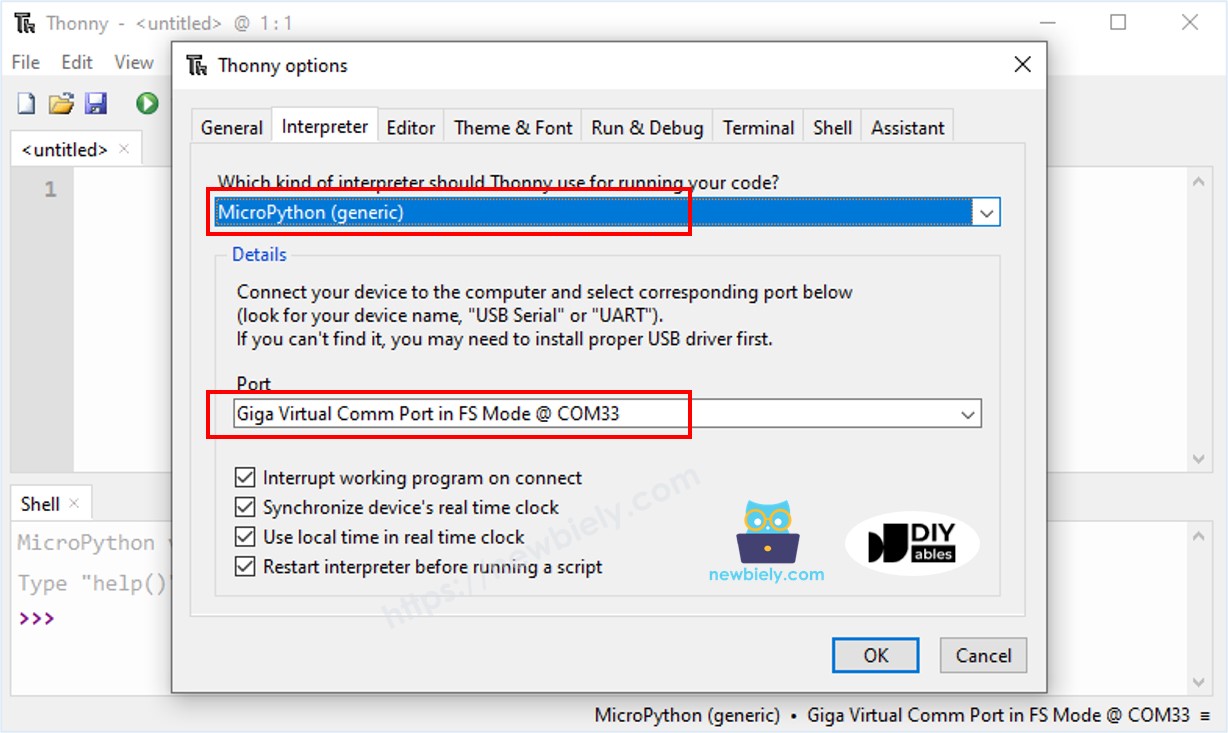
- Select the COM port corresponding to your Arduino board (e.g., COM33 on Windows or /dev/ttyACM0 on Linux).
- Copy the below code and paste it to the Thonny IDE's editor.
print("Hello, World!")
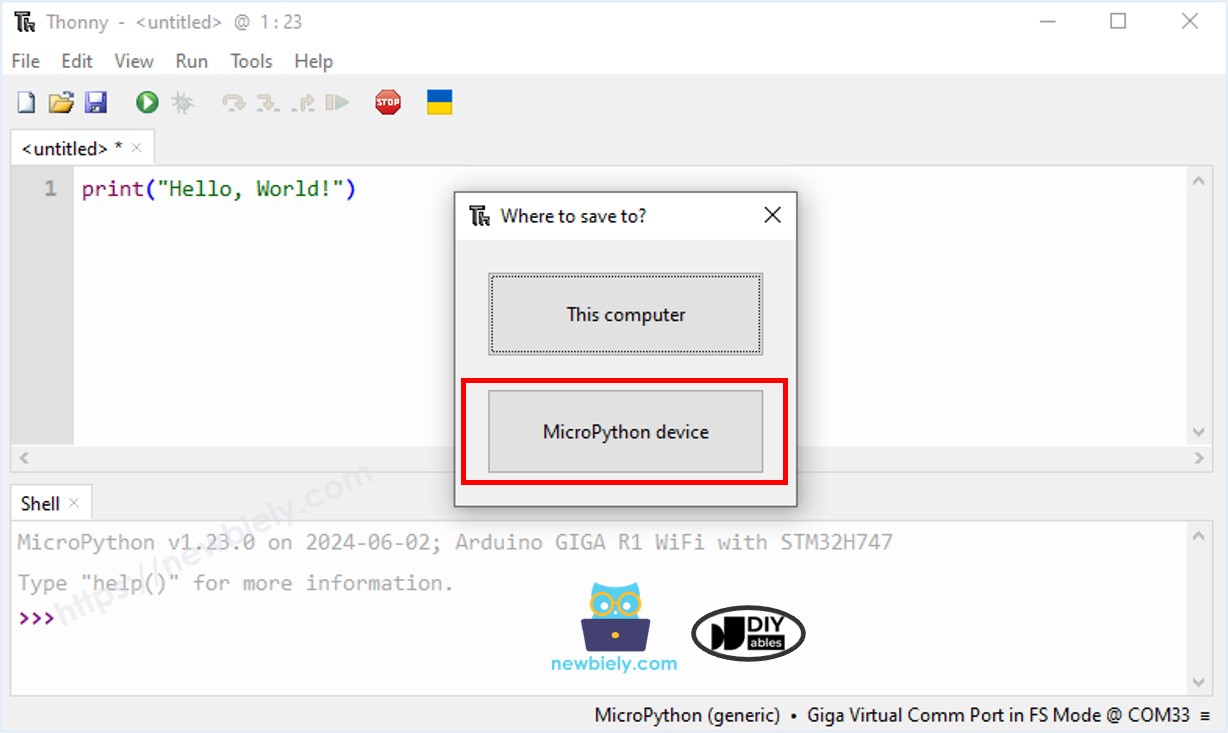
- Save the script to your Arduino board by:
- Click the Save button, or use Ctrl+S keys.
- In the save dialog, you will see two sections: This computer and MicroPython device. Select MicroPython device
- Save the file as main.py
- Click the green Run button (or press F5) to run the script. The script will execute.
- Check out the message in the Shell at the bottom of Thonny.
Shell x
>>> %Run -c $EDITOR_CONTENT
MPY: soft reboot
Hello, World!
MicroPython (generic) • Giga Virtual Comm Port in FS Mode @ COM33 ≡