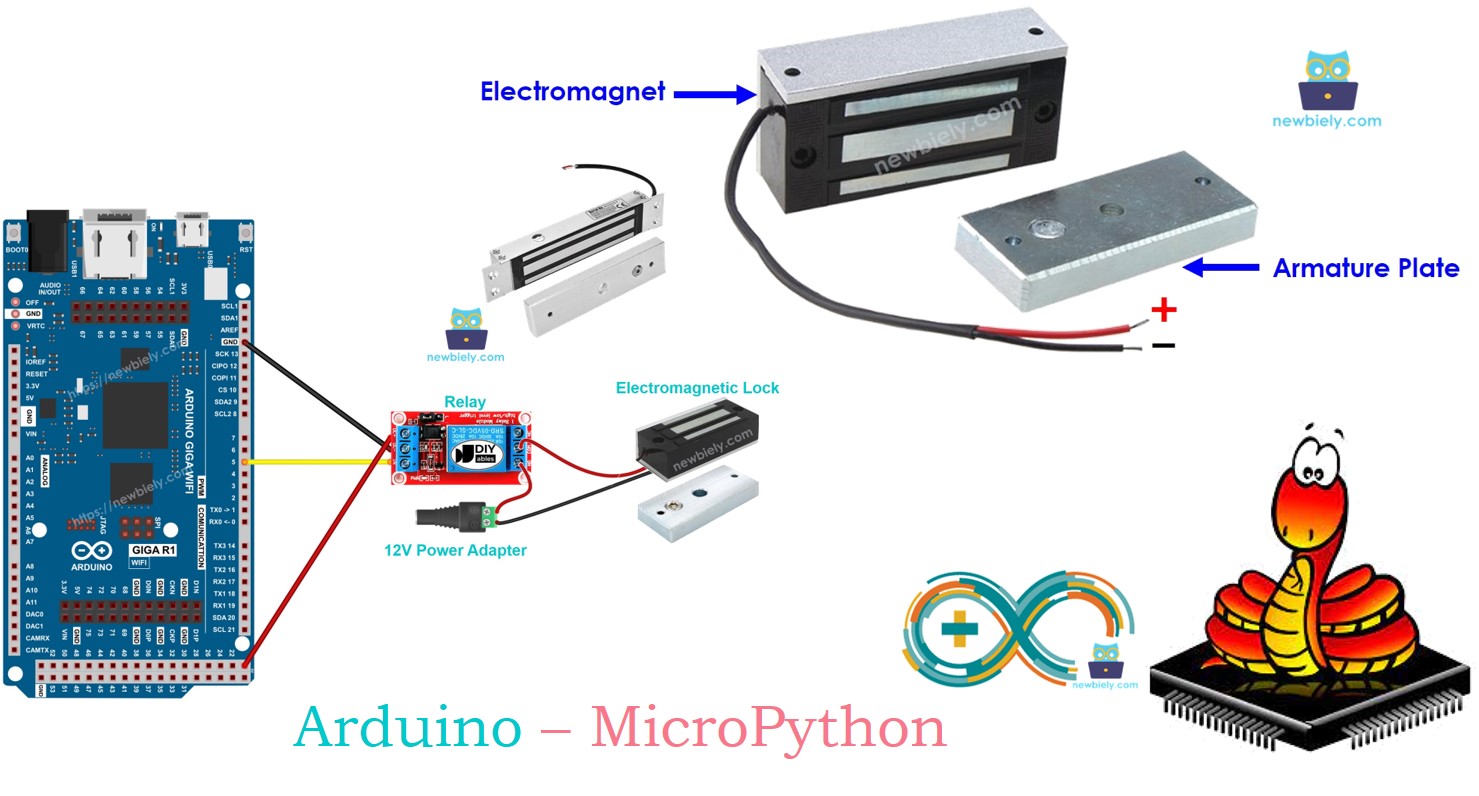
Arduino MicroPython Electromagnetic Lock
This tutorial instructs you how to use an Arduino with MicroPython to control an electromagnetic lock for securing and unlocking your door. Specifically, we will cover:
- How an electromagnetic lock works
- How to connect an electromagnetic lock to the Arduino
- How to write MicroPython code for the Arduino to control the electromagnetic lock

Hardware Preparation
Or you can buy the following kits:
| 1 | × | DIYables Sensor Kit (30 sensors/displays) | |
| 1 | × | DIYables Sensor Kit (18 sensors/displays) |
Additionally, some of these links are for products from our own brand, DIYables .
Overview of Electromagnetic Lock
The electromagnetic lock, or maglock, is commonly used to secure doors. It often works with various devices like switches, fingerprint scanners, RFID/NFC readers, keypads, or software on computers and mobile devices to control access to doors and buildings.
Pinout
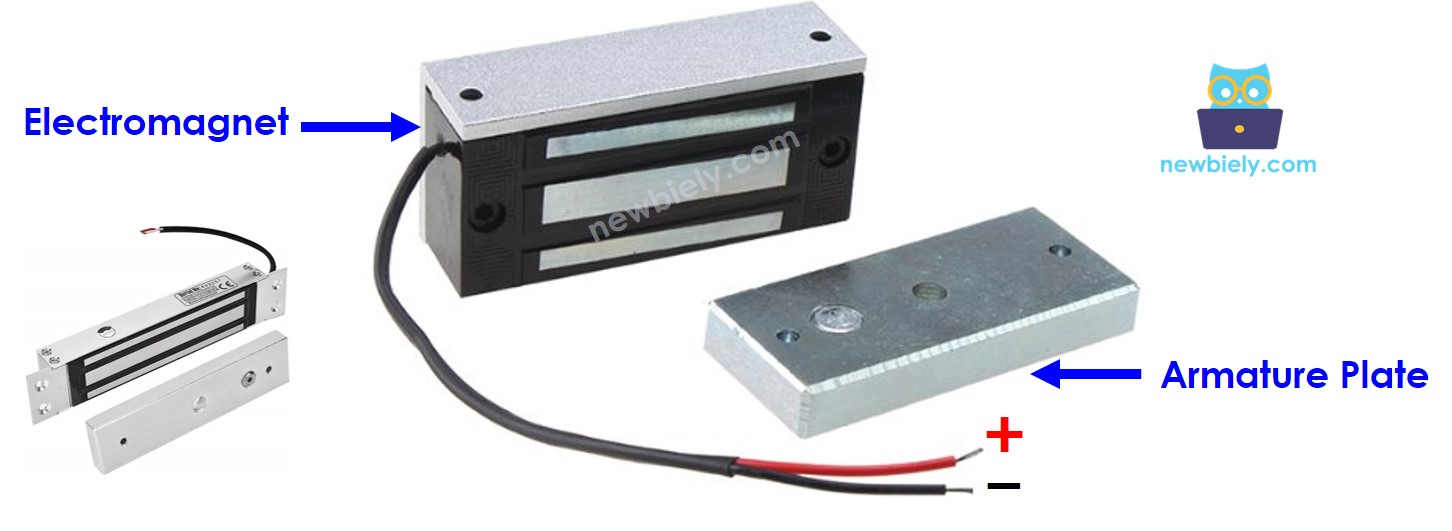
An electromagnetic lock is made up of two parts:
- An electromagnet with two pins
- An armature plate

How It Works
- When the electromagnet is powered on, an electric current flows through it, generating a magnetic field that pulls the armature plate toward it, locking the door.
- When the electromagnet is powered off, the magnetic field disappears, releasing the armature plate and unlocking the door.
※ NOTE THAT:
The electromagnetic lock typically needs a 12V, 24V, or 48V power supply, so it can't be connected directly to an Arduino pin. Instead, it should be connected to the Arduino through a relay.
If the electromagnetic lock is connected to a relay set to 'normally open':
- When the relay is open, the door remains unlocked.
- When the relay is closed, the door stays locked.
You can connect an Arduino to a relay to control the electromagnetic lock. For more details on how to connect a relay to an Arduino, check out the Arduino MicroPython Relay tutorial.
To install the lock, attach the armature plate to the door or window (the moving part) and mount the electromagnet to the door frame (the stationary part). Make sure these two parts come into contact when the door is closed.
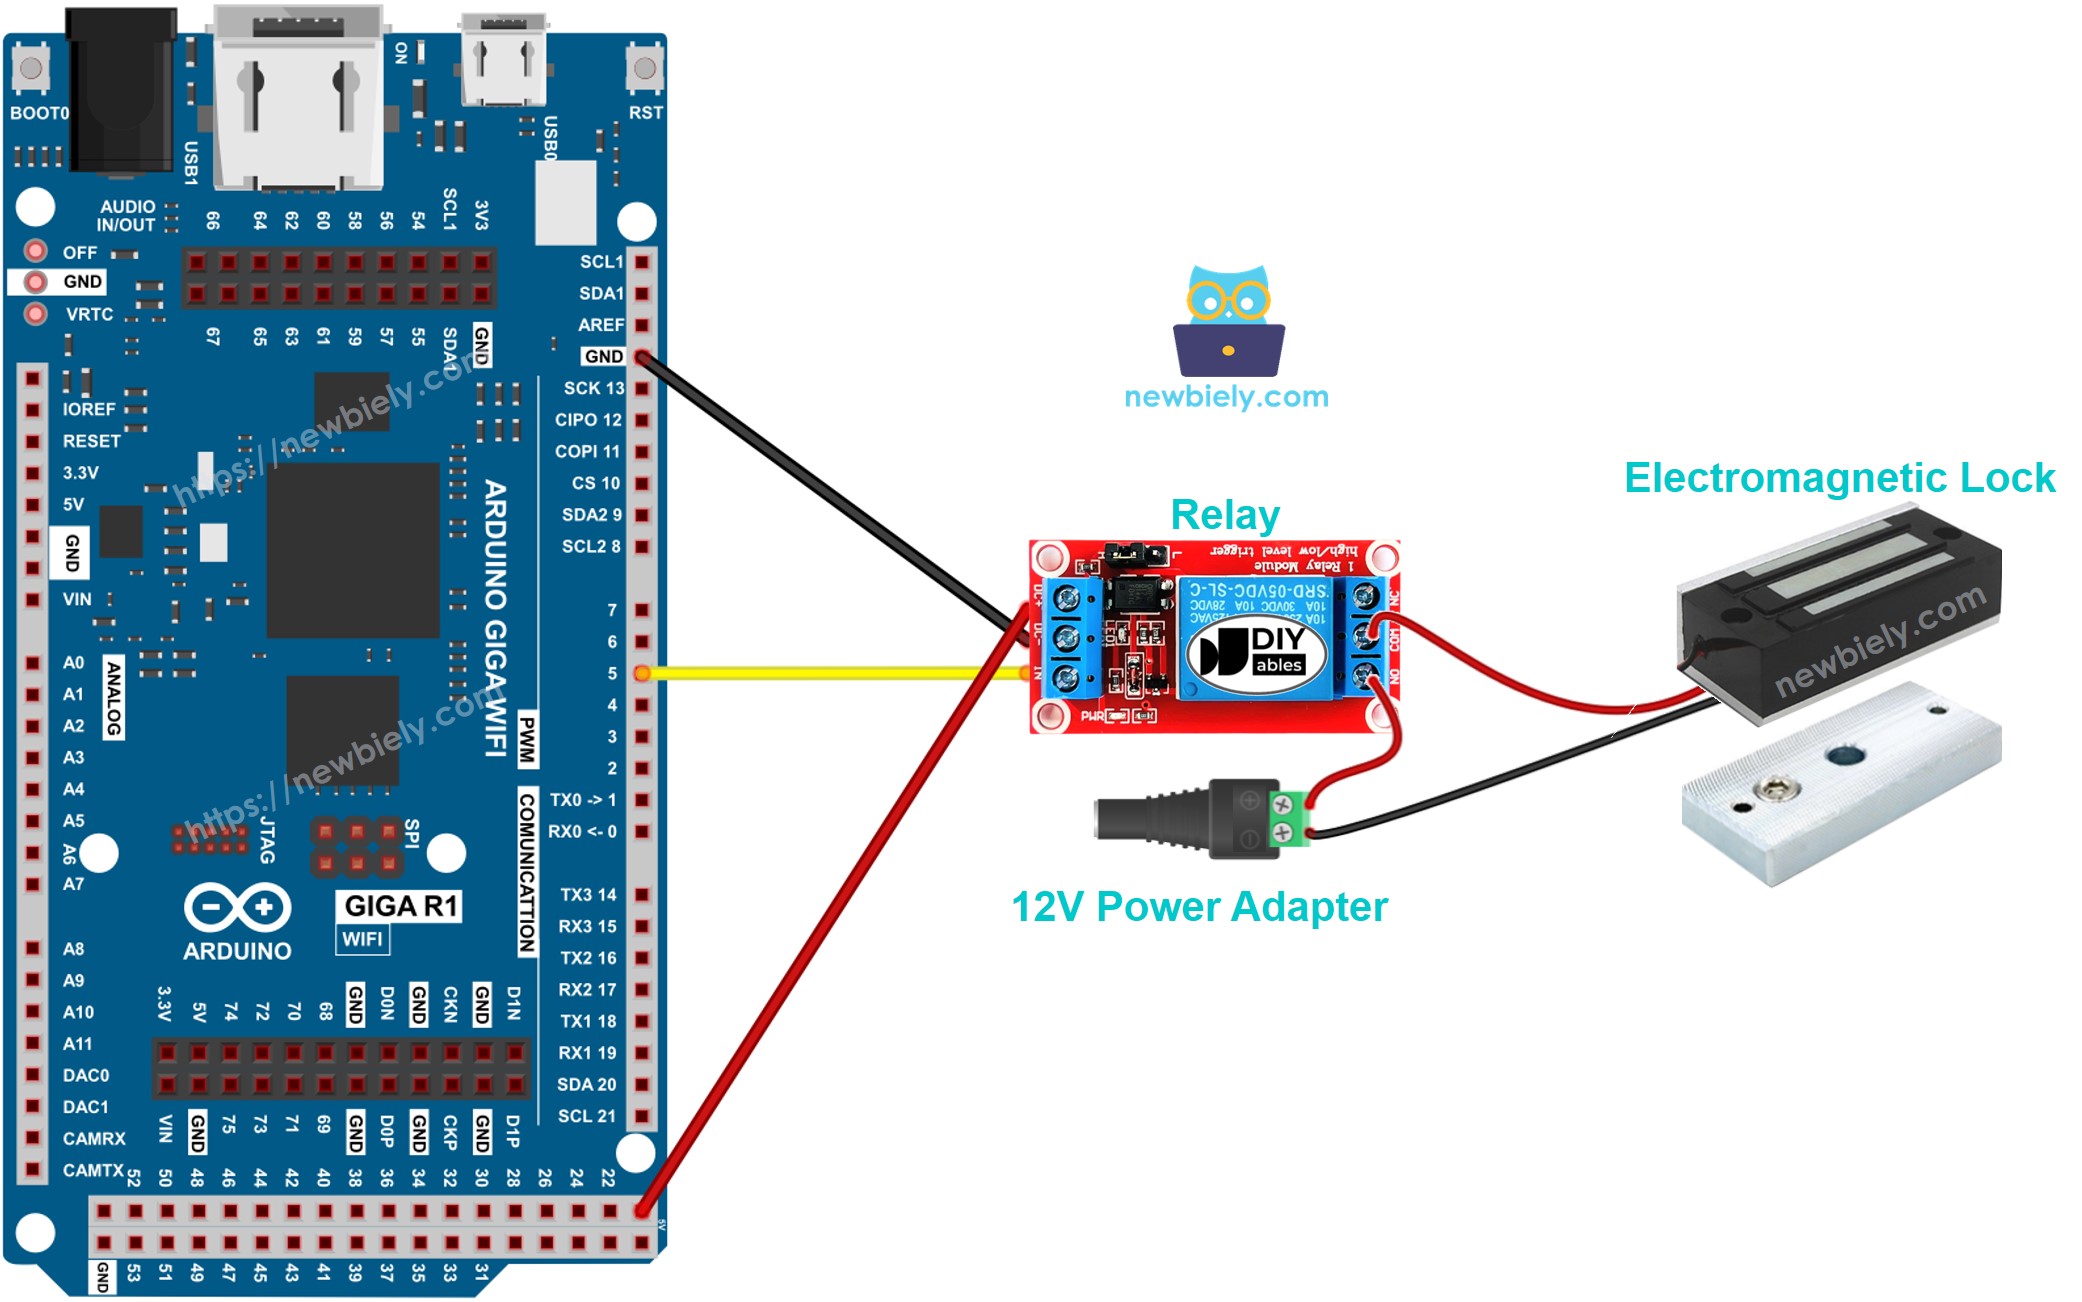
Wiring Diagram

This image is created using Fritzing. Click to enlarge image
Arduino MicroPython Code
This code makes the door lock and unlock every 5 seconds.
Detailed Instructions
Here’s instructions on how to run the above MicroPython code on Arduino with Thonny IDE:
- Make sure Thonny IDE is installed on your computer.
- Make sure MicroPython firmware is installed on your Arduino board.
- If you are new to Arduino with MicroPython, see the Getting Started with Arduino and MicroPython.
- Connect the Arduino board to the electromagnetic lock according to the provided diagram.
- Connect the Arduino board to your computer with a USB cable.
- Open Thonny IDE and go to Tools Options.
- Under the Interpreter tab, select MicroPython (generic) from the dropdown menu.
- Select the COM port corresponding to your Arduino board (e.g., COM33 on Windows or /dev/ttyACM0 on Linux).
- Copy the provided Arduino MicroPython code and paste it into Thonny's editor.
- Save the MicroPython code to your Arduino by:
- Clicking the Save button or pressing Ctrl+S.
- In the save dialog, choose MicroPython device and name the file main.py.
- Click the green Run button (or press F5) to execute the code.
- Place the armature plate close to the electromagnet.
- Check out how the armature plate is attracted to the electromagnet.
