Arduino MicroPython Soil Moisture Sensor
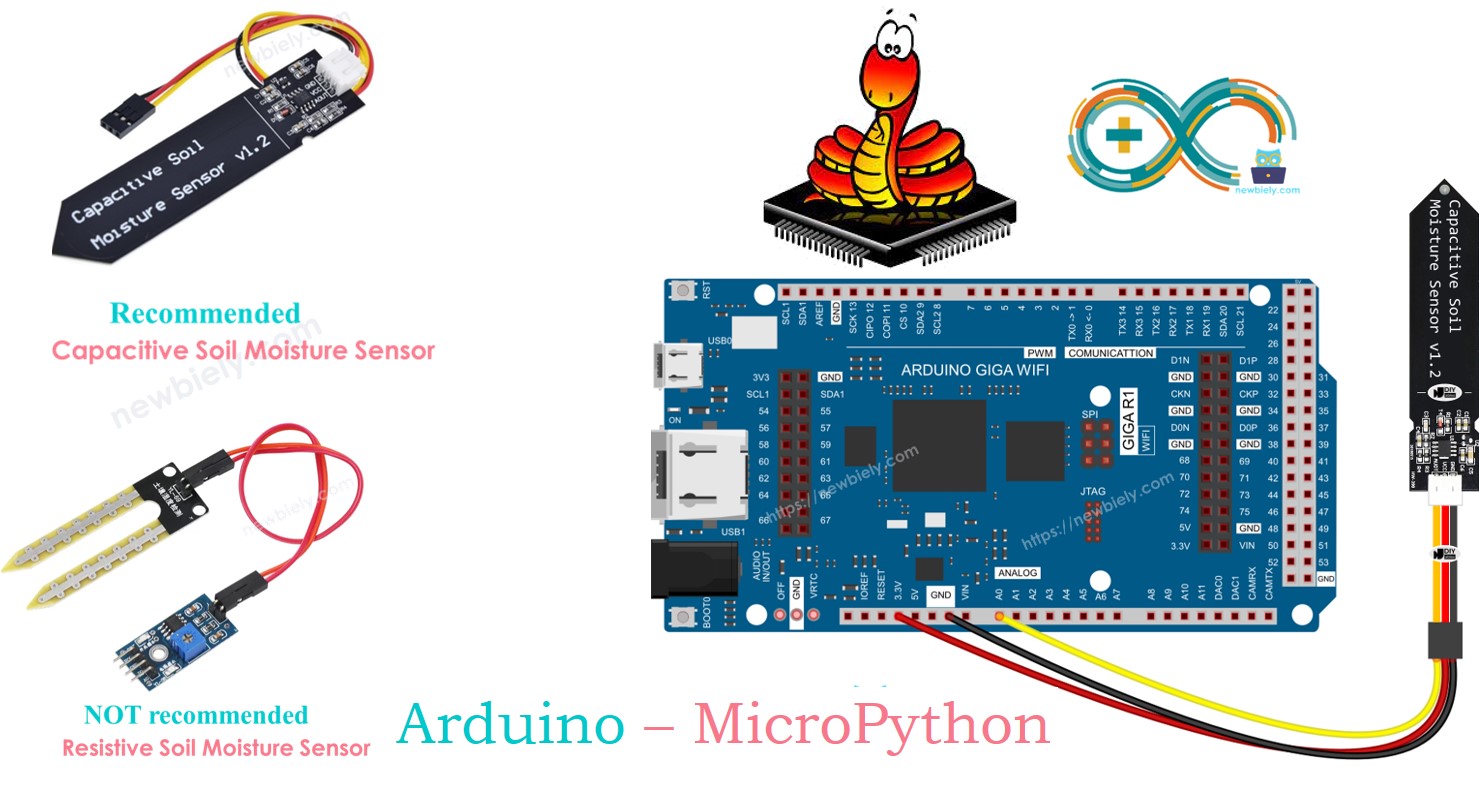
This guide shows you how to use a moisture sensor with Arduino and MicroPython. You will learn:
- The difference between resistive and capacitive moisture sensors
- How to connect a soil moisture sensor to Arduino
- How to write MicroPython code for Arduino to read the sensor's moisture level
- How to write MicroPython code for Arduino to check if the soil is wet or dry
Hardware Preparation
Or you can buy the following kits:
| 1 | × | DIYables Sensor Kit (30 sensors/displays) | |
| 1 | × | DIYables Sensor Kit (18 sensors/displays) |
Additionally, some of these links are for products from our own brand, DIYables .
Buy Note: Many soil moisture sensors available in the market are unreliable, regardless of their version. We strongly recommend buying the sensor with TLC555I Chip from the DIYables brand using the link provided above. We tested it, and it worked reliably.
Overview of Soil Moisture Sensor Sensor
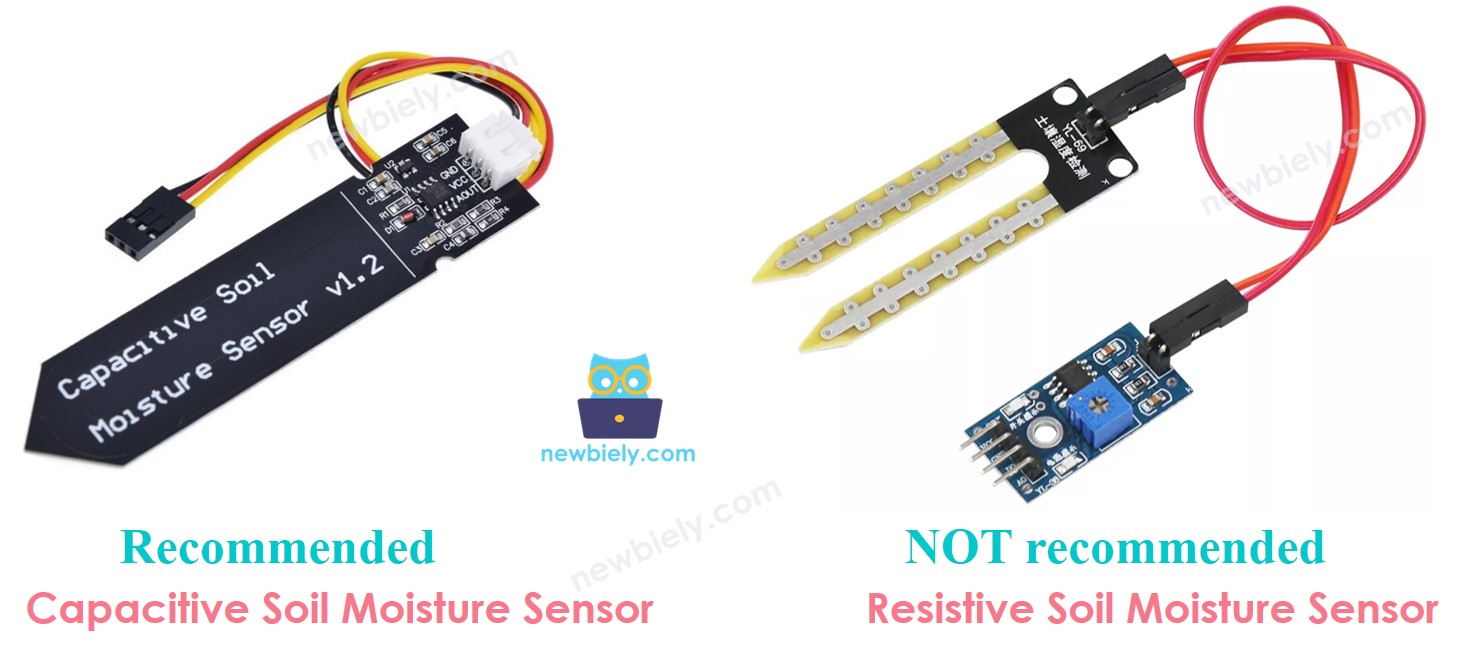
There are two types of moisture sensors:
- Resistive moisture sensor
- Capacitive moisture sensor
Both sensors measure soil moisture, but they work in different ways. We recommend using the capacitive moisture sensor because:
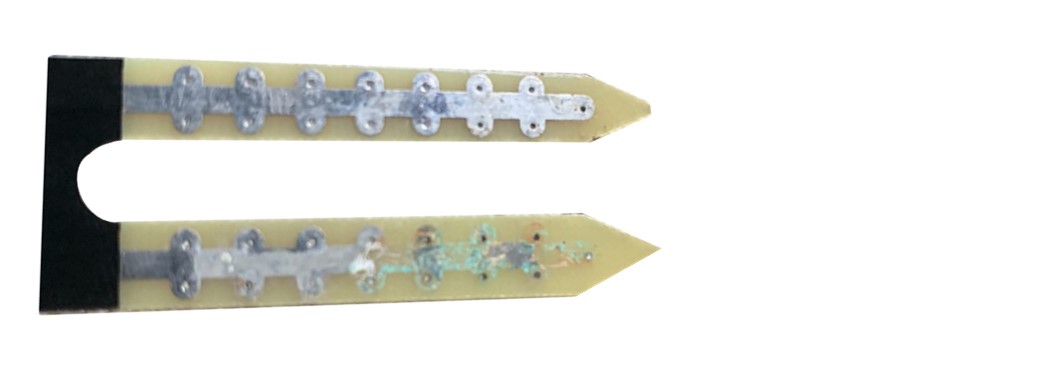
- The resistive moisture sensor can rust over time. This happens because an electric current flows between its probes, causing corrosion.
- The capacitive moisture sensor does not rust over time. Its parts are protected, and no electric current flows between them.
The image below shows rust on a resistive soil moisture sensor.
The rest of this guide will focus on how to use the capacitive soil moisture sensor.
Capacitive Soil Moisture Sensor Pinout
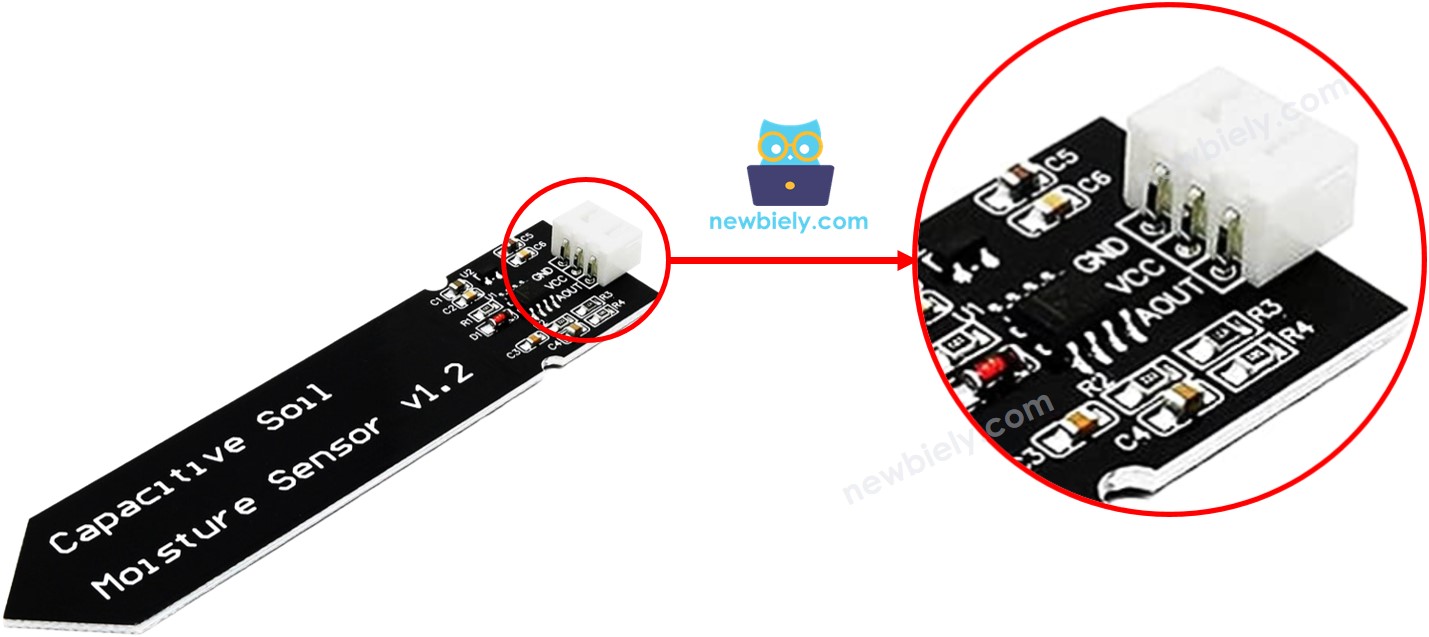
A capacitive soil moisture sensor has three pins:
- GND pin: Connect to GND (0V)
- VCC pin: Connect to VCC (5V or 3.3V)
- AOUT pin: Sends a signal that changes based on soil moisture. Connect this to the analog input on an Arduino.
How It Works
The more water in the soil, the lower the voltage at the AOUT pin of the capacitive soil moisture sensor.
Wiring Diagram
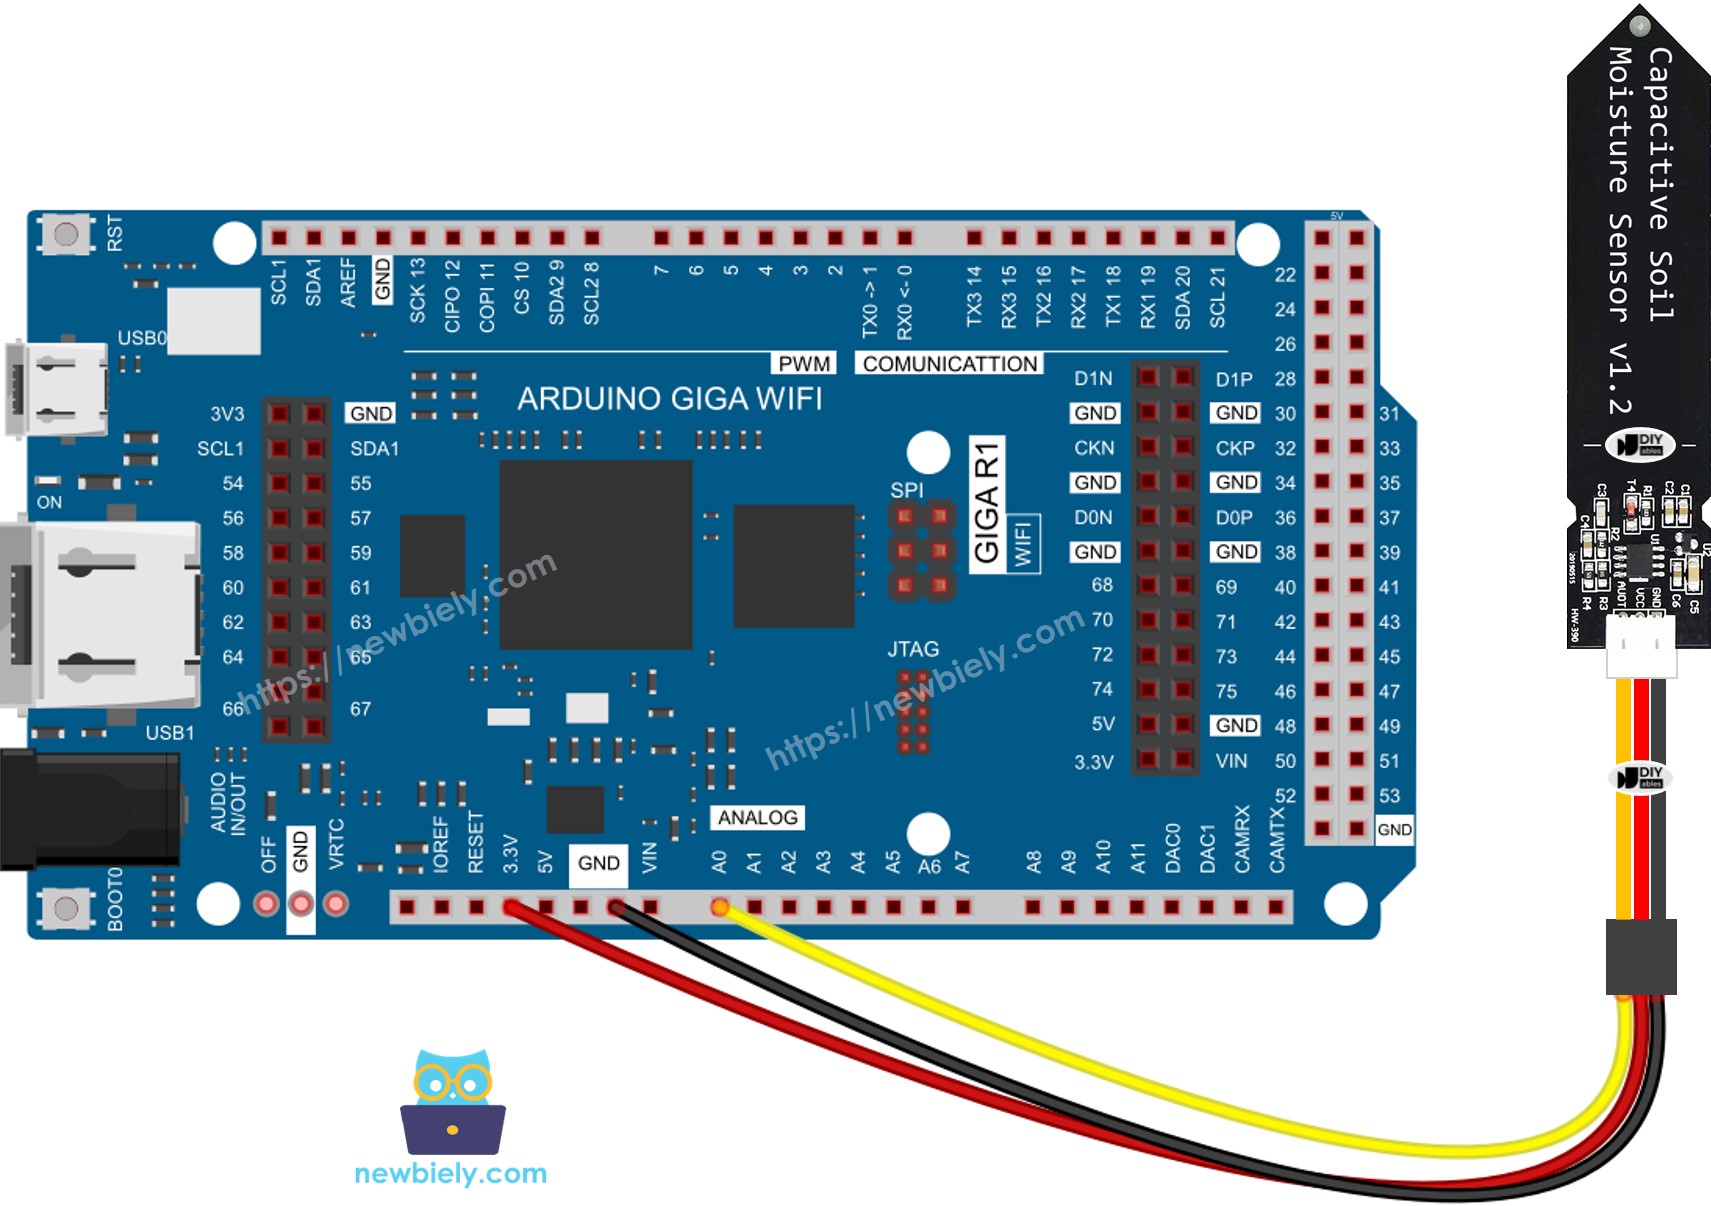
This image is created using Fritzing. Click to enlarge image
Arduino MicroPython Code
Detailed Instructions
Here’s instructions on how to run the above MicroPython code on Arduino with Thonny IDE:
- Make sure Thonny IDE is installed on your computer.
- Make sure MicroPython firmware is installed on your Arduino board.
- If you are new to Arduino with MicroPython, see the Getting Started with Arduino and MicroPython.
- Connect the Arduino board to the soil moisture sensor according to the provided diagram.
- Connect the Arduino board to your computer with a USB cable.
- Open Thonny IDE and go to Tools Options.
- Under the Interpreter tab, select MicroPython (generic) from the dropdown menu.
- Select the COM port corresponding to your Arduino board (e.g., COM33 on Windows or /dev/ttyACM0 on Linux).
- Copy the provided Arduino MicroPython code and paste it into Thonny's editor.
- Save the MicroPython code to your Arduino by:
- Clicking the Save button or pressing Ctrl+S.
- In the save dialog, choose MicroPython device and name the file main.py.
- Click the green Run button (or press F5) to execute the code.
- Insert the sensor into the soil and water it, or you can dip it slowly into a cup of salt water.
- Check out the message in the Shell at the bottom of Thonny.
※ NOTE THAT:
- Don’t use pure water for testing; it doesn’t conduct electricity and won’t affect the sensor readings.
- Sensor readings will never be zero. They usually range from 1200 to 2300, but this can change based on how deep the sensor is, the type of soil or water, and the power supply voltage.
- Keep the circuit part (the top of the sensor) out of the soil or water to prevent damage.
Calibrating the Capacitive Soil Moisture Sensor
The sensor's readings vary depending on the soil type and how much water it contains. To use it correctly, we need to set a point that indicates if the soil is wet or dry.
Steps to Calibrate:
- Run the provided code on the Arduino.
- Insert the moisture sensor into the soil.
- Slowly add water to the soil.
- Check the message in the Shell at the bottom of Thonny.
- Note the value when the soil changes from dry to wet. This value is called the THRESHOLD.
Determine if the soil is wet or dry
After you calibrate, update the THRESHOLD value you recorded with this new code. This code determines if the soil is wet or dry.
Check out the message in the Shell at the bottom of Thonny.
