Arduino MicroPython Flame Sensor
This guide shows you how to use a flame sensor with an Arduino and MicroPython to detect and measure flames and fire. You will learn:
- How a flame sensor works.
- How to connect a flame sensor to an Arduino.
- How to write MicroPython code for the Arduino to detect fire using the flame sensor's digital signal.
- How to write MicroPython code for the Arduino to measure flame intensity using the flame sensor's analog signal.
Then, you can adjust the code to activate a warning horn (using a relay) when it detects fire.
Hardware Preparation
Or you can buy the following kits:
| 1 | × | DIYables Sensor Kit (18 sensors/displays) |
Additionally, some of these links are for products from our own brand, DIYables .
Overview of Flame Sensor
A flame sensor can detect and measure infrared light emitted by a flame, making it ideal for fire detection. Also known as an infrared flame or fire sensor, it provides two types of signals: a digital output (LOW or HIGH) and an analog output.
Infrared flame sensors are specifically designed to detect certain wavelengths of infrared radiation emitted by flames, minimizing false alarms from other infrared sources like human body heat or lights. However, they may still sometimes trigger false alarms or fail to detect actual flames.
Pinout
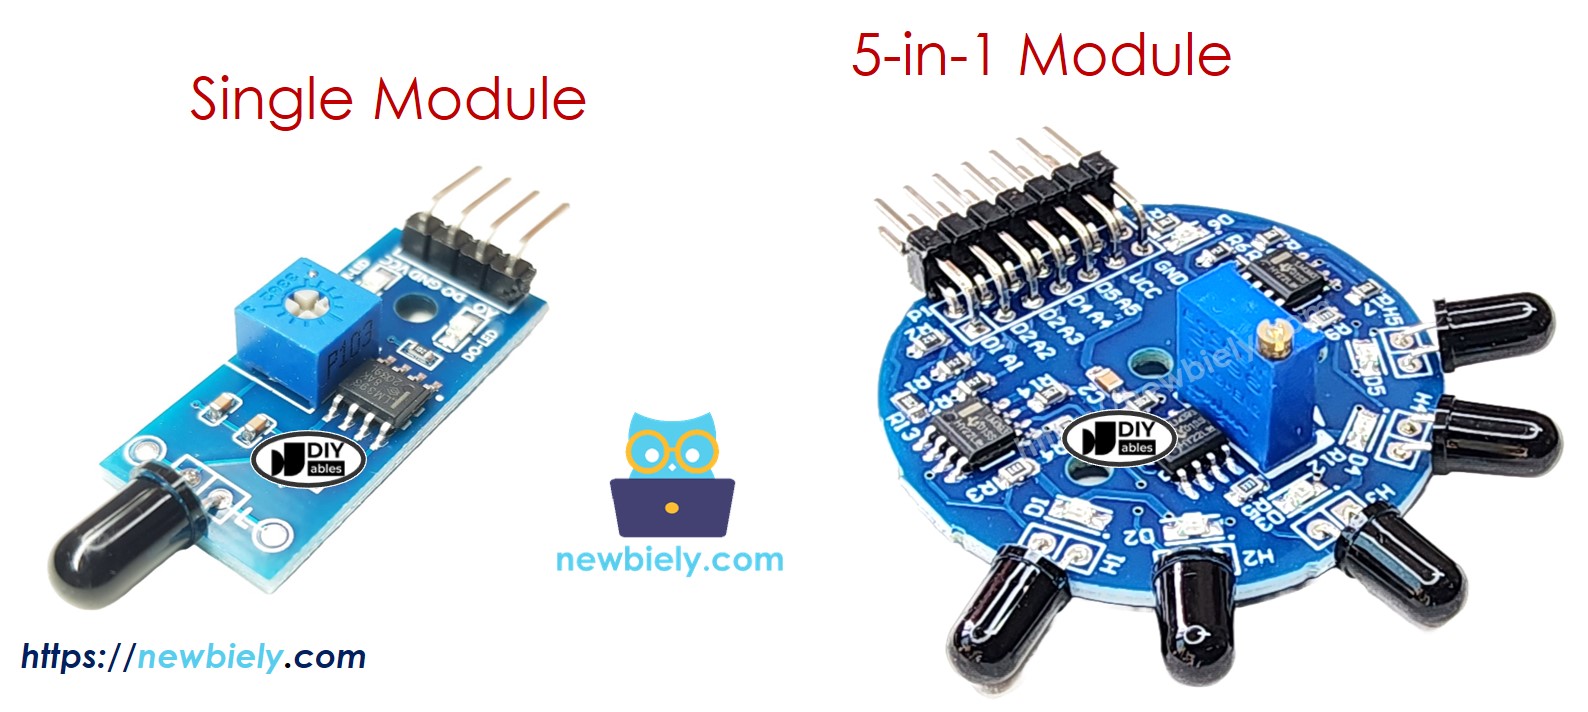
There are two types of flame sensor modules available:
The single flame sensor has four pins:
- VCC pin: Connect to the power supply (3.3V to 5V).
- GND pin: Connect to ground (0V).
- DO pin: Provides a digital output, which is HIGH when no flame is detected and LOW when a flame is present. The sensitivity to flames can be adjusted using the potentiometer on the board.
- AO pin: Outputs an analog signal, where the value decreases with lower infrared levels and increases with higher infrared levels.
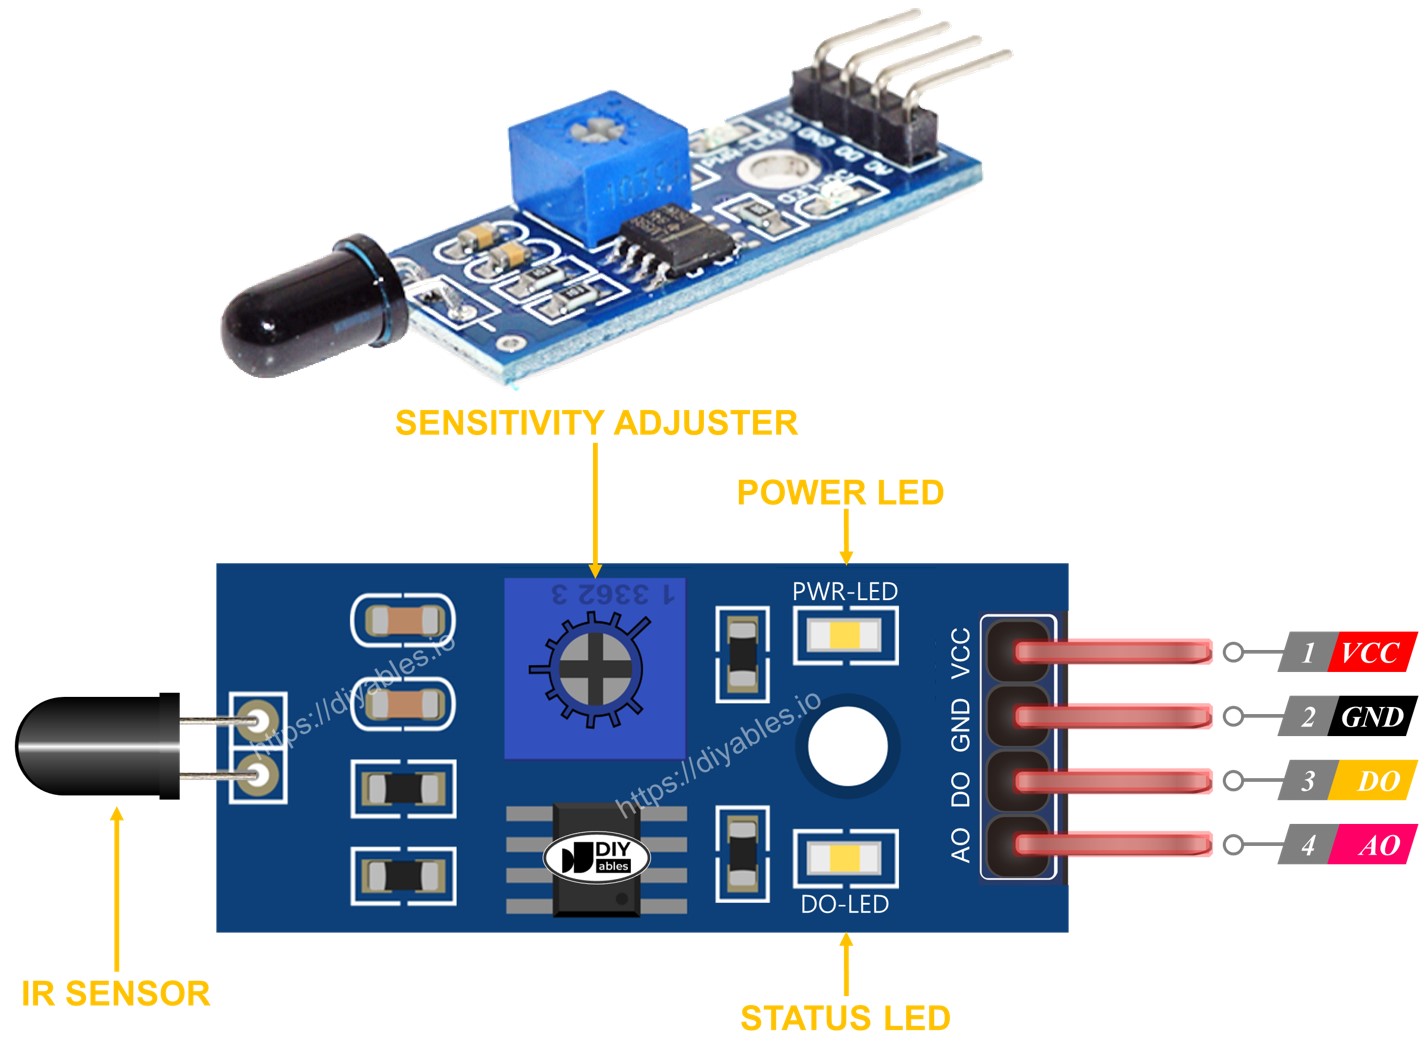
It also features two LED indicators:
- The PWR-LED lights up when the sensor is powered on.
- The DO-LED lights up when a flame is detected.
The 5-in-1 flame sensor integrates five individual flame sensors on a single PCB. These sensors share the same potentiometer, VCC, and GND connections; however, each sensor’s DO (Digital Output) and AI (Analog Input) pins remain independent. In addition, each sensor is oriented in a different direction, expanding the overall detection range.
How It Works
For the DO pin:
- The module has a potentiometer to set the infrared sensitivity threshold.
- When the infrared level goes above this threshold, indicating a flame, the sensor's output pin goes LOW, and the DO-LED lights up.
- When the infrared level is below the threshold, indicating no flame, the sensor's output pin stays HIGH, and the DO-LED remains off.
For the AO pin:
- A high level of infrared light produces a high reading at the AO pin.
- A low level of infrared light produces a low reading at the AO pin.
- The potentiometer does not affect the reading at the AO pin.
Wiring Diagram
The flame sensor module provides two output options. You can use one or both based on what you need.
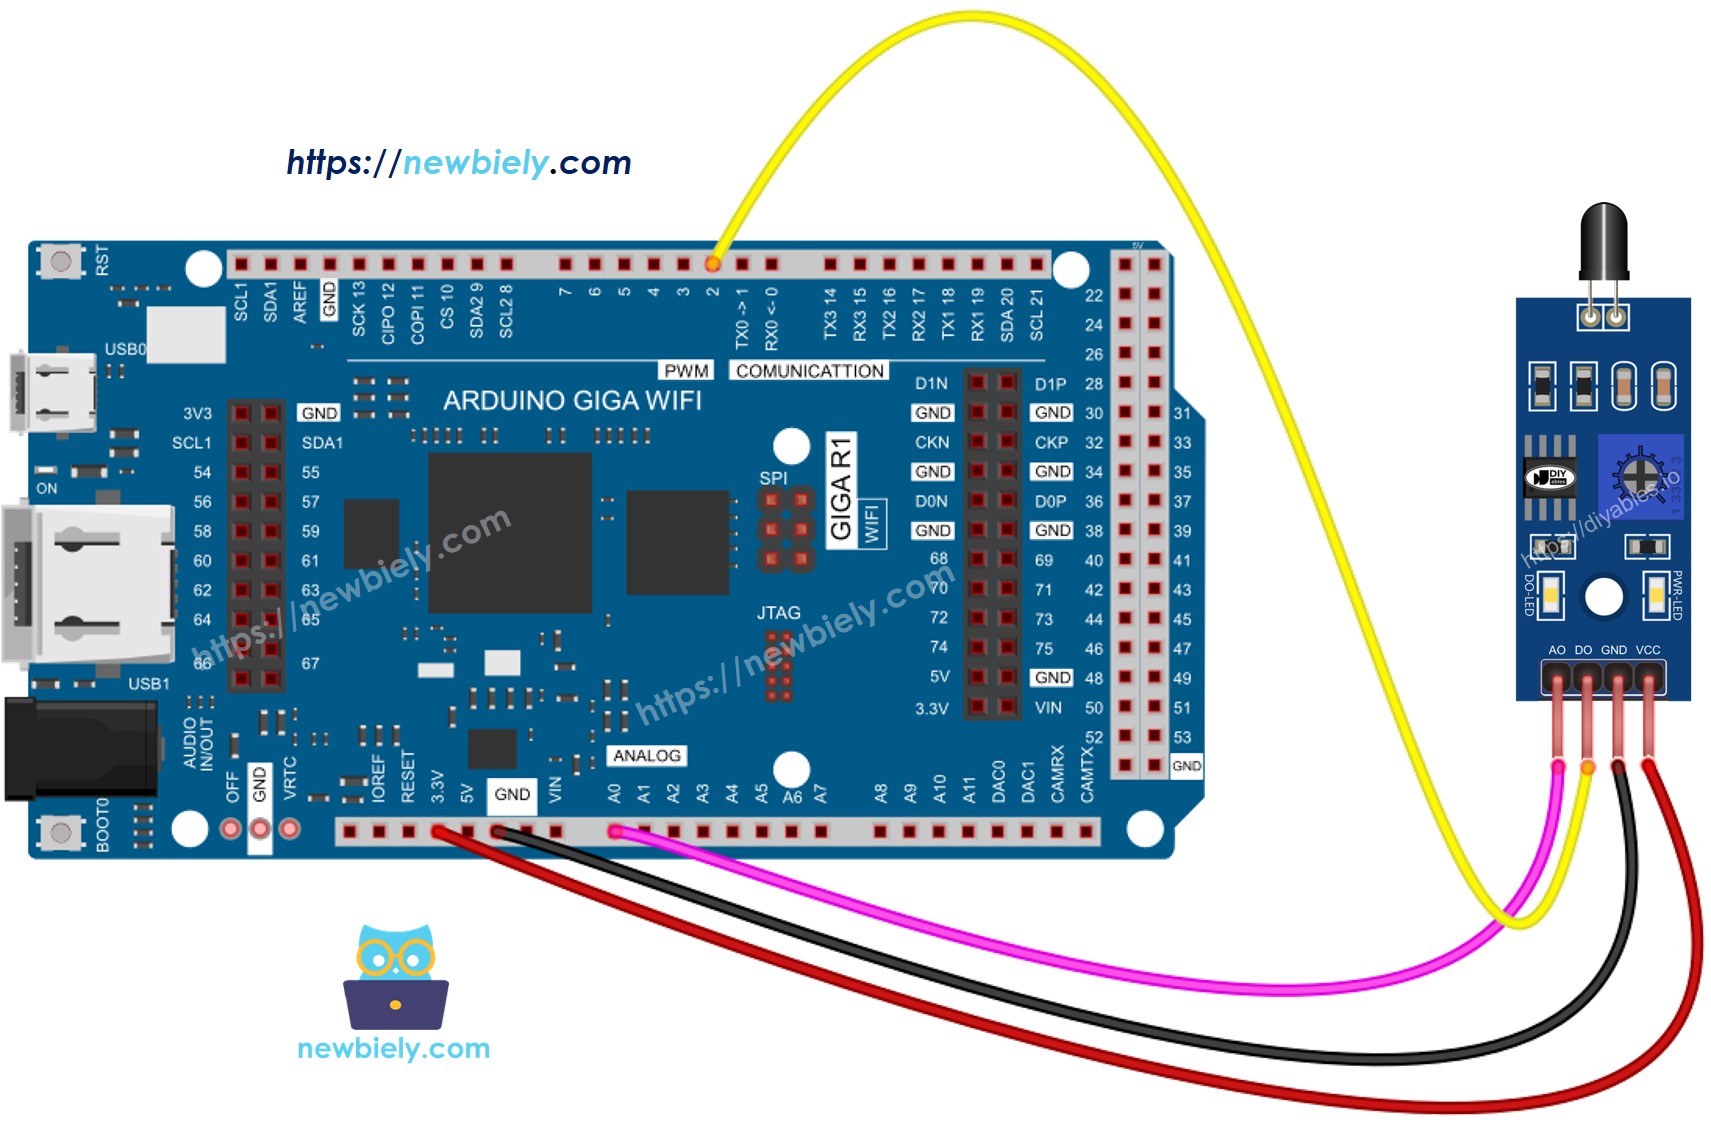
This image is created using Fritzing. Click to enlarge image
Arduino MicroPython Code - Read value from DO pin
Detailed Instructions
Here’s instructions on how to run the above MicroPython code on Arduino with Thonny IDE:
- Make sure Thonny IDE is installed on your computer.
- Make sure MicroPython firmware is installed on your Arduino board.
- If you are new to Arduino with MicroPython, see the Getting Started with Arduino and MicroPython.
- Connect the Arduino board to the flame sensor according to the provided diagram.
- Connect the Arduino board to your computer with a USB cable.
- Open Thonny IDE and go to Tools Options.
- Under the Interpreter tab, select MicroPython (generic) from the dropdown menu.
- Select the COM port corresponding to your Arduino board (e.g., COM33 on Windows or /dev/ttyACM0 on Linux).
- Copy the provided Arduino MicroPython code and paste it into Thonny's editor.
- Save the MicroPython code to your Arduino by:
- Clicking the Save button or pressing Ctrl+S.
- In the save dialog, choose MicroPython device and name the file main.py.
- Click the green Run button (or press F5) to execute the code.
- Aim the flame sensor at a flame.
- Check out the message in the Shell at the bottom of Thonny.
If the LED light is always on or off, even when the sensor is facing a flame, you can turn the potentiometer to change the sensor's sensitivity.
Arduino MicroPython Code - Read value from AO pin
Detailed Instructions
- Copy the provided Arduino MicroPython code and paste it into Thonny's editor.
- Save the code to your Arduino.
- Click the green Run button (or press F5) to execute the code.
- Aim the flame sensor at a flame.
- Check out the message in the Shell at the bottom of Thonny.