Arduino MicroPython MP3 Player
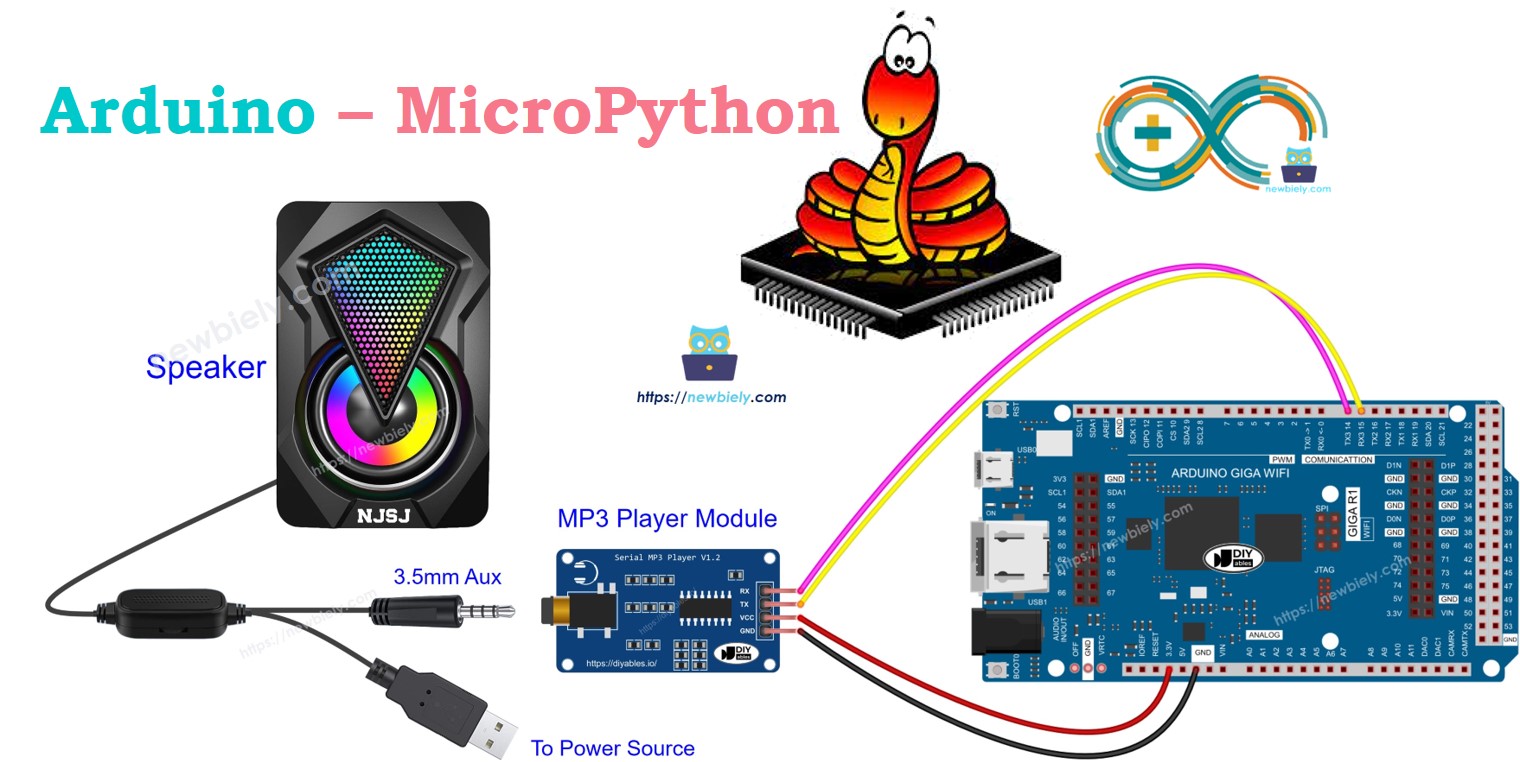
This guide shows you how to build an MP3 player using an Arduino running MicroPython, an MP3 player module, a Micro SD Card, and a speaker. The MP3 player will play songs or audio files stored on the Micro SD Card. The Arduino communicates with the MP3 player module to select and play tracks from the SD card, convert them into audio, and send the output to the speaker. In this guide, you will learn:
- How to connect an MP3 player module and speaker to the Arduino
- How to write MicroPython code for the Arduino to play music from a Micro SD Card
- How to add buttons for play, pause, next, and previous track functions
You can modify the code to add a potentiometer or rotary encoder to control the volume.
Hardware Preparation
Or you can buy the following kits:
| 1 | × | DIYables Sensor Kit (30 sensors/displays) | |
| 1 | × | DIYables Sensor Kit (18 sensors/displays) |
Additionally, some of these links are for products from our own brand, DIYables .
Overview of Serial MP3 Player Module and Speaker
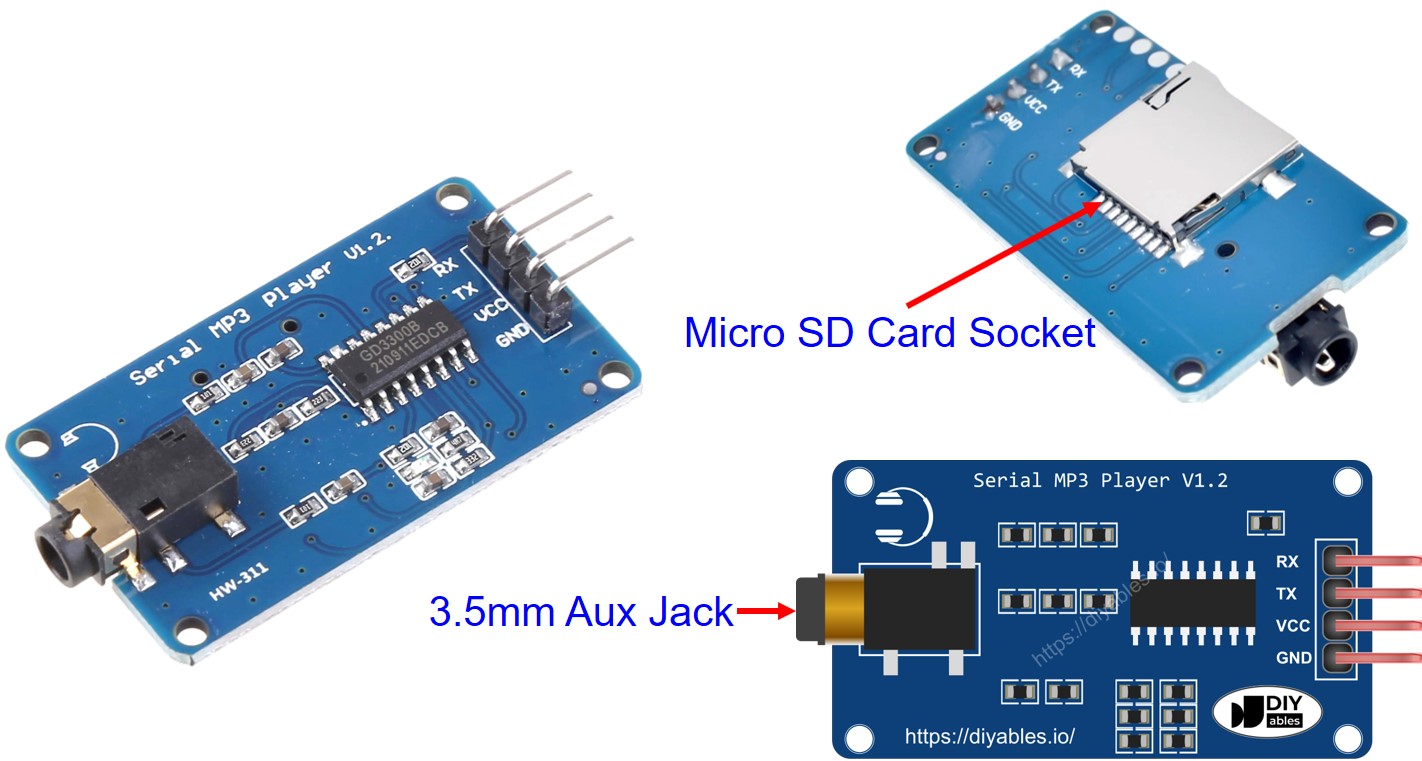
Serial MP3 Player Module Pinout
A serial MP3 player module has three main interfaces:
- Arduino Interface:
- RX pin: Receives data from the Arduino. Connect this to the TX pin on your Arduino for serial communication.
- TX pin: Sends data to the Arduino. Connect this to the RX pin on your Arduino for serial communication.
- VCC pin: Provides power to the module. Connect this to the 3.3V pin on your Arduino.
- GND pin: Ground pin. Connect this to the Arduino's ground (0V).
- Speaker Interface:
- Features a 3.5mm Aux output female jack for audio output.
- Micro SD Card Interface:
- Includes a Micro SD Card slot located on the back of the MP3 module for storing audio files.
- Audio Connection: Equipped with a 3.5mm Aux male connector to connect to an MP3 player.
- Power Connection: Can be powered through a USB, a 5V power adapter, or other compatible power sources.
Speaker Pinout
A speaker typically has two types of connections:
Alternatively, you can use earphones with a 3.5mm Aux male connector.
How It Works
Here’s what you need to do:
- Load a selection of songs or recordings onto a Micro SD card.
- Insert the Micro SD card into the MP3 player module.
- Connect the MP3 player module to the Arduino.
- Connect the MP3 player module to a speaker.
- Plug the speaker into a power source. If you're using headphones or earphones, you can skip this step.
Each MP3 file on the Micro SD card is numbered starting from 0, which determines the playback order. We will write a MicroPython script for the Arduino to send various commands to the MP3 player module. Supported commands include:
- Start Playing
- Stop
- Play Next Track
- Play Previous Track
- Adjust Volume
Upon receiving a command, the MP3 player module plays the files stored on the Micro SD card, converts them into audio signals, and sends these signals to the speaker via the 3.5mm Aux jack.
Wiring Diagram
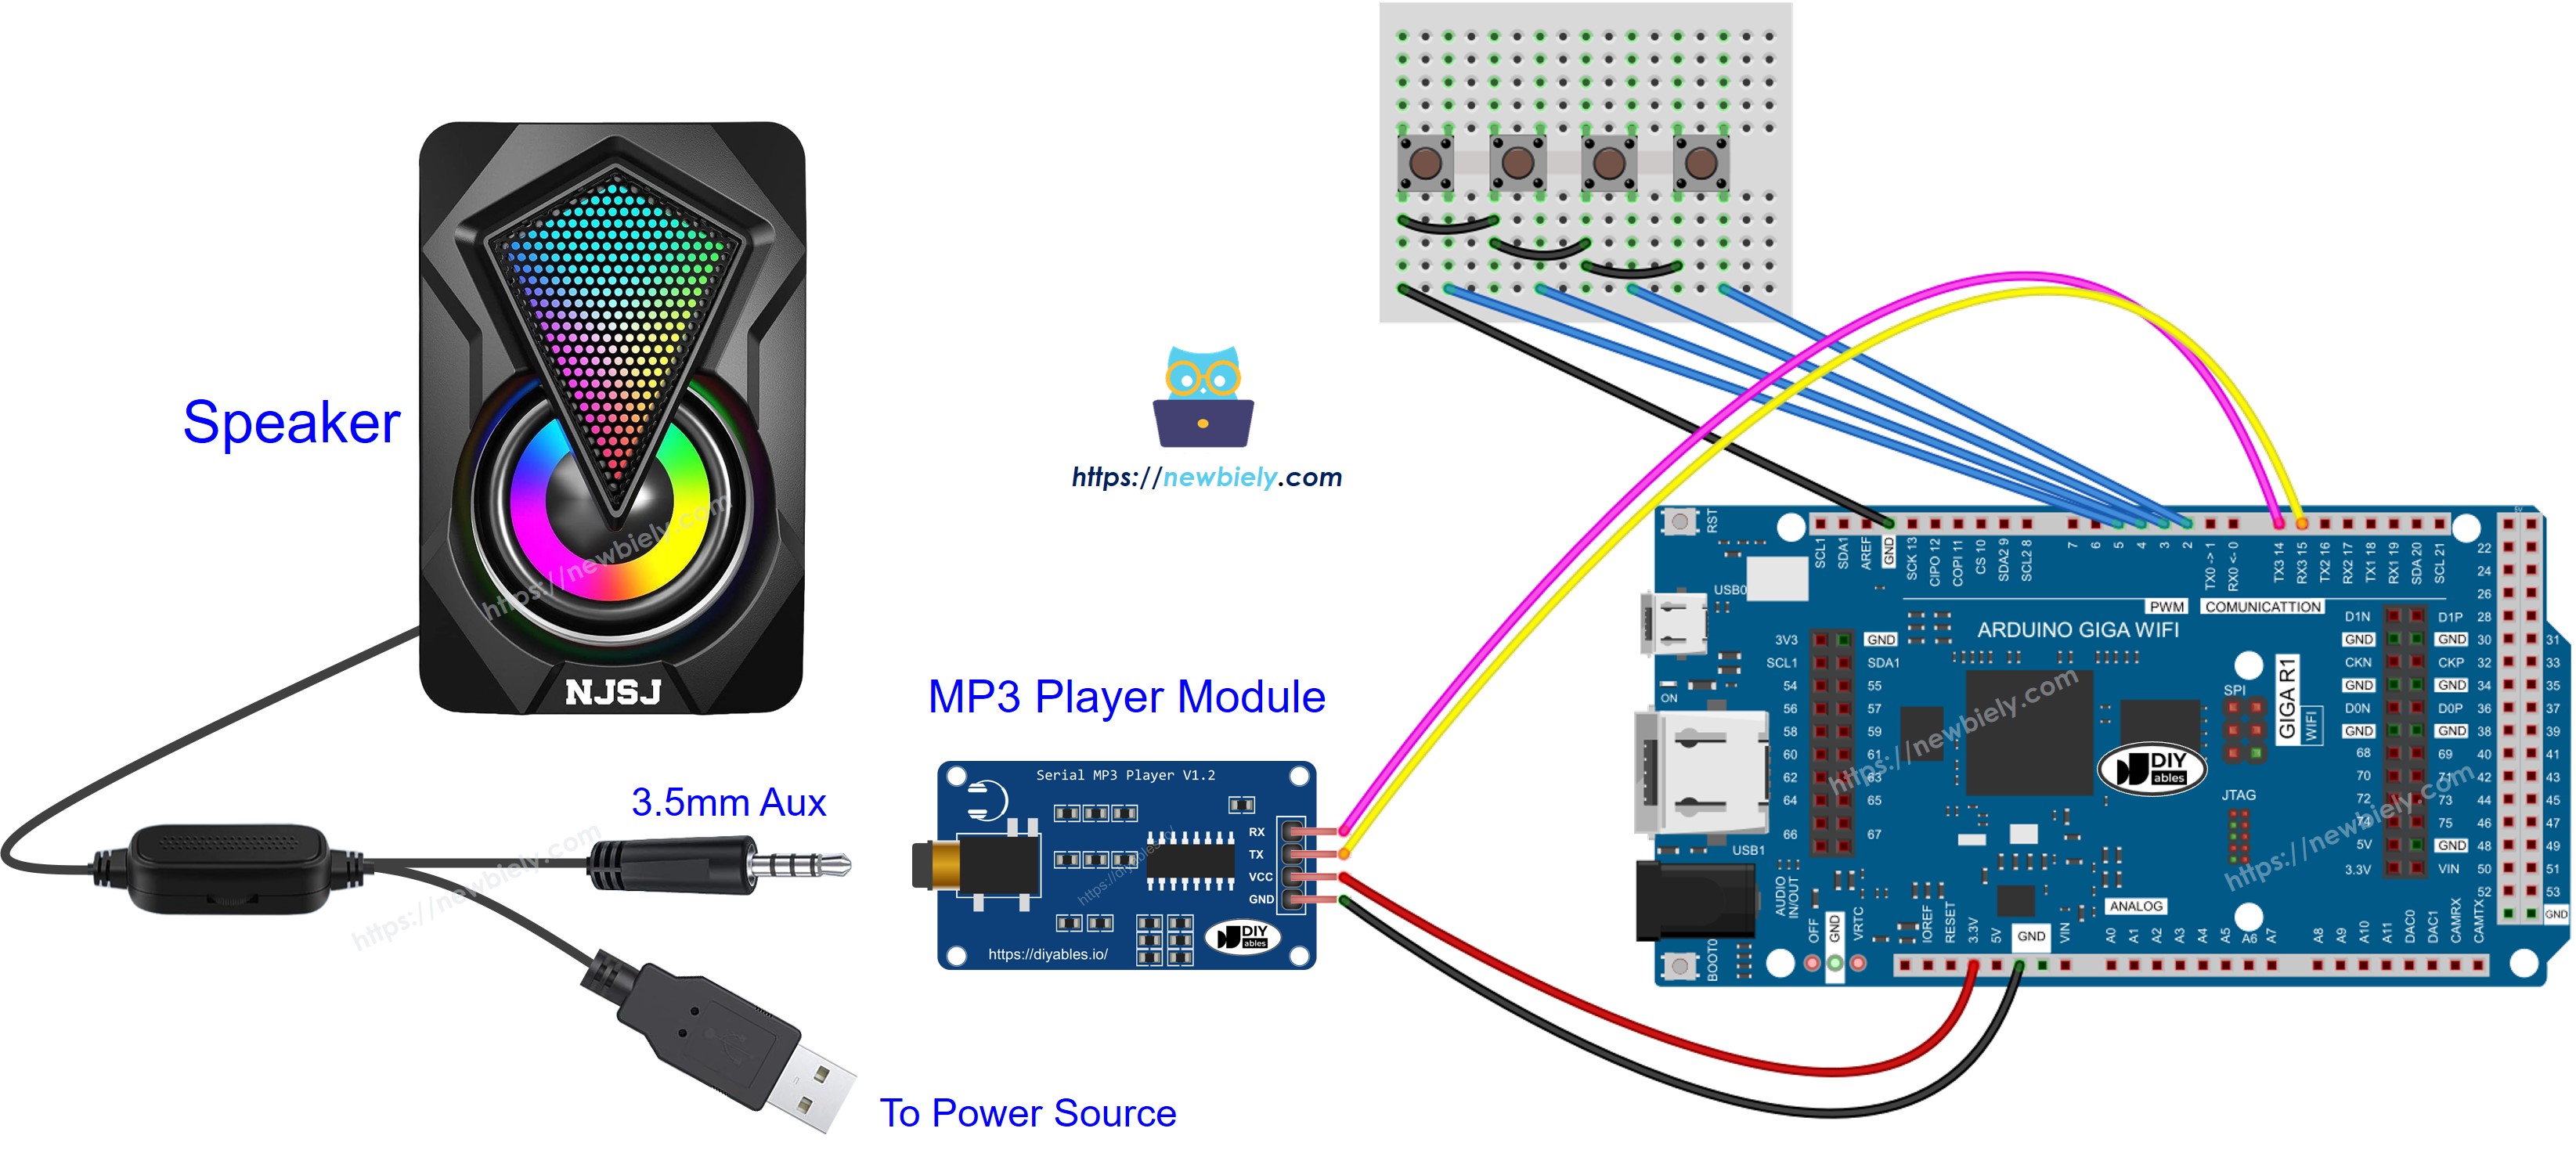
- The Wiring Diagram between Arduino MicroPython MP3, player module, and speaker
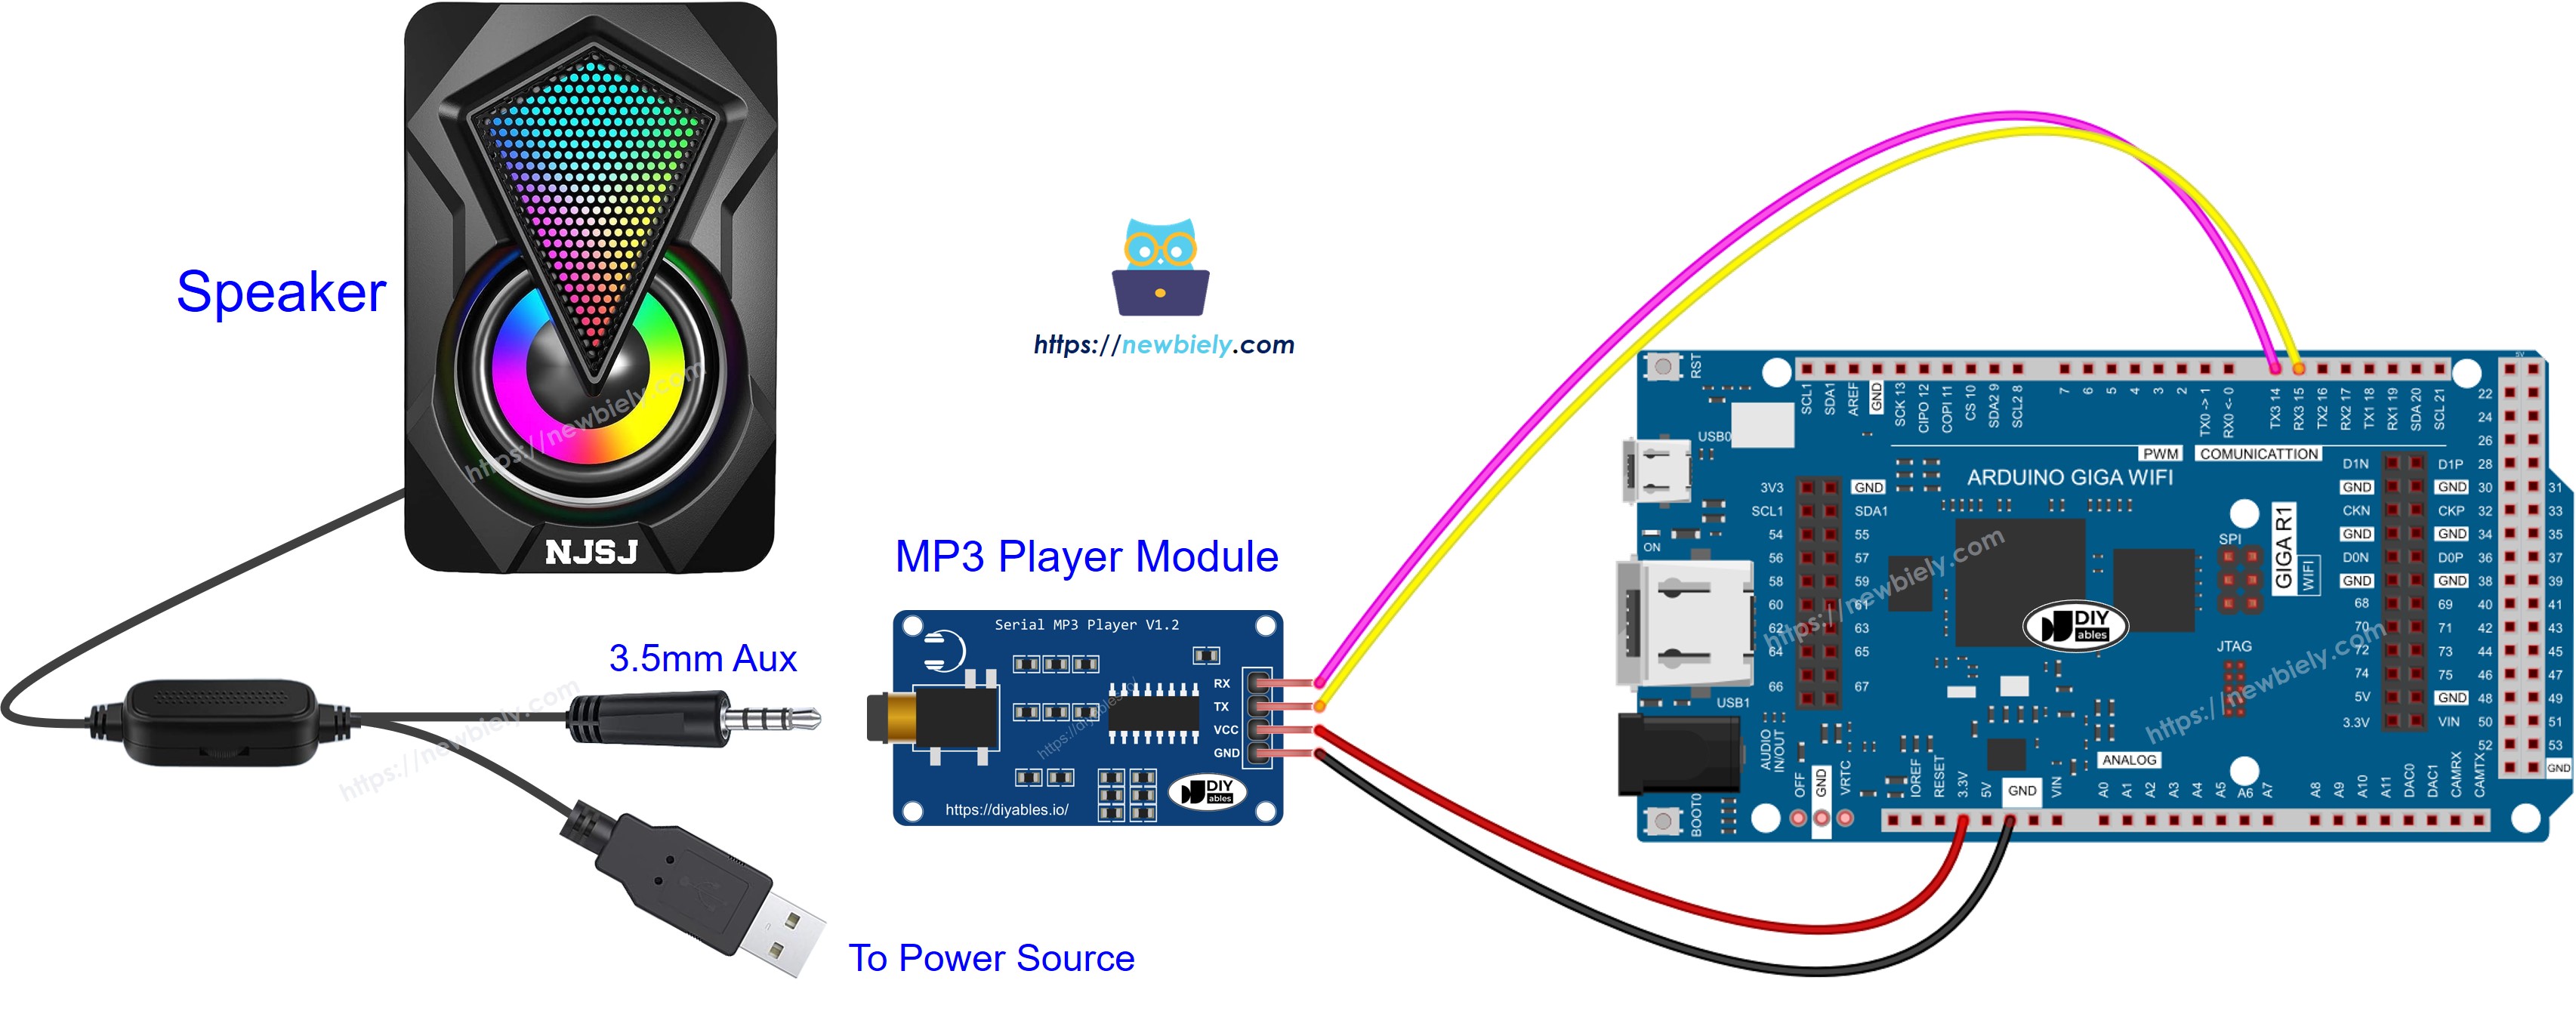
This image is created using Fritzing. Click to enlarge image
- The Wiring Diagram between Arduino MicroPython MP3, player module, and earphone
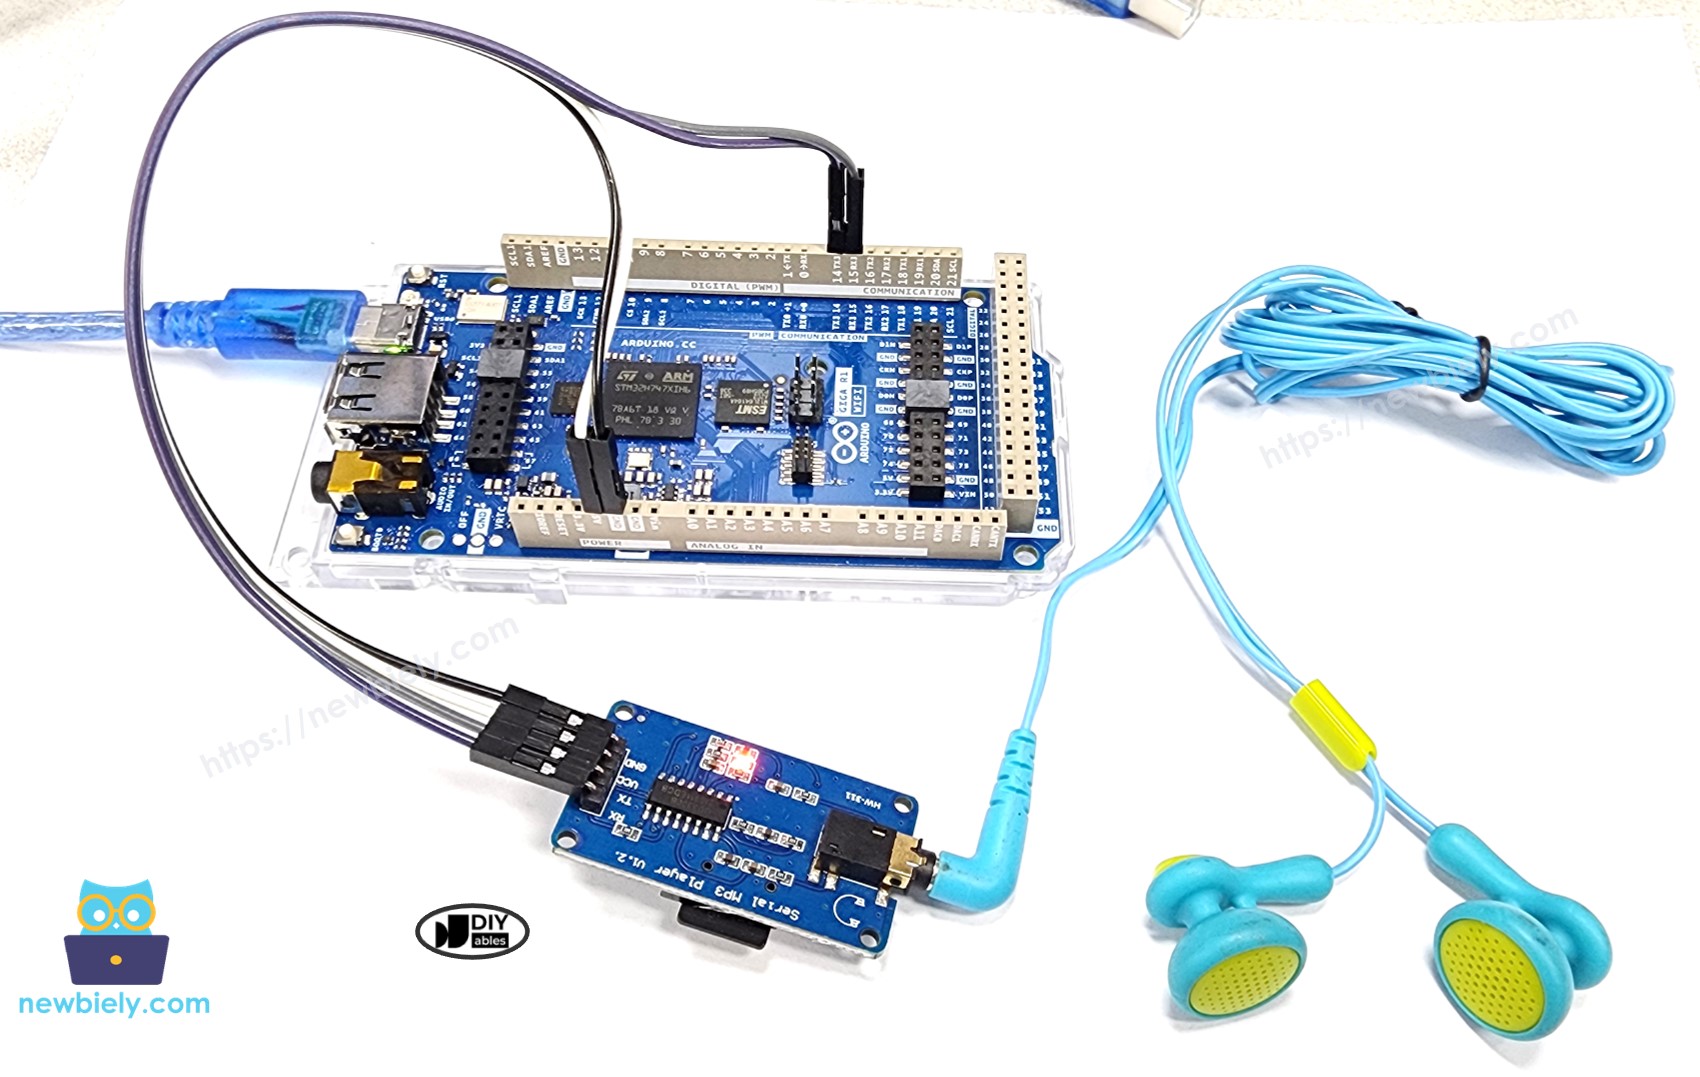
This image is created using Fritzing. Click to enlarge image
Arduino MicroPython Code - Play Music
The code below begins to play the first song stored on the Micro SD Card.
As shown in the wiring diagram, the MP3 module is connected to the RX3 and TX3 pins on the Arduino Giga. You might expect the code to use mp3 = UART(3, baudrate=9600), but it actually uses mp3 = UART(6, baudrate=9600). This might seem confusing, but it's correct. The TX3 and RX3 pins are associated with UART6 on the MicroPython firmware for Arduino Giga.
Detailed Instructions
Here’s instructions on how to run the above MicroPython code on Arduino with Thonny IDE:
- Make sure Thonny IDE is installed on your computer.
- Make sure MicroPython firmware is installed on your Arduino board.
- If you are new to Arduino with MicroPython, see the Getting Started with Arduino and MicroPython.
- Connect the Arduino board to the MP3 player module according to the provided diagram.
- Connect the Arduino board to your computer with a USB cable.
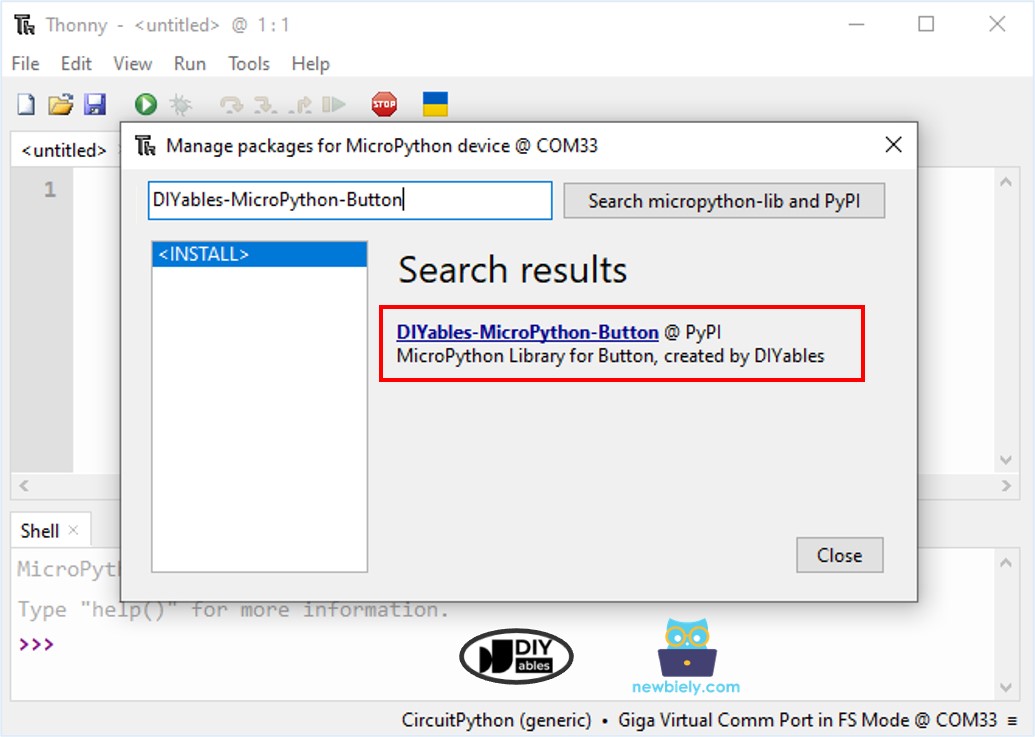
- Open Thonny IDE and go to Tools Options.
- Under the Interpreter tab, select MicroPython (generic) from the dropdown menu.
- Select the COM port corresponding to your Arduino board (e.g., COM33 on Windows or /dev/ttyACM0 on Linux).
- Copy the provided Arduino MicroPython code and paste it into Thonny's editor.
- Save the MicroPython code to your Arduino by:
- Clicking the Save button or pressing Ctrl+S.
- In the save dialog, choose MicroPython device and name the file main.py.
- Click the green Run button (or press F5) to execute the code.
- Enjoy the music

