Raspberry Pi Pico - MQ3 Alcohol Sensor
This tutorial shows you how to detect alcohol using a Raspberry Pi Pico and MQ3 alcohol sensor. This enables measurement of alcohol vapor concentrations in the air. In detail, we will learn:
- How to interface the MQ3 alcohol sensor with Raspberry Pi Pico
- How to code Raspberry Pi Pico to retrieve data from the MQ3 alcohol sensor
Hardware Preparation
| 1 | × | Raspberry Pi Pico W | |
| 1 | × | Raspberry Pi Pico Alternatively, | |
| 1 | × | Micro USB Cable | |
| 1 | × | MQ3 Alcohol Sensor | |
| 1 | × | Jumper Wires | |
| 1 | × | Breadboard | |
| 1 | × | Recommended: Screw Terminal Expansion Board for Raspberry Pi Pico |
Or you can buy the following kits:
| 1 | × | DIYables Sensor Kit (18 sensors/displays) |
Additionally, some of these links are for products from our own brand, DIYables .
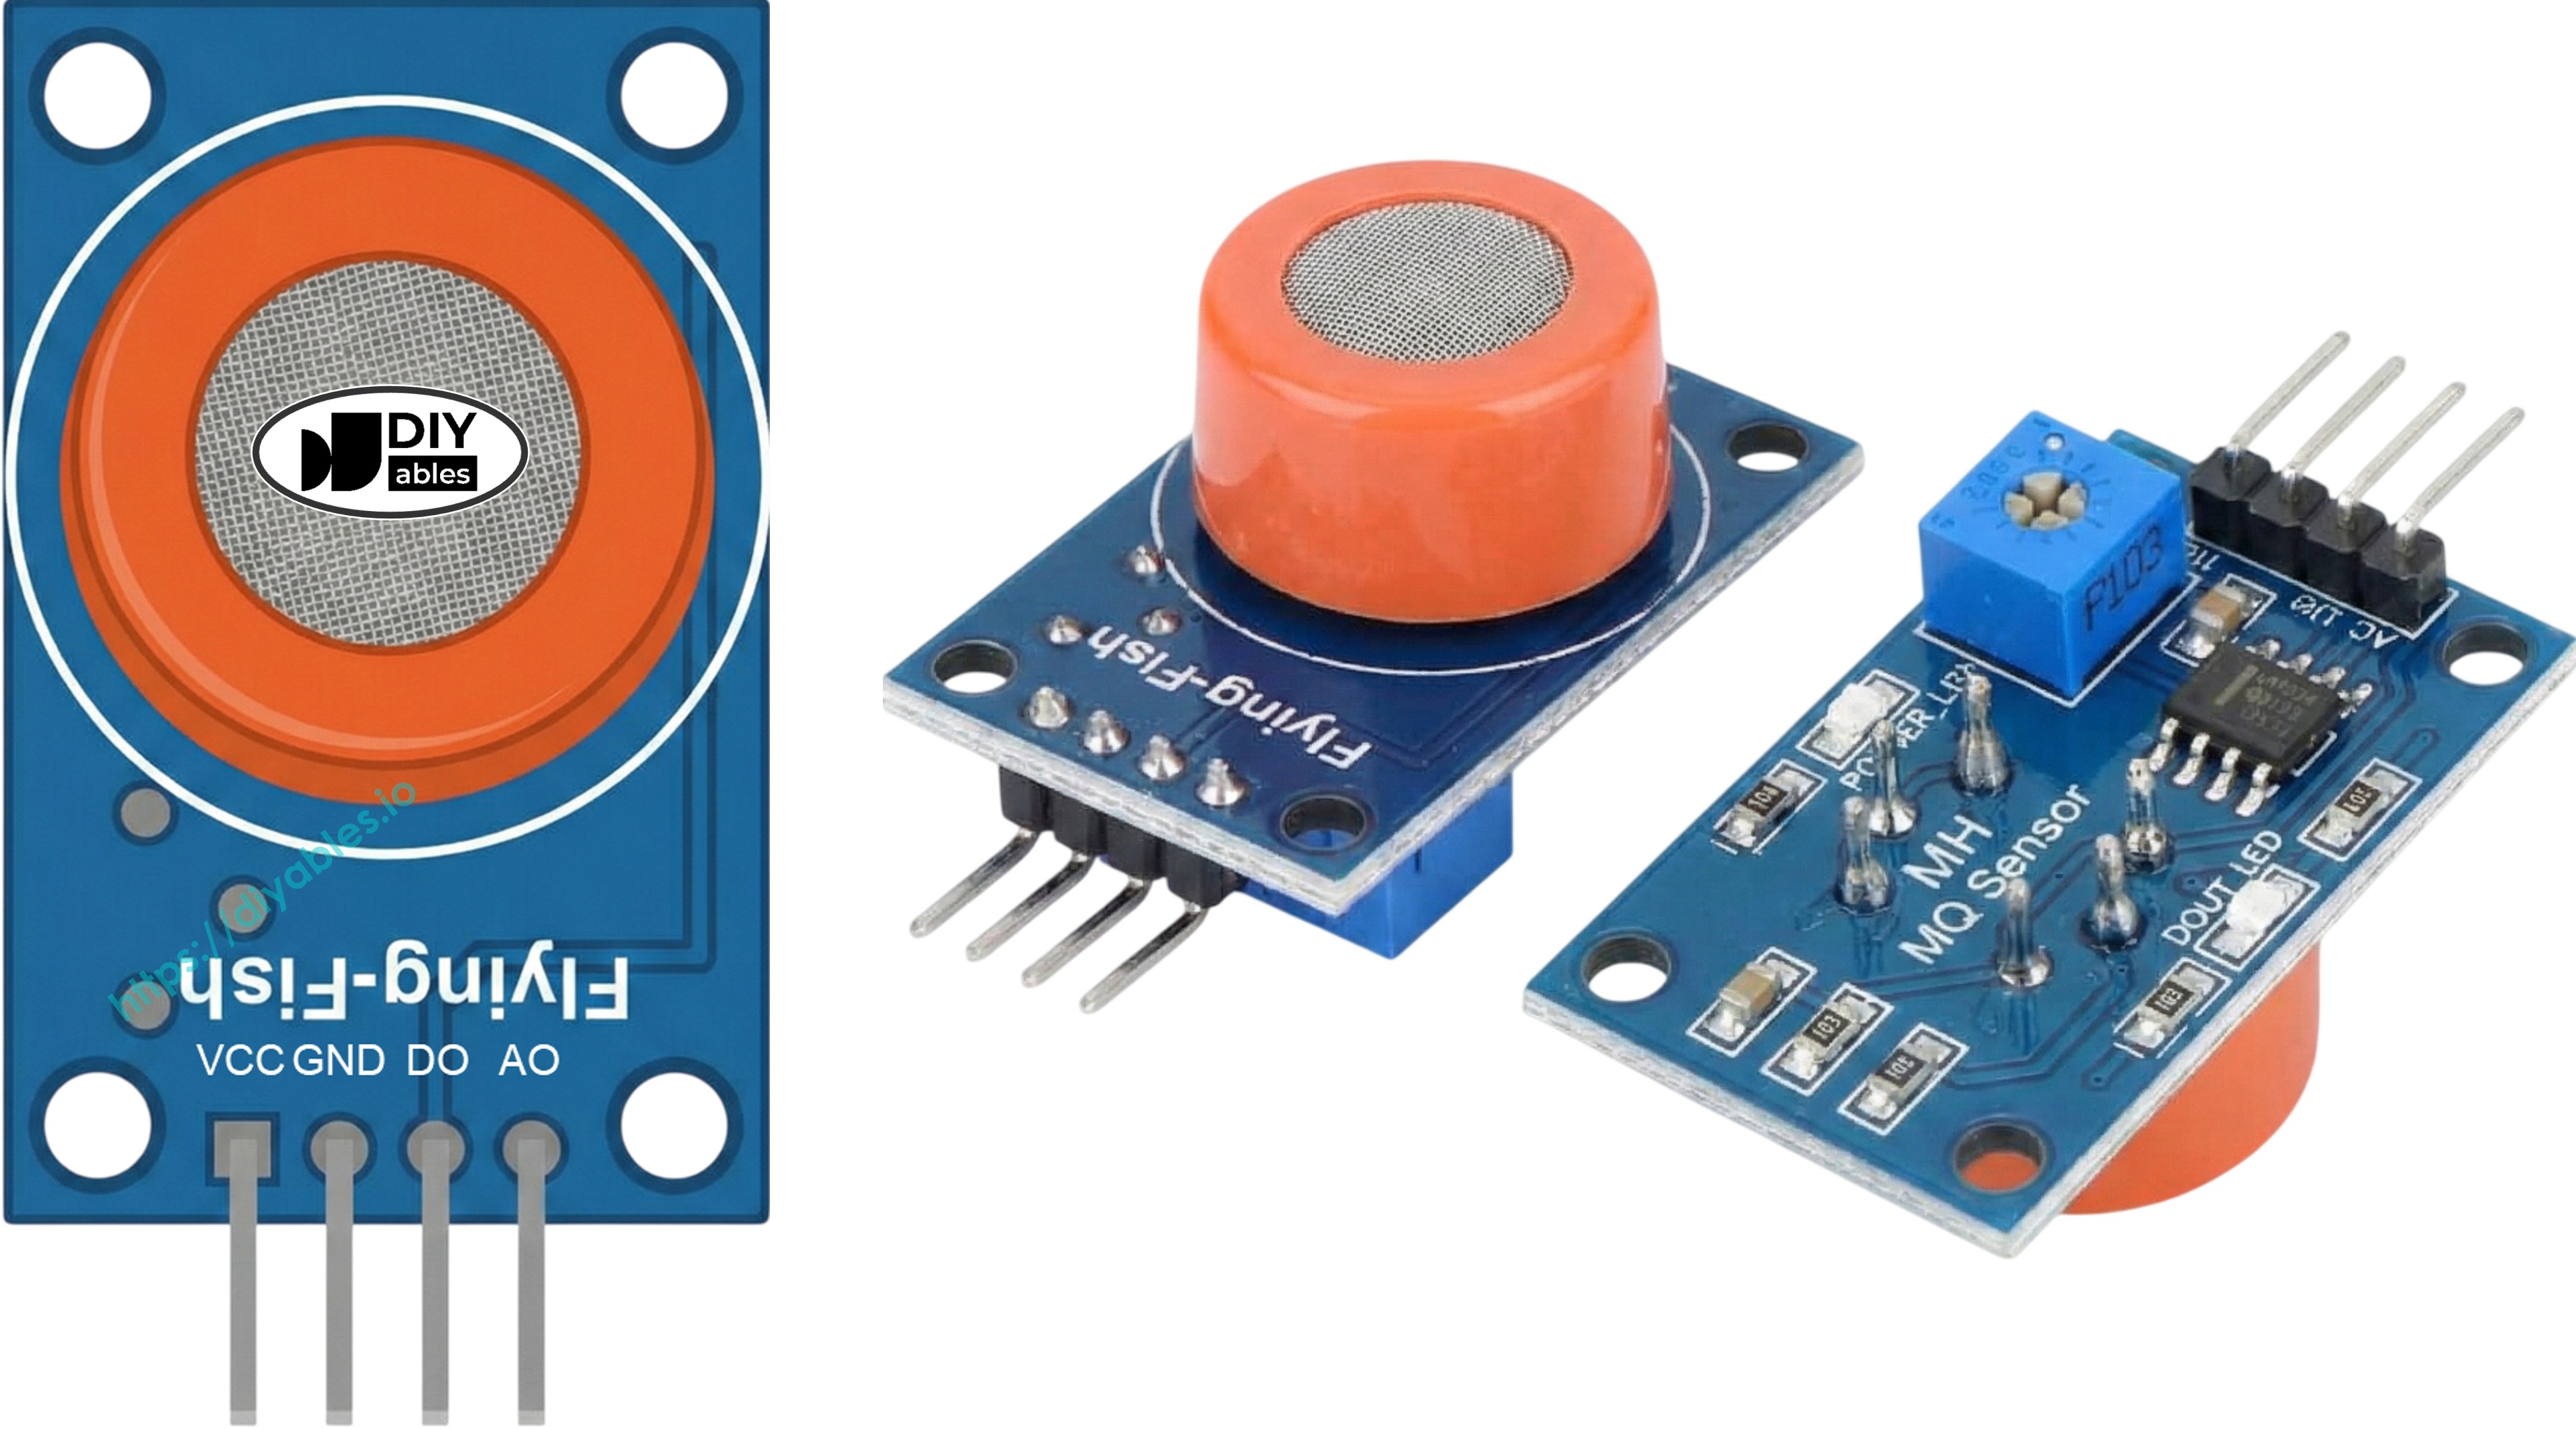
Overview of MQ3 Alcohol Sensor
The MQ3 alcohol sensor can detect alcohol vapor in the environment. It features a digital output pin and an analog output pin for transmitting signals.
The MQ3 sensor is commonly used for detecting alcohol in breathalyzer applications or monitoring alcohol levels in the air. This enables appropriate responses, such as activating an alarm or controlling ventilation equipment.
Pinout
The MQ3 alcohol sensor includes four pins.
- VCC pin: Connect this pin to VCC (5V).
- GND pin: Connect this pin to GND (0V).
- DO pin: This is a digital output pin. It shows LOW when alcohol is detected and HIGH when no alcohol is present. You can adjust the detection threshold using a built-in potentiometer.
- AO pin: This is an analog output pin. It provides a voltage that changes based on alcohol concentration. Higher alcohol levels increase the voltage, lower levels decrease it.
It includes two LED indicators as well.
- One PWR-LED indicator shows the power is on.
- One DO-LED indicator displays the alcohol status based on the DO pin state: it illuminates if alcohol is detected and turns off when no alcohol is present.
How It Works
Regarding the DO pin:
- The module features a potentiometer to adjust sensitivity to alcohol levels.
- When alcohol concentration exceeds the threshold, the sensor's output pin becomes LOW and the DO-LED indicator lights up.
- When alcohol concentration is below the threshold, the sensor's output pin becomes HIGH and the DO-LED indicator turns off.
For the AO pin:
- When alcohol concentration increases, the voltage rises.
- When alcohol concentration decreases, the voltage falls.
The potentiometer does not affect the value on the AO pin.
The MQ3 Sensor Warm-up
The MQ3 alcohol sensor requires a warm-up period before operation.
- If the sensor hasn't been used for over a month, warm it up for 24-48 hours before use to ensure reliable readings. If the sensor was used recently, it only requires 5-10 minutes to warm up. At first, the readings might be elevated, but they will decrease and become stable shortly.
To warm up the MQ3 sensor, connect its VCC and GND pins to a power supply or to the VCC and GND on a Raspberry Pi Pico, and leave it connected for the appropriate duration.
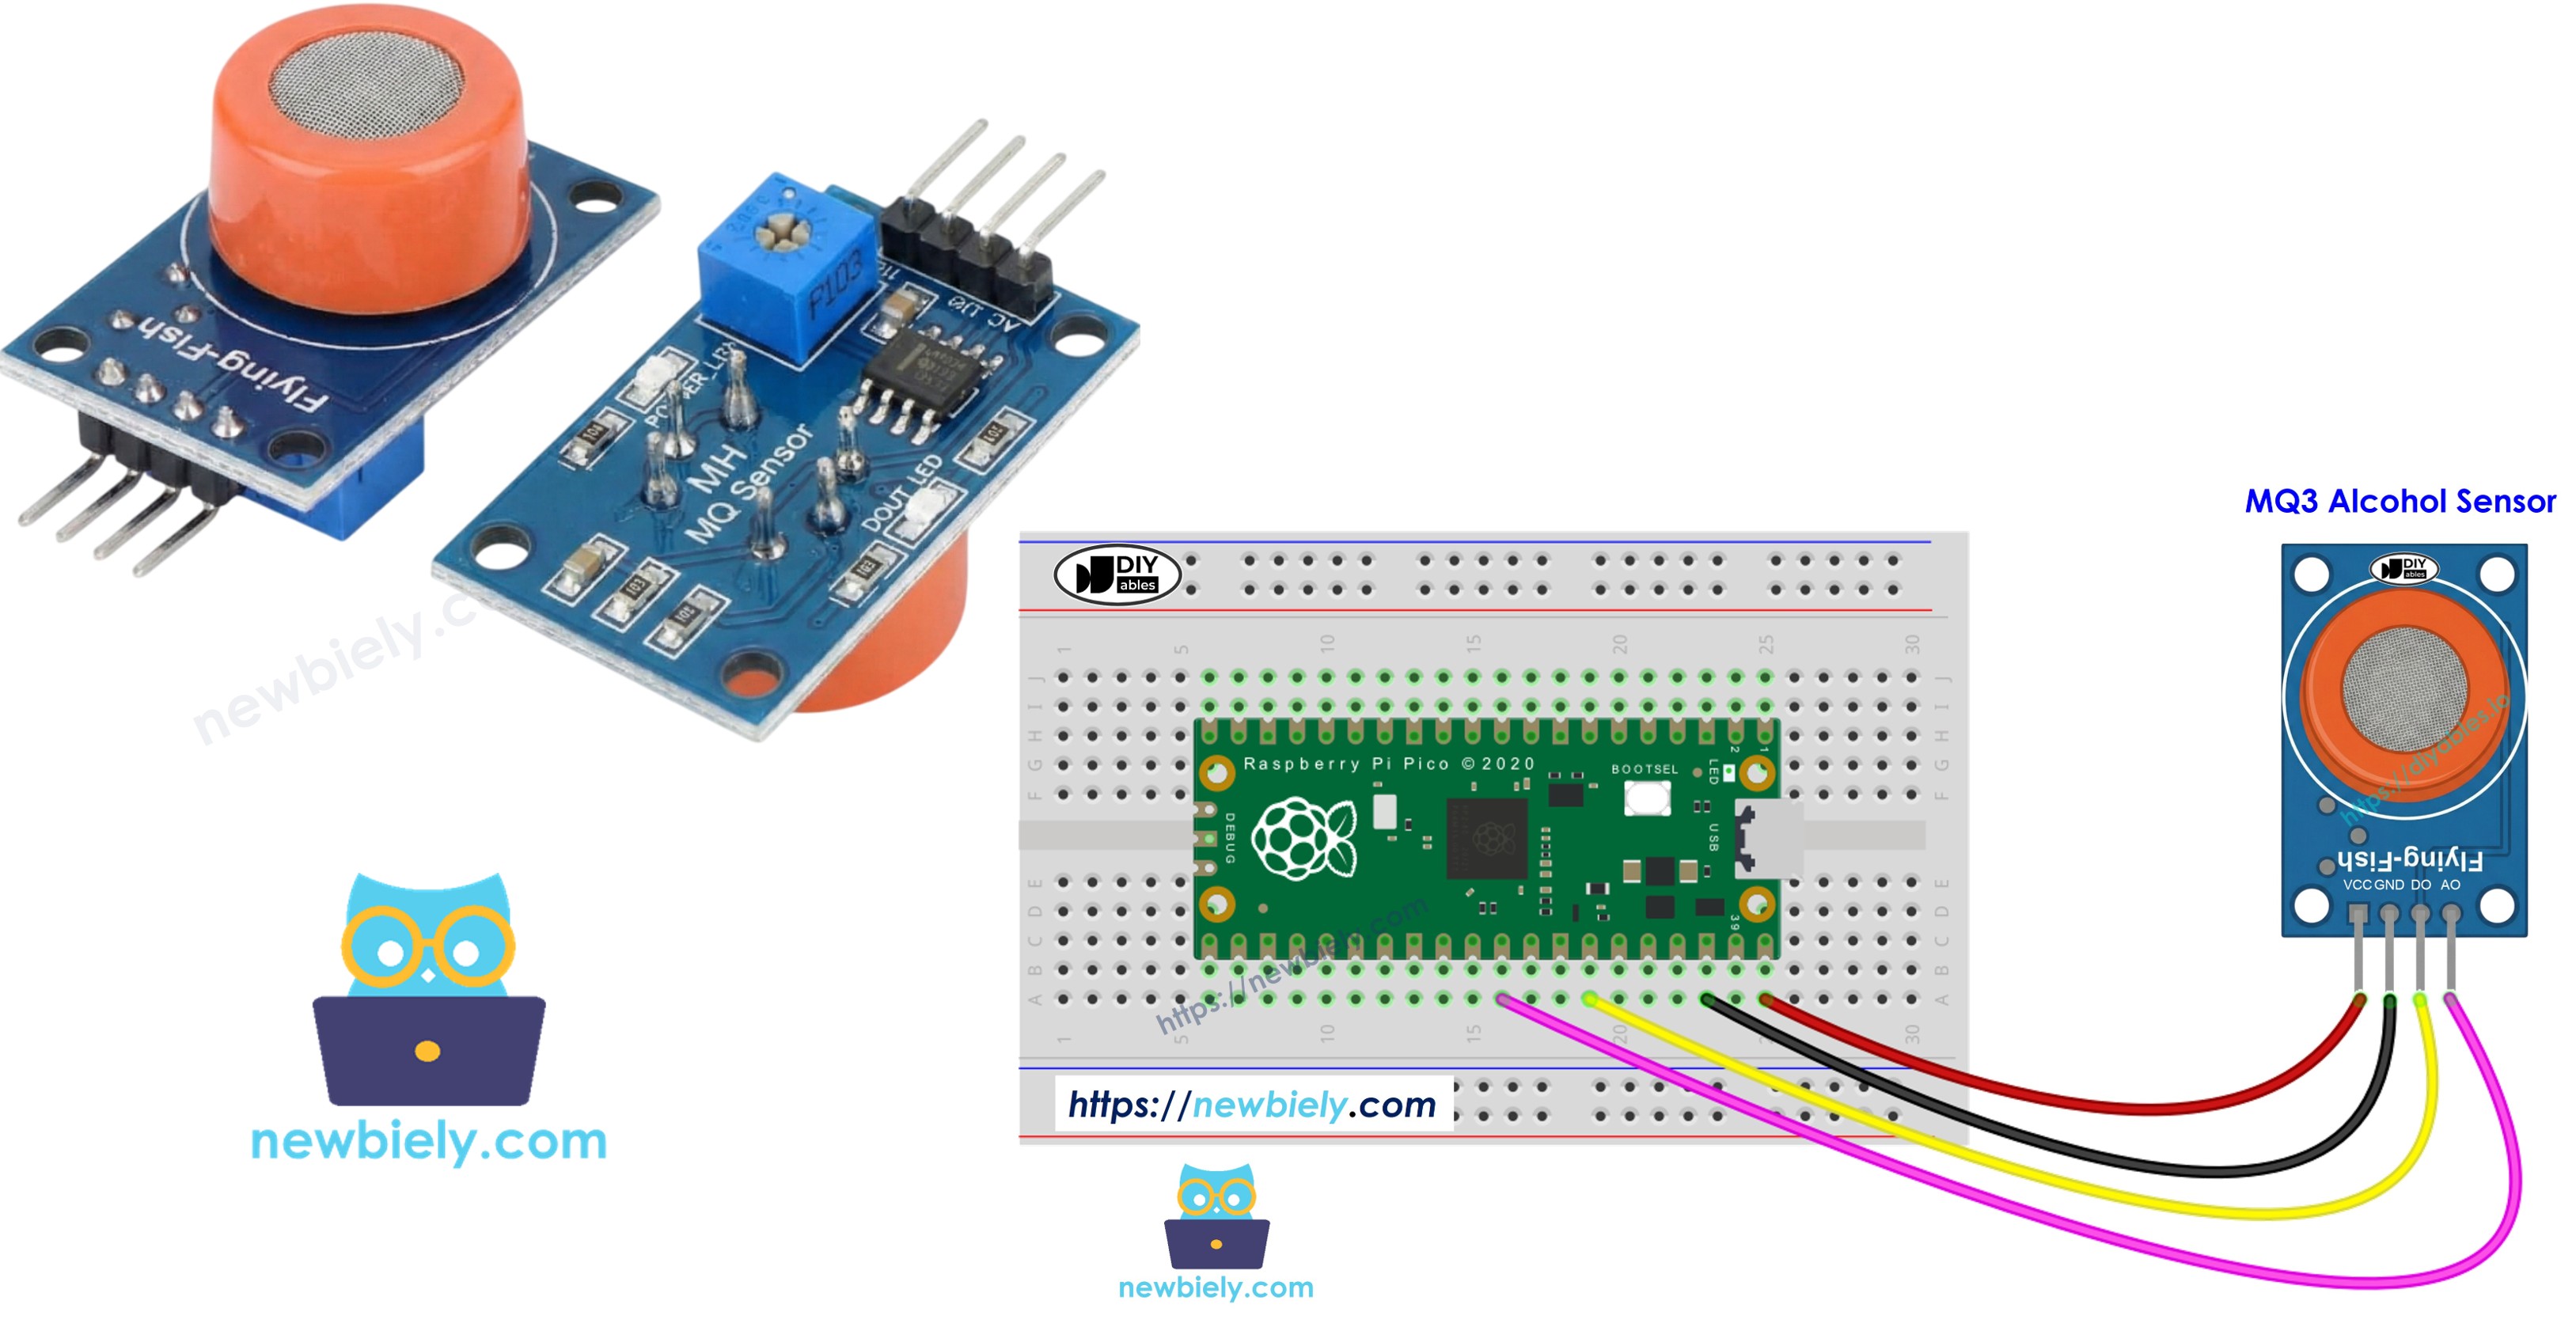
Wiring Diagram
The MQ3 alcohol sensor module offers two outputs. You can utilize one or both, depending on your application.
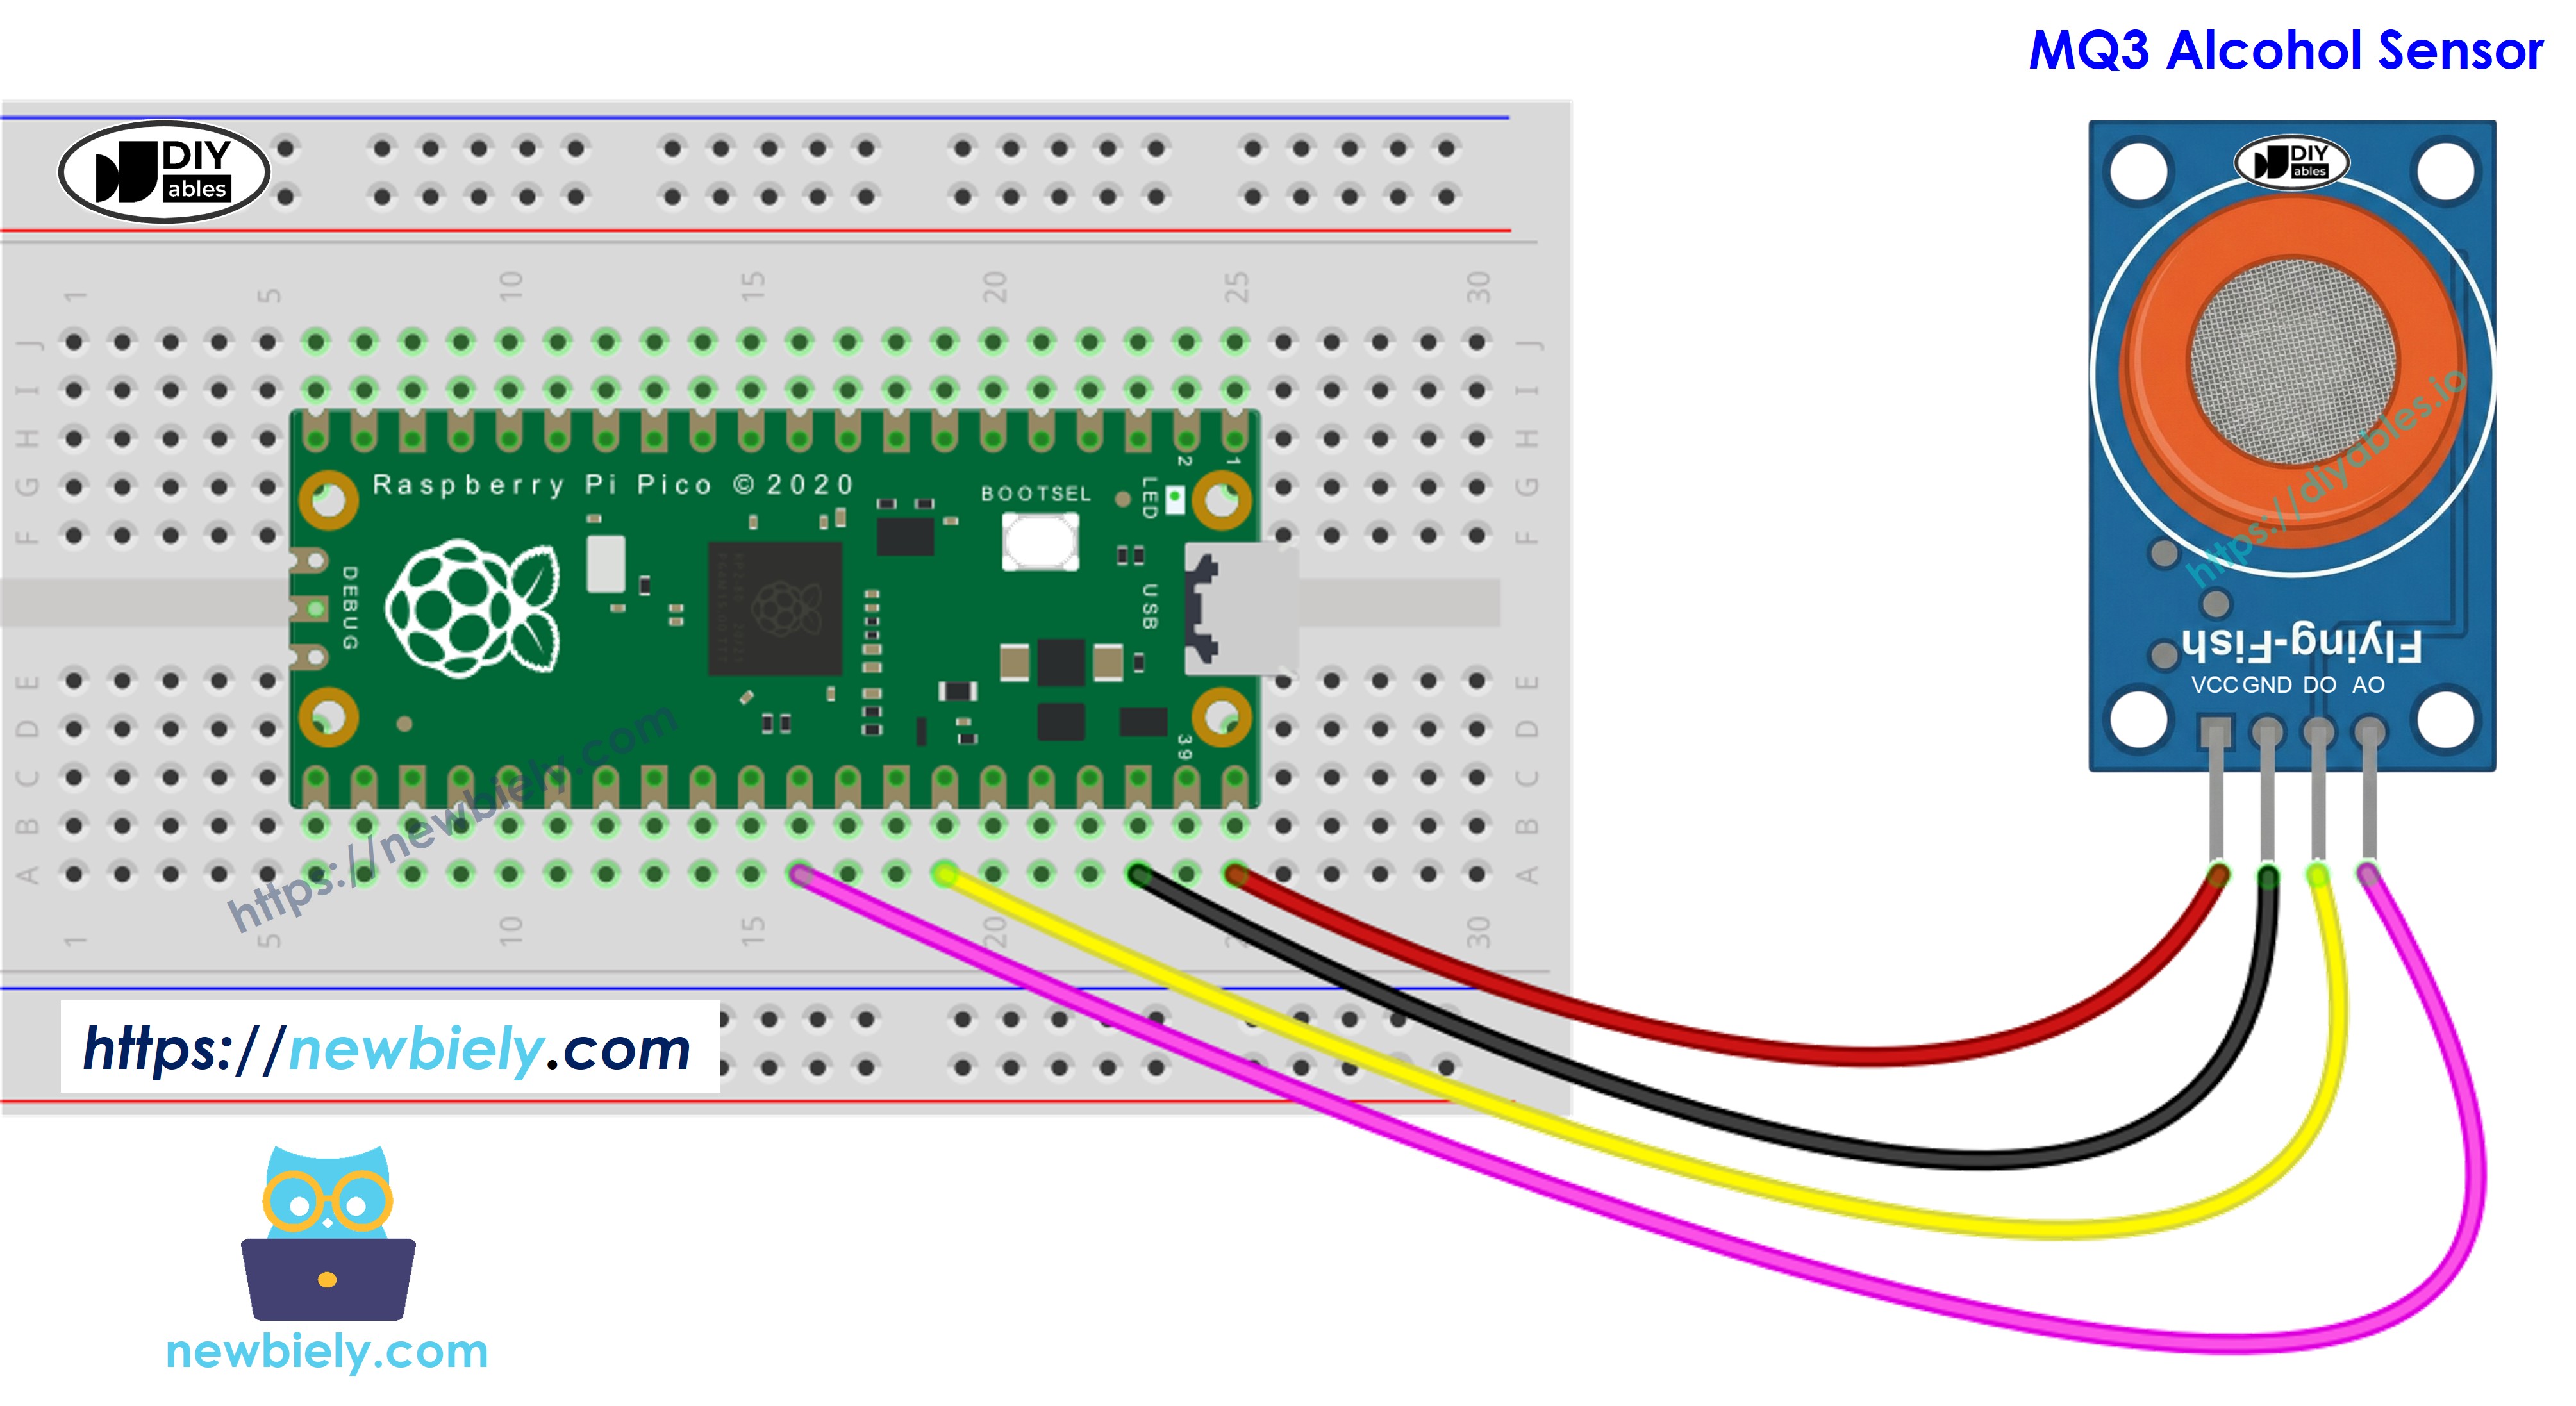
This image is created using Fritzing. Click to enlarge image
Raspberry Pi Pico Code - Read value from DO pin
Detailed Instructions
Please follow these instructions step by step:
- Ensure that Thonny IDE is installed on your computer.
- Ensure that MicroPython firmware is installed on your Raspberry Pi Pico.
- If this is your first time using a Raspberry Pico, refer to the Raspberry Pi Pico - Getting Started tutorial for detailed instructions.
- Connect the Raspberry Pi Pico to the MQ3 alcohol sensor according to the provided diagram.
- Connect the Raspberry Pi Pico to your computer using a USB cable.
- Launch the Thonny IDE on your computer.
- On Thonny IDE, select MicroPython (Raspberry Pi Pico) Interpreter by navigating to Tools Options.
- In the Interpreter tab, select MicroPython (Raspberry Pi Pico) from the drop-down menu.
- Ensure the correct port is selected. Thonny IDE should automatically detect the port, but you may need to select it manually (e.g., COM3 on Windows or /dev/ttyACM0 on Linux).
- Copy the above code and paste it to the Thonny IDE's editor.
- Save the script to your Raspberry Pi Pico by:
- Click the Save button, or use Ctrl+S keys.
- In the save dialog, you will see two sections: This computer and Raspberry Pi Pico. Select Raspberry Pi Pico
- Save the file as main.py
- Click the green Run button (or press F5) to run the script. The script will execute.
- Position the MQ3 alcohol sensor near alcohol vapor or exhaled breath.
- Check out the message in the Shell at the bottom of Thonny.
If the LED indicator stays on constantly or fails to illuminate, you can adjust the sensor's sensitivity by rotating the potentiometer.
Raspberry Pi Pico Code - Read value from AO pin
Detailed Instructions
- Copy the provided MicroPython code and paste it into Thonny's editor.
- Save the code to your Raspberry Pi Pico.
- Click the green Run button (or press F5) to execute the script.
- Position the MQ3 alcohol sensor near alcohol vapor or exhaled breath.
- Check out the message in the Shell at the bottom of Thonny.
You can use the values from DO or AO to determine if alcohol is present, to activate an alarm, or to control ventilation systems.
Raspberry Pi Pico Code - Alcohol Breathalyzer
This section shows how to create a simple breathalyzer using the MQ3 alcohol sensor and Raspberry Pi Pico.
Detailed Instructions
- Copy the provided MicroPython code and paste it into Thonny's editor.
- Save the code to your Raspberry Pi Pico.
- Click the green Run button (or press F5) to execute the script.
- Position the MQ3 alcohol sensor near alcohol vapor or exhaled breath.
- Check out the message in the Shell at the bottom of Thonny.
The output value on the console depends on:
- The concentration of alcohol vapor
- The distance between the sensor and the alcohol source
- How you adjust the potentiometer on the sensor module
NOTE THAT:
This code sets the threshold value to 400. You should calibrate this threshold by running the code, observing the output values, and adjusting it accordingly.