Arduino MKR WiFi 1010 - Code Structure
Understanding Arduino MKR WiFi 1010 code structure is the foundation for programming your board successfully! This beginner-friendly tutorial explains how Arduino MKR WiFi 1010 sketches are organized, making it easy to write, read, and debug your own programs.
Every Arduino MKR WiFi 1010 program follows a consistent structure with two essential functions - setup() and loop() - plus optional sections for libraries, constants, and variables. Master this structure and you'll be able to create any Arduino MKR WiFi 1010 project with confidence.
What You'll Learn:
- How Arduino MKR WiFi 1010 code is organized from top to bottom
- The purpose of setup() and loop() functions in Arduino MKR WiFi 1010
- When to use each section of Arduino MKR WiFi 1010 code
- Including libraries in your Arduino MKR WiFi 1010 projects
- Defining constants and declaring variables for Arduino MKR WiFi 1010
- Best practices for structuring Arduino MKR WiFi 1010 programs
- Common mistakes to avoid with Arduino MKR WiFi 1010 code
Why Code Structure Matters:
- Makes your Arduino MKR WiFi 1010 programs easier to understand
- Prevents common programming errors
- Helps you troubleshoot Arduino MKR WiFi 1010 issues faster
- Enables code reuse across different Arduino MKR WiFi 1010 projects
- Follows industry-standard Arduino programming conventions
- Simplifies collaboration with other Arduino MKR WiFi 1010 developers
To learn how to code for the Arduino MKR WiFi 1010, you need to understand its code structure. This guide explains how the code for the Arduino MKR WiFi 1010 is organized.
Hardware Preparation
| 1 | × | Arduino MKR WiFi 1010 | |
| 1 | × | Micro USB Cable | |
| 1 | × | Optionally, DC Power Jack | |
| 1 | × | Breadboard | |
| 1 | × | Jumper Wires |
Or you can buy the following kits:
| 1 | × | DIYables Sensor Kit (18 sensors/displays) |
Additionally, some of these links are for products from our own brand, DIYables .
Understanding Arduino MKR WiFi 1010 Code Structure
An Arduino MKR WiFi 1010 sketch (program) follows the same organization as standard Arduino code. Every sketch contains two mandatory functions that work together to control your board's behavior:
Think of your Arduino MKR WiFi 1010 program like a recipe:
- Setup: Gathering ingredients and preheating the oven (runs once)
- Loop: Cooking, tasting, and adjusting (repeats continuously)
This simple two-part structure makes Arduino MKR WiFi 1010 programming intuitive and powerful.
The Setup() Function
Purpose: Initialize your Arduino MKR WiFi 1010 and prepare it for operation.
When It Runs:
- Executes immediately when Arduino MKR WiFi 1010 powers on
- Runs once when you press the reset button
- Runs only ONE TIME per power cycle
Common Uses for Arduino MKR WiFi 1010:
- Initialize Serial communication: Serial.begin(9600);
- Configure pin modes: pinMode(LED_BUILTIN, OUTPUT);
- Initialize WiFi connection and settings
- Set up sensors and modules (LCD, servo, sensors)
- Define initial variable values
- Load configuration from storage
Example: Think of setup() as the Arduino MKR WiFi 1010's "wake-up routine" - everything needed before starting the main work.
The Loop() Function
Purpose: Contains the main logic that your Arduino MKR WiFi 1010 executes continuously.
When It Runs:
- Starts immediately after setup() completes
- Repeats forever (millions of times during operation)
- Each complete execution is called one "iteration" or "cycle"
Common Uses for Arduino MKR WiFi 1010:
- Read sensor values continuously
- Check button states and respond to inputs
- Send WiFi data periodically
- Update displays (LCD, LED patterns)
- Control motors, servos, and actuators
- Monitor conditions and trigger actions
Performance Note: The Arduino MKR WiFi 1010 executes loop() very quickly - thousands of times per second! Use delay() when you need to slow down execution.
Example: Think of loop() as the Arduino MKR WiFi 1010's "heartbeat" - it runs continuously, checking sensors and controlling outputs.
Example
Detailed Instructions
New to Arduino MKR WiFi 1010? Complete our Getting Started with Arduino MKR WiFi 1010 tutorial first to set up your development environment.
Step 1: Hardware Setup
- Plug your Arduino MKR WiFi 1010 into your computer's USB port using the Micro USB cable
- Wait for your computer to recognize the device
Step 2: Configure Arduino IDE
- Launch the Arduino IDE on your computer
- Select the Arduino MKR WiFi 1010 board from Tools > Board menu
- Select the correct COM port from Tools > Port menu
Step 3: Upload Example Code
- Copy the simple setup/loop example code from above
- Paste it into a new Arduino IDE sketch
- Click the Upload button (right arrow icon)
- Wait for "Done uploading" message
Step 4: Observe Results
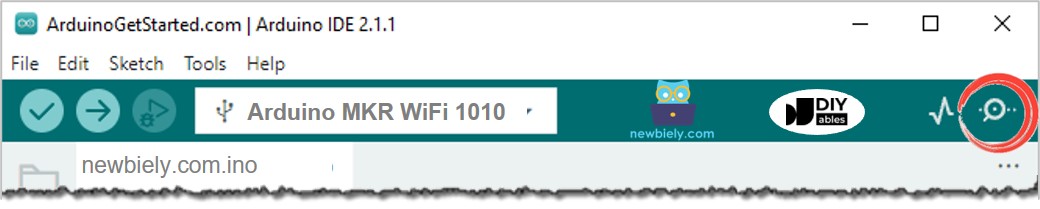
- Click the Serial Monitor icon (magnifying glass) in the top-right corner
- Set baud rate to 9600 in the Serial Monitor
- Watch the output appear:
What You're Seeing: Notice "setup code" prints only once at the top, while "loop code" repeats continuously. This demonstrates the fundamental Arduino MKR WiFi 1010 code structure - setup runs once, loop runs forever.
※ NOTE THAT:
When coding for an Arduino MKR WiFi 1010, you must include both the setup() and loop() functions. If you leave them out, an error will occur.
Additional Code Sections for Arduino MKR WiFi 1010
Besides the mandatory setup() and loop() functions, Arduino MKR WiFi 1010 sketches typically include these optional sections that appear before the setup function:
1. Block Comments
Purpose: Document your Arduino MKR WiFi 1010 code with information about the project.
Common Uses:
- Author name and contact information
- Project description and purpose
- Wiring instructions and pin connections
- License information (MIT, GPL, etc.)
- Version history and change log
Note: The Arduino MKR WiFi 1010 ignores all comment content - it's purely for human readers. Learn more about block comments.
2. Libraries Inclusion
Purpose: Add external code libraries to extend Arduino MKR WiFi 1010 capabilities.
Common Arduino MKR WiFi 1010 Libraries:
- #include <WiFiNINA.h> - WiFi connectivity
- #include <Servo.h> - Servo motor control
- #include <LiquidCrystal.h> - LCD display control
- #include <SPI.h> - SPI communication
Libraries must be installed before use (via Library Manager). Learn more about libraries inclusion.
3. Constant Definition
Purpose: Define fixed values that won't change during Arduino MKR WiFi 1010 execution.
Benefits:
- Makes code more readable: MAX_COUNT instead of 180
- Easy to update - change value in one place
- Compiler optimization - no memory used
- Prevents accidental modification
Example: #define MAX_COUNT 180 - defines a constant named MAX_COUNT with value 180. Learn more about constant definition.
4. Global Variables Declaration
Purpose: Create variables accessible from both setup() and loop() in your Arduino MKR WiFi 1010 program.
Common Uses:
- Object instances: Servo servo; or LiquidCrystal lcd(3, 4, 5, 6, 7, 8);
- Counters and flags: int loop_count = 0;
- Sensor readings storage
- State tracking variables
Important: Variables declared inside setup() or loop() are "local" - only accessible within that function.
Complete Arduino MKR WiFi 1010 Code Structure Example
Here's a comprehensive example showing all sections working together:
What This Code Demonstrates:
- Libraries: Includes Servo and LiquidCrystal for controlling hardware
- Constant: MAX_COUNT defines the maximum counter value
- Global Variables: servo, lcd, and loop_count are accessible everywhere
- Setup: Initializes Serial, LCD, and Servo once
- Loop: Increments counter, updates display, and moves servo repeatedly
Detailed Instructions
Step 1: Upload Complete Example
- Copy the complete code example from above (with libraries, constants, and variables)
- Paste it into Arduino IDE
- Click Upload to send code to your Arduino MKR WiFi 1010
- Wait for "Done uploading" confirmation
Step 2: View Serial Monitor Output
- Open the Serial Monitor (magnifying glass icon)
- Set baud rate to 9600
- Observe the counter incrementing:
Learning Focus: Don't worry about understanding every line of code yet! The goal here is to recognize the overall structure of Arduino MKR WiFi 1010 programs. Each specific command and function will be explained in detail in future tutorials.
Key Takeaway: All Arduino MKR WiFi 1010 programs follow this consistent pattern - libraries at top, then constants/variables, then setup(), then loop(). This structure makes code predictable and easy to navigate.
Troubleshooting
Problem 1: "setup() or loop() function not found"
Symptoms: Compilation error saying setup() or loop() is missing.
Solutions:
- Every Arduino MKR WiFi 1010 sketch MUST have both functions
- Check for typos - must be exactly void setup() and void loop()
- Ensure curly braces {} are properly paired
- Verify functions are outside any classes or namespaces
- Even if empty, include both: void setup() {} and void loop() {}
Problem 2: "Library not found" Error
Symptoms: Compilation fails with "No such file or directory" for #include statement.
Solutions:
- Install missing library via Tools > Manage Libraries in Arduino IDE
- Search for library name exactly as shown in error message
- Verify library is compatible with Arduino MKR WiFi 1010
- Check library name spelling and capitalization
- Some libraries require other libraries as dependencies - install those too
- Restart Arduino IDE after installing libraries
Problem 3: Global Variables Not Accessible in Functions
Symptoms: Variable works in setup() but shows "not declared" error in loop().
Solutions:
- Declare variable before setup() and loop(), at the top of sketch
- Don't re-declare variable inside functions - just use it
- Check variable name spelling matches exactly (case-sensitive)
- Ensure variable isn't shadowed by local variable with same name
Problem 4: Constants Won't Change Value
Symptoms: Trying to modify #define constant causes compilation error.
Solutions:
- Constants defined with #define cannot be changed - that's their purpose!
- Use regular variables if value needs to change: int MAX_COUNT = 180;
- Consider using const int MAX_COUNT = 180; for variables that shouldn't change
- To update constant, edit the #define line and re-upload code
Problem 5: Setup Code Runs More Than Once
Symptoms: Initialization code executes repeatedly instead of once.
Solutions:
- Code is likely in loop() instead of setup() - verify placement
- Check if code is calling setup() from within loop() (don't do this!)
- Pressing reset button or power cycling causes setup() to run again (normal behavior)
- Ensure no infinite loops in setup() that call setup() recursively
Problem 6: Loop Code Runs Too Fast or Too Slow
Symptoms: Arduino MKR WiFi 1010 executes loop iterations faster/slower than expected.
Solutions:
- Add delay(1000); at end of loop() to slow down (1000ms = 1 second)
- Remove unnecessary delays if loop runs too slowly
- Arduino MKR WiFi 1010 runs at 48MHz - loop() executes thousands of times per second without delay
- Use millis() for non-blocking timing instead of delay() for responsive programs
Problem 7: Servo/LCD/Sensor Not Working Despite Code Upload
Symptoms: Code uploads successfully but hardware doesn't respond.
Solutions:
- Verify hardware wiring matches pin numbers in code
- Check power supply - Arduino MKR WiFi 1010 USB may not provide enough current
- Ensure libraries are installed correctly
- Test individual components with simpler example code first
- Verify pin numbers match your Arduino MKR WiFi 1010 connections (3, 4, 5, 6, 7, 8, 9)
Problem 8: "Expected ';' before '}' token"
Symptoms: Compilation error about missing semicolons.
Solutions:
- Check previous line - missing semicolon at end
- Verify all statements end with ; except function declarations
- Count curly braces - ensure every { has matching }
- Comments don't need semicolons: // comment is fine
- Function calls need semicolons: Serial.begin(9600);
Challenge Yourself
Now that you understand Arduino MKR WiFi 1010 code structure, try these exercises:
1. Blink LED with Proper Structure
Create complete sketch with all sections:
Notice how constants make the code more readable!
2. WiFi Connection Counter
Track WiFi connection attempts in global variable:
3. Multi-Sensor Monitoring
Organize complex project with clear structure:
4. State Machine Pattern
Use global variables to track Arduino MKR WiFi 1010 state:
5. Function Organization
Add custom functions after loop():
6. Configuration Section
Group all settings at top:
7. Memory-Efficient Constants
Compare #define vs variables:
For Arduino MKR WiFi 1010 projects with many constants, #define saves memory!
8. Documentation Template
Create reusable header:
Best Practices for Arduino MKR WiFi 1010 Code Structure:
- Always include descriptive comments at the top
- Group related constants together
- Initialize all hardware in setup(), not loop()
- Use meaningful variable names: temperatureCelsius not temp
- Keep loop() clean - move complex logic to separate functions
- Declare global variables only when truly needed across functions
- Test each section independently before combining
- Use consistent indentation (2 or 4 spaces)
- Add blank lines between logical sections for readability
- Comment complex algorithms, not obvious statements