Arduino MKR WiFi 1010 - Ultrasonic Sensor
Measure distances without contact! The HC-SR04 ultrasonic sensor enables your Arduino MKR WiFi 1010 to detect objects and measure distances up to 4 meters using sound waves. This tutorial teaches you how to connect an HC-SR04 ultrasonic sensor to your Arduino MKR WiFi 1010 and program it to measure accurate distances.
What You'll Learn:
- Connecting HC-SR04 ultrasonic sensor to Arduino MKR WiFi 1010 digital pins
- Programming Arduino MKR WiFi 1010 to trigger ultrasonic pulses
- Using Arduino MKR WiFi 1010 to measure echo timing
- Converting Arduino MKR WiFi 1010 timing data to distance measurements
- Filtering noise from Arduino MKR WiFi 1010 distance readings
- Building obstacle detection with Arduino MKR WiFi 1010 ultrasonic sensor
- Understanding sound wave physics with Arduino MKR WiFi 1010
- Creating proximity alerts using Arduino MKR WiFi 1010 distance sensing
Real-World Applications:
- Parking assistants: Arduino MKR WiFi 1010 measuring distance to obstacles
- Obstacle avoidance: Arduino MKR WiFi 1010 robots detecting walls and objects
- Level monitoring: Arduino MKR WiFi 1010 with ultrasonic measuring tank levels
- Automatic doors: Arduino MKR WiFi 1010 detecting approaching people
- Distance alarms: Arduino MKR WiFi 1010 triggering alerts at specific ranges
- Object counters: Arduino MKR WiFi 1010 counting items passing by
- Height measurement: Arduino MKR WiFi 1010 and ultrasonic determining object size
- Security systems: Arduino MKR WiFi 1010 detecting motion and presence
Hardware Preparation
| 1 | × | Arduino MKR WiFi 1010 | |
| 1 | × | Micro USB Cable | |
| 1 | × | Ultrasonic Sensor | |
| 1 | × | Breadboard | |
| 1 | × | Jumper Wires | |
| 1 | × | Optionally, DC Power Jack |
Or you can buy the following kits:
| 1 | × | DIYables Sensor Kit (18 sensors/displays) |
Additionally, some of these links are for products from our own brand, DIYables .
Overview of Ultrasonic Sensor
What is the HC-SR04 Ultrasonic Sensor?
The HC-SR04 is a popular ultrasonic distance sensor that uses sound waves beyond human hearing range to measure distances accurately and without physical contact.
How Ultrasonic Sensing Works:
Key Specifications:
- Operating voltage: 5V DC
- Measuring range: 2cm to 400cm (0.8" to 157")
- Accuracy: ±3mm (±0.12")
- Ultrasound frequency: 40kHz (inaudible to humans)
- Measuring angle: 15° cone
- Trigger pulse: 10µs minimum
- Echo pulse: 150µs to 25ms (proportional to distance)
- Current consumption: 15mA typical
Distance Calculation:
Pinout
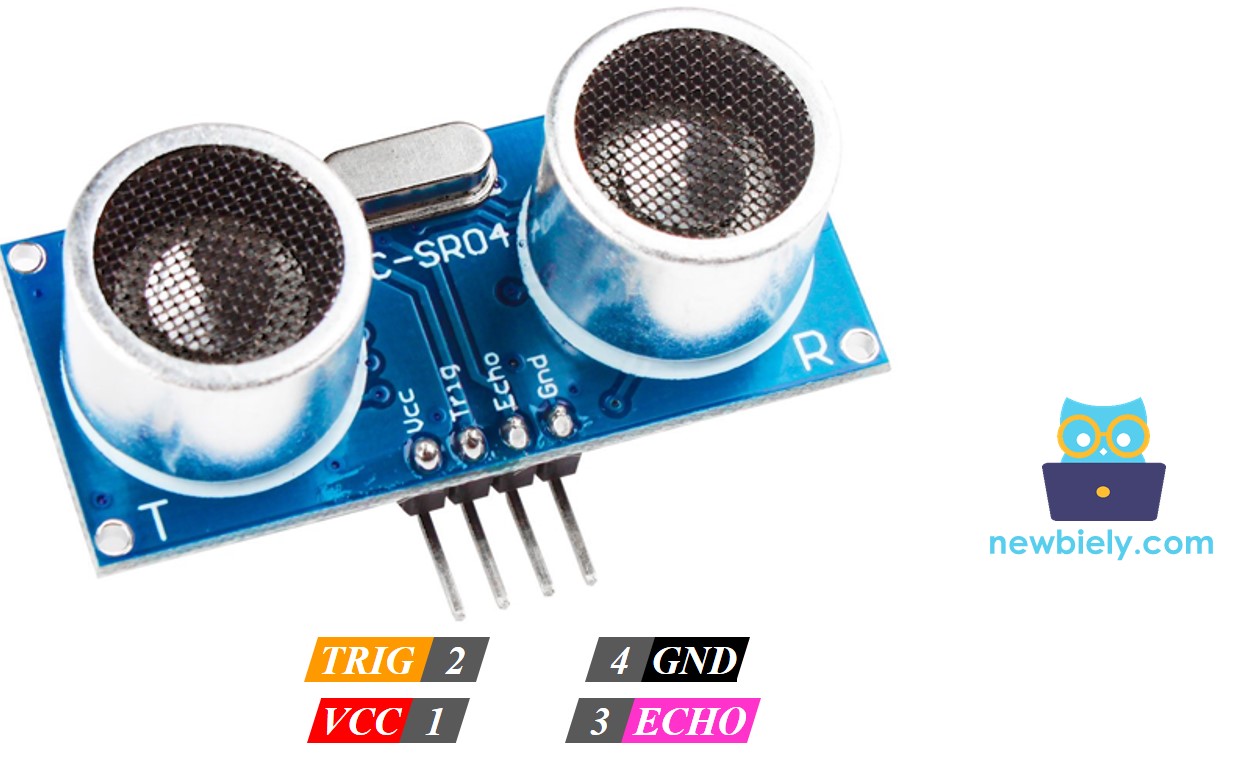
The HC-SR04 ultrasonic sensor has four pins:
Power Pins:
- VCC pin: Connect to 5V power supply
- Sensor requires 5V for proper operation
- Current consumption: ~15mA
- GND pin: Connect to ground (0V)
- Common ground with Arduino
- TRIG pin (Trigger Input): Arduino → Sensor
- Receives start signal from Arduino
- Arduino sends 10µs HIGH pulse to trigger measurement
- Connect to any Arduino digital pin (e.g., D11)
- 5V tolerant input
- ECHO pin (Echo Output): Sensor → Arduino
- Sends distance data back to Arduino
- Outputs HIGH pulse with duration proportional to distance
- Arduino measures pulse width using pulseIn()
- Connect to any Arduino digital pin (e.g., D10)
- 5V output (safe for Arduino MKR WiFi 1010 3.3V inputs)
- Minimum distance: 2cm (closer objects not detected)
- Maximum distance: 400cm (beyond this returns 0 or timeout)
- Detection angle: 15° cone (narrow beam)
- Best results: Hard, flat surfaces perpendicular to sensor
- Poor results: Soft, angled, or sound-absorbing materials
Signal Pins:
Operating Sequence:
Range Limitations:
How Ultrasonic Sensor Works:
For detailed operation principles, see how an ultrasonic sensor works.
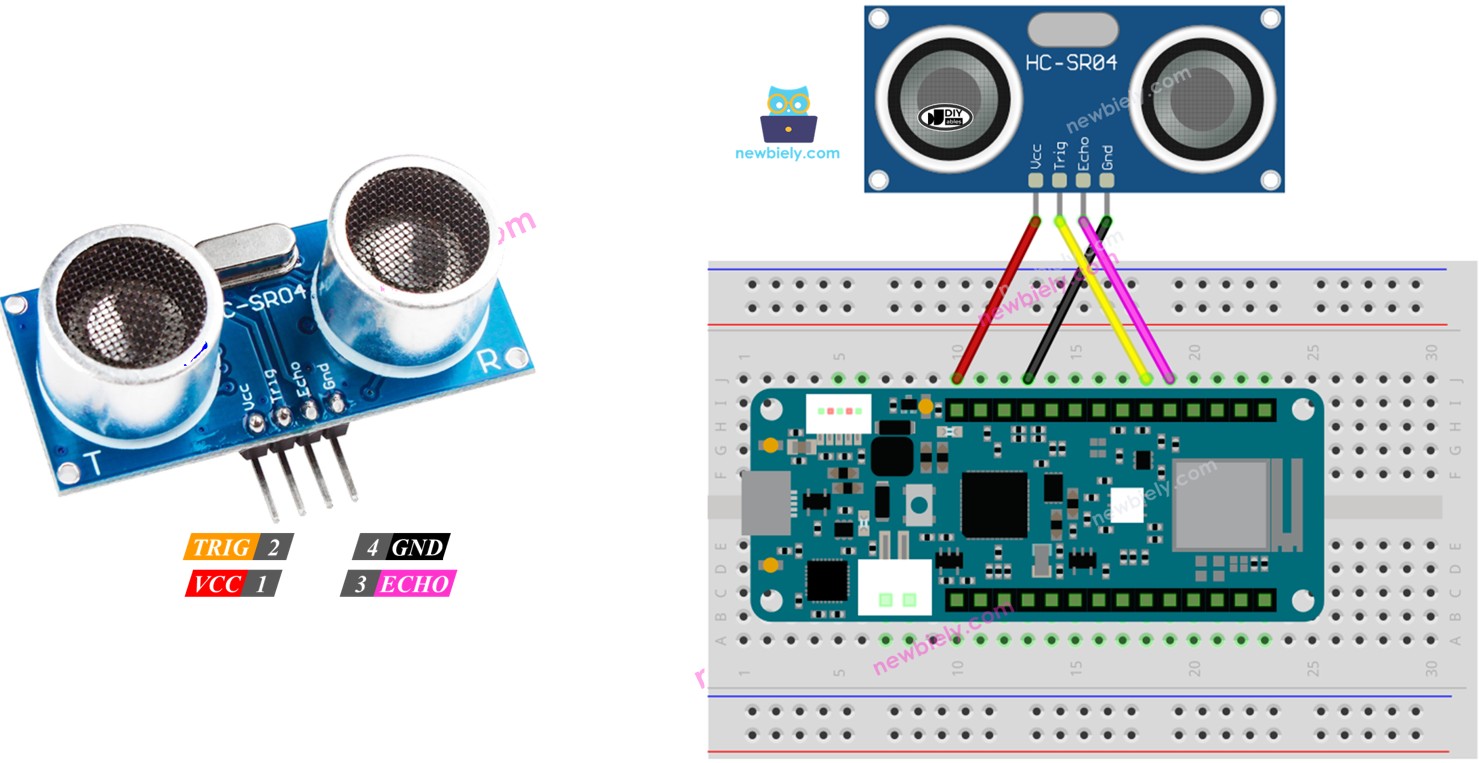
Wiring Diagram between Ultrasonic Sensor and Arduino MKR WiFi 1010
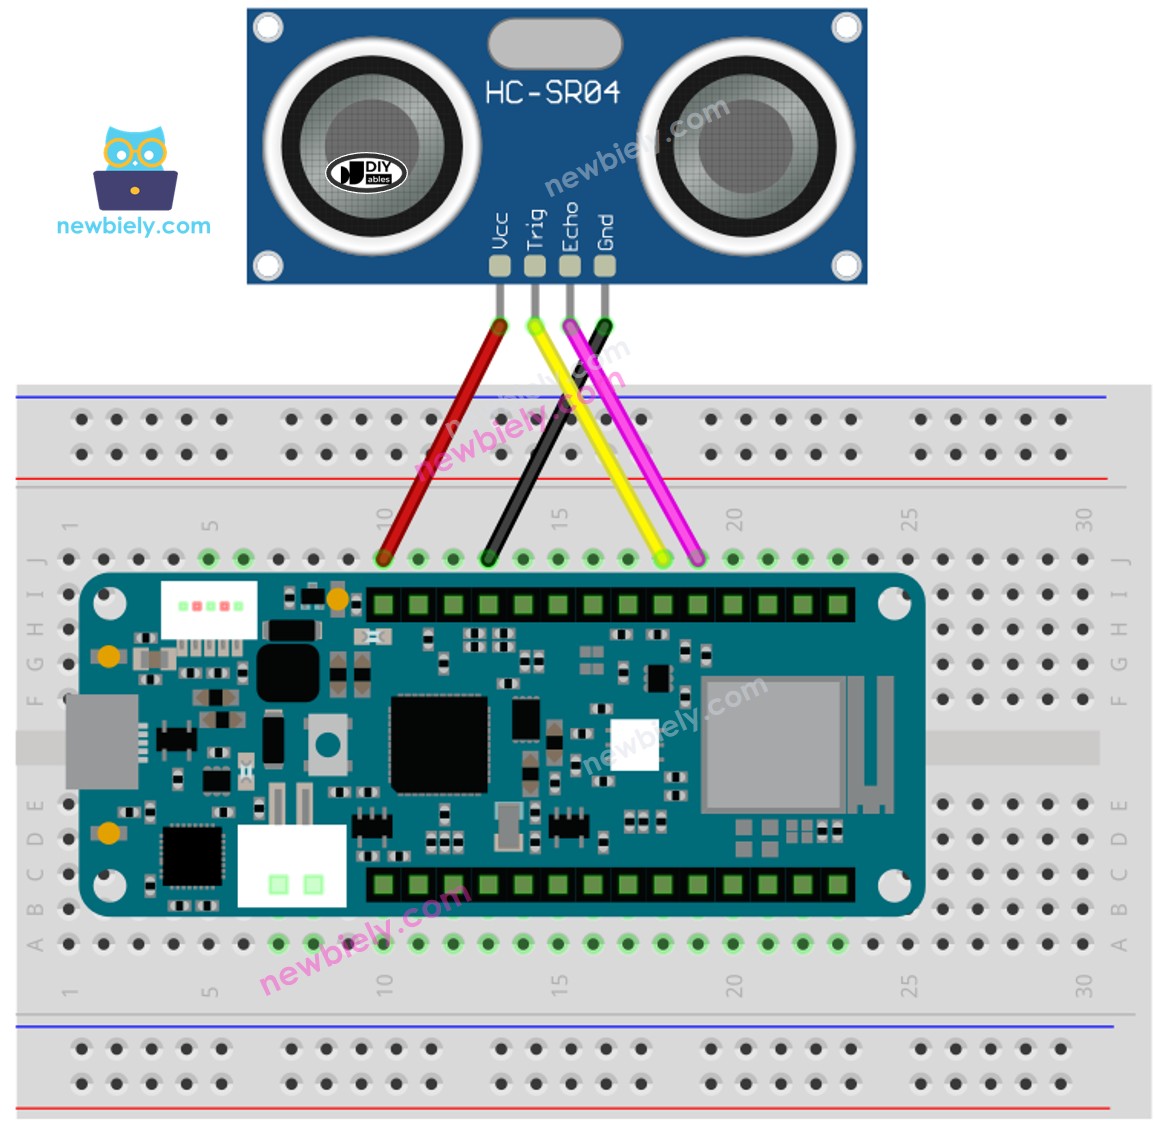
This image is created using Fritzing. Click to enlarge image
Wiring Table
| Ultrasonic Sensor | Arduino MKR WiFi 1010 |
|---|---|
| VCC | 5V |
| GND | GND |
| TRIG | D11 |
| ECHO | D10 |
How To Program Ultrasonic Sensor
- To create a 10-microsecond pulse on a pin of the Arduino MKR WiFi 1010, use the digitalWrite() function followed by the delayMicroseconds() function. For example, you can use pin D11.
- It checks how long the pulse lasts (in microseconds) on a pin of the Arduino MKR WiFi 1010 using the pulseIn() function. For example, use it on pin D10.
- Find distance in centimeters:
Arduino MKR WiFi 1010 Code
Detailed Instructions
New to Arduino MKR WiFi 1010? Complete our Getting Started with Arduino MKR WiFi 1010 tutorial first to set up your development environment.
- Connect the components to the Arduino MKR WiFi 1010 board as depicted in the diagram
- Plug your Arduino MKR WiFi 1010 into your computer's USB port
- Launch the Arduino IDE on your computer
- Select the Arduino MKR WiFi 1010 board and its COM port
- Copy the code above and paste it into the Arduino IDE
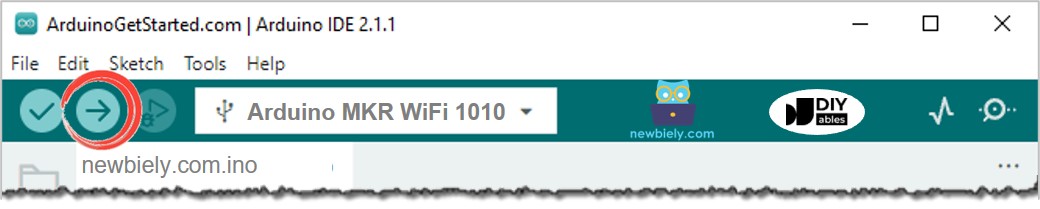
- Click the Upload button to compile and upload the code
- Open the Serial Monitor
- Place your hand at different distances in front of the ultrasonic sensor
- Watch the distance measurements update in real-time
Line-by-line Code Explanation
The Arduino MKR WiFi 1010 code shown above has a simple explanation for each line. Please read the notes in the code.
Troubleshooting
Problem: Sensor always reads 0 cm or no reading
- Check 5V power: HC-SR04 requires 5V. Connect VCC to 5V pin, not 3.3V
- Verify wiring: Confirm TRIG and ECHO pins are connected correctly
- Test distance: Move object to 5-50cm range (minimum 2cm, but more reliable at 5cm+)
- Check timeout: Add timeout to pulseIn() to prevent infinite wait:
Problem: Readings are erratic or jump around
- Use median filter: Take multiple readings and use the middle value:
- Add delay: Wait 60ms between measurements to let sensor settle
- Check physical obstacles: Ensure clear line of sight to target surface
Problem: Maximum reading is only 50-100 cm instead of 400 cm
- Surface reflection: Hard, flat surfaces perpendicular to sensor work best
- Soft materials: Curtains, carpet, clothing absorb sound waves poorly
- Angled surfaces: Sound bounces away instead of returning to sensor
- Small objects: May be outside the 15° detection cone
- Test with cardboard: Use a large, flat cardboard sheet at different distances
Problem: Getting readings even when no object is present
- Add minimum threshold: Ignore distances below 2cm and above 400cm:
- Electromagnetic interference: Keep away from motors, relays during measurement
Problem: Distance readings affected by temperature
- Temperature compensation: Sound speed changes with temperature (343 m/s at 20°C):
How to Filter Noise from Distance Measurements of Ultrasonic Sensor
Check out this guide on how to remove unwanted errors from the distance readings of an ultrasonic sensor
Challenge Extensions
Ready to take your ultrasonic sensor project to the next level? Try these challenges:
Challenge 1: Parking Assistant with LED Indicators
Create a parking distance system with LED feedback:
Challenge 2: Proximity Buzzer
Add a buzzer that beeps faster as objects get closer:
Challenge 3: Servo Angle Indicator
Use a servo motor to show distance visually (like a gauge):
Challenge 4: LCD Distance Display with Bar Graph
Show distance with text and a visual bar graph on LCD:
Challenge 5: Object Counter
Count objects passing in front of sensor (like people or products):
Challenge 6: Water Level Monitor
Mount sensor above water tank to measure fill level:
Challenge 7: Multi-Sensor Array
Use multiple sensors for wide-area coverage or 2D mapping:
Challenge 8: Speed Measurement
Calculate speed of moving objects:
Challenge 9: Automatic Light Controller
Turn lights on when someone approaches:
Challenge 10: Distance Data Logger
Log measurements to SD card with timestamps: