Arduino MKR WiFi 1010 - Control Fan
Learn to control DC cooling fans with your Arduino MKR WiFi 1010! Master ON/OFF control in this tutorial, then graduate to advanced variable speed control. Perfect for temperature-regulated cooling systems, ventilation projects, and thermal management applications.
What You'll Learn:
- Relay-based fan control for high-voltage DC fans (12V/5V)
- Safe wiring practices when dealing with external power supplies
- Programming timed fan operations
- Foundation for temperature-activated cooling systems
Applications:
- Cooling systems: Temperature-triggered fan activation (pair with DHT22 sensor)
- Ventilation: Timed bathroom/kitchen exhaust control
- Electronics cooling: Protect overheating components in enclosures
- Air circulation: Automated greenhouse or grow box ventilation
- 3D printer cooling: Part cooling fan control
Tutorial Scope: This guide covers ON/OFF switching. For variable speed control (PWM-based), see our advanced fan speed control tutorial.
Hardware Preparation
| 1 | × | Arduino MKR WiFi 1010 | |
| 1 | × | Micro USB Cable | |
| 1 | × | Relay | |
| 1 | × | 12V DC Cooling Fan | |
| 1 | × | Alternatively, 5V DC Cooling Fan | |
| 1 | × | 12V Power Adapter | |
| 1 | × | Breadboard | |
| 1 | × | Jumper Wires | |
| 1 | × | Optionally, DC Power Jack |
Or you can buy the following kits:
| 1 | × | DIYables Sensor Kit (18 sensors/displays) |
Additionally, some of these links are for products from our own brand, DIYables .
Overview of DC Fan
Pinout
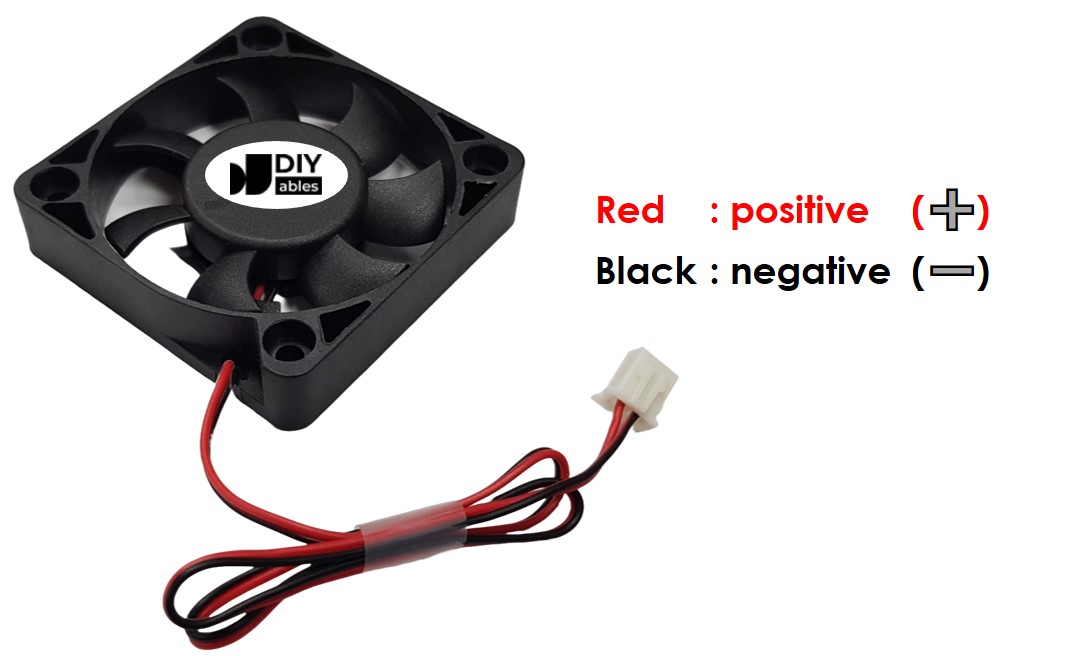
A DC fan normally has two pins:
- Negative pin (black): Connect this to the negative wire of the DC power supply.
- Positive pin (red): Connect this to the positive wire of the DC power supply.
The DC power supply's voltage must be the same as what the fan needs. In this lesson, we will use fans that operate on 12VDC and 5VDC.
How to Control Fan
- When a DC fan gets power from a 12V/5V power supply, it runs at full speed.
- When a DC fan gets a 12V/5V PWM signal, you can control its speed.
This guide shows you how to use the Arduino MKR WiFi 1010 to turn a fan on and off. Another guide will explain how to control the fan’s speed.
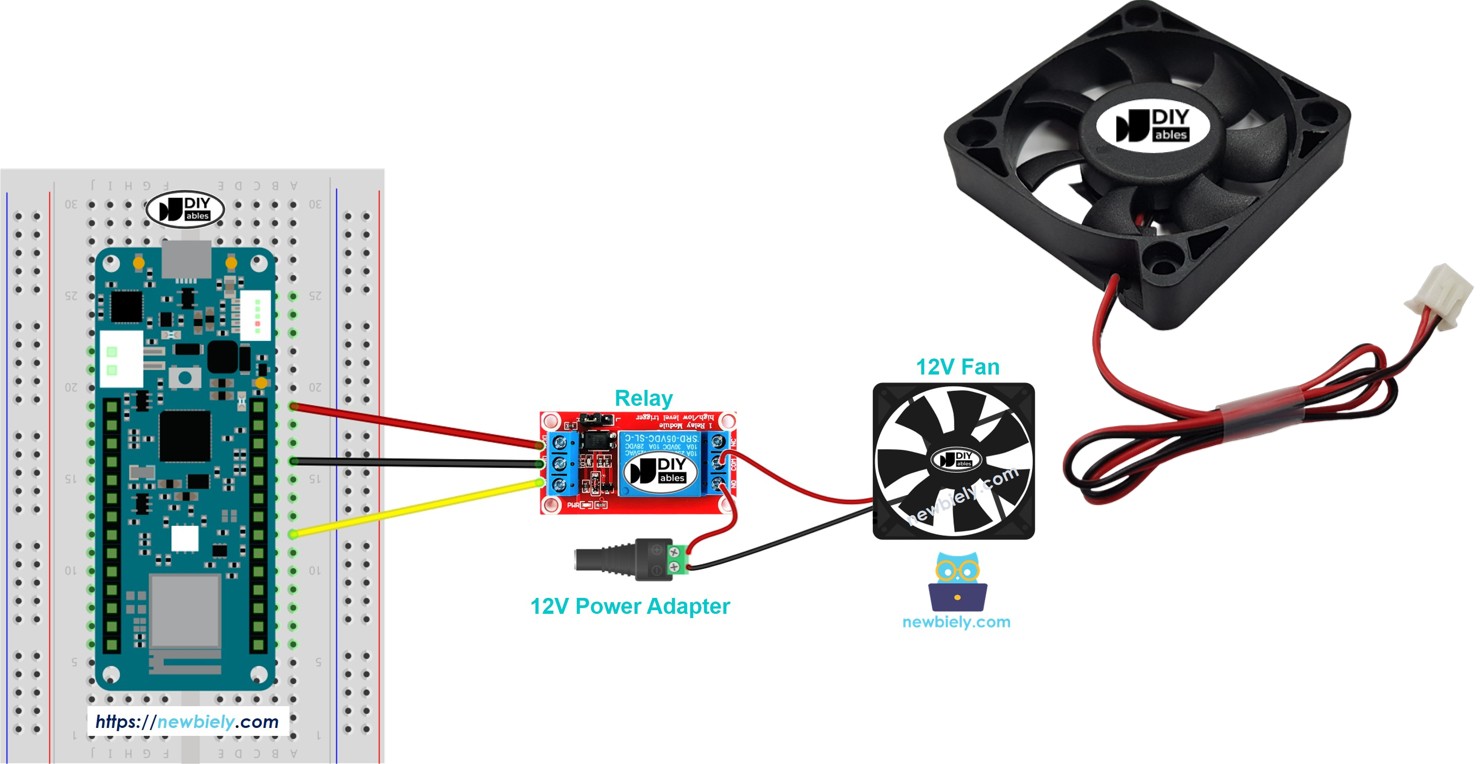
Since the fan uses high voltage, you cannot hook it up directly to the Arduino MKR WiFi 1010. Instead, you need to connect the fan to the Arduino through a relay. We have detailed guides about relays—including wiring, operation, and programming—in our Arduino MKR WiFi 1010 - Relay tutorial.
Wiring Diagram
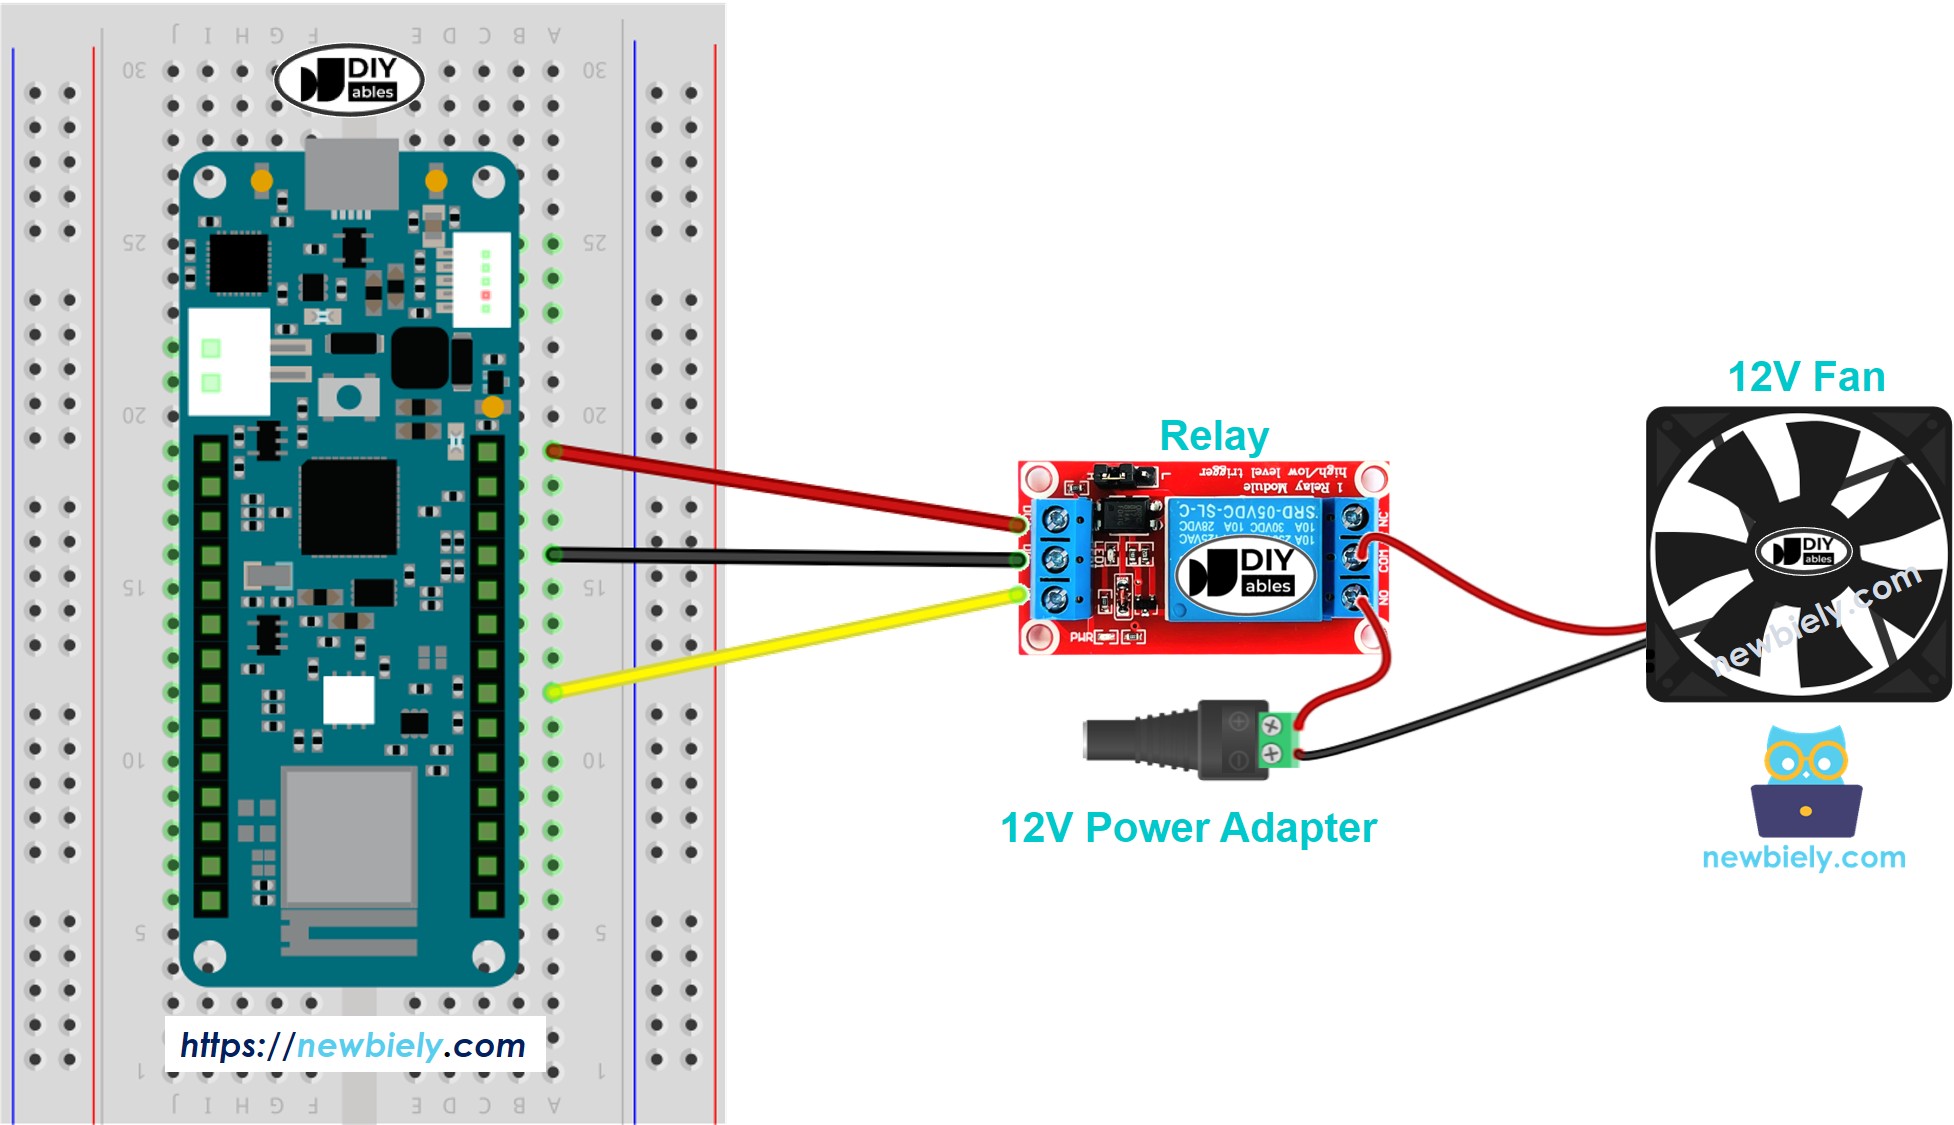
This image is created using Fritzing. Click to enlarge image
Remember, if you use a fan that runs on 5V, you should use a 5V power adapter.
Arduino MKR WiFi 1010 Code
The code below switches the fan on and off every 10 seconds.
Detailed Instructions
New to Arduino MKR WiFi 1010? Complete our Getting Started with Arduino MKR WiFi 1010 tutorial first to set up your development environment.
- Connect the components to the Arduino MKR WiFi 1010 board as depicted in the diagram
- Plug your Arduino MKR WiFi 1010 into your computer's USB port
- Launch the Arduino IDE on your computer
- Select the Arduino MKR WiFi 1010 board and its COM port
- Copy the code above and paste it into the Arduino IDE
- Click the Upload button in the Arduino IDE to compile and send the code to your Arduino MKR WiFi 1010 board.
- Check the fan's status.
Line-by-line Code Explanation
The Arduino MKR WiFi 1010 code above explains every line. Please read all the comments in the code!