Arduino MKR WiFi 1010 - Soil Moisture Sensor
Introduction to Arduino MKR WiFi 1010 Soil Moisture Sensing
Welcome to this comprehensive guide on using the Arduino MKR WiFi 1010 to measure soil humidity! Whether you are building an automated herb garden or a sophisticated IoT farm monitor, the Arduino MKR WiFi 1010 paired with a soil moisture sensor is a perfect starting point.
In this tutorial, we will focus on using the Arduino MKR WiFi 1010 to retrieve and interpret data from a soil moisture sensor. We'll even explore why choosing the right type of soil moisture sensor for your Arduino MKR WiFi 1010 project is critical for long-term reliability.
What You'll Learn:
- The differences between capacitive and resistive soil moisture sensors for your Arduino MKR WiFi 1010.
- How to correctly wire a soil moisture sensor to the Arduino MKR WiFi 1010.
- Reading analog values from the soil moisture sensor on your Arduino MKR WiFi 1010.
- Calibrating the soil moisture sensor to detect "wet" and "dry" states accurately.
- Programming the Arduino MKR WiFi 1010 to make decisions based on the soil moisture sensor output.
Real-World Applications:
- Automated Irrigation: Use Arduino MKR WiFi 1010 and a soil moisture sensor to trigger watering.
- Greenhouse Monitoring: Remote data logging with Arduino MKR WiFi 1010 and soil moisture sensor units.
- Smart Home Gardening: An easy Arduino MKR WiFi 1010 and soil moisture sensor project for beginners.
- IoT Agricultural Nodes: Deploying Arduino MKR WiFi 1010 and soil moisture sensor arrays across large fields.
Hardware Preparation
| 1 | × | Arduino MKR WiFi 1010 | |
| 1 | × | Micro USB Cable | |
| 1 | × | Capacitive Soil Moisture Sensor | |
| 1 | × | Breadboard | |
| 1 | × | Jumper Wires | |
| 1 | × | Optionally, DC Power Jack |
Or you can buy the following kits:
| 1 | × | DIYables Sensor Kit (18 sensors/displays) |
Additionally, some of these links are for products from our own brand, DIYables .
Buy Note: Many soil moisture sensors available in the market are unreliable, regardless of their version. We strongly recommend buying the sensor with TLC555I Chip from the DIYables brand using the link provided above. We tested it, and it worked reliably.
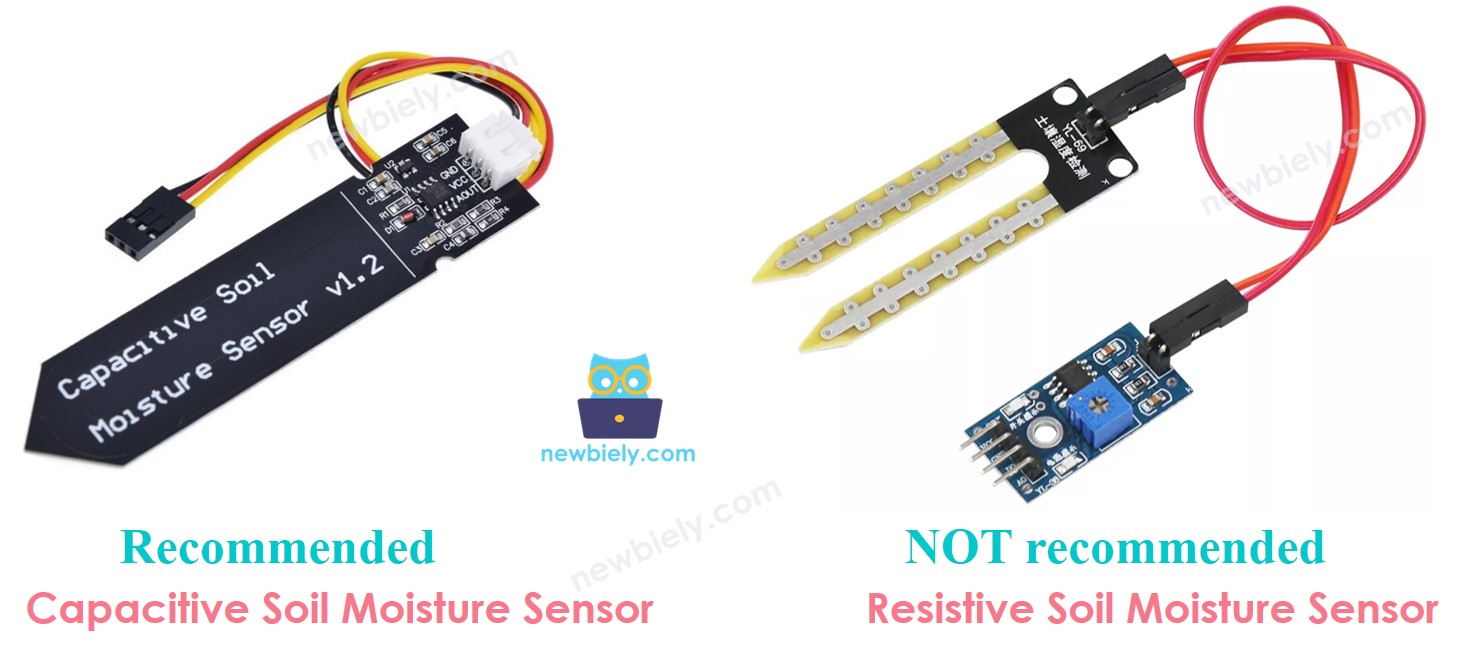
Overview of Soil Moisture Sensors
When choosing a soil moisture sensor for your Arduino MKR WiFi 1010, you'll typically encounter two main technologies. Understanding these will help you build a better Arduino MKR WiFi 1010 project.
| Feature | Resistive Sensor | Capacitive Sensor |
|---|---|---|
| Measurement Method | Electrical conductivity | Electrical charge capacity |
| Durability | Low (corrodes quickly) | High (lasts much longer) |
| Cost | Very Low | Low to Moderate |
| Reliability | Decreases over time | Maintains accuracy |
We strongly recommend using a capacitive soil moisture sensor with your Arduino MKR WiFi 1010.
Why Capacitive is Better
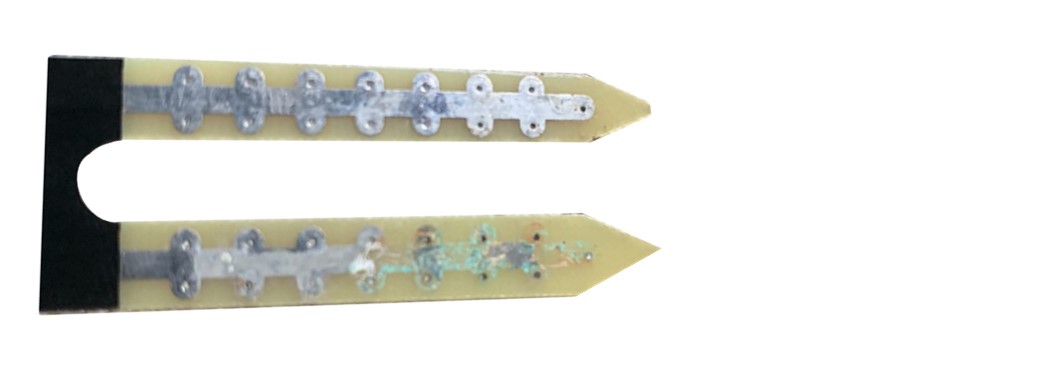
Resistive sensors work by passing a current through the soil between two probes. This leads to electrolysis, which causes the metal on the probes to rust and disappear within days or weeks.
In contrast, a capacitive soil moisture sensor for the Arduino MKR WiFi 1010 has its electronic components protected by a coating. It doesn't pass current through the soil, meaning it can live in wet dirt for a very long time without damage.
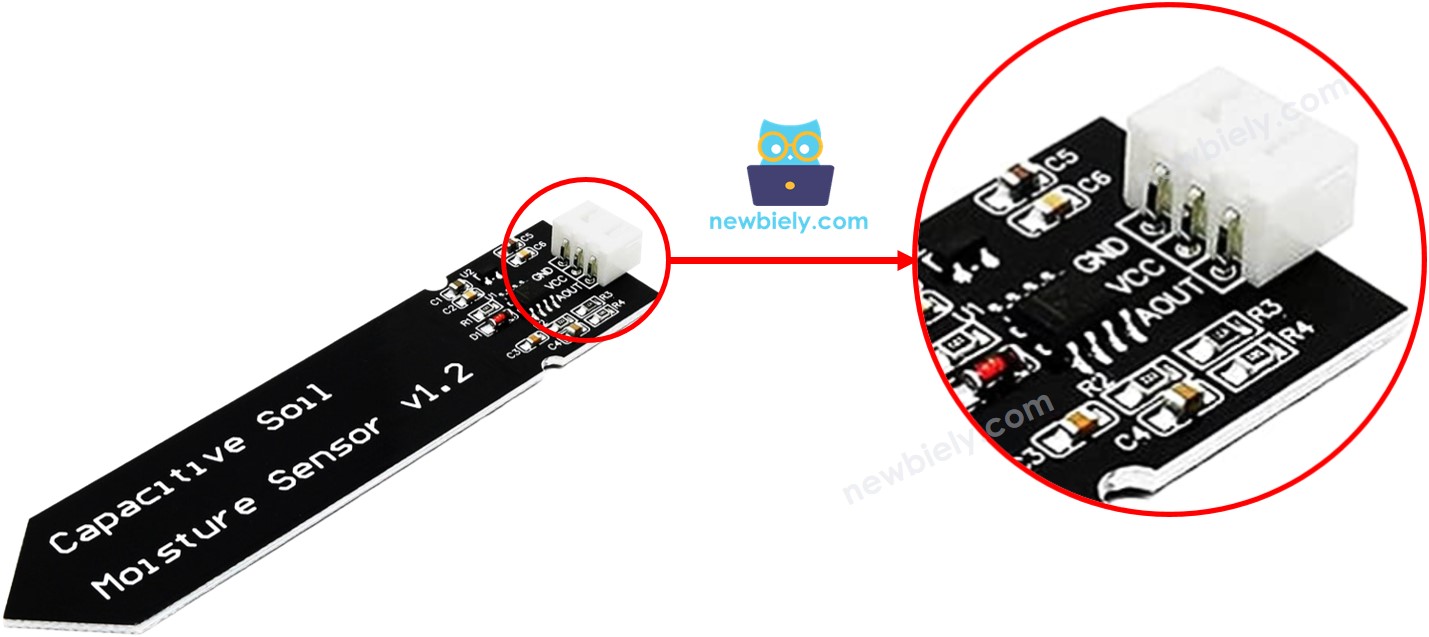
Capacitive Soil Moisture Sensor Pinout
The soil moisture sensor you'll use with the Arduino MKR WiFi 1010 has three simple pins:
- VCC: Connects to the Arduino MKR WiFi 1010 power (typically 3.3V or 5V).
- GND: Connects to the Ground pin on the Arduino MKR WiFi 1010.
- AOUT (Signal): This analog output pin connects to an analog input on your Arduino MKR WiFi 1010.
How It Works
The soil moisture sensor works on an inverse relationship:
- Dry Soil: Produces a higher voltage at the AOUT pin.
- Wet Soil: Produces a lower voltage at the AOUT pin.
The Arduino MKR WiFi 1010 reads this analog voltage and converts it into a number between 0 and 1023 (or 4095 depending on resolution settings).
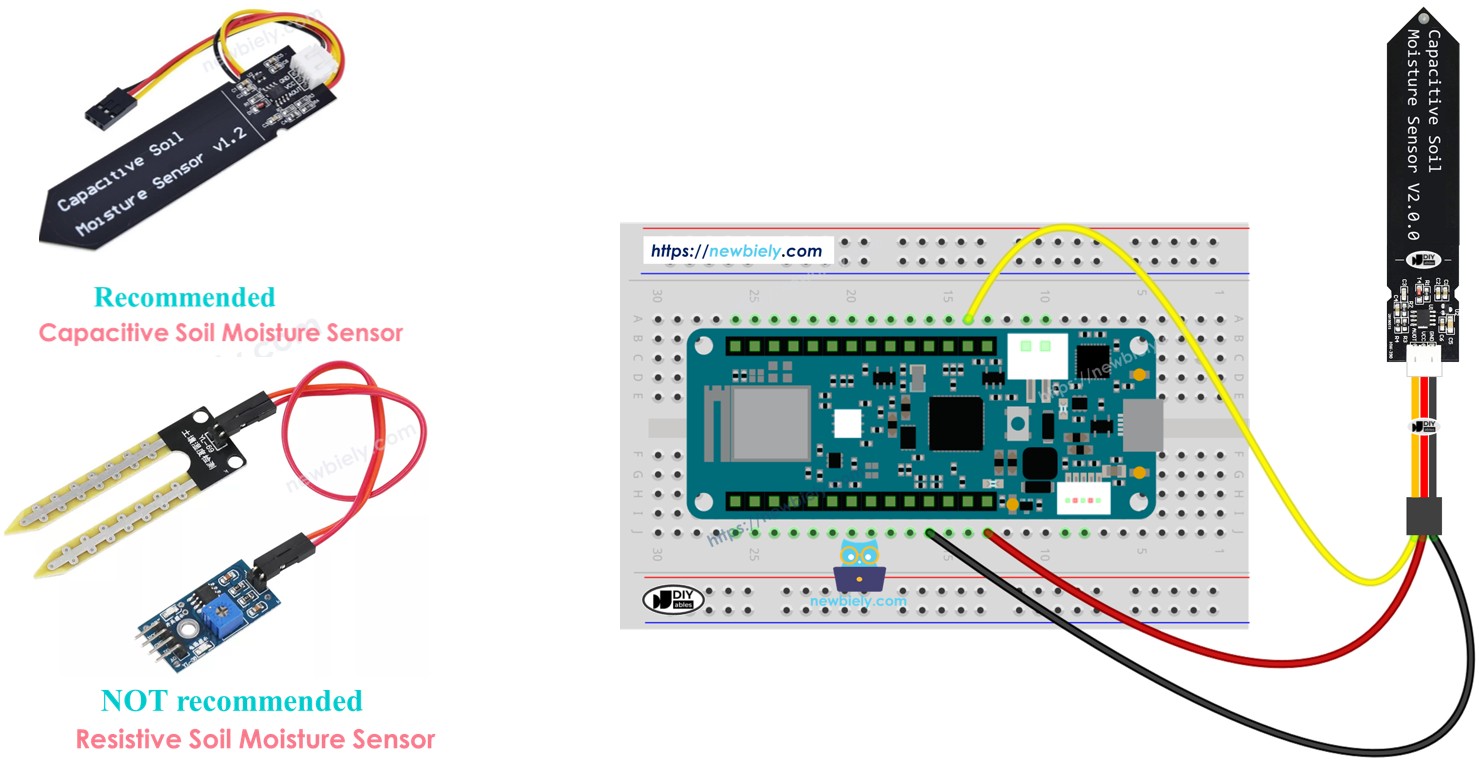
Wiring Diagram
Connecting the soil moisture sensor to your Arduino MKR WiFi 1010 is quick and easy. Follow the diagram below to get started.
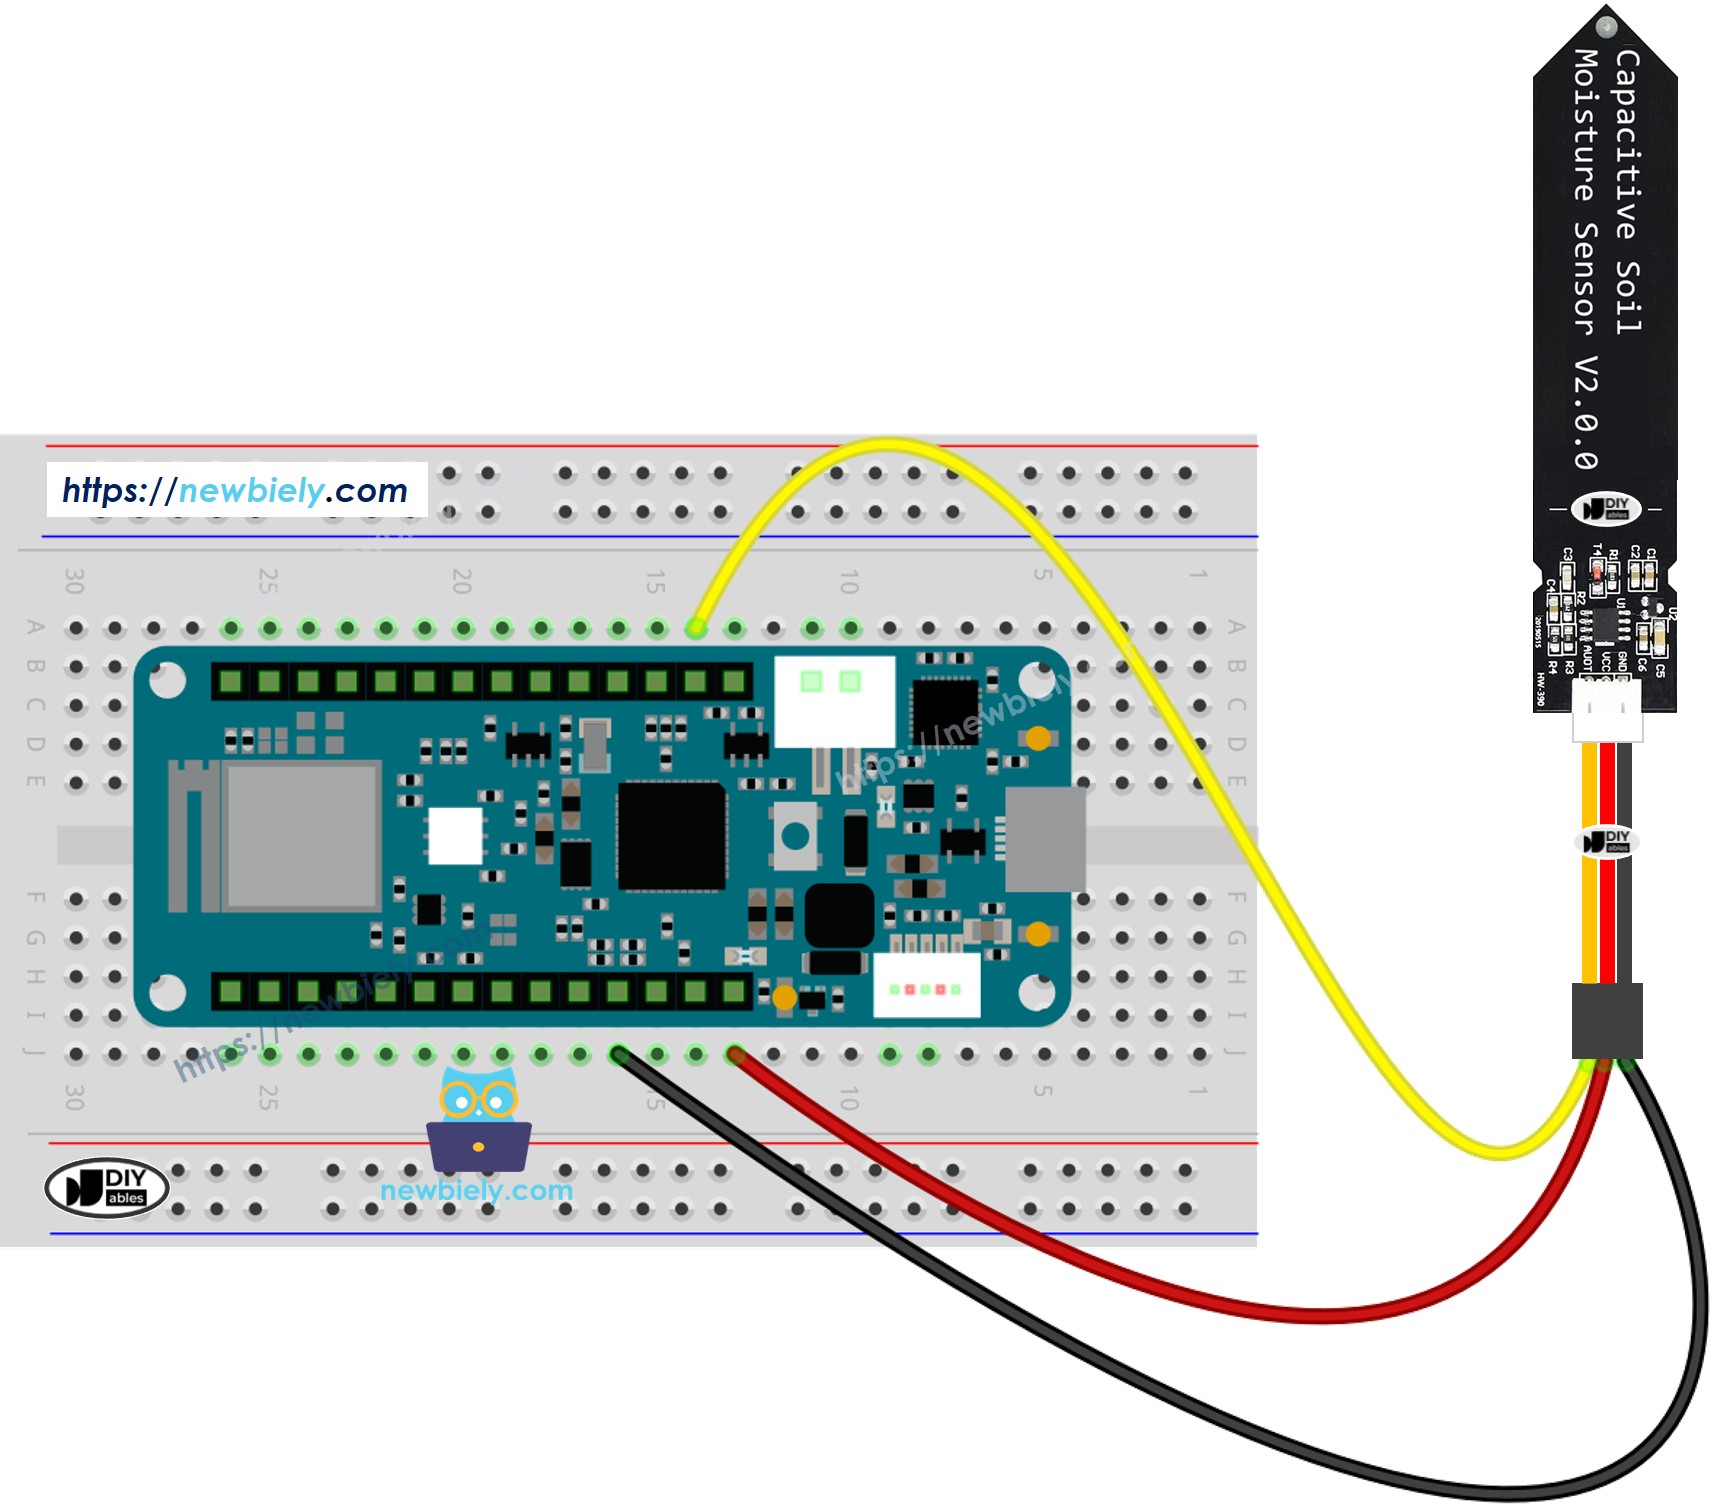
This image is created using Fritzing. Click to enlarge image
Simply plug the board into USB, which provides more than enough power for both the Arduino MKR WiFi 1010 and the soil moisture sensor.
Arduino MKR WiFi 1010 Code
Here is the basic code to start reading values from your soil moisture sensor using the Arduino MKR WiFi 1010.
Detailed Instructions
New to Arduino MKR WiFi 1010? Complete our Getting Started with Arduino MKR WiFi 1010 tutorial first to set up your development environment.
- Wiring: Connect the soil moisture sensor to the Arduino MKR WiFi 1010 as shown in the wiring diagram.
- Connect to PC: Use the micro USB cable to link your Arduino MKR WiFi 1010 to your computer.
- Select Board: In your Arduino IDE, make sure you have selected the Arduino MKR WiFi 1010 board and the correct COM port.
- Upload Code: Copy the code above into the IDE and click Upload.
- Observe Results: Open the Serial Monitor. Dip the soil moisture sensor into a moist environment (like a wet paper towel) and watch the numbers change!
Notes for beginners:
- Don't submerge the top part of the soil moisture sensor (where the cable connects) in water.
- Pure water may not change the reading much; use tap water or moist soil for better results with your Arduino MKR WiFi 1010 test.
Calibration for Capacitive Soil Moisture Sensor
Every soil moisture sensor and type of soil is slightly different. To make your Arduino MKR WiFi 1010 smart, you need to find the specific values for "Dry" and "Wet."
- Air Reading: Hold the soil moisture sensor in the air (completely dry). Record the value from the Serial Monitor.
- Wet Reading: Place the soil moisture sensor in very wet soil. Record this value.
- Set Threshold: Choose a number in the middle of these two values to be your THRESHOLD.
Determine if the soil is wet or dry
Once you have your THRESHOLD, update the code below. The Arduino MKR WiFi 1010 will now tell you the soil status in plain English!
Check the Serial Monitor to see the output from your Arduino MKR WiFi 1010.
Troubleshooting Tips
- Static Readings: If the Arduino MKR WiFi 1010 always shows the same number, check your signal wire connection.
- Corrosion: Ensure you are using a capacitive soil moisture sensor to avoid the rot that kills resistive sensors.
- Power Issues: The Arduino MKR WiFi 1010 provides enough power via USB. Avoid using low-quality batteries that might fluctuate.
Challenge Yourself - Creative Customizations
Now that you can read a soil moisture sensor with your Arduino MKR WiFi 1010, try these upgrades:
Add a Visual Alert
Connect an LED to your Arduino MKR WiFi 1010. Program it to blink red when the soil moisture sensor detects dry soil.
Data Logging
Use the WiFi capabilities of the Arduino MKR WiFi 1010 to send the soil moisture sensor readings to a cloud dashboard!
Multi-Sensor Array
Connect multiple soil moisture sensors to different analog pins on your Arduino MKR WiFi 1010 to monitor a whole array of plants.