Arduino MKR WiFi 1010 - Light Sensor
Welcome to your complete guide on using a light sensor with the Arduino MKR WiFi 1010! Light sensing is one of the most fundamental and practical skills in electronics. In this comprehensive tutorial, you'll learn how to connect a photoresistor (LDR - light-dependent resistor) to your Arduino MKR WiFi 1010 board and read light intensity levels from your environment. The Arduino MKR WiFi 1010 is perfect for light sensing projects because of its accurate analog input capabilities, compact size, and built-in WiFi connectivity for IoT applications. Whether you're creating an automatic night light, smart blinds, solar panel tracker, or daylight monitor, the Arduino MKR WiFi 1010 with a light sensor provides simple and reliable light detection. This tutorial will guide you through wiring the photoresistor to your Arduino MKR WiFi 1010, understanding how light-dependent resistors work, programming your board step-by-step to read analog light values, and converting those values into meaningful brightness levels. By the end of this tutorial, you'll have a fully functional light sensing system using the Arduino MKR WiFi 1010 and LDR sensor, displaying real-time light levels on the Serial Monitor, with skills you can apply to countless light-activated projects.
What You'll Learn
- How to wire a photoresistor (LDR) to the Arduino MKR WiFi 1010 with proper voltage divider circuit
- Understanding how light-dependent resistors change resistance based on light intensity
- Programming the Arduino MKR WiFi 1010 to read analog values from the light sensor
- Converting analog readings into meaningful brightness levels (dark, dim, medium, bright, very bright)
- Using the Arduino MKR WiFi 1010 analog input pins to measure voltage changes
- Building a voltage divider circuit with the Arduino MKR WiFi 1010 and photoresistor
- Troubleshooting light sensor readings and understanding sensor limitations
Real-World Applications
- Automatic Night Lights: Create lights that turn on automatically when it gets dark using the Arduino MKR WiFi 1010
- Smart Blinds: Build motorized window blinds that adjust based on sunlight intensity detected by your Arduino MKR WiFi 1010
- Solar Panel Trackers: Optimize solar panel positioning by tracking the sun's direction with multiple light sensors
- Plant Growth Monitors: Monitor light levels in greenhouses or indoor gardens to ensure optimal growing conditions
- Energy-Saving Systems: Automatically control indoor lighting based on natural daylight availability
- Photography Light Meters: Create DIY light meters for photography exposure calculations
- Security Systems: Detect when lights are turned on or off in monitored areas for home security applications
Ready to start sensing light with your Arduino MKR WiFi 1010? Let's begin building your light detection project!
Hardware Preparation
| 1 | × | Arduino MKR WiFi 1010 | |
| 1 | × | Micro USB Cable | |
| 1 | × | Light Sensor | |
| 1 | × | 10 kΩ Resistor | |
| 1 | × | Breadboard | |
| 1 | × | Jumper Wires | |
| 1 | × | Optionally, DC Power Jack |
Or you can buy the following kits:
| 1 | × | DIYables Sensor Kit (18 sensors/displays) |
Additionally, some of these links are for products from our own brand, DIYables .
The LDR light sensor is very affordable, but it requires a resistor for wiring, which can make the setup more complex. To simplify the wiring, you can use an LDR light sensor module as an alternative.
Overview of Light Sensor
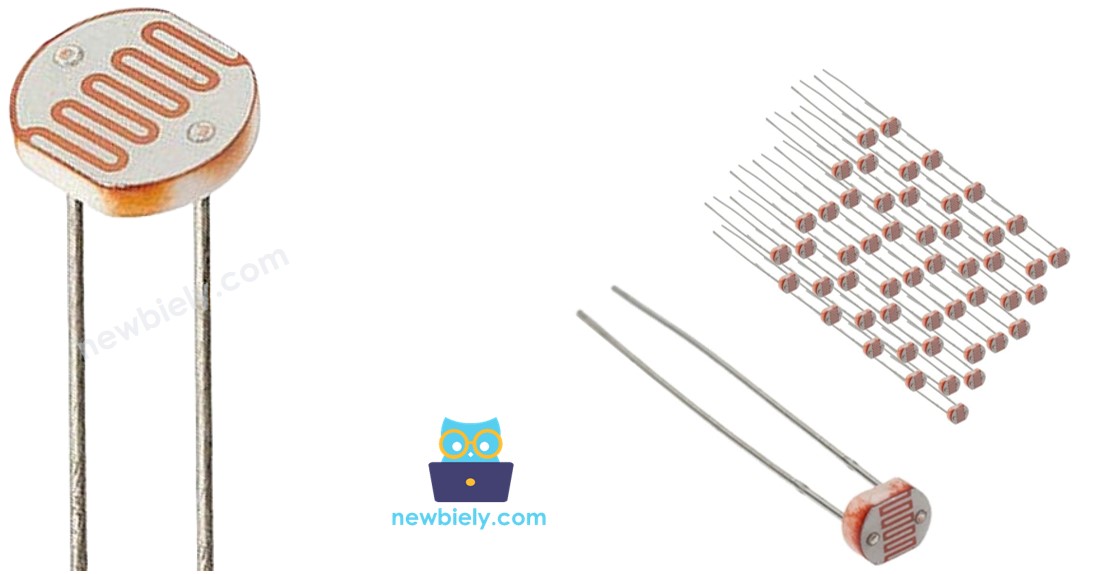
A photoresistor (also called a photocell, LDR, or light-dependent resistor) is a simple sensor that changes its resistance based on the amount of light hitting it. The brighter the light, the lower the resistance. This makes it perfect for detecting light levels and determining whether it's dark, dim, or bright!
Light Sensor Pinout
A photoresistor has just two pins, and they're not polarized (meaning it doesn't matter which way you connect them - just like a regular resistor).
How Light Sensor Works
Here's the key principle: the resistance of a photoresistor is inversely proportional to light intensity. This means:
- More light → Lower resistance → Easier for electricity to flow
- Less light → Higher resistance → Harder for electricity to flow
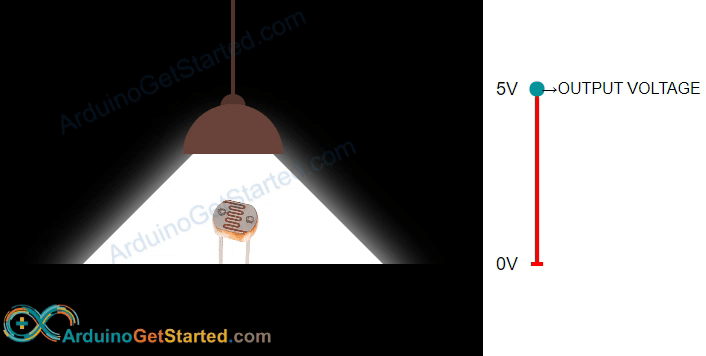
Important Note: Photoresistors provide relative light measurements, not absolute lux values. They're great for detecting light changes and brightness levels, but they're not suitable for applications requiring precise, calibrated light measurements.
Arduino MKR WiFi 1010 - Light Sensor
The Arduino MKR WiFi 1010 has analog input pins that can read voltages from 0V to 3.3V and convert them to digital values from 0 to 4095. By connecting a photoresistor in a voltage divider circuit, you can use the analogRead() function to measure light intensity as a number that changes with brightness!
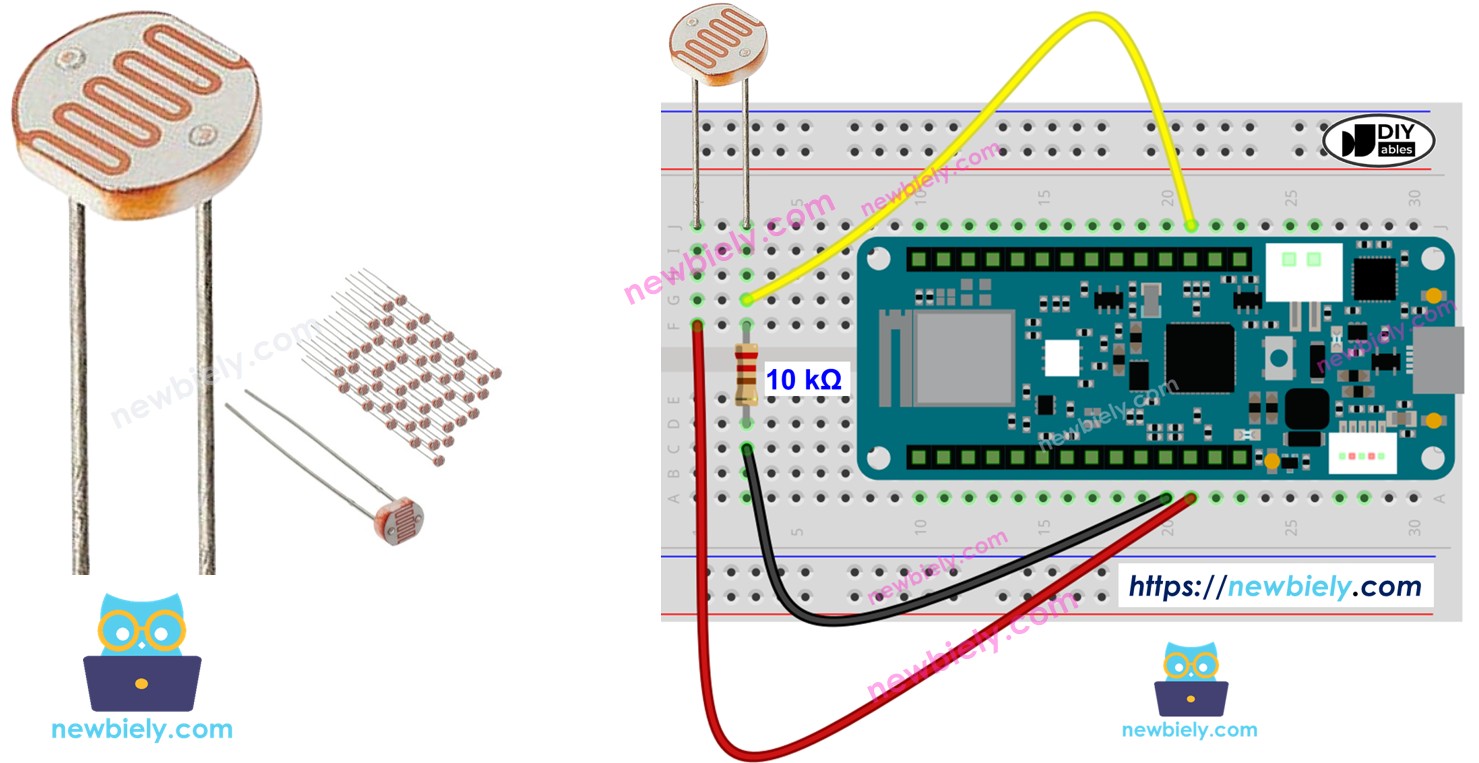
Wiring Diagram
Connect your light sensor (photoresistor) to the Arduino MKR WiFi 1010 as shown below. The photoresistor is wired with a 10kΩ resistor to create a voltage divider circuit:
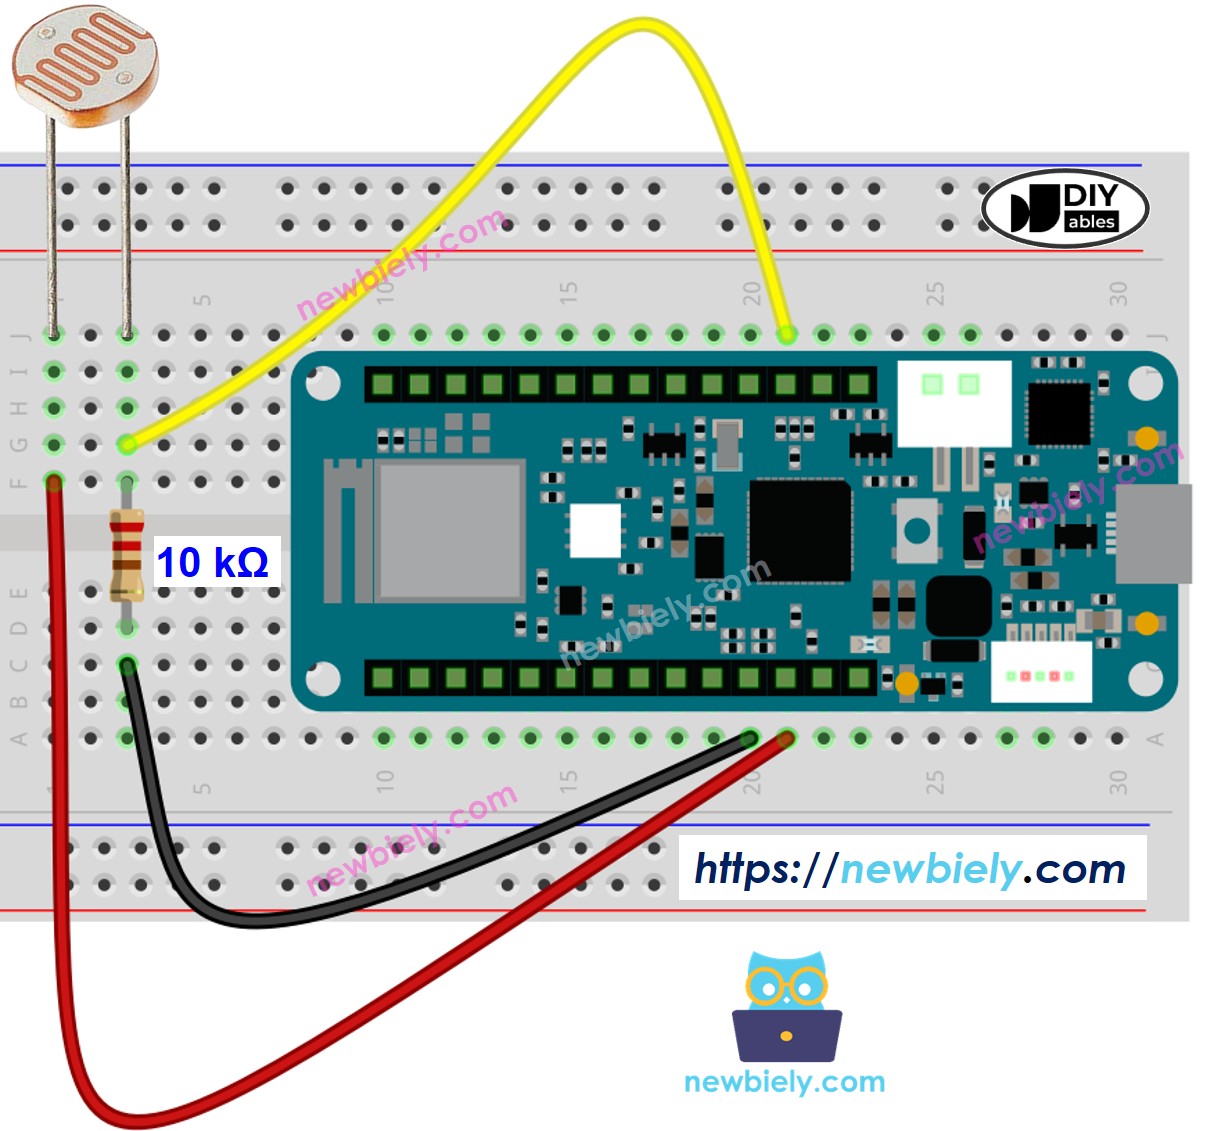
This image is created using Fritzing. Click to enlarge image
Arduino MKR WiFi 1010 Code
Below is Arduino MKR WiFi 1010 code that gets a reading from a light sensor and figures out how bright it is.
Detailed Instructions
New to Arduino MKR WiFi 1010? Complete our Getting Started with Arduino MKR WiFi 1010 tutorial first to set up your development environment.
- Wire the components according to the diagram above
- Connect the Arduino MKR WiFi 1010 to your computer via USB cable
- Open Arduino IDE and select the correct board and COM port
- Copy the code and upload it to your board
- Open the Serial Monitor
- Shine light on the sensor or cover it with your hand
- View the results on the Serial Monitor:
Light Sensor and LED
Wiring Diagram
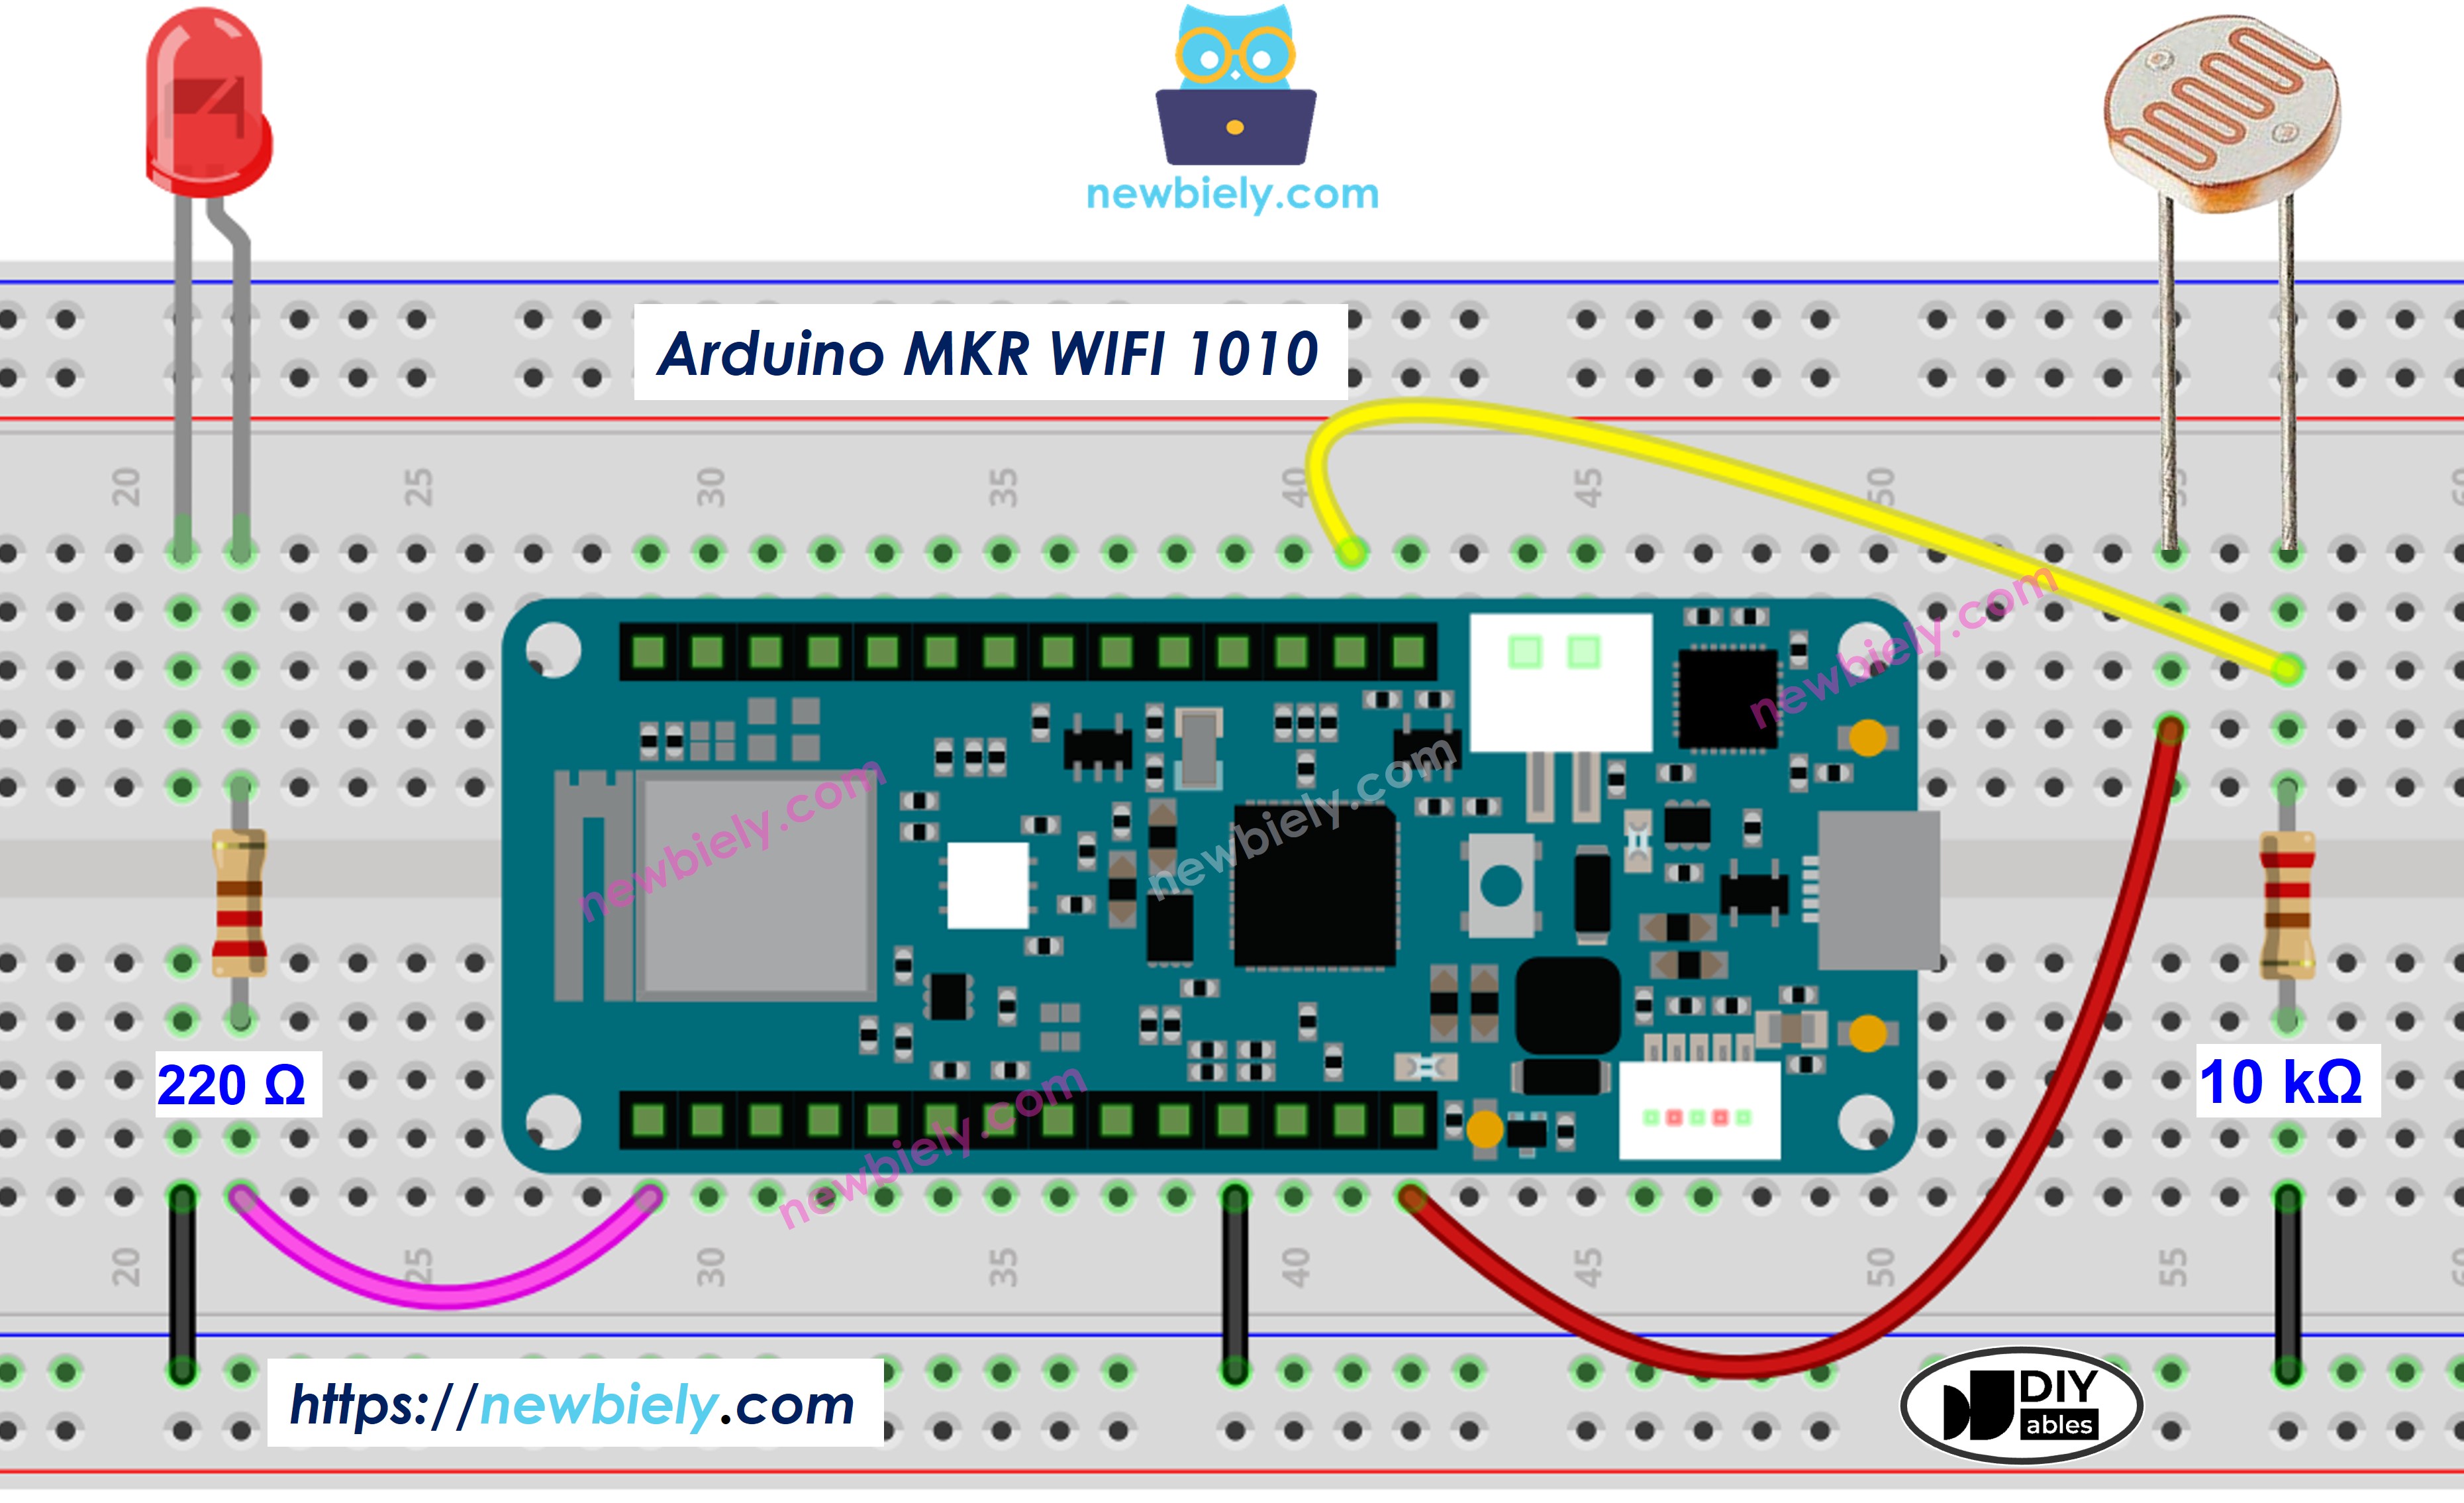
This image is created using Fritzing. Click to enlarge image
Arduino MKR WiFi 1010 Code
The code below will switch the LED on when it is dark and off when it is light.
Challenge Yourself
Ready to take your light sensing skills further? Try these exciting projects:
- Automatic LED Control: Make LEDs turn on automatically when it gets dark and turn off when it's bright
- Sunrise Alarm: Create an alarm system that triggers based on sunrise detection (when light levels increase)
- Light-Controlled Fan: Build a system where a fan speed changes based on light intensity (useful for temperature control)
- Multi-Sensor Light Tracker: Use multiple photoresistors to track the direction of the brightest light source
- WiFi Light Logger: Send light level data wirelessly to your computer or cloud service using the MKR WiFi 1010's connectivity
- RGB Light Feedback: Control an RGB LED color based on light levels (blue for dark, yellow for dim, red for bright)
- Smart Window Shades: Combine a servo motor with the light sensor to automatically open/close blinds based on sunlight