Arduino MKR WiFi 1010 - Water/Liquid Valve
This comprehensive guide explains how to control the flow of liquids like water, beer, or oil using the Arduino MKR WiFi 1010 and a solenoid valve. Whether you're building an automated watering system, a beverage dispenser, or an industrial control project, learning to use a solenoid valve with Arduino MKR WiFi 1010 opens up countless automation possibilities.
What You'll Learn:
- Connecting a solenoid valve to Arduino MKR WiFi 1010 through a relay module
- Programming Arduino MKR WiFi 1010 to control solenoid valve operations
- Understanding how solenoid valves work with Arduino MKR WiFi 1010 control signals
- Wiring a relay between Arduino MKR WiFi 1010 and solenoid valve for safe operation
- Writing Arduino MKR WiFi 1010 code to open and close solenoid valves automatically
- Implementing timed solenoid valve control with Arduino MKR WiFi 1010
Real-World Applications:
- Home automation: Use Arduino MKR WiFi 1010 with solenoid valve for automatic garden watering
- Industrial control: Arduino MKR WiFi 1010 controlling solenoid valves in manufacturing processes
- Beverage dispensing: Solenoid valve and Arduino MKR WiFi 1010 for automated drink machines
- Aquarium systems: Arduino MKR WiFi 1010 managing solenoid valves for water changes
The same method works for controlling gas flow, making Arduino MKR WiFi 1010 and solenoid valve combinations perfect for various fluid control applications.
Hardware Preparation
| 1 | × | Arduino MKR WiFi 1010 | |
| 1 | × | Micro USB Cable | |
| 1 | × | Relay | |
| 1 | × | Liquid Solenoid Valve | |
| 1 | × | 12V Power Adapter | |
| 1 | × | Optionally, DC Power Jack | |
| 1 | × | Breadboard | |
| 1 | × | Jumper Wires |
Or you can buy the following kits:
| 1 | × | DIYables Sensor Kit (18 sensors/displays) |
Additionally, some of these links are for products from our own brand, DIYables .
Overview of Water/Liquid Valve
A solenoid valve is an electromechanical device that controls liquid or gas flow using an electromagnetic coil. When powered, the coil creates a magnetic field that moves an internal plunger, opening or closing the valve. These valves are perfect for automated control systems with the Arduino MKR WiFi 1010.
Pinout
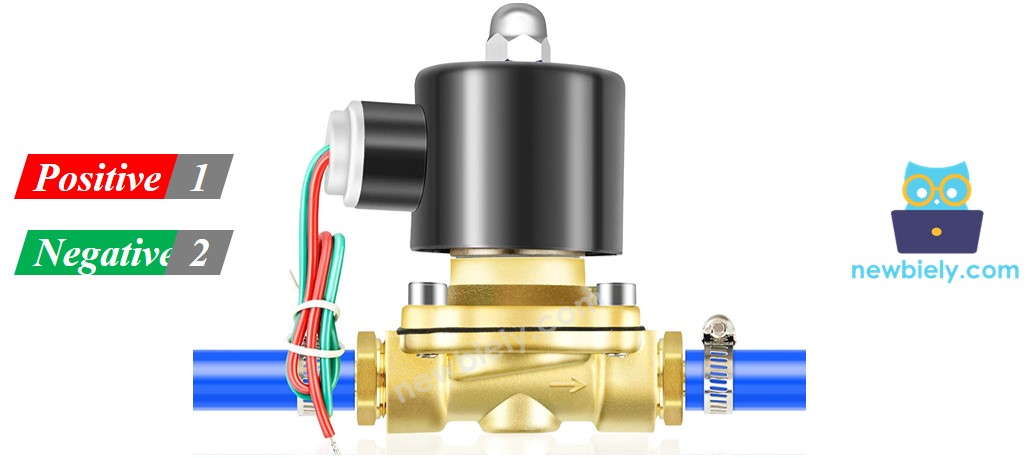
A solenoid valve typically has two connection points for power:
- Red positive pin (+): Connect this pin to the +12V terminal of your DC power supply.
- Black or other colored negative pin (–): Connect this pin to the ground (GND) terminal of your DC power supply.
How Water/Liquid Valve works
The valve is usually shut. When you add 12V of DC power to its two points, the valve opens so water or liquid can flow.
※ NOTE THAT:
Some valves have a rubber ring inside that needs a minimum pressure to open the valve after you apply 12V DC. This pressure is made by the liquid flowing.
Some valves only let the liquid flow in one direction.
How to Control Water/Liquid Solenoid Valve
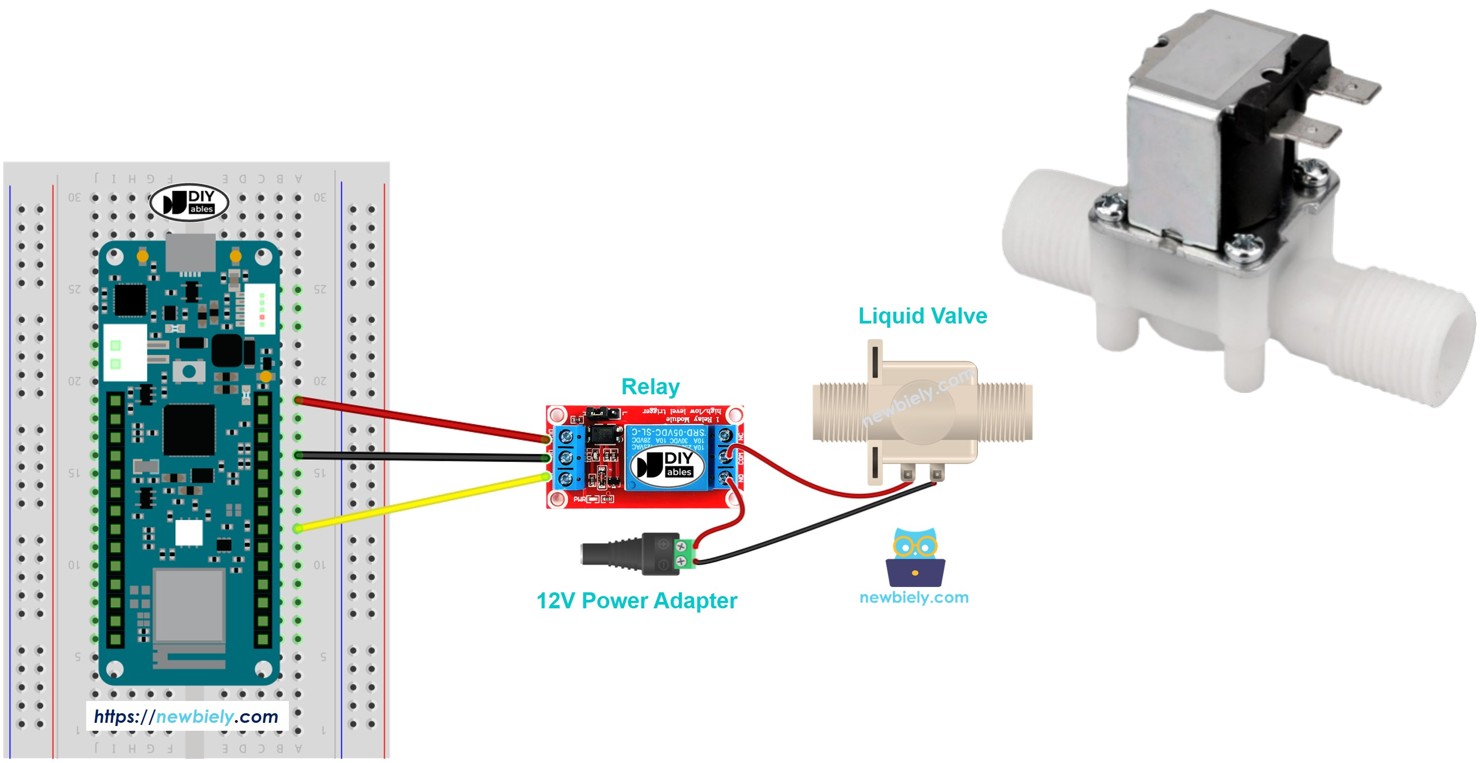
If the valve gets power from a 12V supply, it will open. To control the valve, you must use a relay between the Arduino MKR WiFi 1010 and the valve. The Arduino MKR WiFi 1010 sends signals to the solenoid valve through the relay. Find out more about the relay in the Arduino MKR WiFi 1010 - Relay tutorial.
Wiring Diagram
Follow this wiring diagram carefully to connect your solenoid valve to the Arduino MKR WiFi 1010 through a relay module:
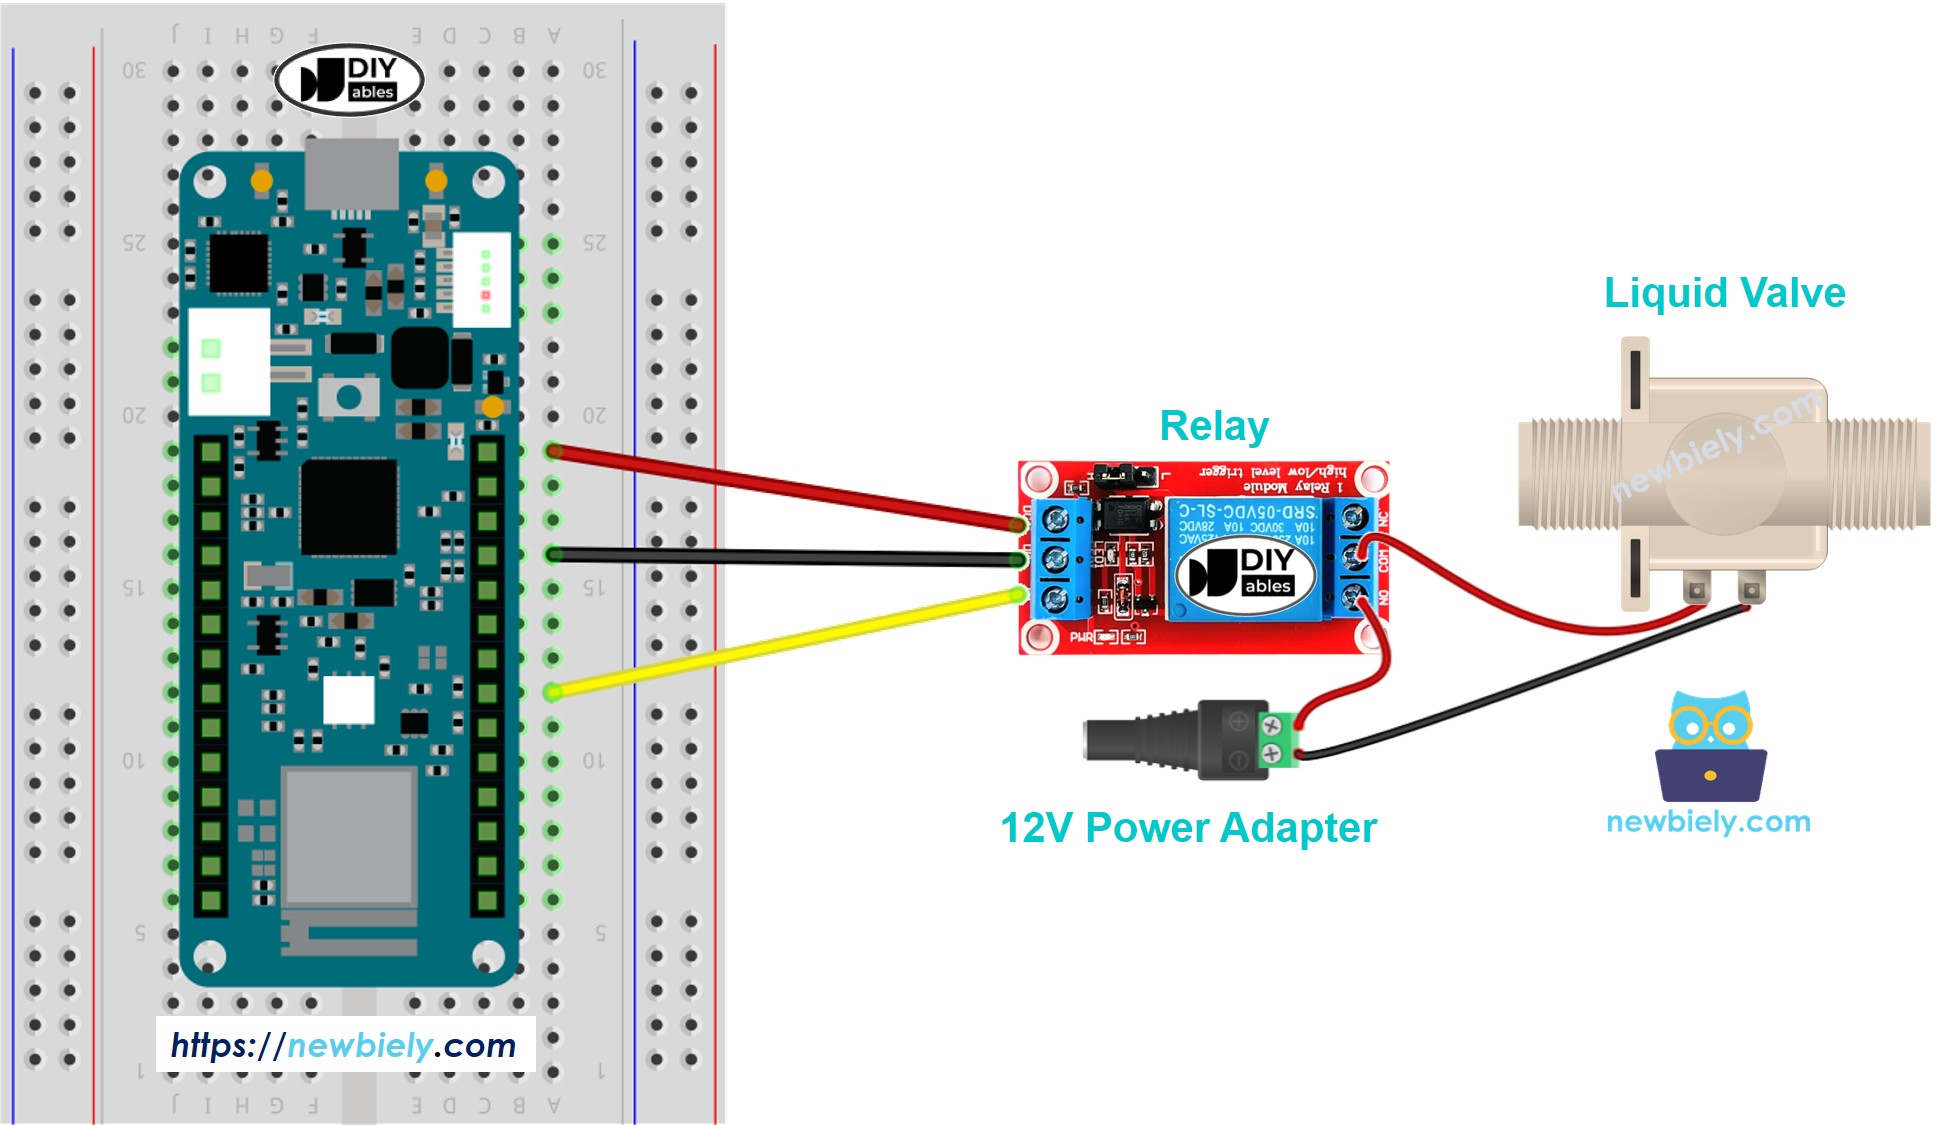
This image is created using Fritzing. Click to enlarge image
Connection Summary:
- Arduino MKR WiFi 1010 control pin → Relay signal input
- Relay power terminals → 12V DC power supply and solenoid valve
- The relay isolates the Arduino MKR WiFi 1010's low-voltage circuit from the high-power valve circuit
Arduino MKR WiFi 1010 Code
This Arduino MKR WiFi 1010 code demonstrates automatic solenoid valve control. The program repeatedly opens the valve for five seconds to allow liquid flow, then closes it for five seconds. This cycling pattern is useful for timed watering systems, periodic dispensing, or testing your valve setup.
Detailed Instructions
New to Arduino MKR WiFi 1010? Complete our Getting Started with Arduino MKR WiFi 1010 tutorial first to set up your development environment.
- Carefully connect the components to your Arduino MKR WiFi 1010 board following the wiring diagram shown above - proper connections are essential for safe operation!
- Connect your Arduino MKR WiFi 1010 to your computer using a USB cable
- Launch the Arduino IDE on your computer
- Select the Arduino MKR WiFi 1010 board and its correct COM port
- Copy the code above and paste it into the Arduino IDE
- Click the Upload button to compile and upload the code to your Arduino MKR WiFi 1010 board
- Ensure your 12V power supply is connected to the relay and solenoid valve
- Place the valve's output in a container or connect it to your liquid system
- Observe the solenoid valve opening and closing in 5-second intervals
- You should hear a clicking sound from both the relay and the valve as they operate
- Check to see if the water or liquid is flowing during the open periods
Code Explanation
Let's break down how the Arduino MKR WiFi 1010 code controls the solenoid valve:
Setup Phase:
- The code defines the relay control pin and initializes it as an OUTPUT
- This pin will send HIGH (on) or LOW (off) signals to the relay module
Main Loop:
- digitalWrite(relayPin, HIGH) - Activates the relay, which connects 12V power to the solenoid valve, opening it
- delay(5000) - Keeps the valve open for 5 seconds (5000 milliseconds)
- digitalWrite(relayPin, LOW) - Deactivates the relay, cutting power to the valve and closing it
- delay(5000) - Keeps the valve closed for 5 seconds before repeating the cycle
The code comments provide additional details for each line - review them to understand the complete operation.
Troubleshooting Tips
If your solenoid valve isn't working with Arduino MKR WiFi 1010, try these solutions:
Valve Doesn't Open:
- Verify the 12V power supply is connected and working - use a multimeter to check voltage
- Confirm the relay is clicking when activated - if not, check the Arduino MKR WiFi 1010 signal pin connection
- Test if the valve needs minimum pressure - try raising the liquid source higher
- Check that liquid flow direction matches the arrow on the valve body
- Ensure the relay is rated for the valve's current draw (usually 300-500mA)
Valve Opens But No Flow:
- Check for blockages in the valve or connected tubing
- Verify sufficient liquid pressure in the supply line
- Some valves require 0.02-0.8 MPa minimum pressure to operate properly
- Inspect the valve for debris or damage to the internal seal
Relay Doesn't Click:
- Verify the Arduino MKR WiFi 1010 pin is set as OUTPUT in the code
- Check connections between Arduino MKR WiFi 1010 and relay signal pin
- Test the relay with a different pin to rule out relay failure
- Ensure the relay module has proper power supply (VCC and GND)
Inconsistent Operation:
- Check all wire connections are secure and not loose
- Verify the 12V power supply can provide enough current
- Look for voltage drops in long wire runs - use thicker wires if needed
Challenge Yourself - Creative Customizations
Once you have the basic solenoid valve control working with Arduino MKR WiFi 1010, try these enhancements:
Sensor-Triggered Valve Control:
Multiple Valve Control:
- Connect several solenoid valves to different Arduino MKR WiFi 1010 pins
- Create a watering sequence that operates each valve independently
- Build a multi-zone irrigation system with scheduled watering
WiFi Control Integration:
- Use the Arduino MKR WiFi 1010's built-in WiFi to create a web interface
- Control your solenoid valve remotely from your smartphone
- Add scheduling features for automatic daily watering
- Send notifications when watering begins and ends
Advanced Features:
- Add a flow sensor to measure the amount of liquid dispensed
- Implement safety timers to prevent valve from staying open too long
- Create a rain sensor integration that skips watering when it's raining
- Add a water level sensor to prevent empty reservoir operation