Arduino MKR WiFi 1010 - Temperature Sensor
Welcome to your complete guide on using a temperature sensor with the Arduino MKR WiFi 1010! Temperature monitoring is one of the most practical skills in electronics and IoT projects. In this comprehensive tutorial, you'll learn how to connect a DS18B20 temperature sensor to your Arduino MKR WiFi 1010 board and read accurate temperature measurements in both Celsius and Fahrenheit. The Arduino MKR WiFi 1010 is perfect for temperature sensing projects because of its compact size, built-in WiFi connectivity, and reliable analog/digital input capabilities. Whether you're creating a weather station, smart home automation, greenhouse monitor, or industrial temperature logger, the Arduino MKR WiFi 1010 with DS18B20 sensor provides accurate and dependable temperature readings. This tutorial will guide you through wiring the temperature sensor to your Arduino MKR WiFi 1010, installing the required libraries, programming your board step-by-step, and understanding how one-wire digital temperature sensors work. By the end of this tutorial, you'll have a fully functional temperature monitoring system using the Arduino MKR WiFi 1010 and DS18B20 sensor, displaying real-time temperature readings on the Serial Monitor, with skills you can apply to countless temperature-sensing projects.
What You'll Learn
- How to wire a DS18B20 temperature sensor to the Arduino MKR WiFi 1010 with proper connections
- Understanding one-wire digital temperature sensors and how they communicate with Arduino
- Installing and using the DallasTemperature and OneWire libraries for temperature reading
- Programming the Arduino MKR WiFi 1010 to read temperature values in both Celsius and Fahrenheit
- Reading sensor data and displaying temperature measurements on the Serial Monitor
- Working with waterproof temperature sensors and sensor adapters with built-in resistors
- Troubleshooting temperature sensor connections and ensuring accurate readings
Real-World Applications
- Weather Stations: Build personal weather monitoring systems that track temperature changes throughout the day
- Smart Home Automation: Create temperature-controlled systems that adjust heating, cooling, or ventilation based on room temperature
- Greenhouse Monitoring: Monitor and log soil and air temperature in greenhouses to optimize plant growing conditions
- Aquarium Controllers: Maintain precise water temperature in fish tanks and aquariums with automatic heater control
- Food Storage Systems: Monitor refrigerator and freezer temperatures to ensure food safety and quality
- Industrial Temperature Logging: Track temperature in manufacturing processes, server rooms, or storage facilities
- HVAC Systems: Develop smart heating and cooling controllers that respond to accurate temperature readings
Ready to start measuring temperature with your Arduino MKR WiFi 1010? Let's begin building your temperature sensing project!
Hardware Preparation
| 1 | × | Arduino MKR WiFi 1010 | |
| 1 | × | Micro USB Cable | |
| 1 | × | DS18B20 Temperature Sensor (WITH Adapter) | |
| 1 | × | DS18B20 Temperature Sensor (WITHOUT Adapter) | |
| 1 | × | Breadboard | |
| 1 | × | Jumper Wires | |
| 1 | × | Optionally, DC Power Jack |
Or you can buy the following kits:
| 1 | × | DIYables Sensor Kit (18 sensors/displays) |
Additionally, some of these links are for products from our own brand, DIYables .
Buy Note: Many DS18B20 sensors available in the market are unreliable. We strongly recommend buying the sensor from the DIYables brand using the link provided above. We tested it, and it worked reliably.
Overview of DS18B20 Temperature Sensor
The DS18B20 is a digital temperature sensor that measures temperature accurately from -55°C to +125°C. It uses a special communication method called the 1-Wire protocol, which means it can send digital temperature data using just one wire! This makes wiring simple and allows you to connect multiple sensors to the same pin if needed.
DS18B20 Temperature Sensor Pinout
The DS18B20 has three pins:
- GND pin: Connect to ground (0V)
- VCC pin: Connect to power (5V or 3.3V)
- DATA pin: Connect to any digital pin on your Arduino MKR WiFi 1010 for sending temperature data

The DS18B20 comes in two versions:
- TO-92 package: Looks like a small transistor with three legs
- Waterproof probe: Sealed in a stainless steel tube (recommended for this tutorial)
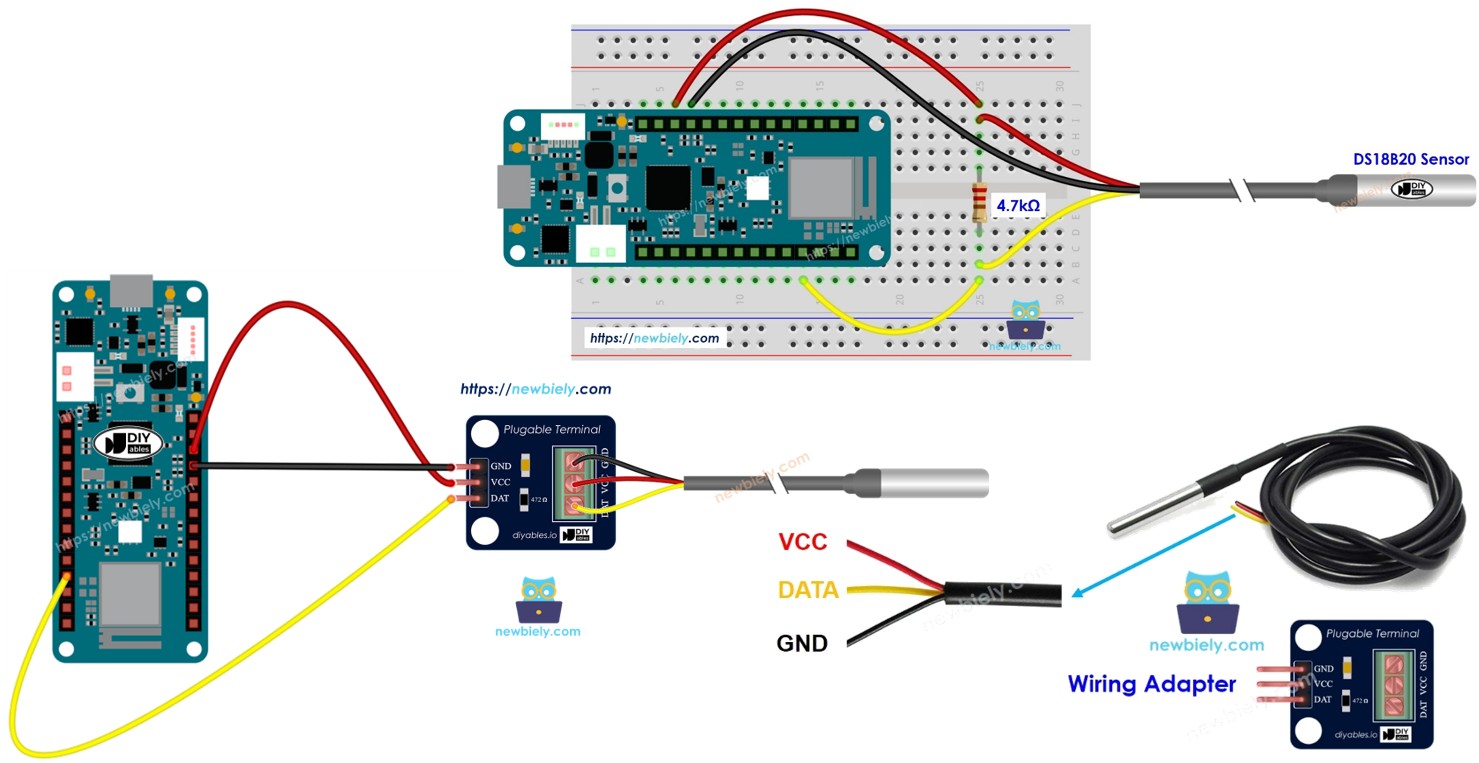
Important Note: The DS18B20 requires a 4.7kΩ pull-up resistor between the DATA and VCC pins. To make your life easier, we recommend buying a DS18B20 sensor with a wiring adapter that already includes this resistor built-in. This eliminates the need for additional components and simplifies your wiring!
Wiring Diagram
Connect your DS18B20 temperature sensor to the Arduino MKR WiFi 1010 as shown below:
Option 1: Using a breadboard
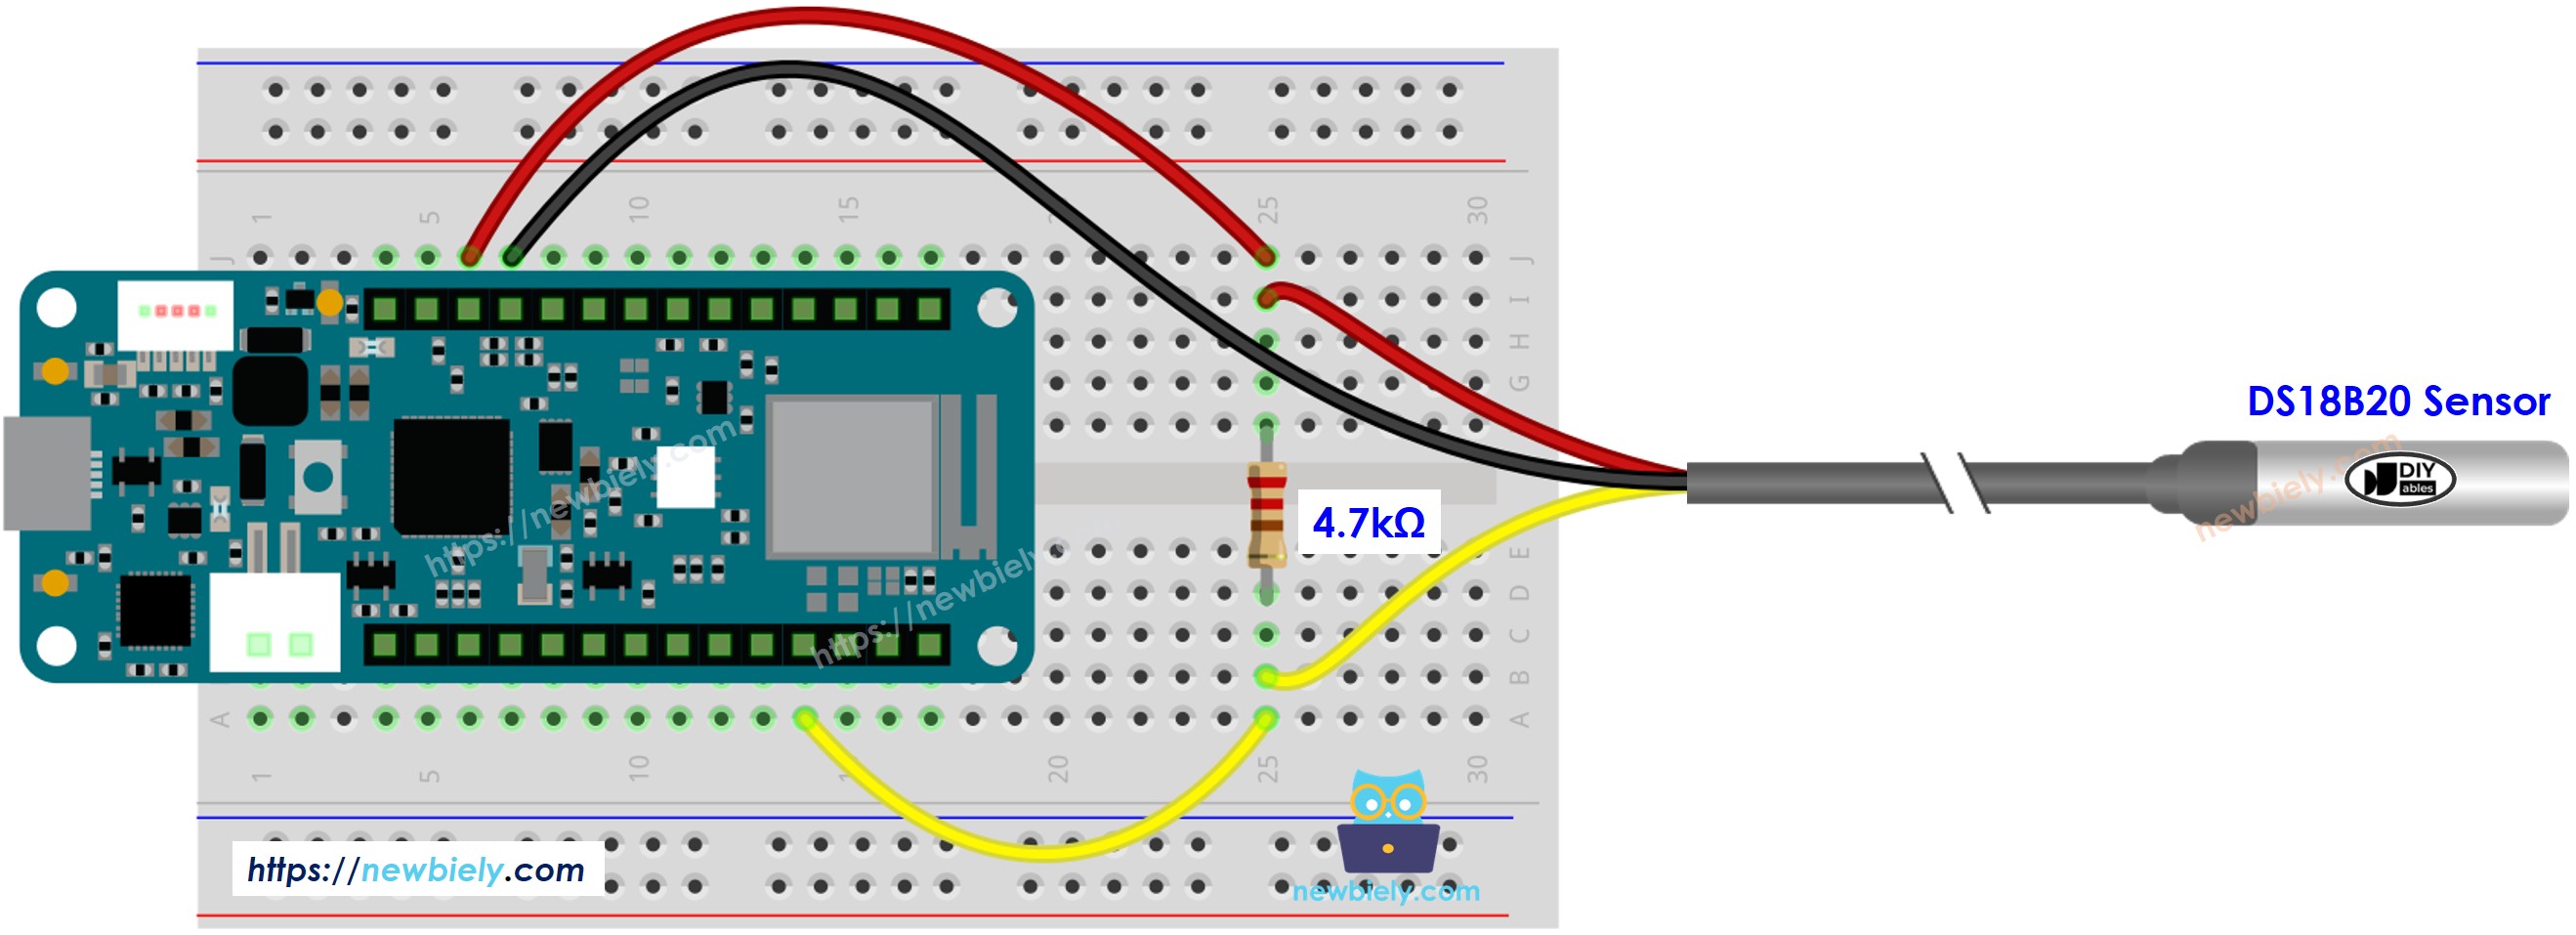
This image is created using Fritzing. Click to enlarge image
Option 2: Using a sensor with adapter (Recommended!)
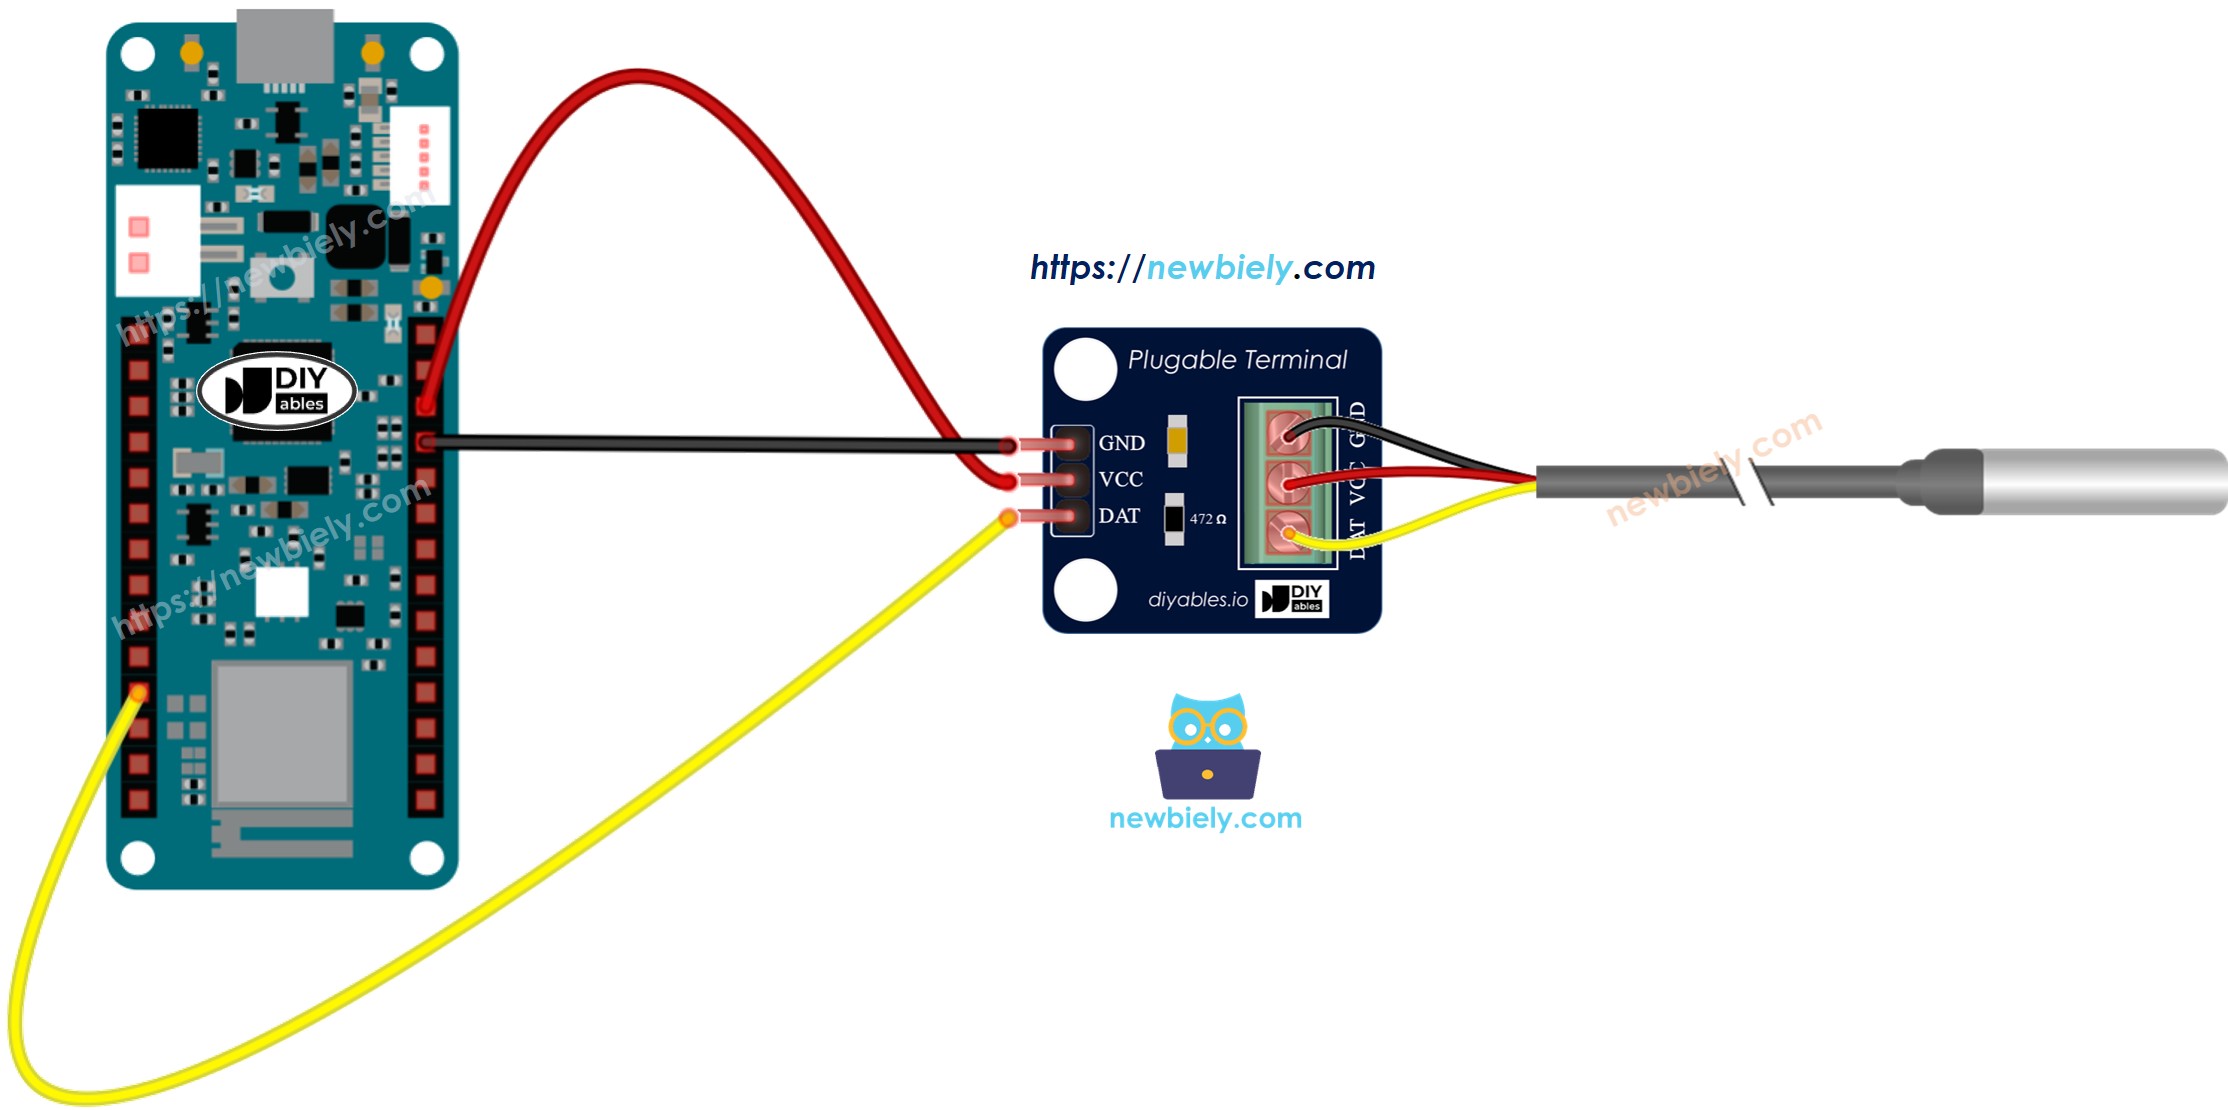
This image is created using Fritzing. Click to enlarge image
Pro Tip: Save yourself time and hassle by getting a DS18B20 sensor with a wiring adapter. The adapter includes the required pull-up resistor, making your wiring much simpler and more reliable!
Arduino MKR WiFi 1010 Code
Detailed Instructions
New to Arduino MKR WiFi 1010? Complete our Getting Started with Arduino MKR WiFi 1010 tutorial first to set up your development environment.
- Wire the components according to the diagram above
- Connect the Arduino MKR WiFi 1010 to your computer via USB cable
- Open Arduino IDE on your computer
- Select the correct board and COM port
- Click the Library Manager icon, search for DallasTemperature, and install it
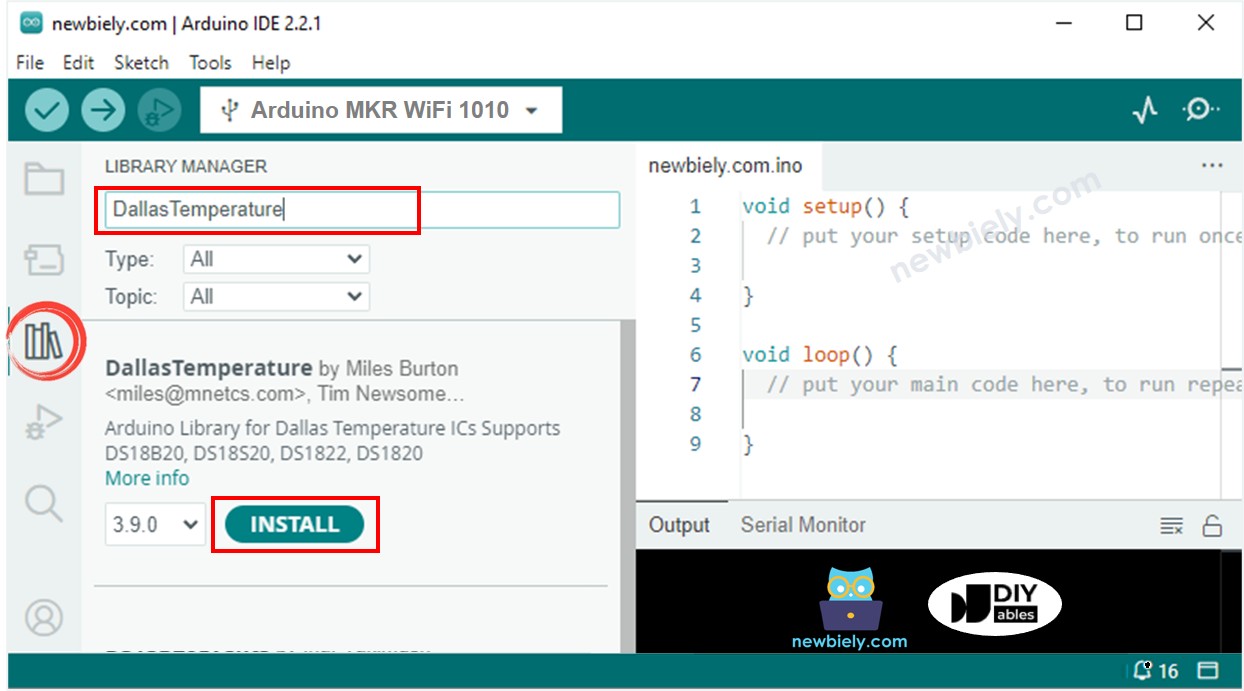
- When prompted, click Install All to add the OneWire library dependency

- Copy the code and upload it to your board
- Touch the sensor with your hand or place it in hot/cold water to change temperature
- Open the Serial Monitor to view temperature readings:
Challenge Yourself
Ready to take your temperature sensing skills further? Try these exciting projects:
- Temperature Logger: Save temperature readings to an SD card and create temperature graphs over time
- WiFi Temperature Monitor: Send temperature data to your phone or computer using the MKR WiFi 1010's wireless capability
- Multi-Sensor Network: Connect multiple DS18B20 sensors to one pin and monitor temperatures in different rooms
- Temperature Alarm: Make an LED flash and a buzzer sound when temperature goes above or below set thresholds
- Thermostat Controller: Build a smart thermostat that automatically controls a heater or fan based on temperature
- Aquarium Temperature Guardian: Create an automatic temperature control system for fish tanks with alert notifications
- Temperature vs. Time Plotter: Display real-time temperature graphs on a TFT screen or send data to a plotting application