Arduino MKR WiFi 1010 - Control Heating Element
Learn to safely control 12V heating elements with your Arduino MKR WiFi 1010! This fundamental tutorial teaches relay-based heater switching—essential for temperature regulation systems, DIY incubators, and thermal projects.
What You'll Learn:
- Safe relay-based control of high-power heating elements
- Proper electrical isolation between Arduino and heater circuits
- Programming timed heating cycles
- Foundation for thermostat and temperature control systems
Applications:
- DIY incubators: Egg hatching, bacterial cultures
- Reptile terrariums: Temperature-regulated habitats
- 3D printer heated beds: Build surface temperature control
- Food warming: Slow cooker automation, sous vide projects
- Chemical processes: Temperature-controlled reactions
- Greenhouse heating: Frost protection systems
WARNING
CRITICAL SAFETY WARNING
Heating elements pose serious safety risks:
- Burn hazard: Surface temperatures exceed 80°C (176°F)—severe burns possible
- Fire risk: Improper installation or failures can ignite nearby materials
- Electrical shock: 12V is generally safe, but wiring errors can be dangerous
- Thermal runaway: Without temperature feedback, heaters can overheat catastrophically
Safety Requirements:
- Never leave unattended: Always supervise heating element operation
- Use thermal cutoffs: Add temperature-sensing shutoff (future tutorial)
- Fire-resistant mounting: Secure to metal or ceramic surfaces only
- Ventilation: Ensure adequate airflow and heat dissipation
- Testing: Initially test with power supply disconnected, then in controlled environment
- Know your limits: If unsure about electrical safety, consult an expert
We are not responsible for injuries, fires, or property damage. Proceed only if you fully understand electrical and thermal hazards.
Tutorial Scope: This guide covers basic ON/OFF control. For intelligent temperature regulation with sensor feedback, see our Heating System with Temperature Control tutorial.
Hardware Preparation
| 1 | × | Arduino MKR WiFi 1010 | |
| 1 | × | Micro USB Cable | |
| 1 | × | Relay | |
| 1 | × | Heating Element | |
| 1 | × | 12V Power Adapter | |
| 1 | × | Optionally, DC Power Jack | |
| 1 | × | Breadboard | |
| 1 | × | Jumper Wires |
Or you can buy the following kits:
| 1 | × | DIYables Sensor Kit (18 sensors/displays) |
Additionally, some of these links are for products from our own brand, DIYables .
Overview of Heating Elements
Heating elements are resistive devices that convert electrical energy into thermal energy. Understanding their characteristics ensures safe, effective integration.
Pinout and Electrical Characteristics
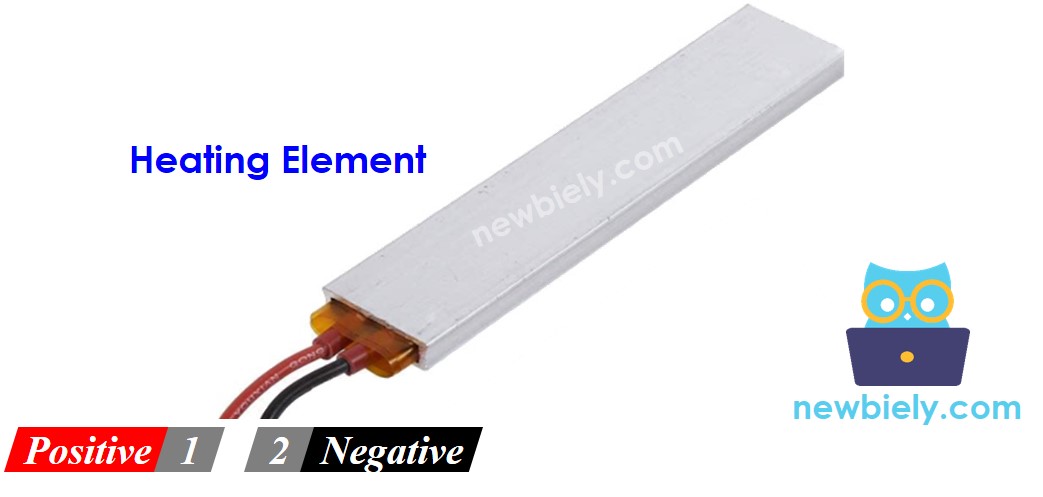
Heating elements feature two wire terminals:
- Positive (+) pin (red wire):
- Connects to positive terminal of 12V DC power supply
- Polarity usually doesn't matter for resistive heaters, but follow manufacturer markings
- Negative (-) pin (black wire):
- Connects to ground (GND) terminal of 12V power supply
- Completes circuit for current flow
- Voltage rating: Typically 12V DC (this tutorial), but also available in 5V, 24V, 110V AC
- Power consumption: 10-50W common for small elements (higher = more heat)
- Current draw: Calculate using P = V × I (e.g., 24W at 12V = 2A current)
- Temperature range: Can reach 80-200°C depending on design
- Current = Power ÷ Voltage = 24W ÷ 12V = 2A
- Your power supply must provide at least 2A continuous current
- Your relay must be rated for at least 2A switching current
- Voltage mismatch: Heating elements require 12V; Arduino pins output only 3.3V
- Current demand: Elements draw 1-5A; Arduino pins supply maximum 15mA (333× insufficient!)
- Isolation: Keeps high-power heater circuit separate from sensitive Arduino logic
- Arduino sends 3.3V LOW signal → Relay opens → Heater OFF (no power flow)
- Arduino sends 3.3V HIGH signal → Relay closes → Heater ON (12V applied, heat generated)
- Relay pinout and internal mechanics
- How electromagnetic coils control switch contacts
- Wiring diagrams for various configurations
- Programming relay control logic
- Choosing appropriate relay ratings
Key Specifications (check your element's datasheet):
Example Calculation:
If your heating element is rated 12V, 24W:
How Heating Element Control Works
Operating Principle: When voltage is applied across the heating element's resistance, current flows, generating heat (Joule heating effect). More current = more heat.
Control Method: ON/OFF switching via relay
Why Relay is Essential:
Direct connection would instantly destroy your Arduino and likely damage the heating element.
The Relay Solution:
The relay acts as an electrically-isolated switch, allowing low-power Arduino signals to control high-power heater operation safely.
Relay Prerequisite: Not familiar with relays? Study our comprehensive Arduino MKR WiFi 1010 - Relay tutorial. It covers:
Master those concepts, then apply them here for heating element control!
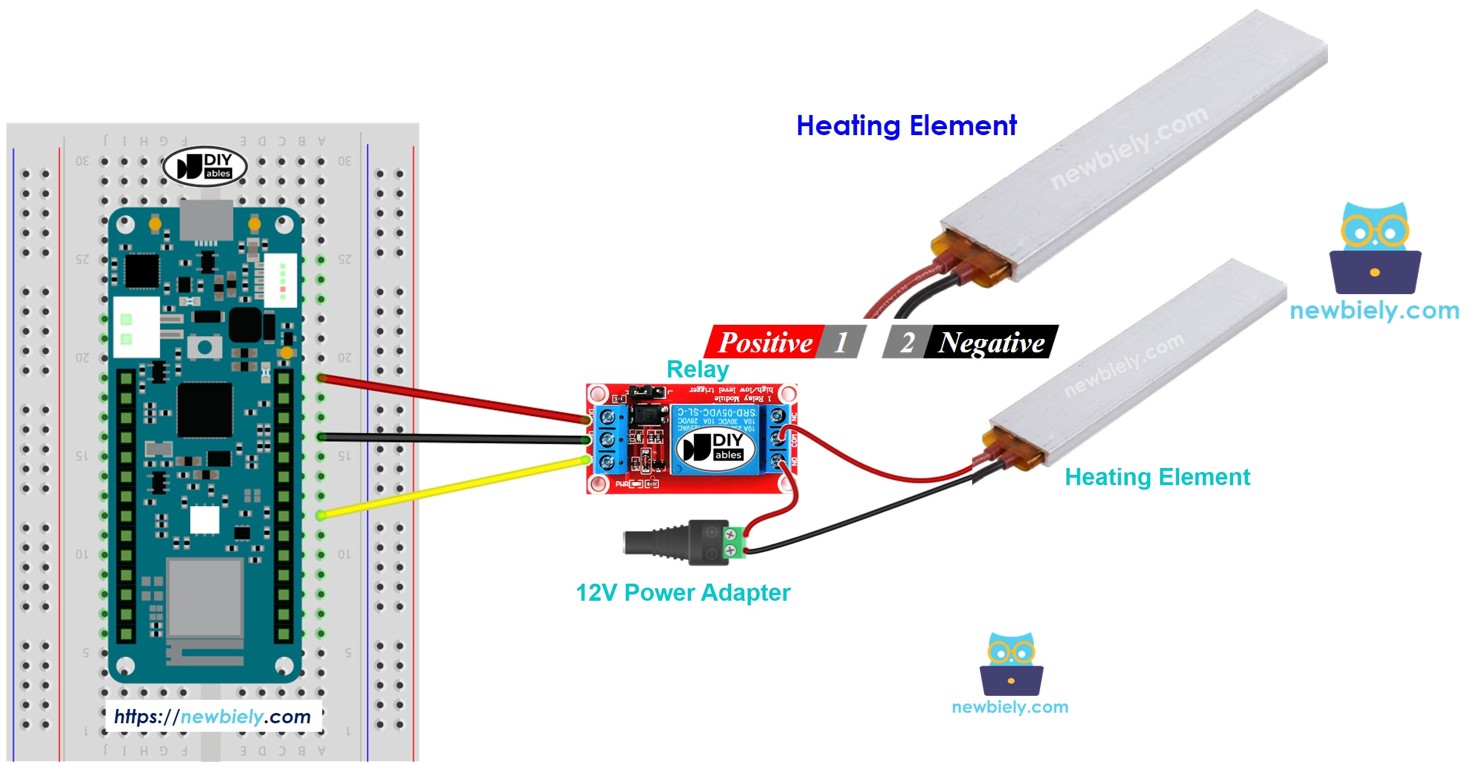
Wiring Diagram
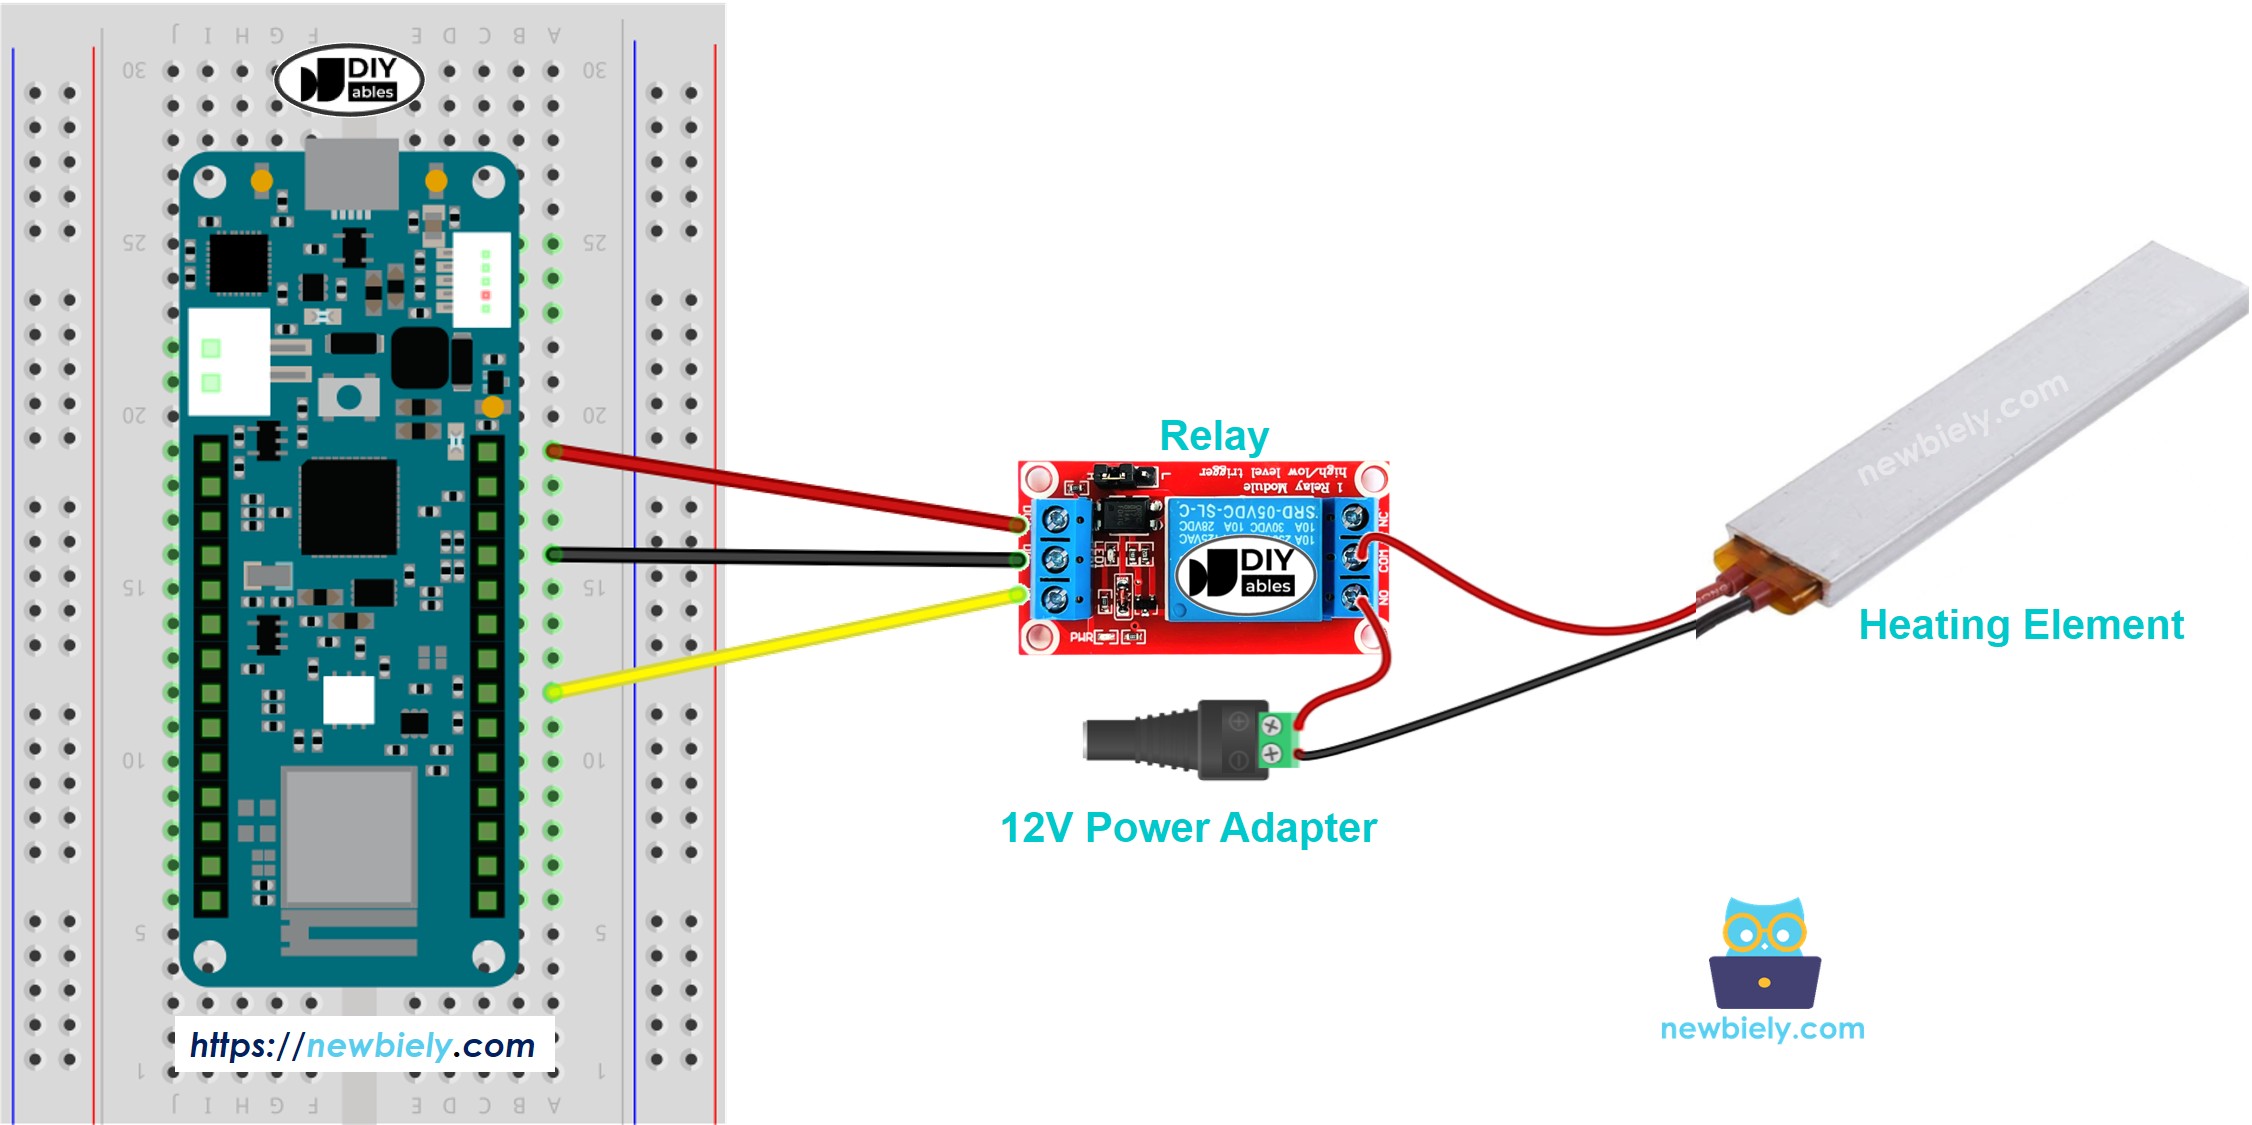
This image is created using Fritzing. Click to enlarge image
Arduino MKR WiFi 1010 Code
This code repeatedly turns the heating element on for five seconds and then off for five seconds.
Detailed Instructions
New to Arduino MKR WiFi 1010? Complete our Getting Started with Arduino MKR WiFi 1010 tutorial first to set up your development environment.
- Connect the components to the Arduino MKR WiFi 1010 board as depicted in the diagram
- Plug your Arduino MKR WiFi 1010 into your computer's USB port
- Launch the Arduino IDE on your computer
- Select the Arduino MKR WiFi 1010 board and its COM port
- Copy the code provided above and paste it into the Arduino software.
- Click the Upload button to compile and send the code to your Arduino MKR WiFi 1010 board.
- Look at the temperature of the heating element.
WARNING
Be careful. It can burn you and your home. This is very serious, and we want you to be safe. If you are not 100% sure about what you are doing, please do not touch anything. Ask someone who understands. We are not responsible for your safety.
Code Explanation
The Arduino MKR WiFi 1010 code above has an explanation for each line. Please read the comments in the code!