
Arduino MicroPython SCD40 CO2 Sensor
This guide shows you how to check the air in your room with an SCD40 CO2 sensor, an Arduino Giga R1 WiFi and MicroPython. You will learn:
- What the SCD40 measures and how to read its CO2 value in ppm.
- How to connect the SCD40 module to the Arduino over I2C.
- How to write MicroPython code (with no extra library) that reads the CO2 level and says if the air is good or not.
- How to read the temperature and humidity that the same sensor gives for free.
https://newbiely.com/images/cover/arduino-scd40-co2-sensor-micropython.jpg
Hardware Preparation
Or you can buy the following kits:
| 1 | × | DIYables Sensor Kit (18 sensors/displays) |
Additionally, some of these links are for products from our own brand, DIYables .
Overview of SCD40 CO2 Sensor and Pinout
When many people stay in a closed room, the CO2 level goes up and the air feels heavy. The SCD40 from Sensirion measures this CO2 directly. It is a real NDIR (photoacoustic) sensor, not a gas sensor that only guesses an "eCO2" value like the MQ135 or CCS811. The idea is simple: a tiny infrared light blinks inside the sensor chamber. CO2 takes in some of that light and makes a very small pressure "sound", and a small microphone hears it. More CO2 gives a stronger sound.
| SCD40 | |
|---|---|
| Supply voltage | 2.4V to 5.5V |
| Interface | I2C, address 0x62 |
| CO2 output range | 0 to 40,000 ppm |
| CO2 accuracy | ±(50 ppm + 5% of reading), from 400 to 2,000 ppm |
| New reading | every 5 seconds (every 30 seconds in low-power mode) |
| Temperature accuracy | ±0.8°C (15°C to 35°C) |
| Humidity accuracy | ±6 %RH (15°C to 35°C, 20 to 65 %RH) |
| Average current | about 15 mA at 3.3V |
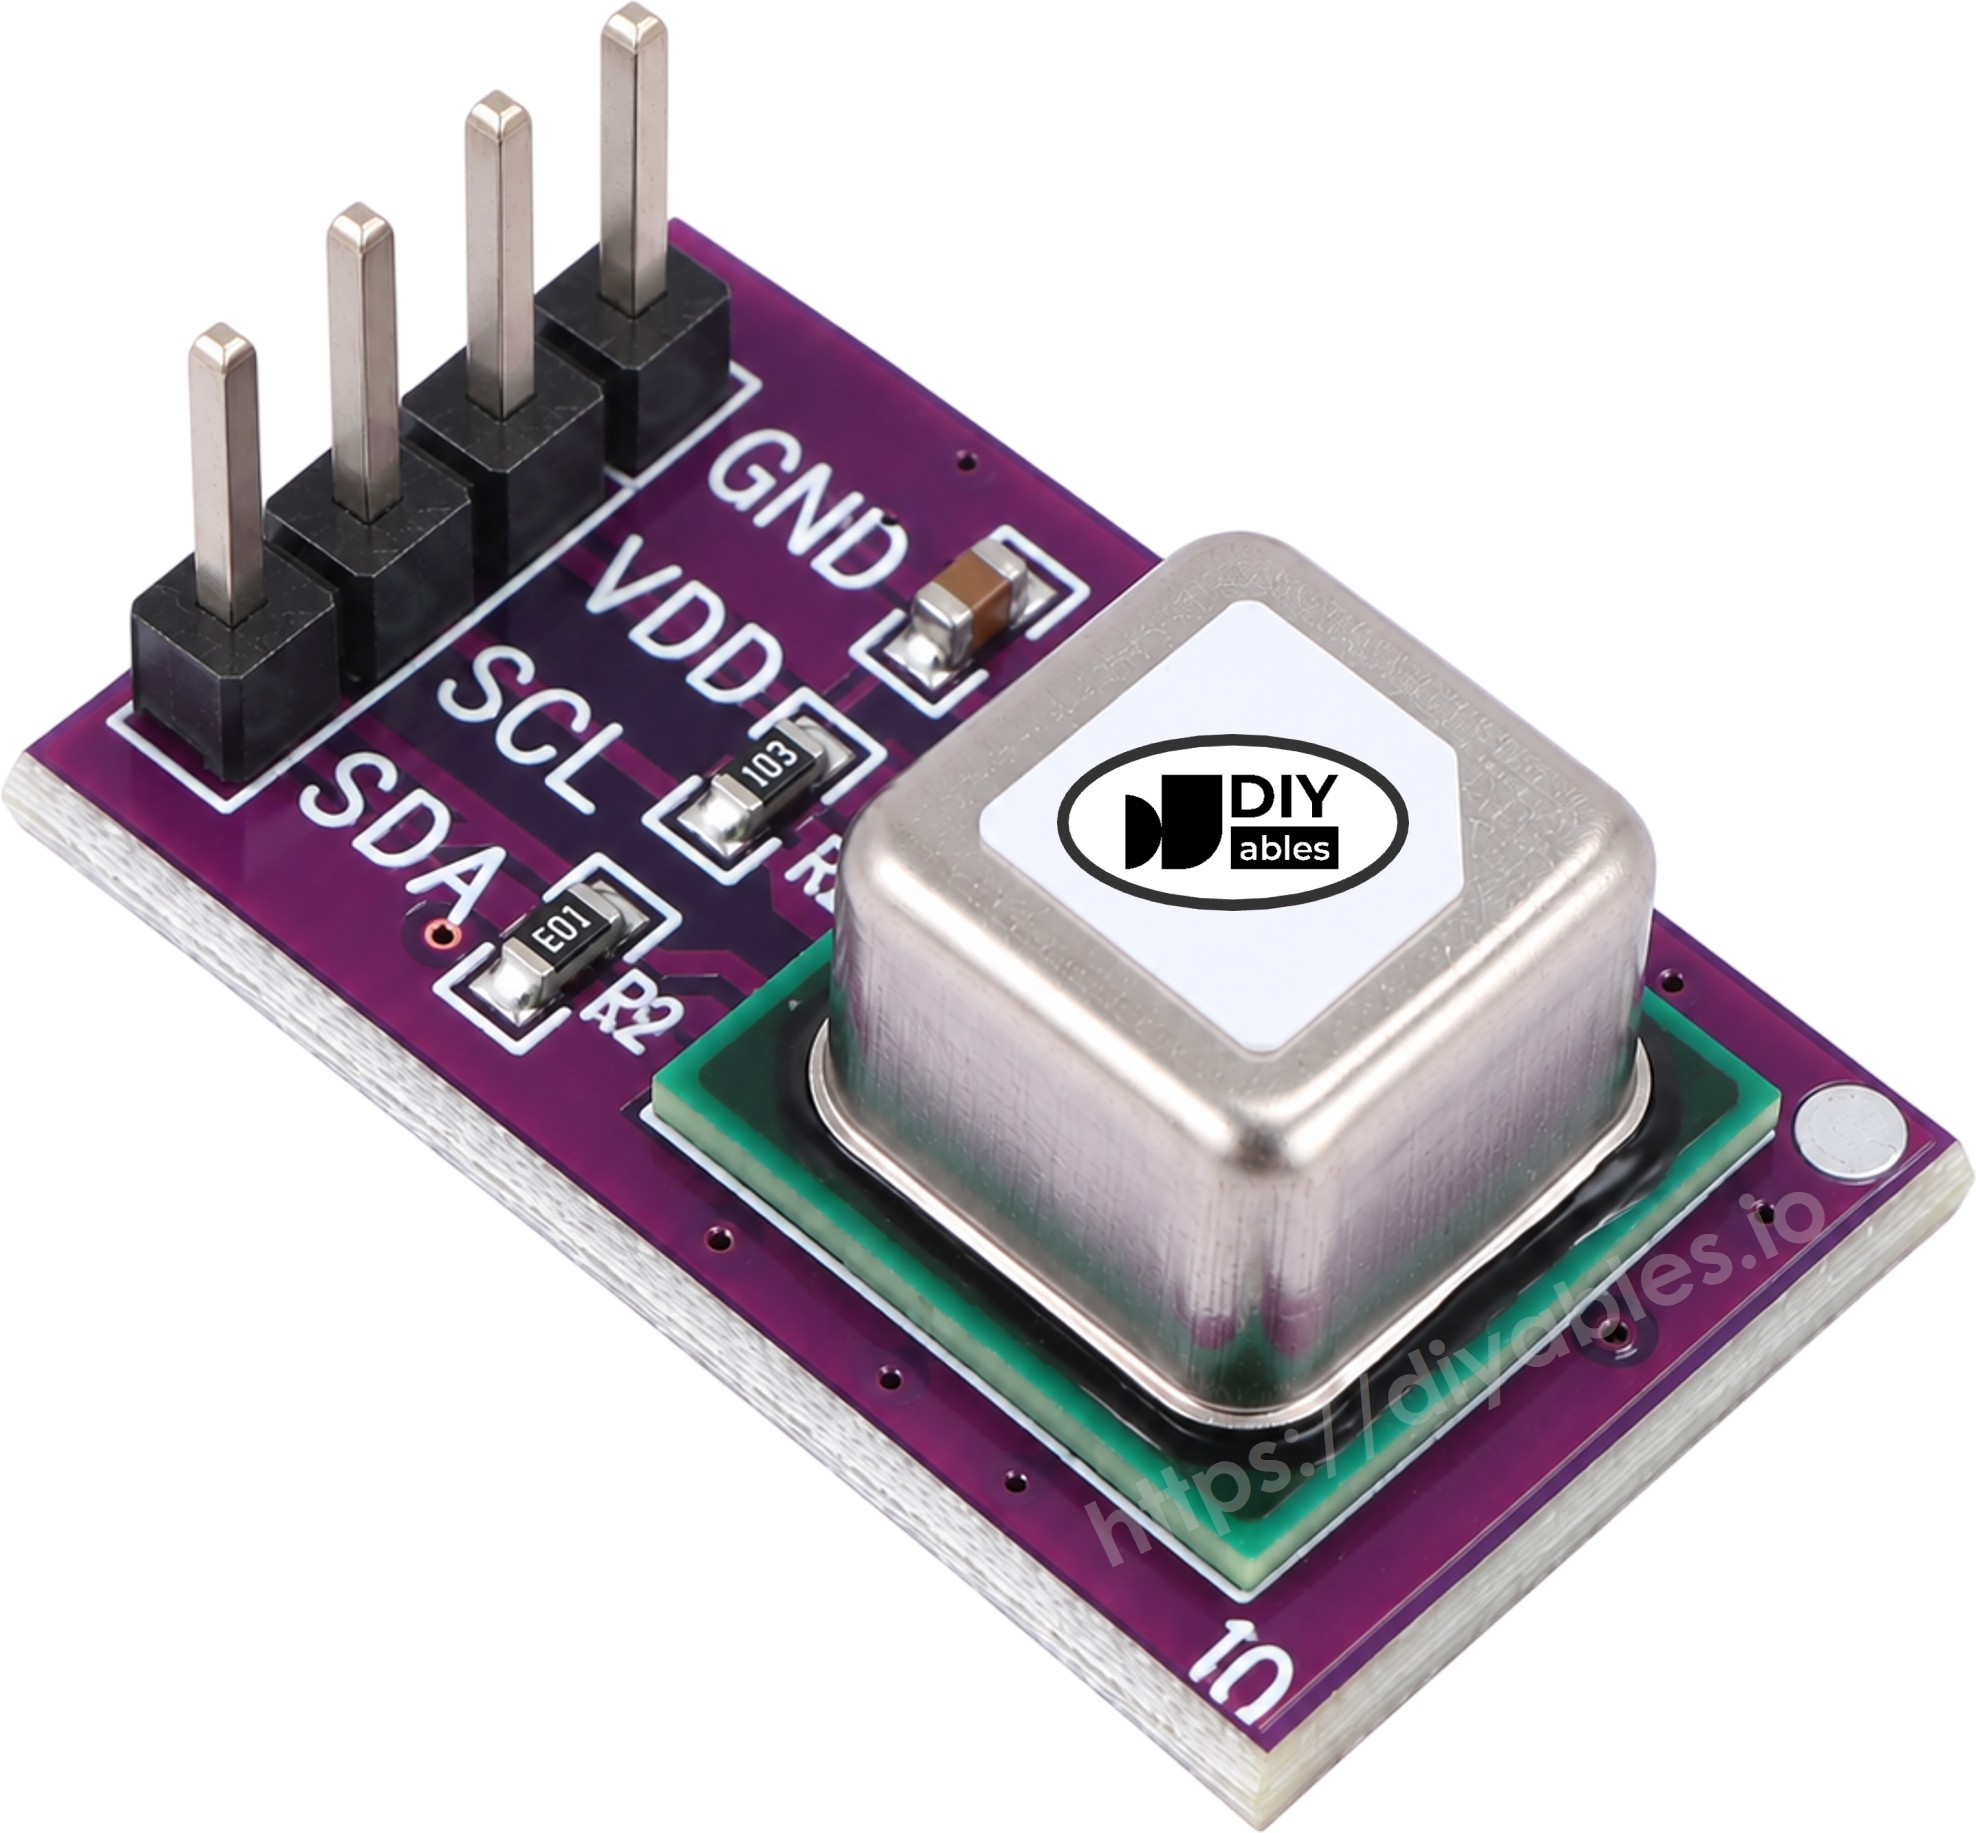
The SCD40 module has four pins:
- VCC pin: connect to 3.3 volts on the Arduino Giga (the sensor accepts 2.4 to 5.5 volts).
- GND pin: connect to GND (0 volts).
- SCL pin: the I2C clock signal.
- SDA pin: the I2C data signal.
Most SCD40 modules already have I2C pull-up resistors on the board, so you do not need to add any. Because these pull-ups go to the VCC pin, powering the module from 3.3 volts keeps the SDA and SCL lines at the safe 3.3V logic level of the Giga.
A few things good to know:
- Automatic self-calibration is ON by default. The sensor thinks that the lowest value it sees in about a week is fresh outdoor air (around 400 ppm). So, let it see fresh air (for example near an open window) for an hour or more at least once a week.
- The first readings after power-on can be a bit off. Give it a few minutes to settle.
How to read the CO2 number:
| CO2 level (ppm) | Air quality | What to do |
|---|---|---|
| around 400 | Fresh | Normal outdoor air |
| 400 to 1000 | Good | Normal indoor air |
| 1000 to 2000 | Stuffy | Open a window |
| above 2000 | Poor | Headache or sleepiness is possible, let fresh air in |
Wiring Diagram
The SCD40 uses the same I2C1 pins of the Arduino Giga as other I2C modules in this series.
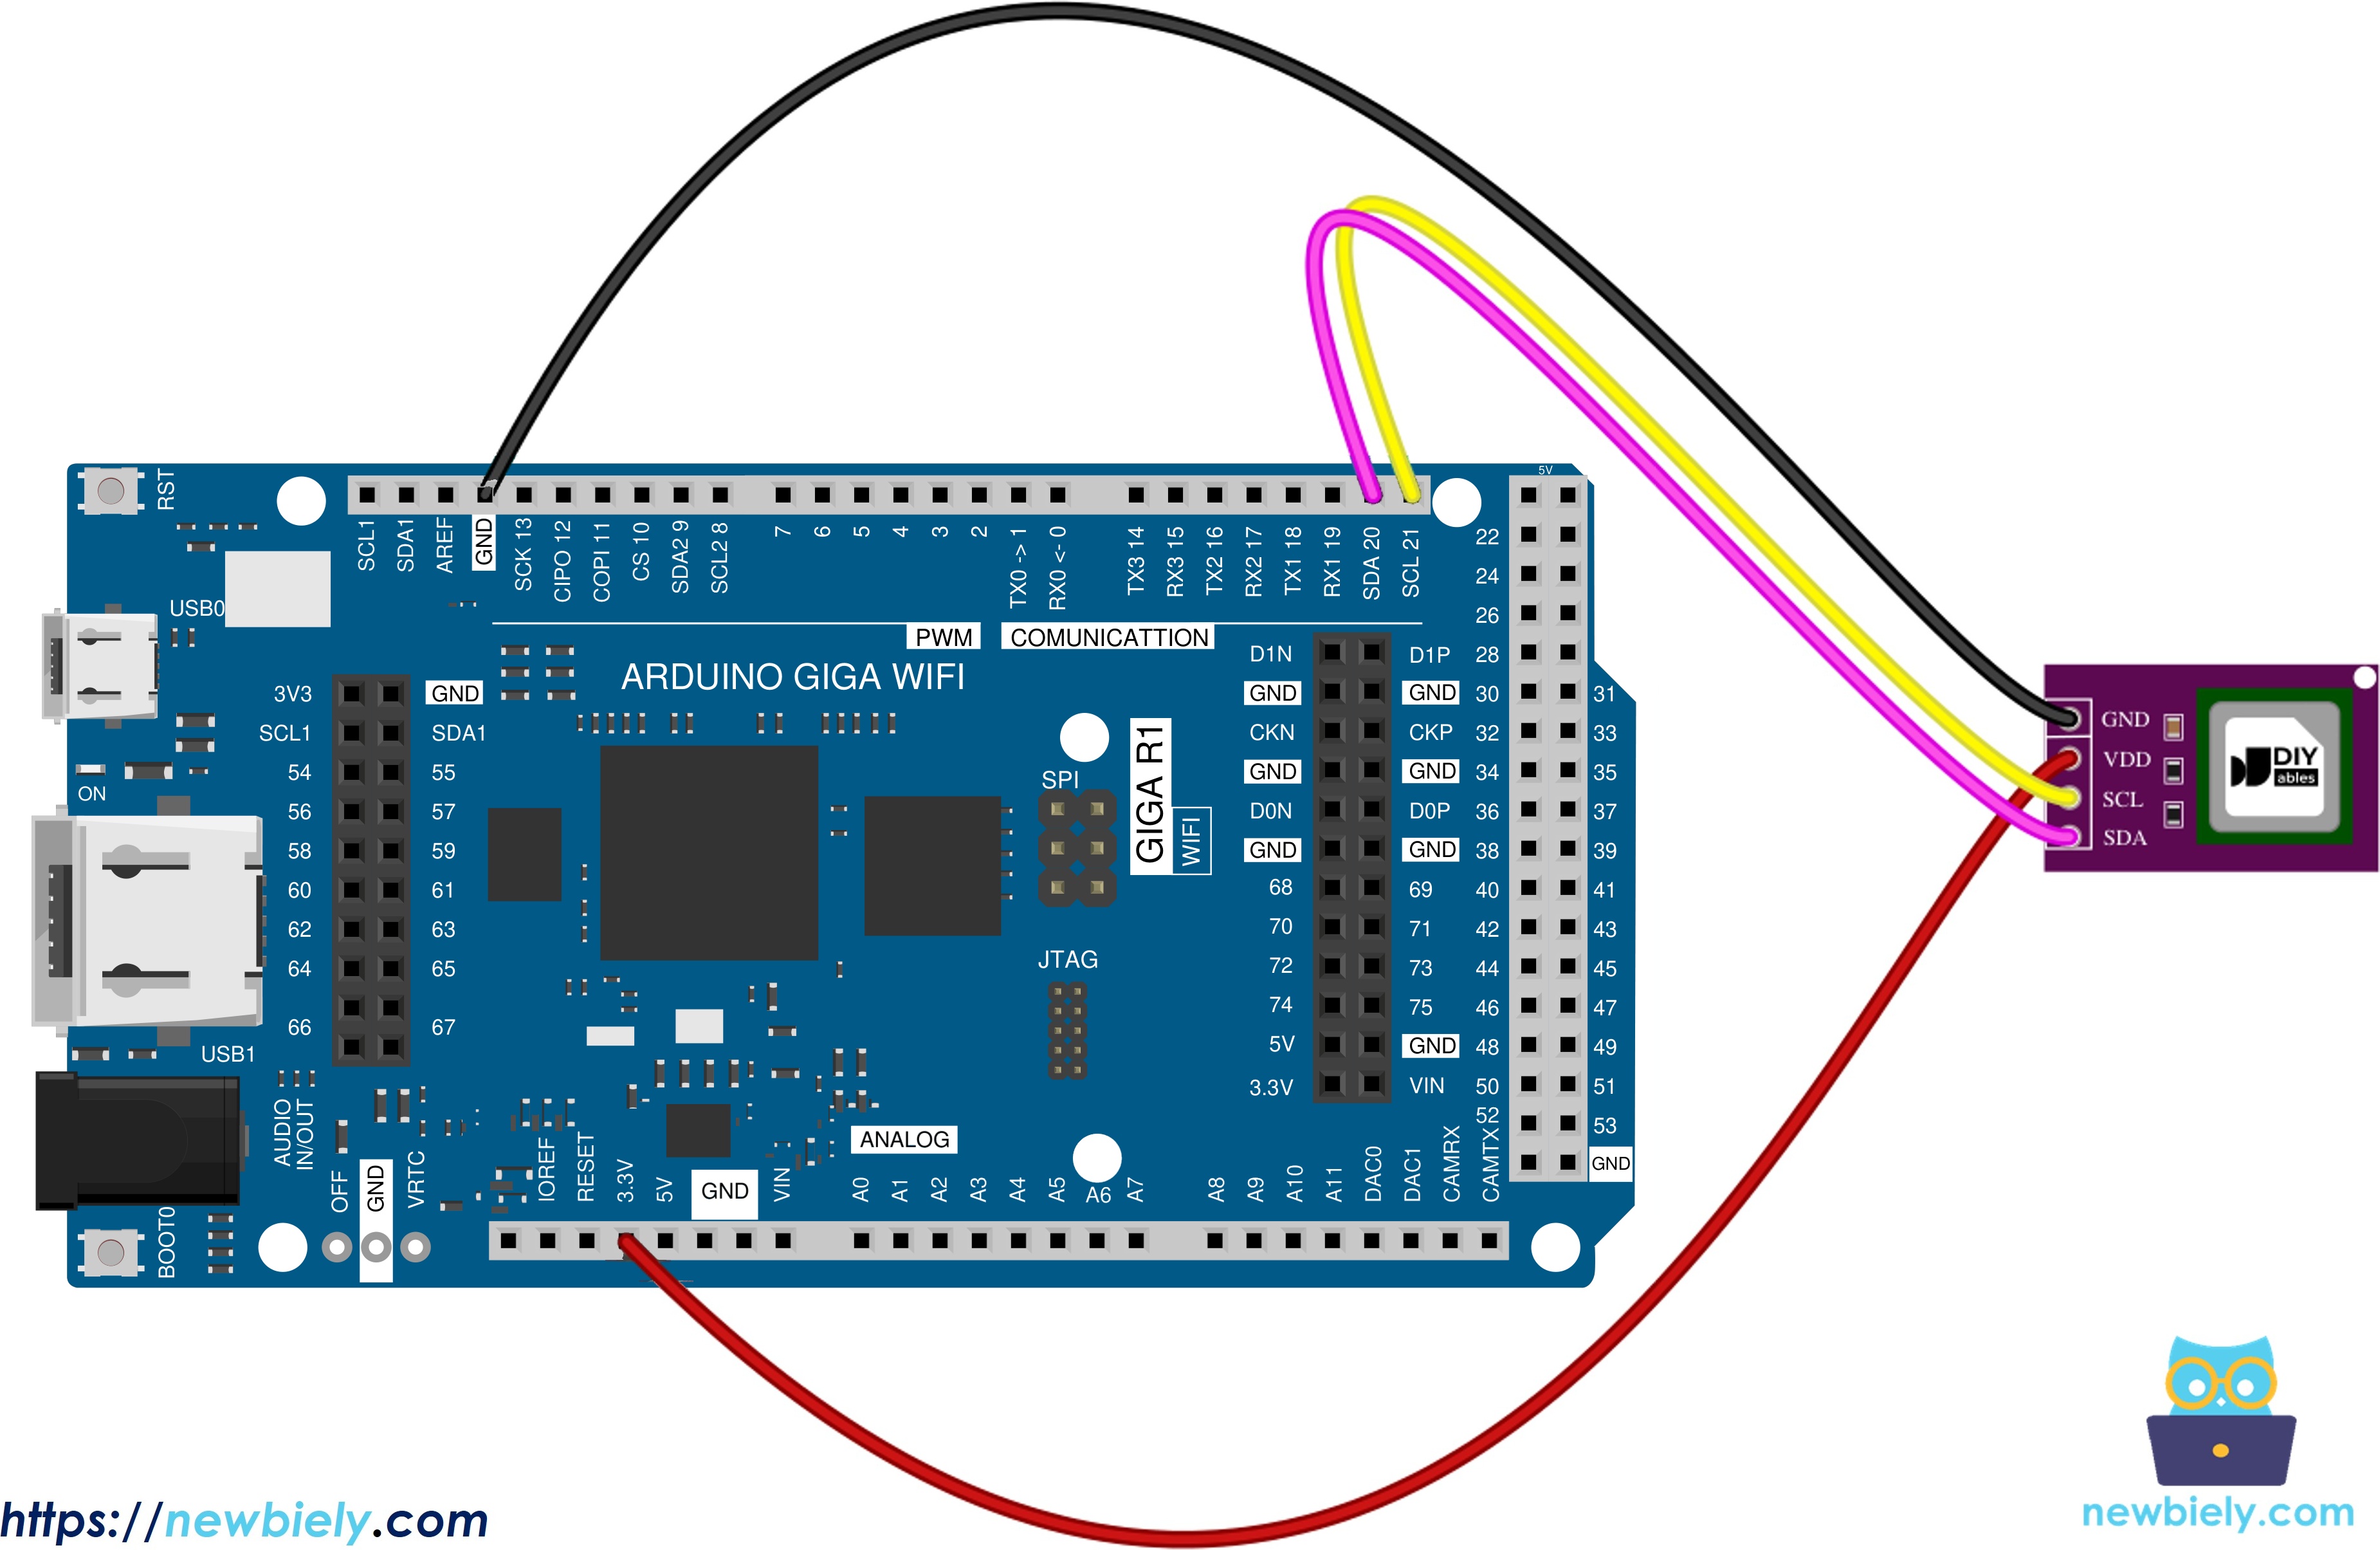
This image is created using Fritzing. Click to enlarge image
| SCD40 Module | Arduino Giga |
|---|---|
| VCC | 3.3V |
| GND | GND |
| SDA | D9 |
| SCL | D8 |
How To Program SCD40 With MicroPython
There is no need to install a library. The SCD40 understands a few simple I2C commands, and the code sends them with the machine.I2C class:
- Each command is a 16-bit number, sent high byte first, for example 0x21B1 starts the measurement.
- After a "read" command, the code waits 1 ms and then reads the answer. Every 2 data bytes come with 1 CRC byte, which the code checks to catch bad data.
- 0xE4B8 asks "is new data ready?". 0xEC05 reads 9 bytes: CO2, temperature and humidity.
The CO2 value is the first word, already in ppm. No math is needed.
Arduino MicroPython Code - Read CO2
Detailed Instructions
Here’s instructions on how to run the above MicroPython code on Arduino with Thonny IDE:
- Make sure Thonny IDE is installed on your computer.
- Make sure MicroPython firmware is installed on your Arduino board.
- If you are new to Arduino with MicroPython, see the Getting Started with Arduino and MicroPython.
- Connect the SCD40 module to the Arduino as shown in the wiring table above.
- Connect the Arduino board to your computer with a USB cable.
- Open Thonny IDE and go to Tools Options.
- Under the Interpreter tab, select MicroPython (generic) from the dropdown menu.
- Select the COM port corresponding to your Arduino board (e.g., COM33 on Windows or /dev/ttyACM0 on Linux).
- Copy the provided Arduino MicroPython code and paste it into Thonny's editor.
- Save the MicroPython code to your Arduino by:
- Clicking the Save button or pressing Ctrl+S.
- In the save dialog, choose MicroPython device and name the file main.py.
- Click the green Run button (or press F5) to execute the code.
- Wait about 5 seconds for the first value. Then breathe gently toward the sensor and watch the number go up.
- Check out the message in the Shell at the bottom of Thonny.
A new line shows up about every 5 seconds, because the sensor makes a new reading at that speed. If you see "OSError" right away, check the SDA and SCL wires. A quick test is print(I2C(1).scan()): the SCD40 should show up as 98 (that is 0x62).
Reading Temperature and Humidity from the SCD40
The SCD40 has a small temperature and humidity sensor inside. It uses them to correct its CO2 value, and you can read them too. They come in the same 9-byte answer, as the second and third words. The code turns them into normal units like this:
- Temperature (°C) = -45 + 175 × word2 / 65535
- Humidity (%) = 100 × word3 / 65535
Note that the sensor warms up a little while it works, so the temperature can read slightly higher than the room.
Arduino MicroPython Code - CO2, Temperature and Humidity
Detailed Instructions
- Copy the code above and paste it into Thonny's editor.
- Save it to the Arduino as main.py and click the green Run button (or press F5).
- Check out the message in the Shell at the bottom of Thonny.