Raspberry Pi Pico - Write Variable to SD Card
This tutorial walks you through storing various MicroPython data types on a Micro SD Card using the Raspberry Pi Pico. Topics covered:
- Writing a text string to a file on the Micro SD Card
- Saving an integer number to the Micro SD Card
- Saving a floating-point number to the Micro SD Card
- Storing a byte array on the Micro SD Card
- Recording data in key=value format on the Micro SD Card
For the reverse process — reading key-value pairs from the Micro SD Card and converting them into int, float, or string variables — see the Raspberry Pi Pico - Read Config from SD Card tutorial.
Hardware Preparation
Or you can buy the following kits:
| 1 | × | DIYables Sensor Kit (18 sensors/displays) |
Additionally, some of these links are for products from our own brand, DIYables .
Overview of Micro SD Card Module
To learn about the Micro SD Card Module — including pin descriptions, wiring, and example code — refer to the Raspberry Pi Pico - Micro SD Card tutorial.
Wiring Diagram
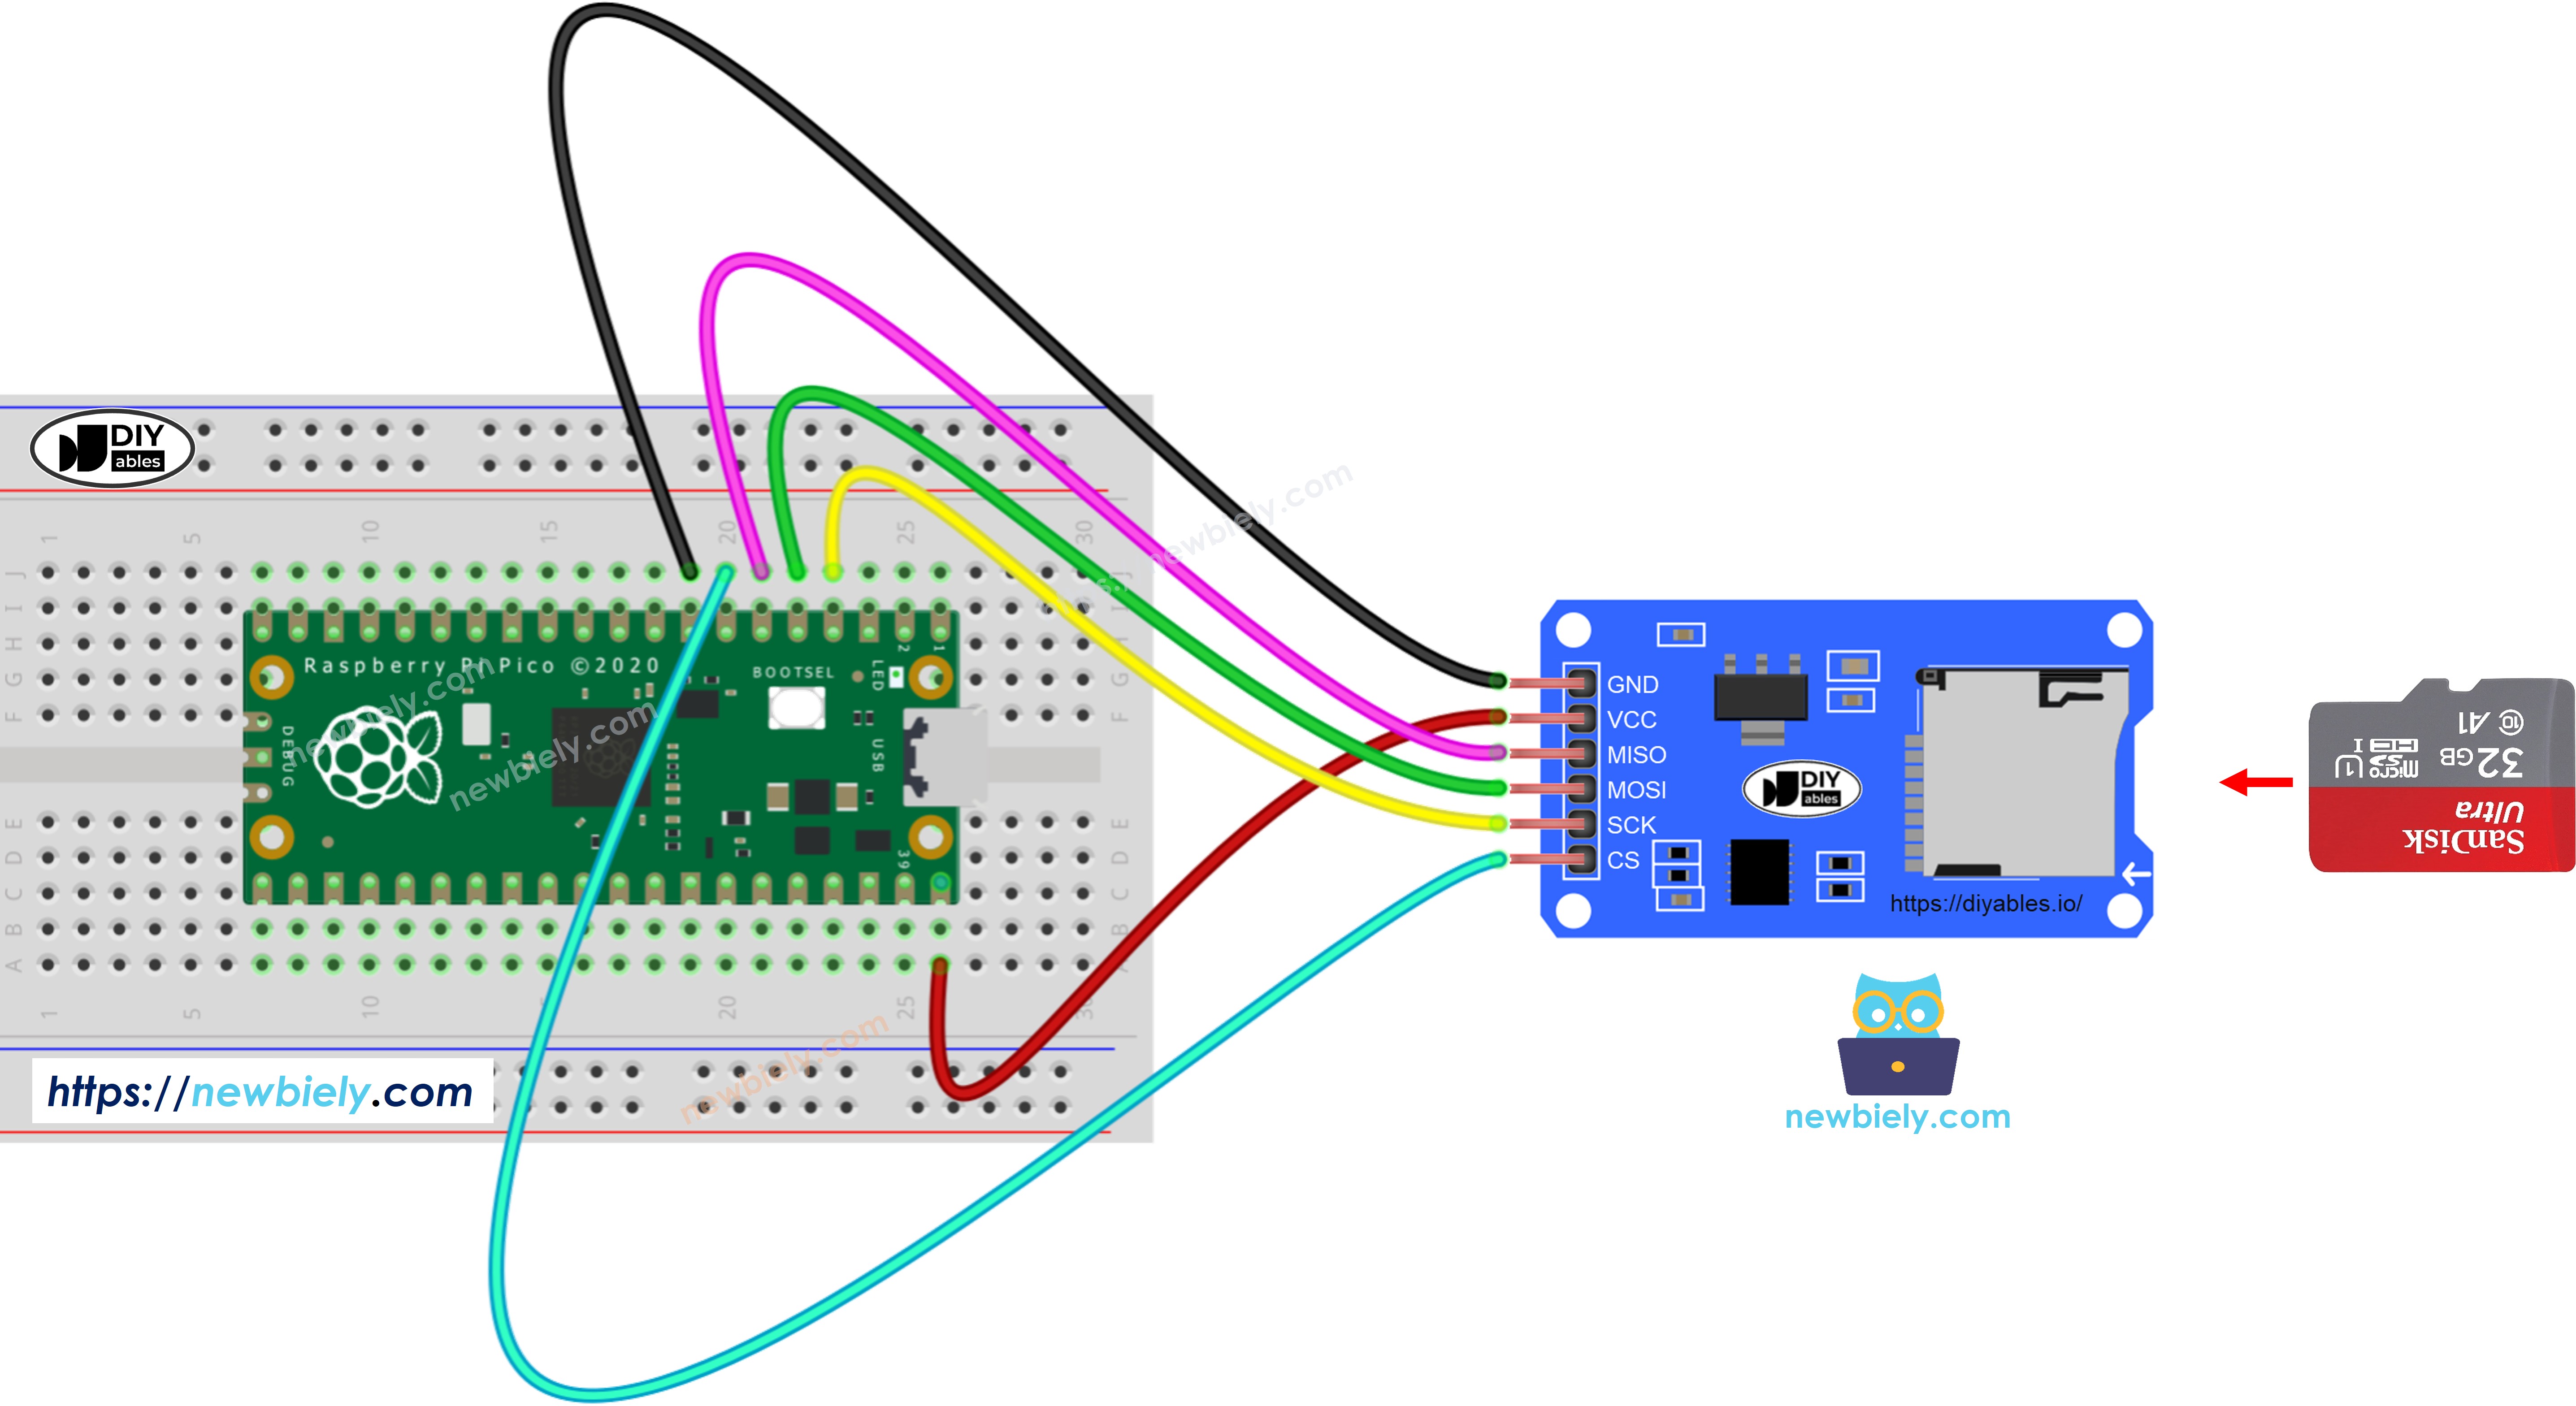
This image is created using Fritzing. Click to enlarge image
The wiring table below shows how to connect the Micro SD Card Module to the Raspberry Pi Pico:
| Micro SD Card Module | Raspberry Pi Pico |
|---|---|
| VCC | VBUS (5V) |
| GND | GND |
| MISO | GP4 |
| MOSI | GP3 |
| SCK | GP2 |
| CS | GP5 |
※ NOTE THAT:
When using a shield that already includes a Micro SD Card slot (for example, an Ethernet shield), no additional SD Card Module is required — just slide the card straight into the shield's built-in slot.
Raspberry Pi Pico - Saving Variables to a File on Micro SD Card
This MicroPython code demonstrates how to write different data types to a file:
- Save an int value to the Micro SD Card
- Save a float value to the Micro SD Card
- Save a string to the Micro SD Card
- Save a byte array to the Micro SD Card
Detailed Instructions
Follow the steps below to set up and run the code:
- Verify that Thonny IDE is installed on your PC.
- Make sure MicroPython firmware has been flashed onto your Raspberry Pi Pico.
- First-time users should consult the Raspberry Pi Pico - Getting Started guide for setup details.
- Assemble the circuit following the wiring diagram above.
- Plug the Raspberry Pi Pico into your computer via USB cable.
- Open Thonny IDE.
- Go to Tools Options, then in the Interpreter tab pick MicroPython (Raspberry Pi Pico).
- Check that the correct serial port is selected — Thonny usually finds it automatically, but manual selection may be needed (for example COM3 on Windows or /dev/ttyACM0 on Linux).
- Paste the code above into the Thonny editor window.
- Save the file to the Raspberry Pi Pico:
- Press Ctrl+S or click Save.
- When prompted, select the Raspberry Pi Pico location.
- Name the file main.py.
- Hit the green Run button (or press F5). The script will start executing.
- Review the output in the Shell panel at the bottom of Thonny.
Saving your script as main.py in the Pico's root directory means it will launch automatically whenever the board powers up or resets — ideal for standalone projects. Scripts saved under a different name must be started manually through the Thonny Shell.
- Make sure the Micro SD Card is formatted as FAT16 or FAT32 (look up instructions online)
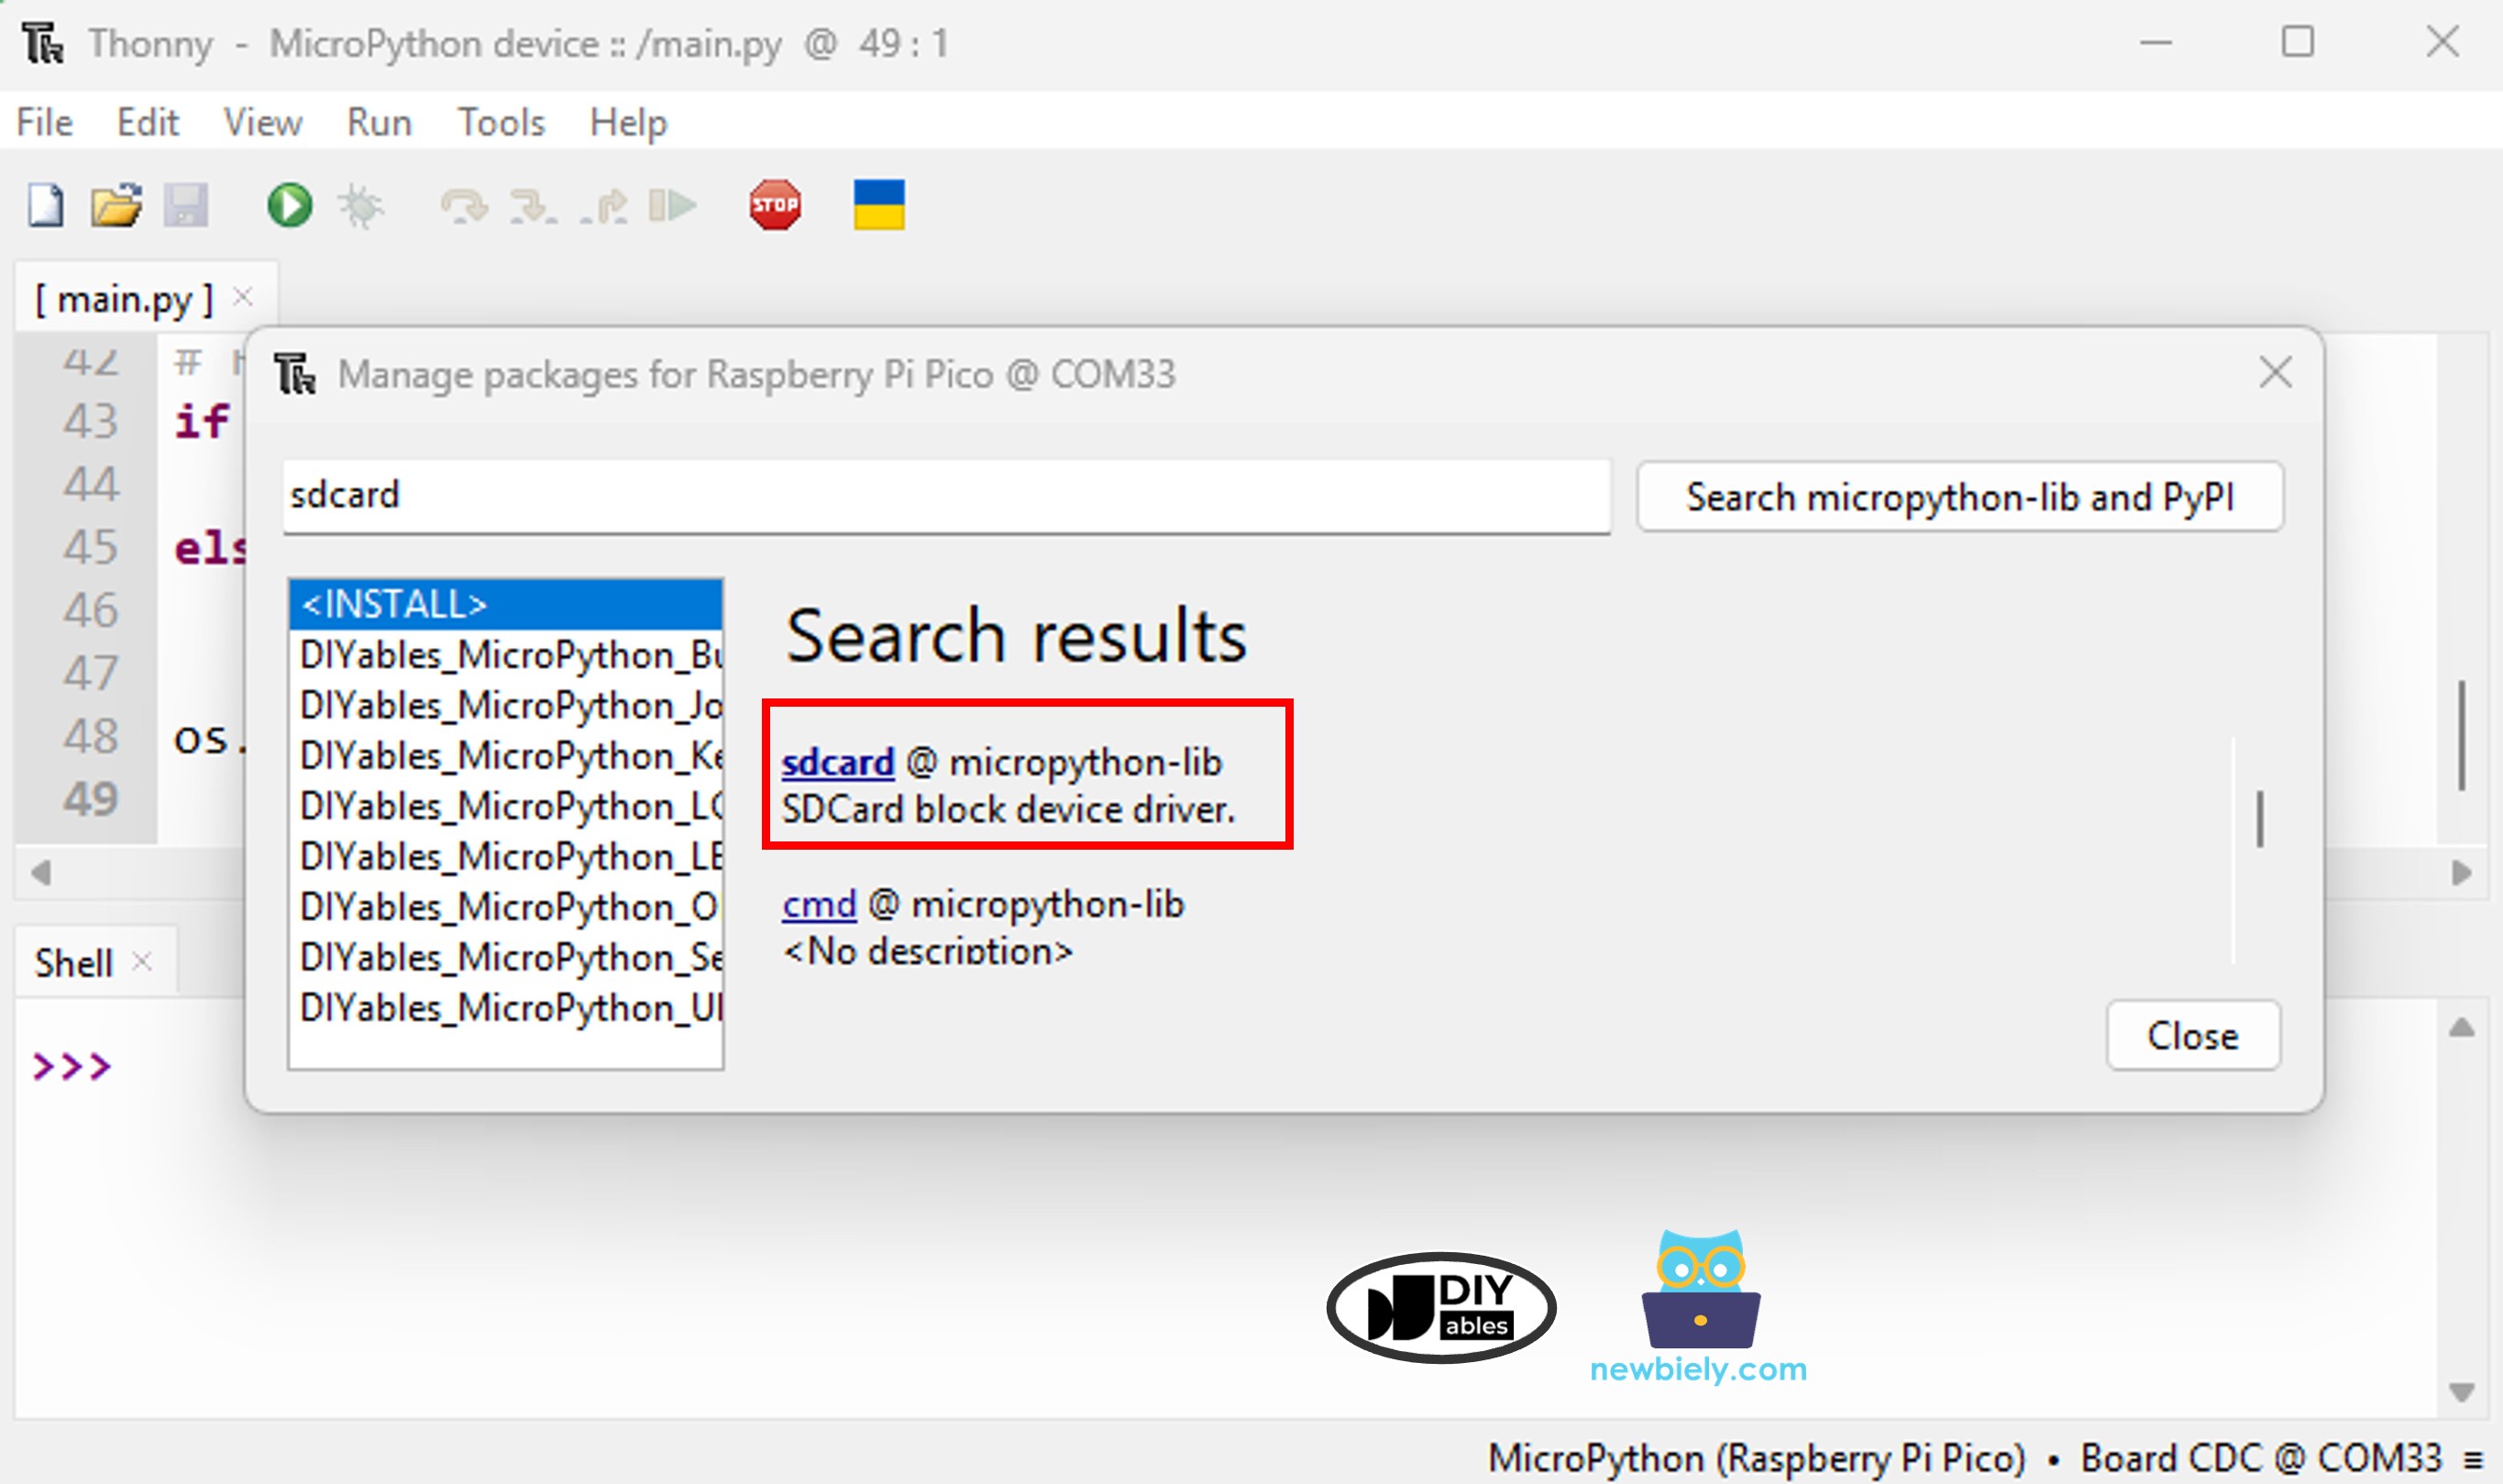
- Install the sdcard library on the Raspberry Pi Pico via Thonny IDE:
- Go to Tools Manage packages in Thonny IDE.
- Type sdcard in the search box and install the micropython-sdcard package.
- Paste the code into Thonny's editor
- Click Run to execute the code on the Raspberry Pi Pico
- Check the Shell for the output:
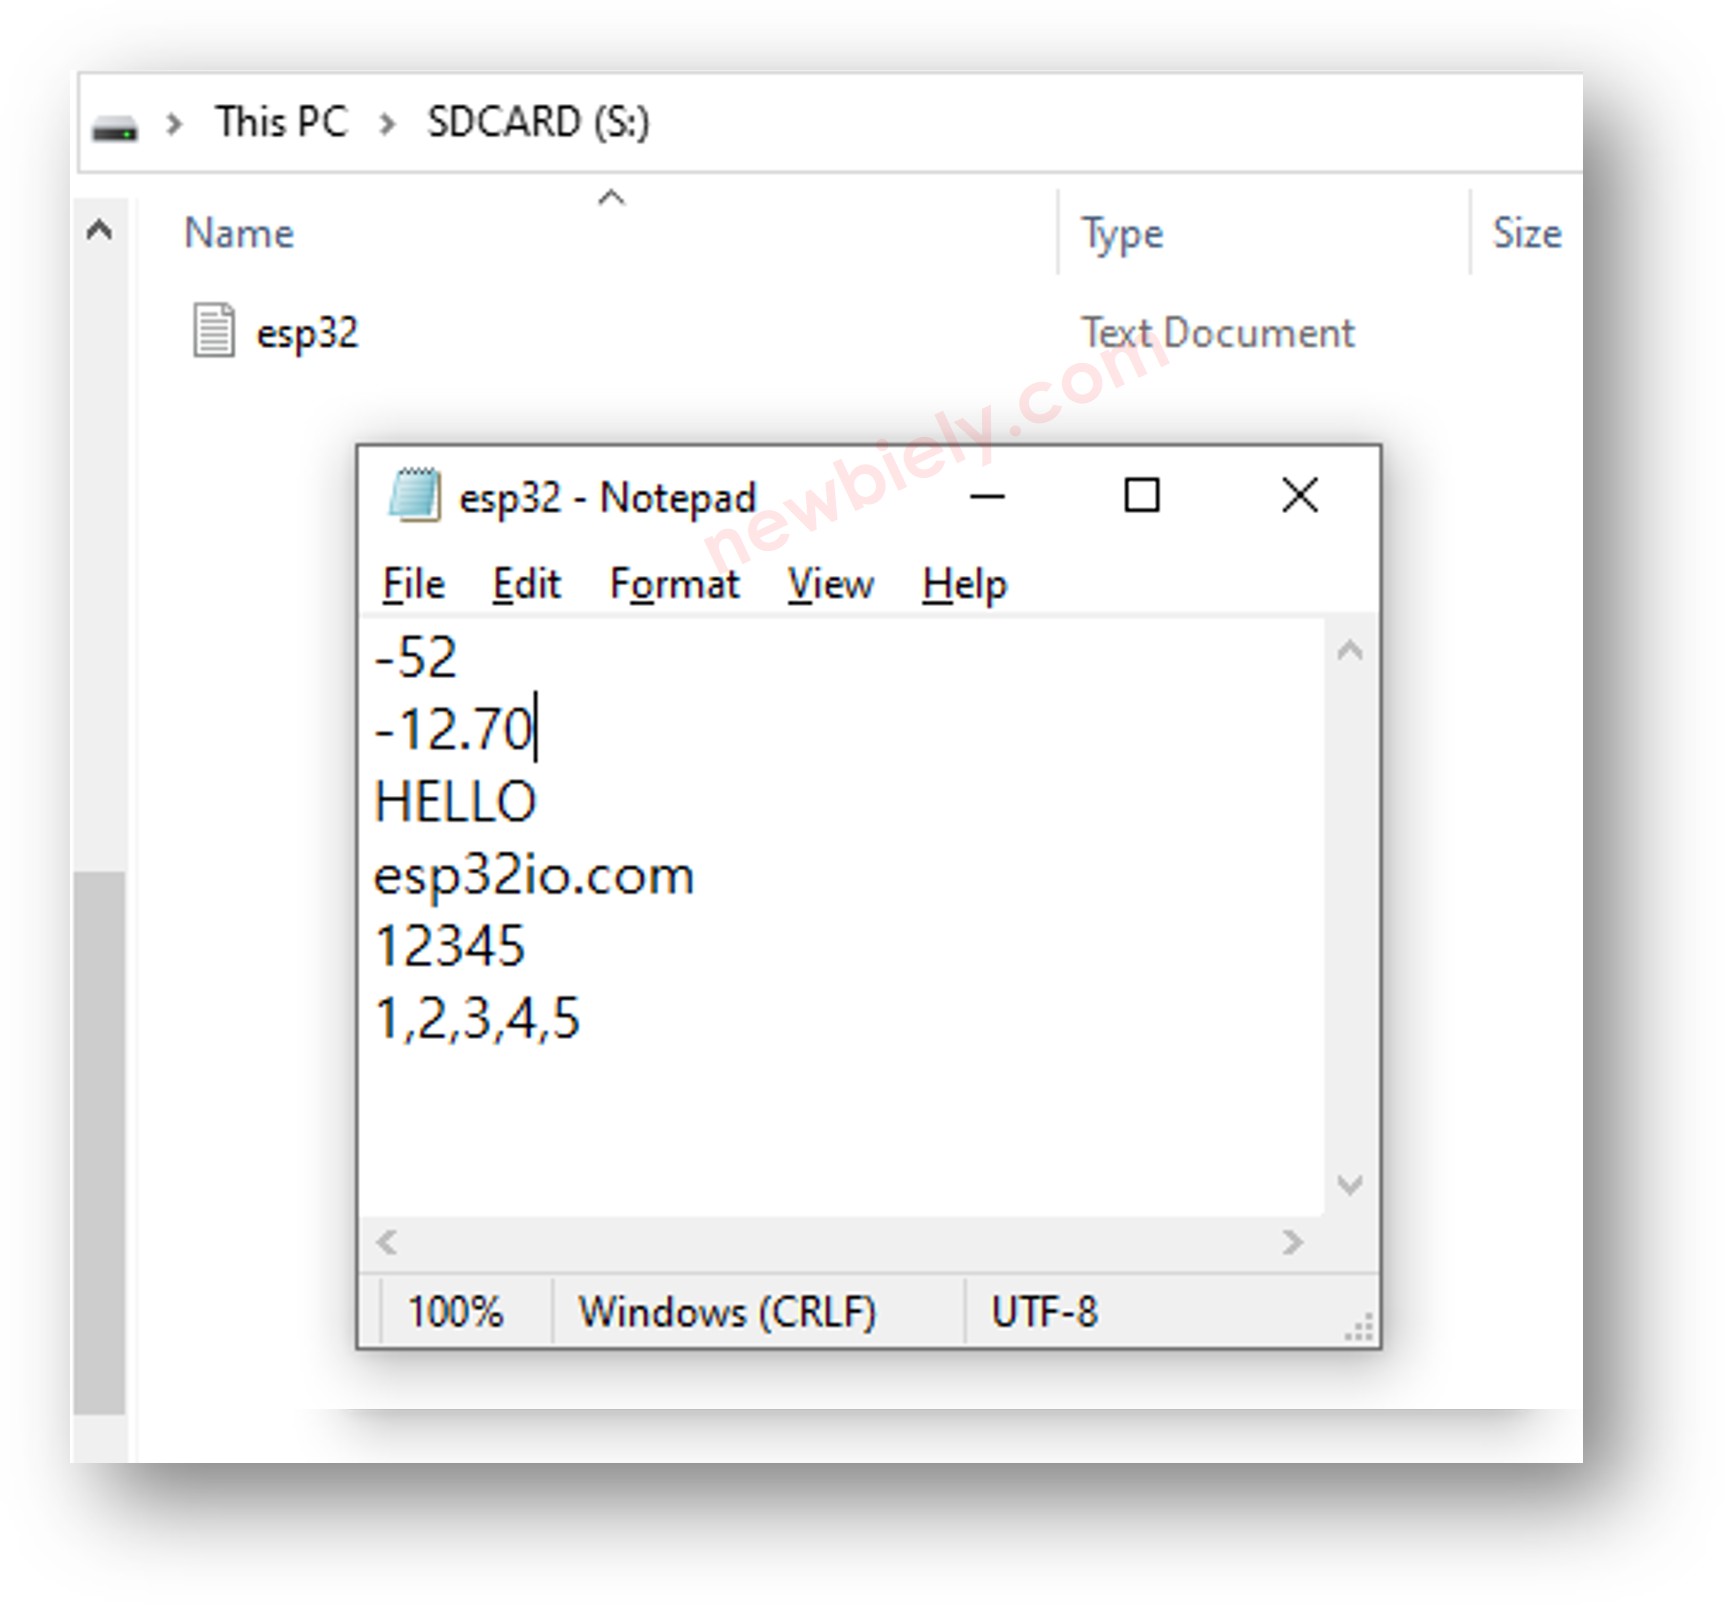
- Remove the Micro SD Card from the module.
- Plug it into a USB SD Card reader connected to your PC.
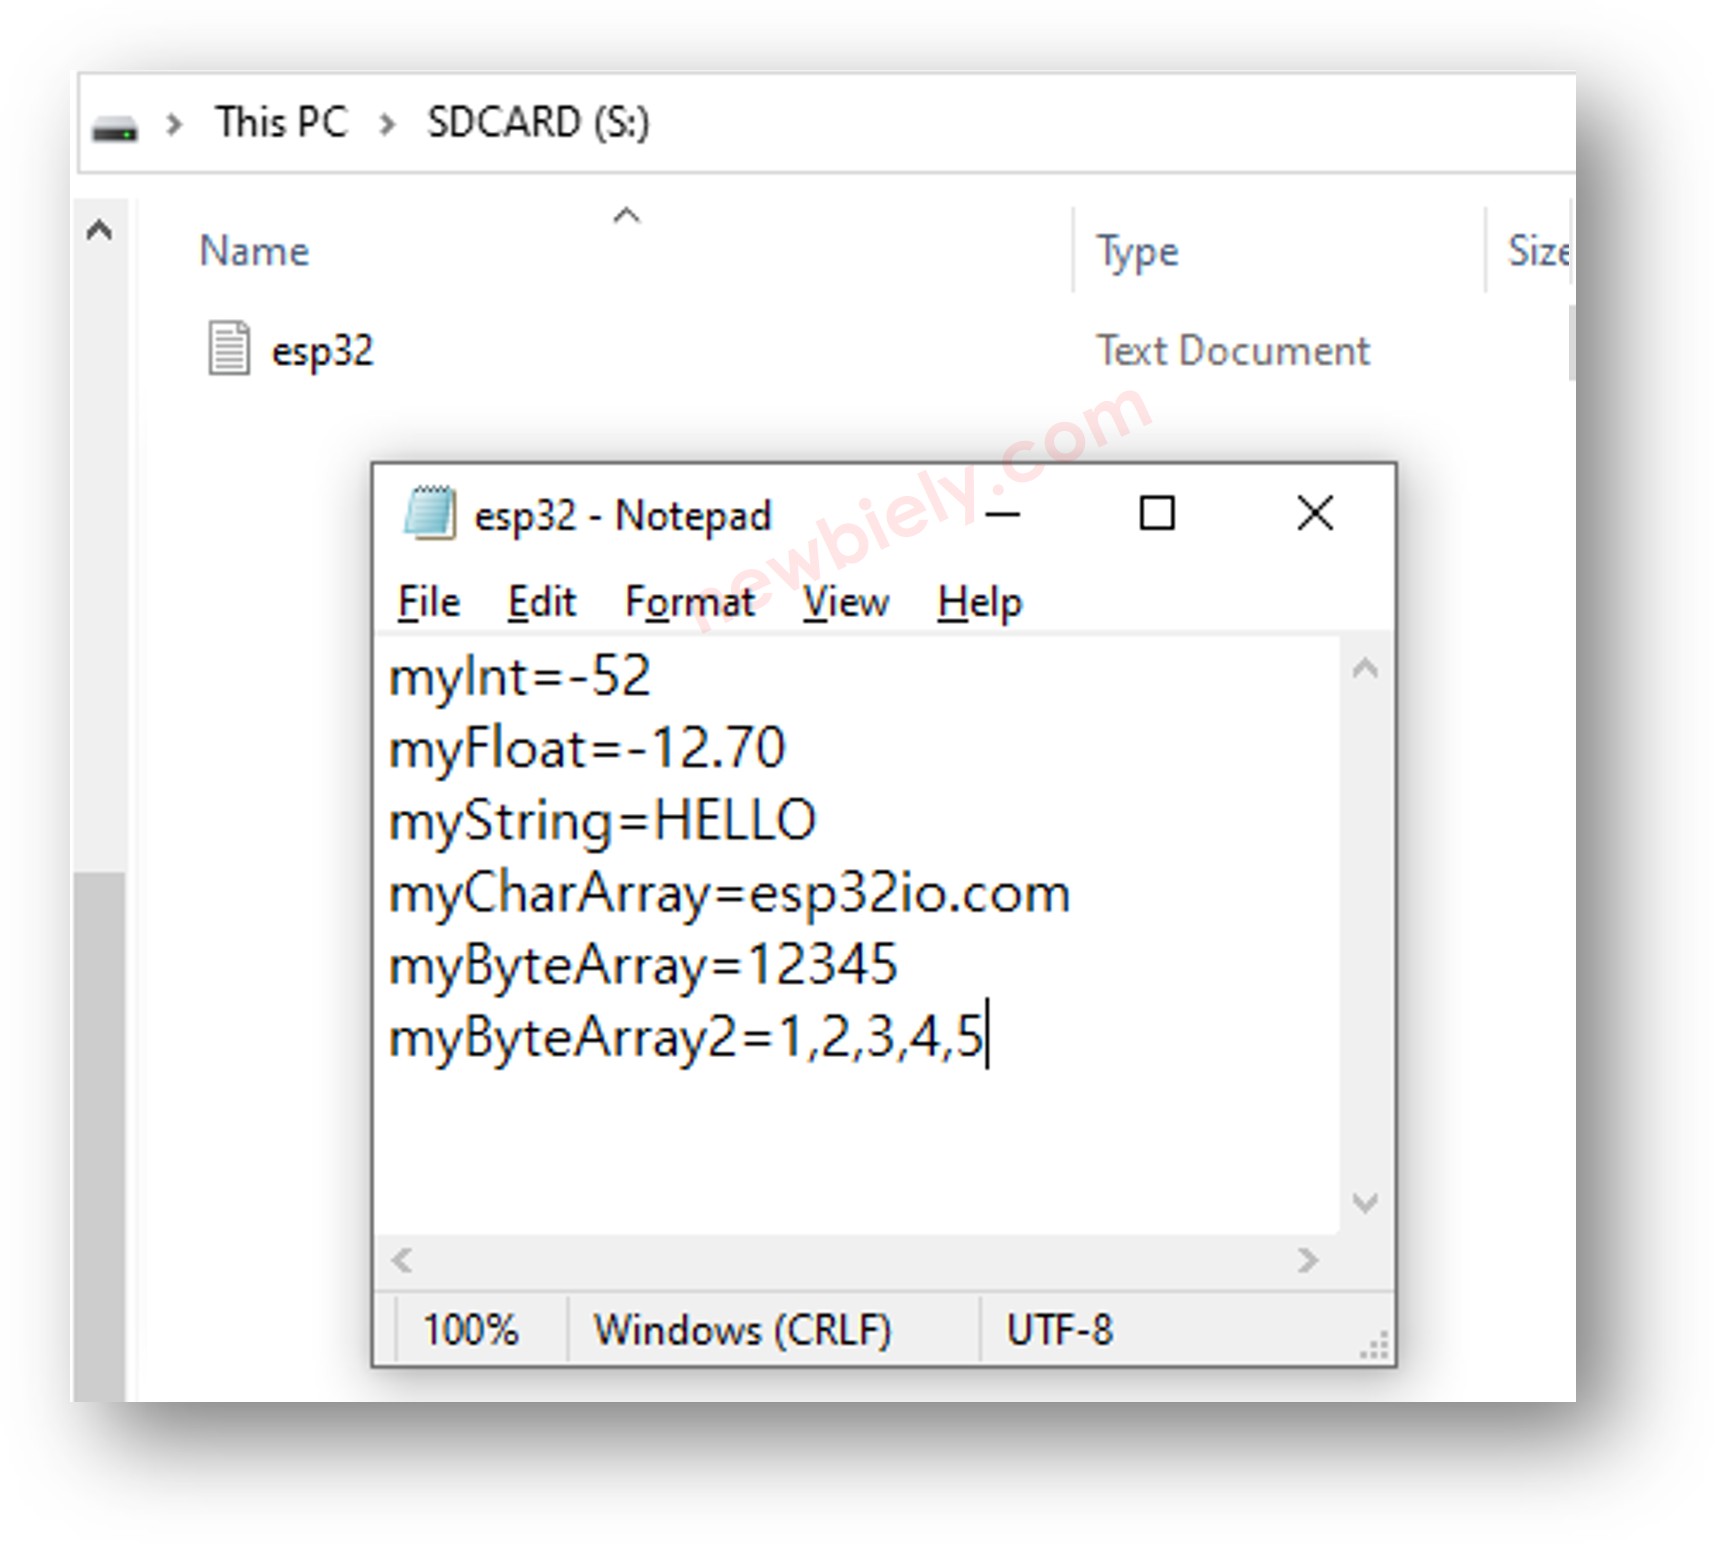
- Open the pico.txt file — its content should match the Shell output:
Raspberry Pi Pico - Storing Key-Value Pairs on Micro SD Card
Detailed Instructions
- Paste the above code into Thonny's editor.
- Click Run to execute the script on the Raspberry Pi Pico.
- Observe the results in the Shell:
- Eject the Micro SD Card from the module, insert it into a USB reader, and connect it to your PC. Open the pico.txt file to verify its contents match the output shown above.