Raspberry Pi Pico - Read Config from SD Card
This tutorial explains how to read configuration settings from a file stored on a Micro SD Card using the Raspberry Pi Pico with MicroPython. You will learn to:
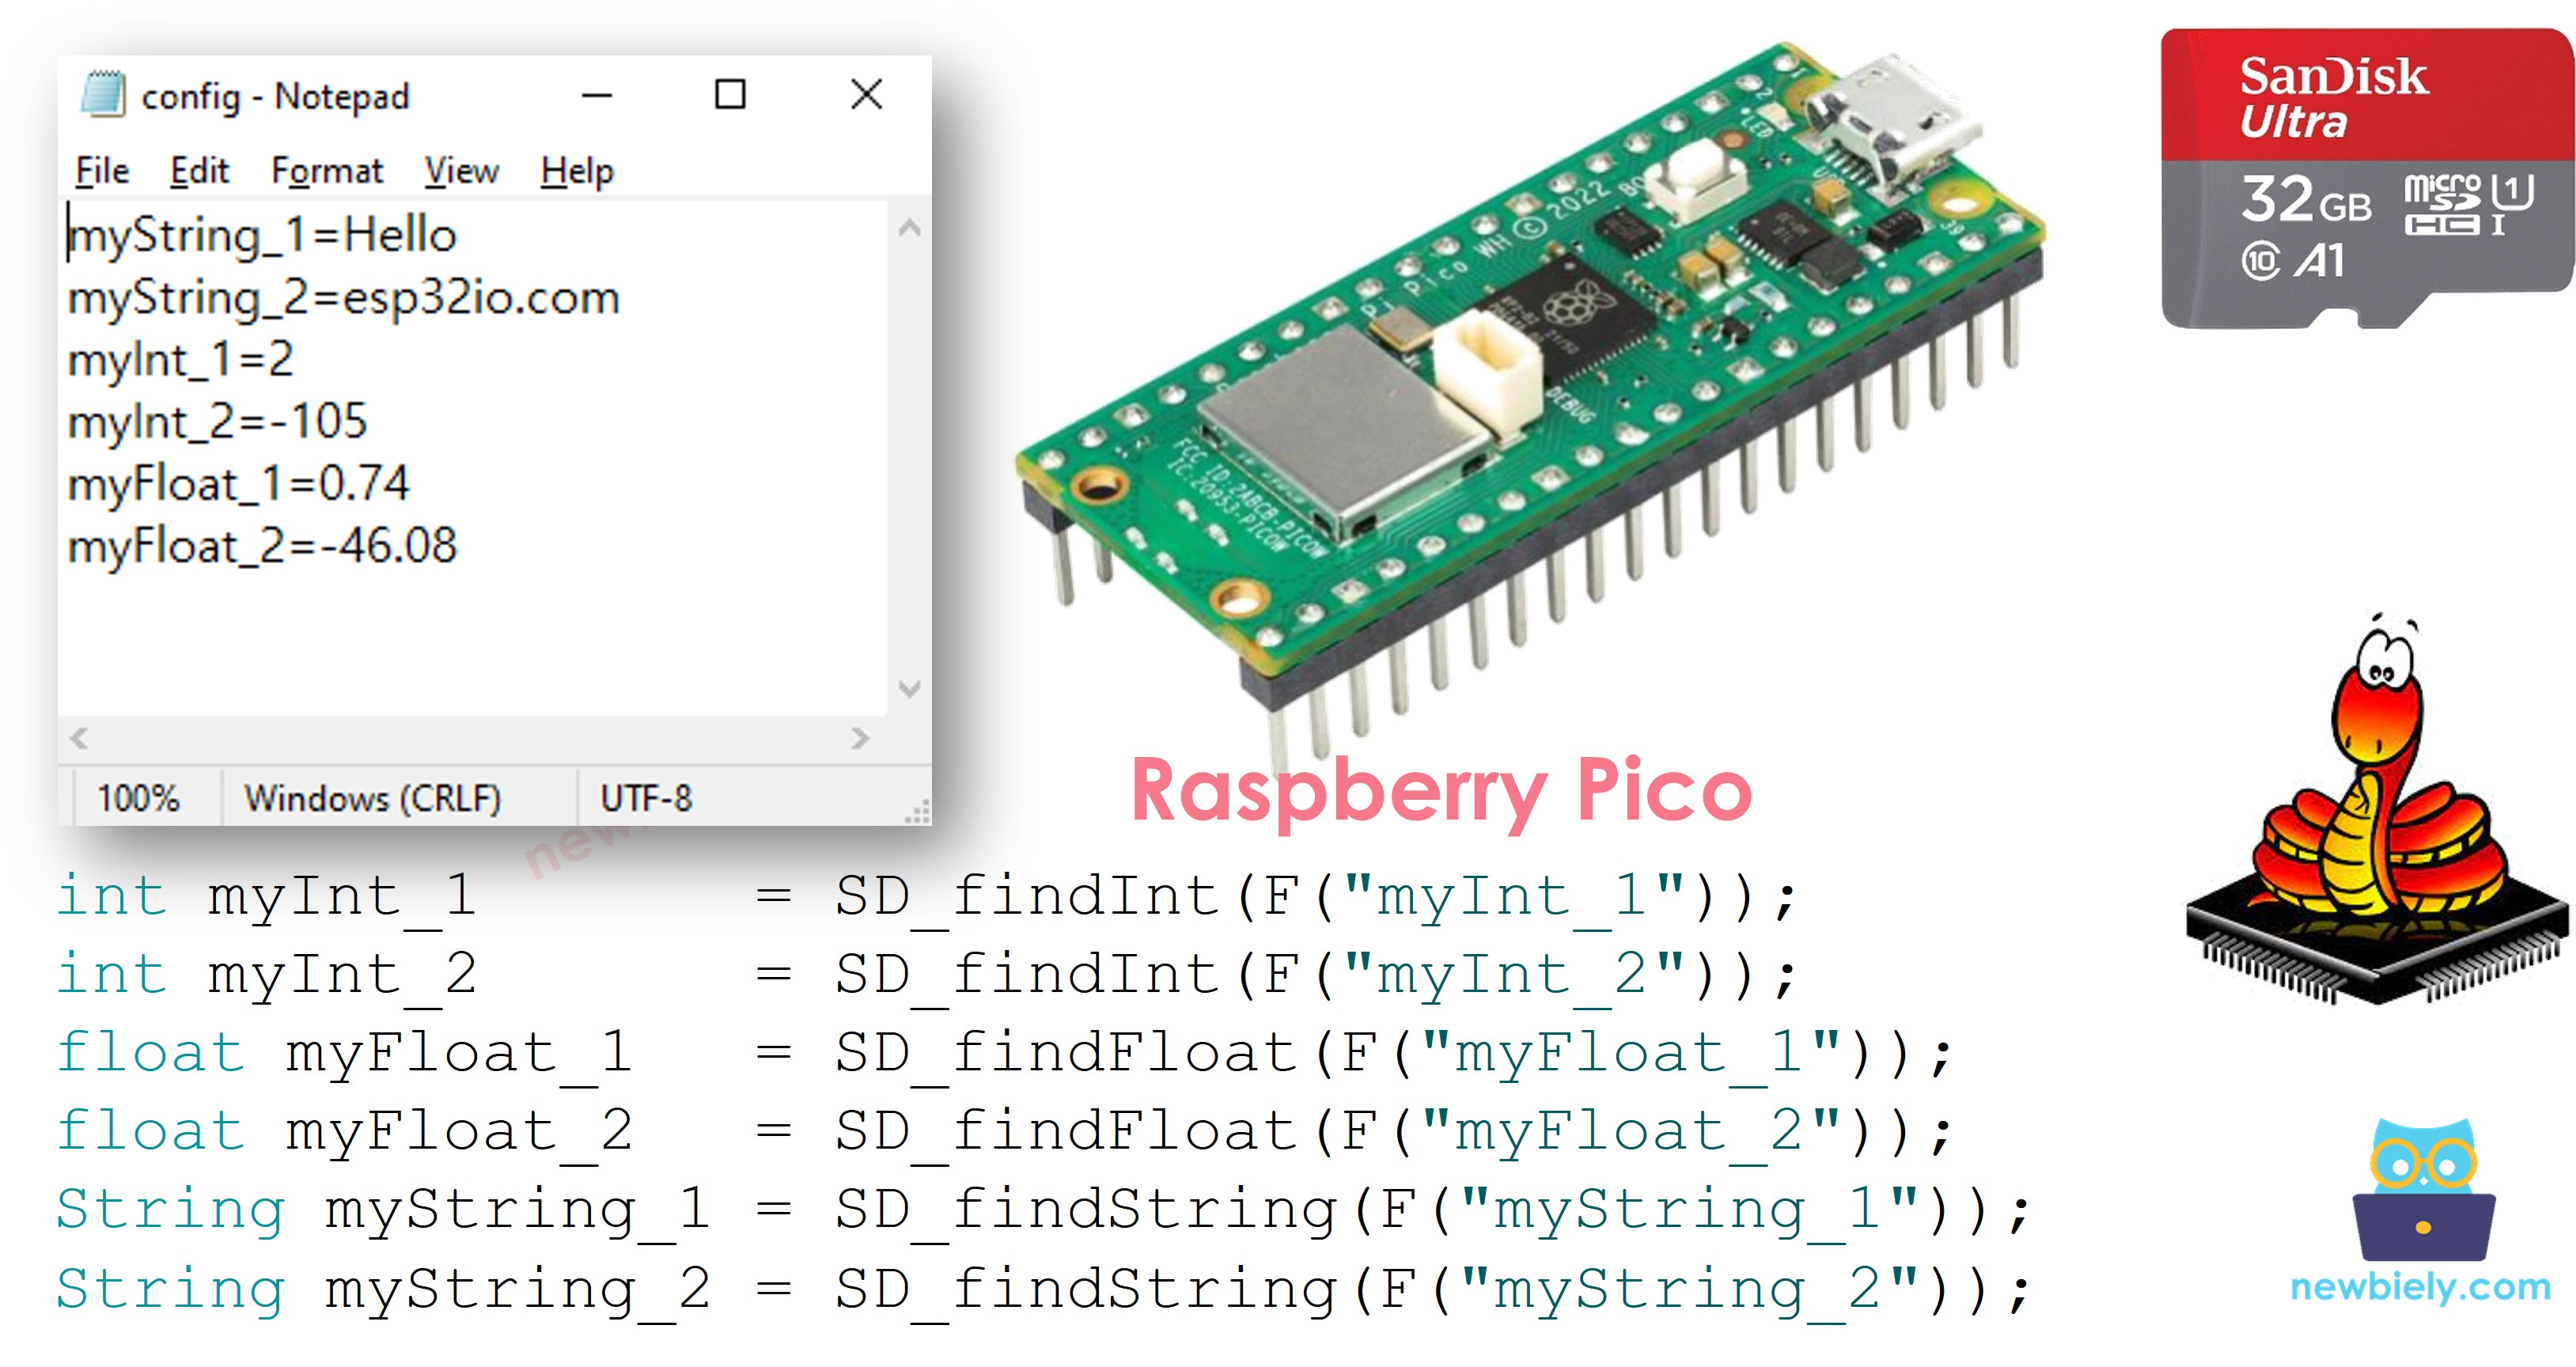
- Prepare a config.txt file containing key-value pairs on the Micro SD Card.
- Read a setting from the config file and store it in an int variable.
- Read a setting from the config file and store it in a float variable.
- Read a setting from the config file and store it in a String variable.
Hardware Preparation
Or you can buy the following kits:
| 1 | × | DIYables Sensor Kit (18 sensors/displays) |
Additionally, some of these links are for products from our own brand, DIYables .
Overview of Micro SD Card Module
To learn about the Micro SD Card Module — including pin descriptions, wiring, and example code — refer to the Raspberry Pi Pico - Micro SD Card tutorial.
How It Works
The config file on the Micro SD Card uses a simple text-based format:
- One key-value pair per line, with each line separated by a newline character.
- Inside each line, the key and its value are split by the = character.
The MicroPython code looks up a specific key in the file, extracts its value, and assigns it to a variable. Depending on the key, the value is converted to int, float, or String.
Wiring Diagram
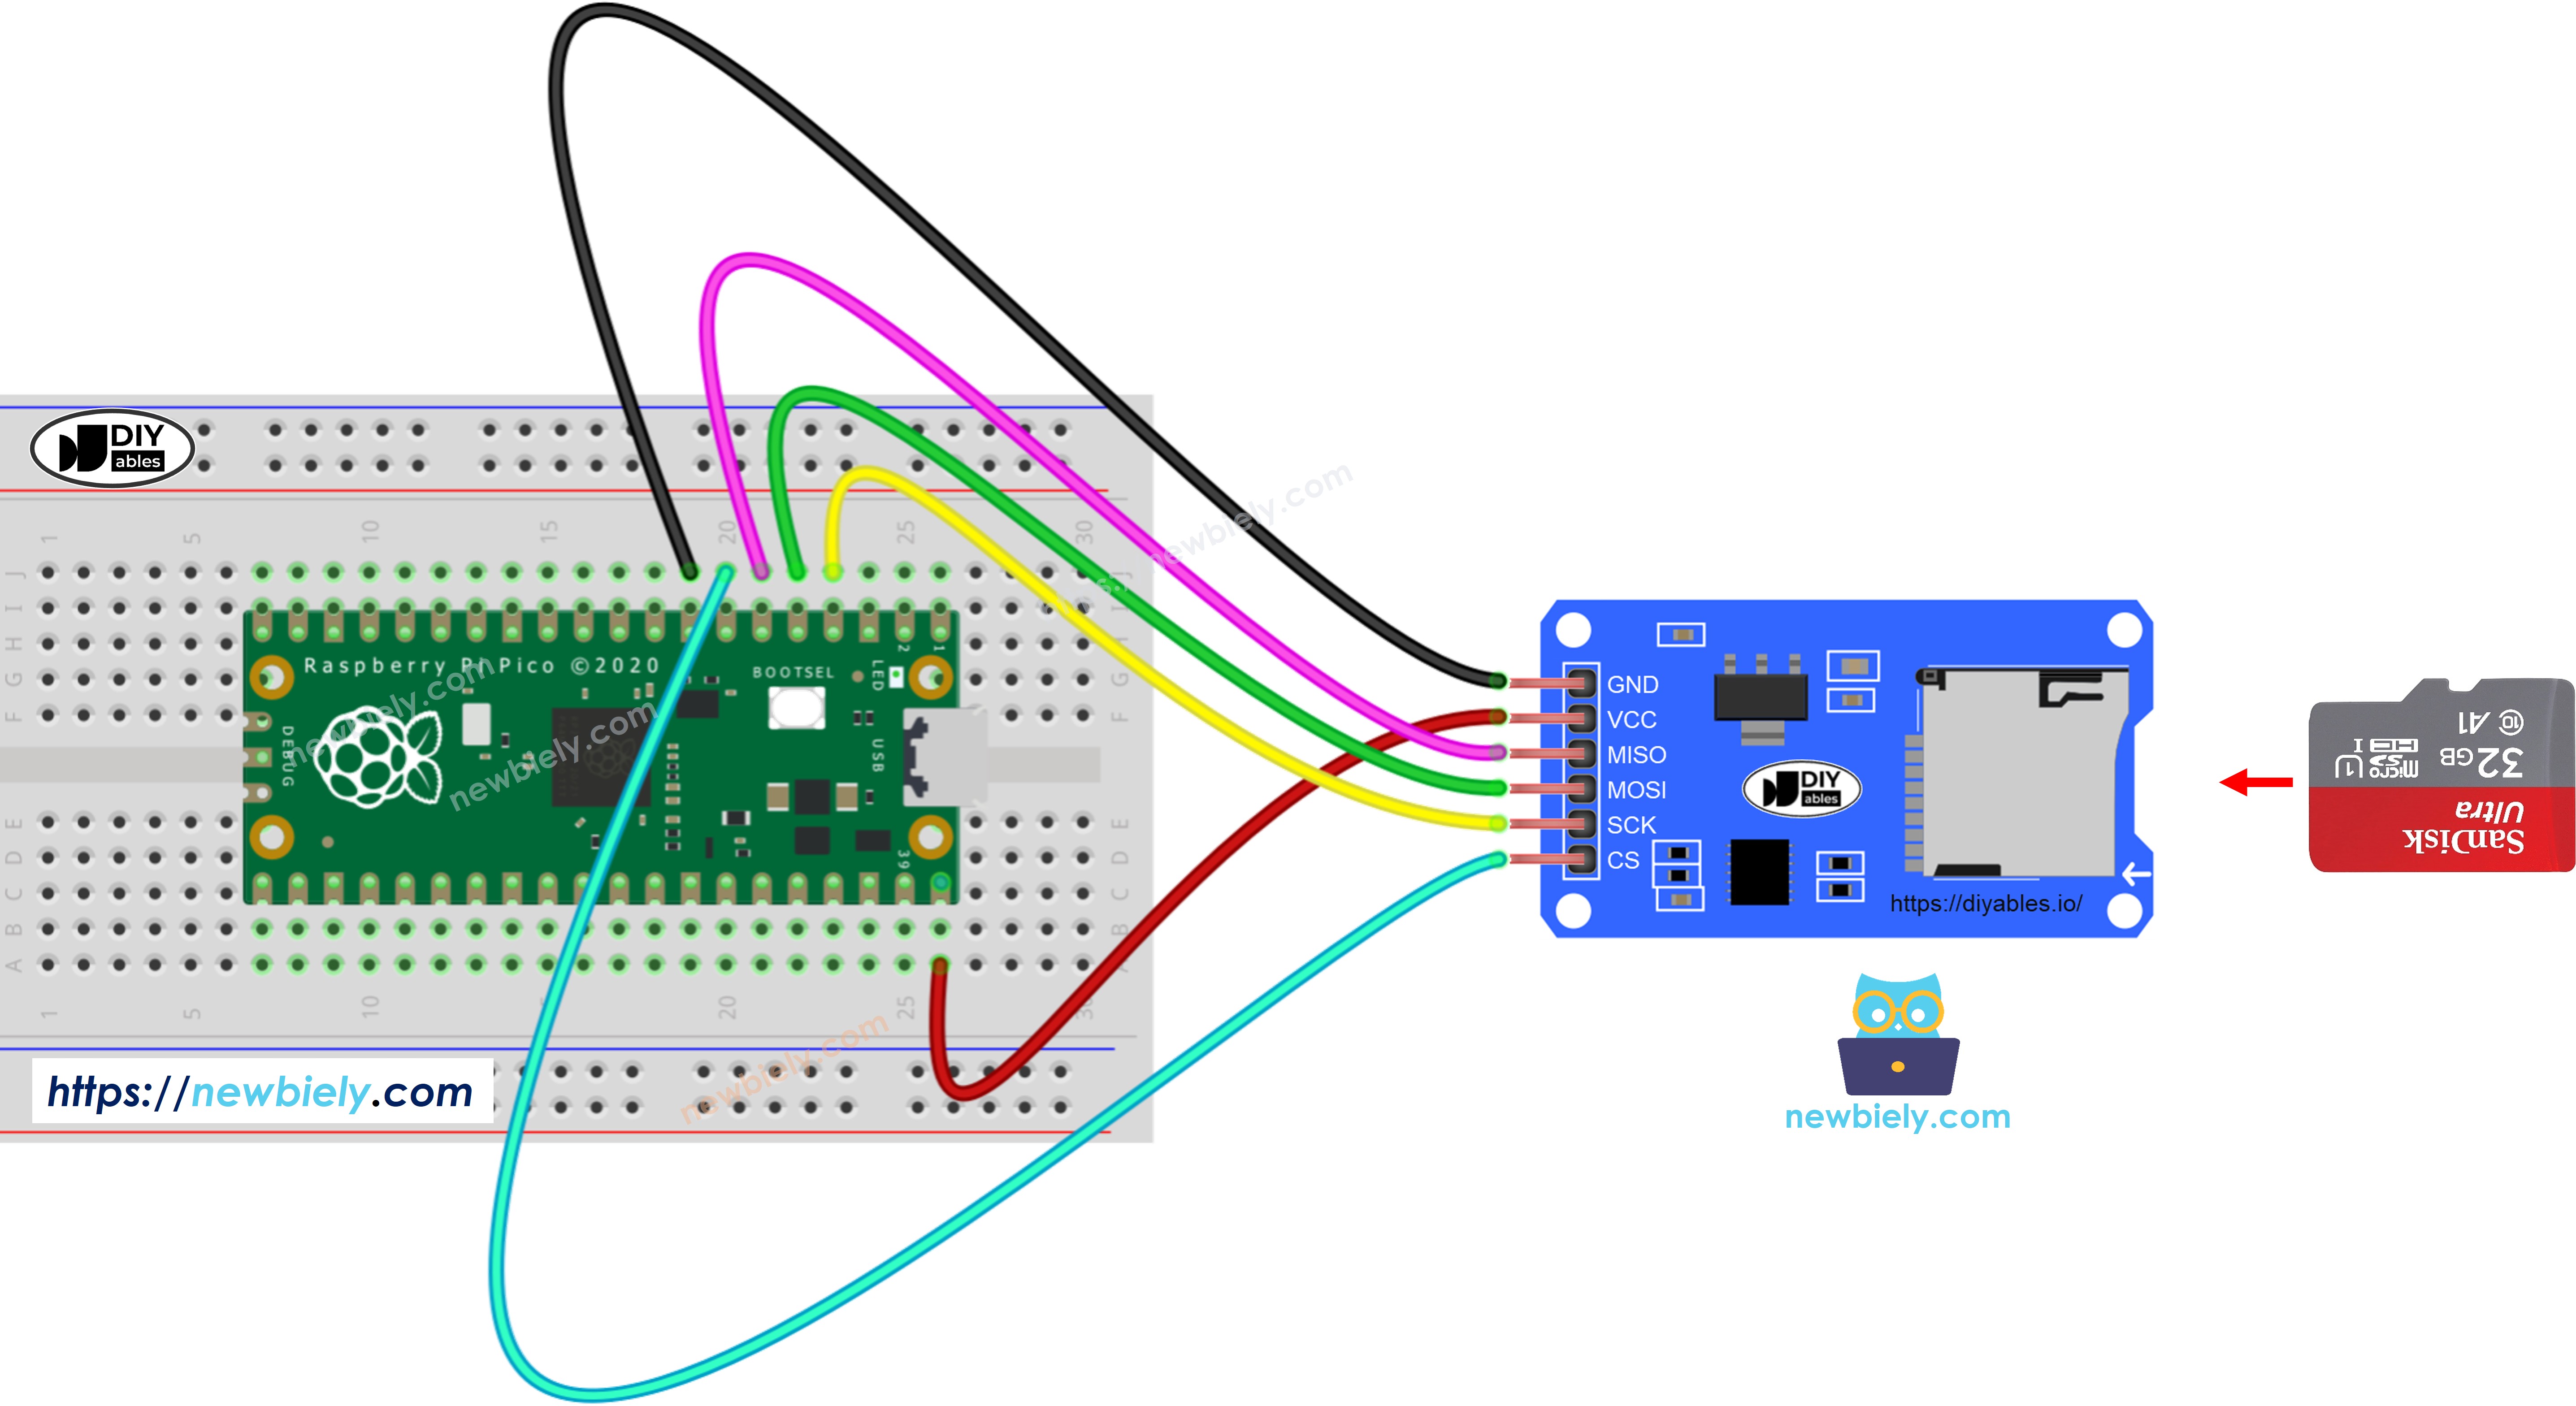
This image is created using Fritzing. Click to enlarge image
The wiring table below shows how to connect the Micro SD Card Module to the Raspberry Pi Pico:
| Micro SD Card Module | Raspberry Pi Pico |
|---|---|
| VCC | VBUS (5V) |
| GND | GND |
| MISO | GP4 |
| MOSI | GP3 |
| SCK | GP2 |
| CS | GP5 |
※ NOTE THAT:
When using a shield that already includes a Micro SD Card slot (for example, an Ethernet shield), no additional SD Card Module is required — just slide the card straight into the shield's built-in slot.
How to Load Config Settings into Variables
- Open Notepad or Notepad++ and create a new file named config.txt. Add the key-value pairs shown below:
- Plug the Micro SD Card into your computer with a USB 3.0 SD Card Reader.
- Confirm the card is formatted as FAT16 or FAT32 (search online for formatting instructions if necessary).
- Copy the config.txt file to the root folder of the Micro SD Card.
- Safely eject the Micro SD Card from the computer.
- Attach the Micro SD Card to the Raspberry Pi Pico through the SD Card Module, following the wiring diagram.
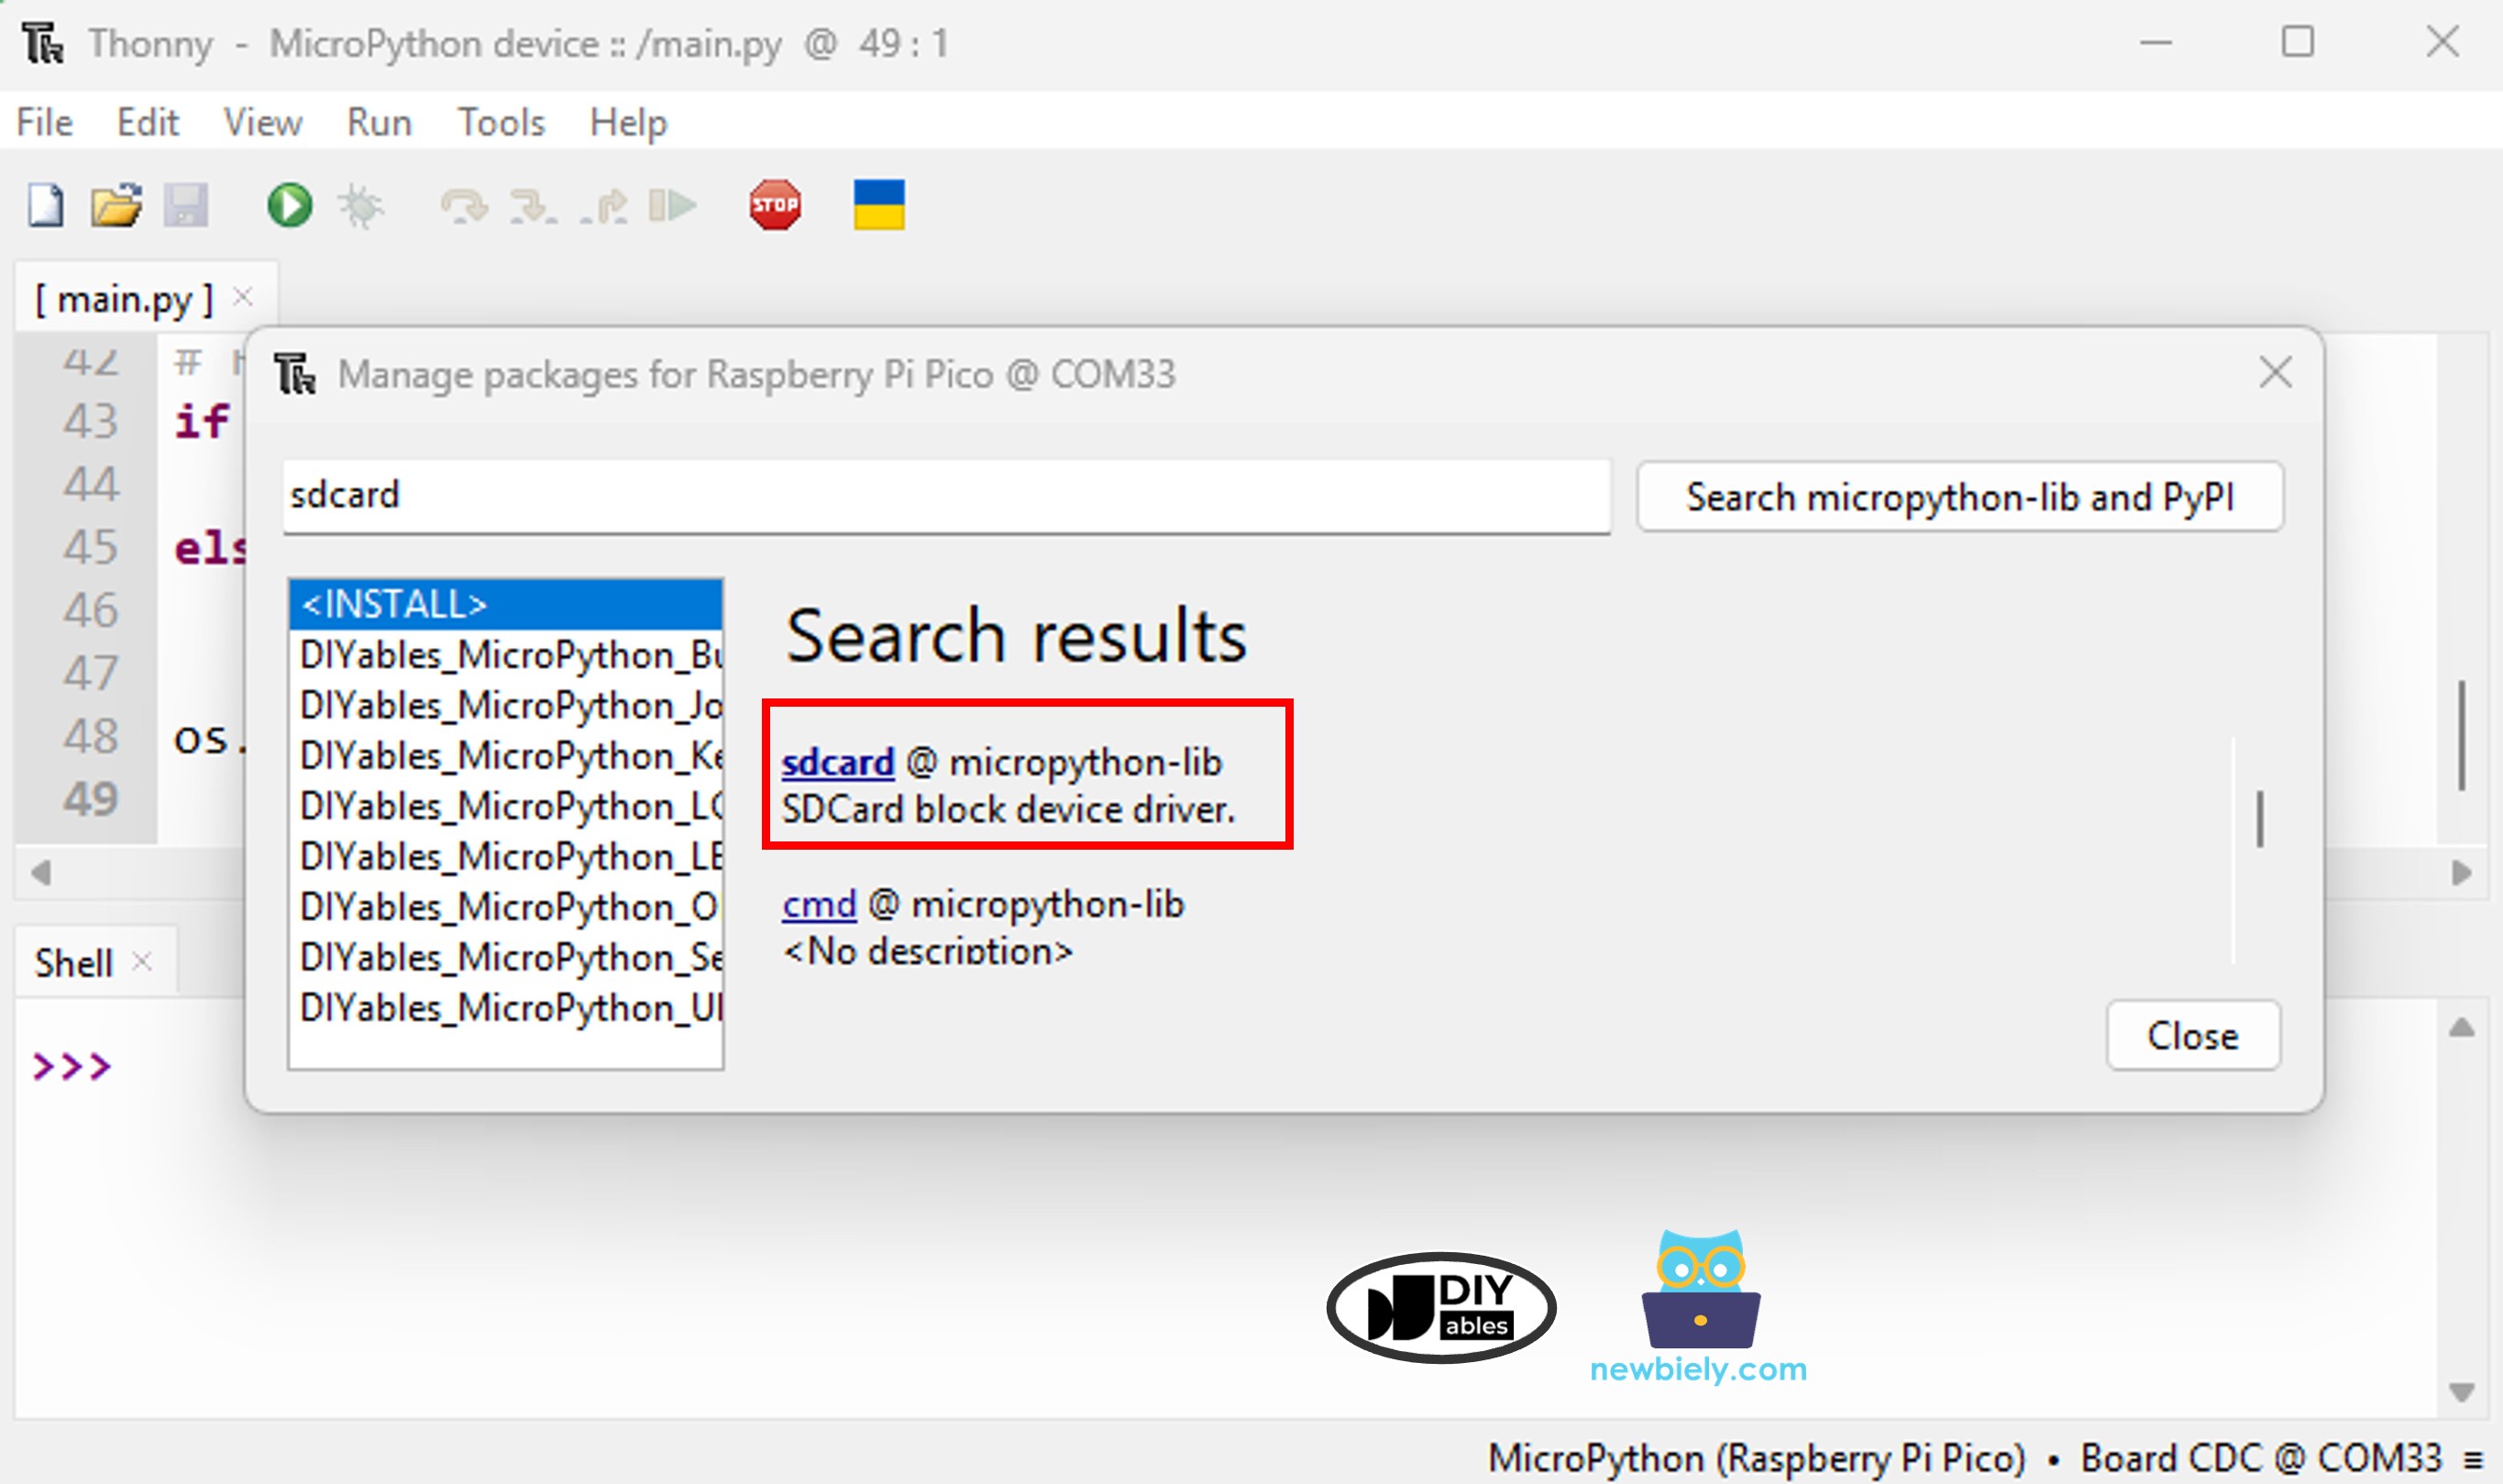
- Install the sdcard library on the Raspberry Pi Pico via Thonny IDE:
- Go to Tools Manage packages in Thonny IDE.
- Type sdcard in the search box and install the micropython-sdcard package.
- Paste the following MicroPython code into Thonny's editor.
- Click Run to execute the code on the Raspberry Pi Pico.
- Check the Shell for the output:
- The parsed values in the Shell match exactly with the entries saved in the config file on the Micro SD Card.
You can extend the code by adding more key-value pairs to suit your project.
※ NOTE THAT:
The lookup order of entries in the config file does not matter. The code scans from top to bottom until a matching key is found.